Leaderboard


Popular Content
Showing content with the highest reputation on 03/04/2020 in all areas
-
GUYS. THERE IS A STORMTROOPER AT MY DOOR! I might need to leave work early to let him in. Obviously, to be continued...3 points
-
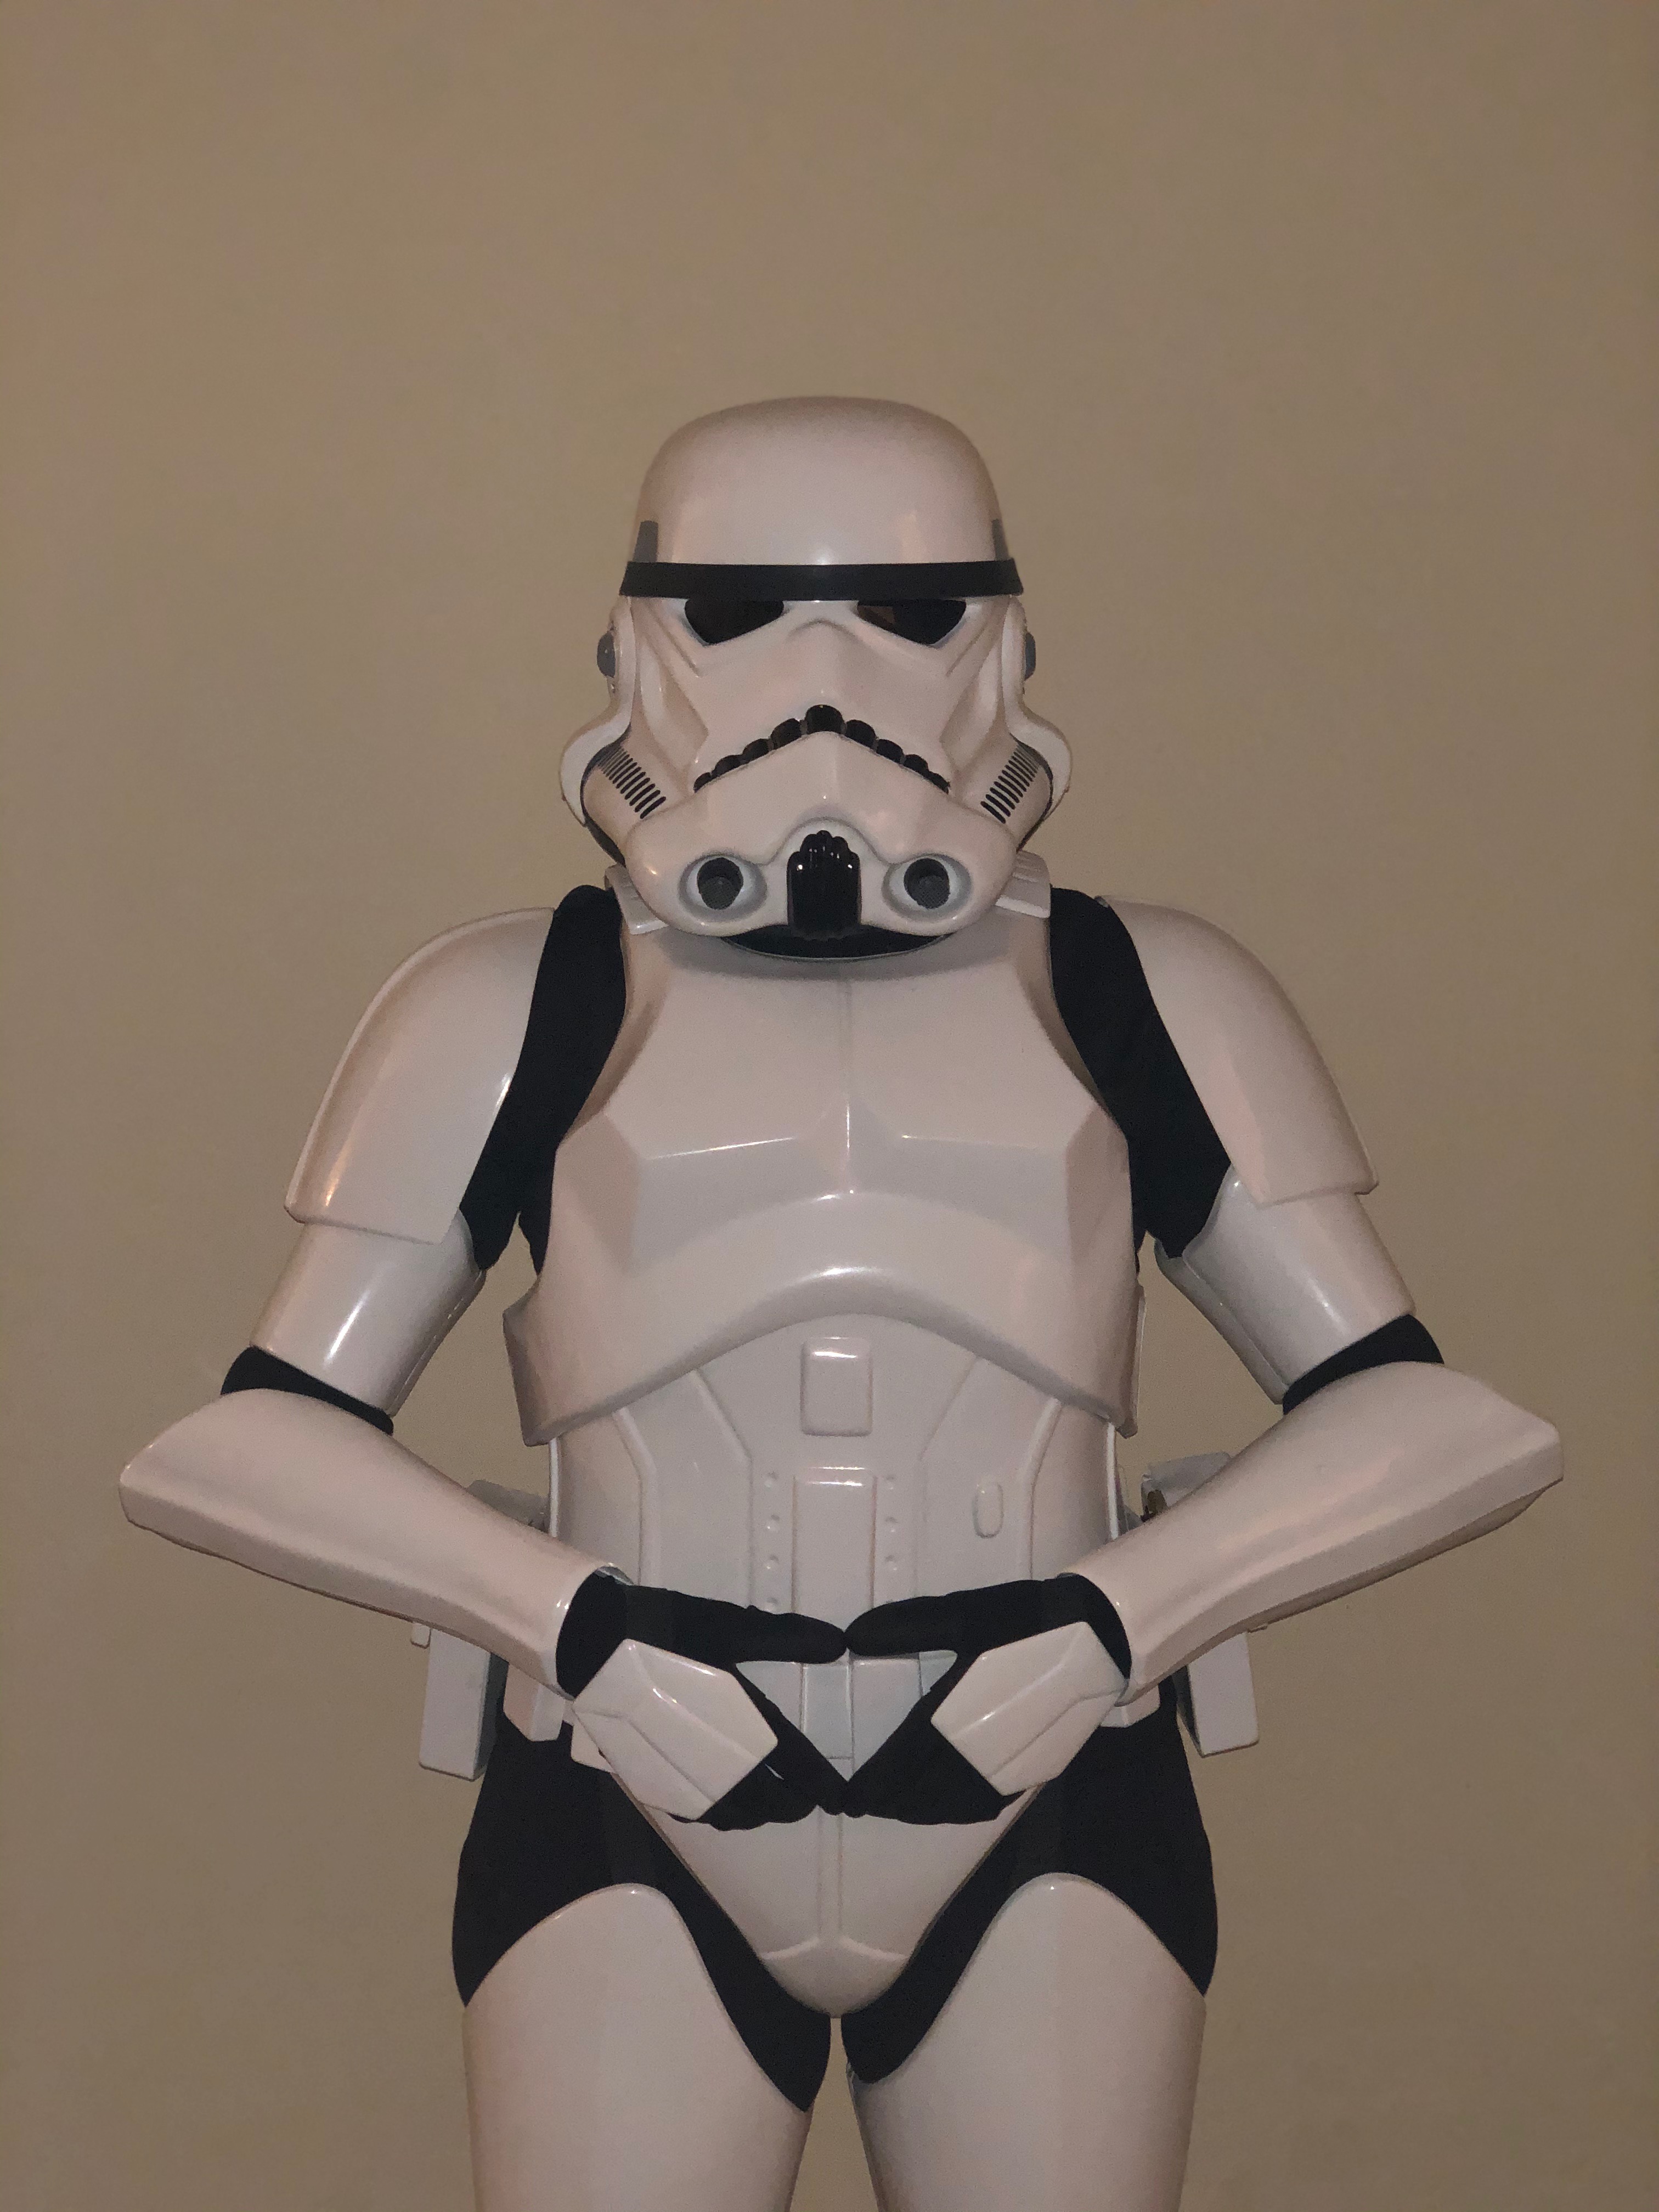
Overall the armour looks great - you just need to adjust some of the strapping. As mentioned above, you can tighten up your ab to chest strapping so the parts overlap. This might bring your chest down and therefore your shoulder straps forward - which is good because this will also help with the placement of your shoulder bells. Because of your height, you are going to want to hike up the cod and butt plates as much as possible if not done so already. When you raise your biceps, you will probably want to raise your forearms a little bit too. You may want to add a bicep hook to the inside to keep your bicep and shoulder bell sitting a bit more tidy. One thing I didn't see mentioned (I didn't read very carefully) is the coverstrips at the top of your thighs - you will want to cut that back to it is just flush with the thigh - it looks like it extends up past the end in the front-view picture. Also, if you have not done so already, try adding a bit of velcro to the top front of your boot and the inside of your shin (lower front). This will keep the shins from rotating on you. Just a few tweaks with the strapping and you are going to look awesome in that kit!2 points
-
Hey trooper, The eyes look okay so far. If you can, try taking pics from front, left and right, ideally from a few feet back. (Helps is gauge the proportions better than close ups). Best tip I could give here is using a free smart phone app like LiveCollage. This will allow you to compare your progress with screen used helmets*. Here’s an example - this is one of my builds compared with a screen used helmet during my build. -------------- I used the reference photo as an initial cutting guide, then took photos of the helmet (from a few feet back). Then put the two images together using the app. To me, this is the best way to monitor your progress. * see starwarshelmets.com or the FISD image gallery for good screen shots. Hope that helps a little. :-)2 points
-
Shoulder straps needs to be curved down and biceps could be raised up.2 points
-
Lift torso and lower chest, chest needs to overlap AB plate no gap! helmet is sitting to high remove foam padding if necessary or add thinner one, also biceps need to by higher and shoulder bells in place Mark (AP)2 points
-
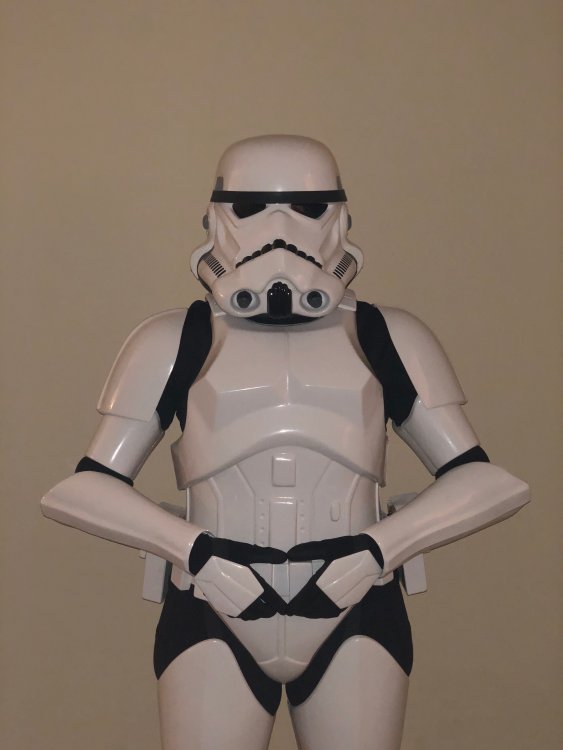
1. Name - William Stuart 2. Future Garrison/Squad/Outpost or local area - Central California Garrison 3. Armor maker - Authentic Props 4. Helmet maker - Authentic Props 5. Cloth belt maker - Authentic Props 6. Neck seal maker - DarmansProps 7. Boot maker - Imperial Boots 9. Blaster maker - Praetorian Blasters 10. Height - 6' 1" 11. Weight - 160 lbs 12. TK type - ANH Stunt 13. Name(s) of any Trooper(s) who significantly helped with your build - justjoseph63 Hi everyone! I was not sure if I needed to put this in a build thread first, but I believe my armor is pretty much done! Yes, I do know I need to still bend my shoulder straps down, but I was hoping to get feedback on everything else first. Thank you and ALL the feedback is welcomed! :) Also, I am still not sure why my shoulder, particularly my right shoulder bell is off. I have a couple close pictures to see any anyone can give tips on that too! haha1 point
-
Great news, can't wait for the excited unpacking, then the sheer horror of "where do I start"1 point
-
Nice work, I would suggest using a softer coil wire1 point
-
I have just kept mine white, normally if I bend over people aren't watching from behind But if it's an issue you could paint black or wrap black tape around them.1 point
-
So cool Congratulations !1 point
-
I'm an actively trooping Scout looking to expand my lack of marksmanship and I think a TK is the right fit.1 point
-
1. Yes, try tightening up the ab to chest straps first (either use shorter straps or move the contact points - depends on how they are installed). 2. Yes. Just guessing from the images, at least an inch. You can test fit with some painters tape to hold the pieces in place. Take a picture and show us - we'll guide you from there. 3. I would recommend buying a pair of Lexan scissors. They look like this: You can get a curved or straight edge. Amazon and hobby/hardware stores will have these. And also get some sandpaper. 200 grit, 400 grit, and 600 grit to smooth out any cut edges.1 point
-
Thanks! I'll have to look into them. Hopefully my current boots can get me past approval, getting closer to finishing, right now just waiting around, since our belts are being stiched as I type. Then once the helmet bits arrive we will have a painting day when we go in and paint all that needs to be. Very exciting! Also love your profile picture, looking badass1 point
-
My gloves came in. Wow! What a quality. They fit perfect. These are from Endorfinders. Next and last missing softpart is the neckseal. Are there any recommendations for that?1 point
-
I agree with my colleagues storm, as regards the braces you can thermoform them on your shoulder with a thermoforming gun or with a simple phono.1 point
-
Agreed with comments above. Your shoulder bells seem to be twisting towards the back, leaving a lot of black showing in the front between the chest plate and shoulder bell. Make sure when you suit up that your kidney/butt/ab plate are straight and hiked up as high as possible. You can see on the right side that the kidney is not aligning with the ab, which is why it's sitting crooked (most visible in your back shot). I think you mostly have some small adjustments to make, which is good news!1 point
-
Congratulations Trooper, Welcome to EIB!1 point
-
Hey all It been a long time but I thought I would post an update on my build. It been slow going and at times I've avoided working on it. I have done some things but still have a ways to go before submitting. I have all of the limb cut to size and taped expect for the thighs, it was suggested that I leave them for last to get them sized right. My trunk pieces had all been trimmed down and sanded, I may have to adjust the returns. I've also cut out all the boxes & buttons. Over the next couple of night I will get the trunk pieces fit as I'm going to a build party this weekend and hopefully can get some tips on how it fits in person before I start gluing. My cover strips have been cut already and I have extra for shimming sides or if I need more. There is still a number of things I have to trim or cut ABS belt, thigh ammo pack, trim down the hands a bit more, finish my helmet, return edge on kidney & butt plate and complete my thermal detonator ( it was being drying outside when i took this pic). There is more I'm sure I can't think of right now. Anyways here it is all placed out.1 point
-
Just about to start doing mine also :-) luckily i have another kit to use as a template1 point
-
Started shaping the thighs. Got it pretty close to where I want it for the moment. These upper leg pieces have been the most tedious. The fronts have somewhat of an acceptable shape. The rear pieces, however, are an odd sculpt. They also have no suggested points of alignment like all of the other pieces. You really do have to cut away a lot of material in order to get the correct shape. I’m going to leave them for now and circle back around to them once I get suited up for a full test fit. Just have to shape the overlapped parts on the sides now. Sent from my iPhone using The Force1 point
-
Always there with the closeups! Those are great. I’m not too sure which way I like. I suppose screen shot gets the win right now. I will leave some length on the strap for the upper clip in case I have to move the assembly under my thighs too. My legs don’t necessarily fill up the thigh and calf armor pieces. Gonna have to add something in both to keep it all from flopping around. Sent from my iPhone using The Force1 point
-
You’ve got it....front and side. Here are a couple of pics: I ended up positioning the buckles inside my thigh as my GML was not keen to see them despite picture evidence to the contrary. Sent from my iPhone using Tapatalk Pro1 point
-
The ANH stormie is just going to be the beginning >:D1 point
-
Very nice work so far1 point
-
Before I get too far ahead, is there a clear position the front and side thigh straps need to be in? Is it directly in the front and directly on the side? Also, where should I position the buckle for each? Is it exposed midway between the thigh and torso? Sent from my iPhone using The Force1 point
-
Here's a pic of the test fit. Boy does it look rough. Oh well, lots of stuff I'm happy with(shins, forearms, upper chest) Also forgot to tape up shoulders1 point
-
I will take some photos and post them to show what I mean.1 point
-
Congratulations trooper1 point
-
Hi Kyle. I'm in Waterdown, not horribly far from you. We have members in your region as well. I'd be happy to help out with your build. I'll PM you with details.1 point
-
Congratulations Robert, Welcome to EIB. !!! just a little work and go for Centurion !!1 point
-
Now that's the spirit, Robert! Looking forward to seeing the results!1 point
-
The spacing looks MUCH better, Thomas! You may want to think about rotating them in, though. Ideally, the thigh cover strips should line up (or be very close) to the ones on the calf.1 point
-
I use a technique where you attache a 2B pencil to an eraser or small piece of wood with an elastic band. You then run the block around the outline of the top of thigh and scribe a line in the exact same shape as the original shape you simply hold the block and pencil at a 90 degree angle angle so the tip of the pencil contact the surface and away you go. You can use the same technique to shorten the shins from the bottom. I'll get a photo up when I have a minute and it will make perfect sense.1 point
-
More sanding, more primer... Don't mind the Rubies Rebels E-11 conversion - it's for a friend. And has been giving me all kinds of trouble with its seam-filling and paint. Almost done tho. I also have two Jawa builds that I'm wrapping up and are heading out for friends. More time to focus on this! Also filled the oval slot on the back left shoulder, left the round one (I don't plan on relocating the shoulder bridge tabs at this time). Used a 2-part flexible body filler meant for bumpers, then a thin skin of the Dynatron 650 spot putty. After another coat of filler primer, it's pretty much gone. Makeshift paint booth did its job, except when a piece of cardboard fell off the fence and marred some wet paint on the chest piece... Sigh... I'll fill and fix it again. More sanding in the coming days and then spraying a bunch of panel's backsides flat white, then front sides their first coat of Rust-Oleum Gloss White.1 point
-
You will need to angle them around more, Thomas, as seen in the photo below. As mentioned, it doesn't matter where the ammo boxes sit in the front in comparison with the cover strip, but it's the sides that are important. The images that Mario sent you are perfect examples.1 point
-
Yup, we are just about done with her kit!
 1 point
 -
Requesting access please as I’m interested in the racing shirts https://www.501st.com/members/displaymemberdetails.php?userID=29577 TK51723 ID517231 point
-
Movie-Troopers had slim biceps, here´s a good look to aim for They should however be able to move freely up and down so don´t make them too tight.1 point


-Copy.thumb.jpeg.8715a83cb32a3e6745f879885b26e712.jpeg)