gmrhodes13
-
Posts
31,281 -
Joined
-
Last visited
-
Days Won
1,077
Content Type
Profiles
Forums
Gallery
Articles
Everything posted by gmrhodes13
-

TX-17241 Starting My Journey!
gmrhodes13 replied to dogbertwrldrulr's topic in New Member Introductions
How tall are you?, most armor makes can comfortably fit up to 6', anything over that is challenging. Adding extra strapping between the backplate and kidney would allow the backplate to come up. -
Sha Sha's (Slow) KB/850/3D printed FOTK Build for Short Troopers
gmrhodes13 replied to shashachu's topic in TFA Build Threads
1) I give everything a wipe with Prepsol which is a wax and grease remover, not sure if there's an equivalent 2) leave unpainted -
Looking good, just a tip, I use some wire and gaffa tape inside so I can hang pieces so everything gets a full coat, also handy for drying.
-
Google photos generally don't work, I use Imgur or Flickr to host images, (Imgur can no longer be seen by those in the UK) Here's another host First time I've seen an OTTK from 850, looking forward to seeing your progress
- 1 reply
-
- 1
-

-
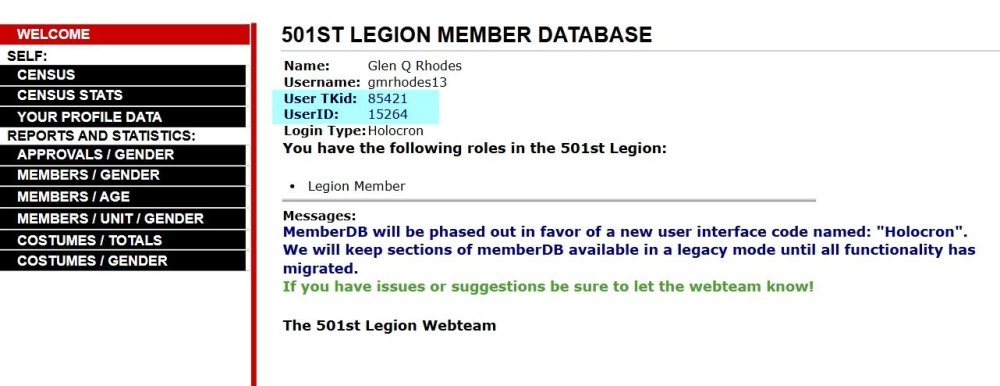
Please add both TKID and the User ID to your request, you can find this in the legion Holocron
-
Greetings from West Yorkshire - UK Garrison member
gmrhodes13 replied to Pezza222000's topic in New Member Introductions
Hello and welcome aboard, if already a legion member you can request higher access here This should help you https://www.whitearmor.net/forum/forum/38-getting-started-read-this-first/ Here's a great thread full of helpful information, should help you on your way Some great videos here https://www.youtube.com/@cableguydan also here https://www.youtube.com/@pandapropsncostumes A great way to get helpful feedback is posting a build thread, you can do that here https://www.whitearmor.net/forum/forum/80-anh-build-threads/ Good luck and hope to see a build from you soon -
ANH Paint colour guide
gmrhodes13 replied to themaninthesuitcase's topic in Assembly, Mods, and Painting
I use satin black, no requirements in the CRL References -
Hello and welcome to the forum, you can request 501st access, you can then post your sales thread in the 501st only area
-
My Rubies TK Supreme ROTJ build/mod[*RB]
gmrhodes13 replied to JSmails's topic in ROTJ Build Threads
Sorry missed that, only one coffee so far -
My Rubies TK Supreme ROTJ build/mod[*RB]
gmrhodes13 replied to JSmails's topic in ROTJ Build Threads
Personally I think all you can do is try to equal the gaps between pieces, the armor itself is short and not much you can do about your height. In the end it's totally up to your GML (garrison membership liaison) if they will approve for basic, I would suggest reaching out and see what they say. -
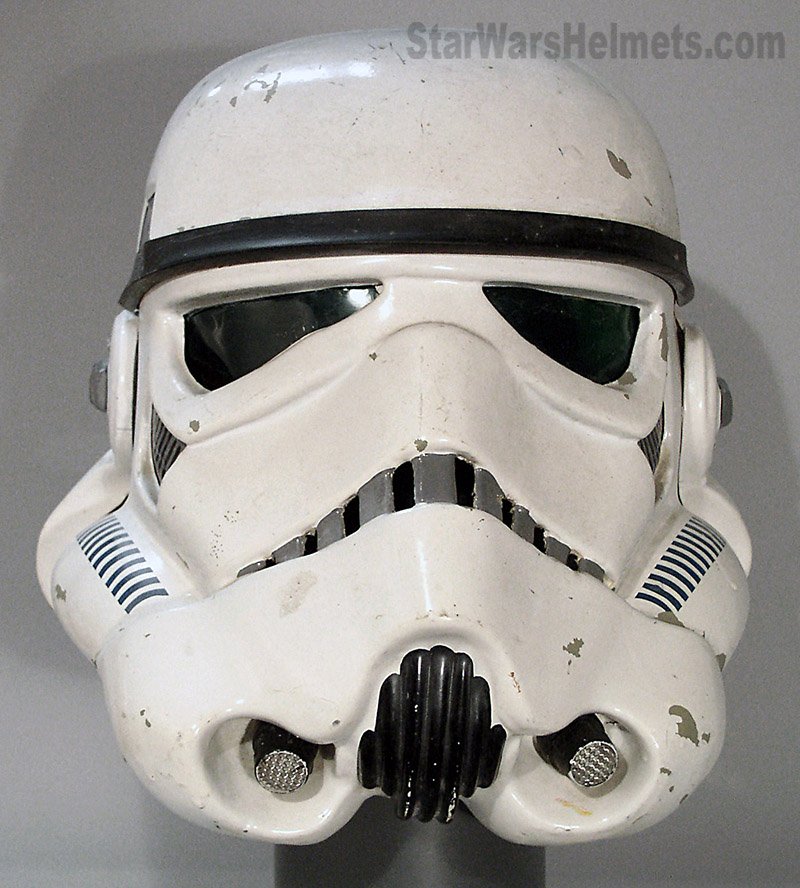
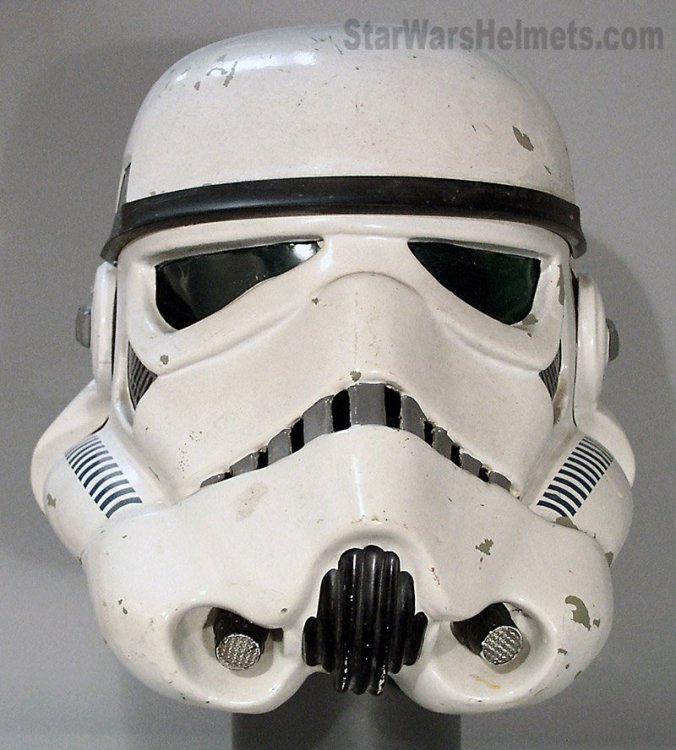
If you use the "direct link" or image with file extension, ie .jpg, .jpeg, .png, .bmp etc your image will show in your post Trim in areas that touch, that will reduce the gaps, some great info below, also adding a step to the ear and backplate will help bring the ear in more Alignment, some makes of helmets are a little harder to achieve this, it is only a suggestion and should not impede approval. The "ideal" ear placement is as seen below, where the screws line up with the rear angle of the trap right above it. Because some armorers design their helmets differently or send them pre-assembled this is not always possible to achieve, but it is suggested that you try to get as close as you can. Note: Top ear screws should ideally be located directly below the rear of the trap. My go to threads for ears Some references of screen helmets, many had gaps
-
My Rubies TK Supreme ROTJ build/mod[*RB]
gmrhodes13 replied to JSmails's topic in ROTJ Build Threads
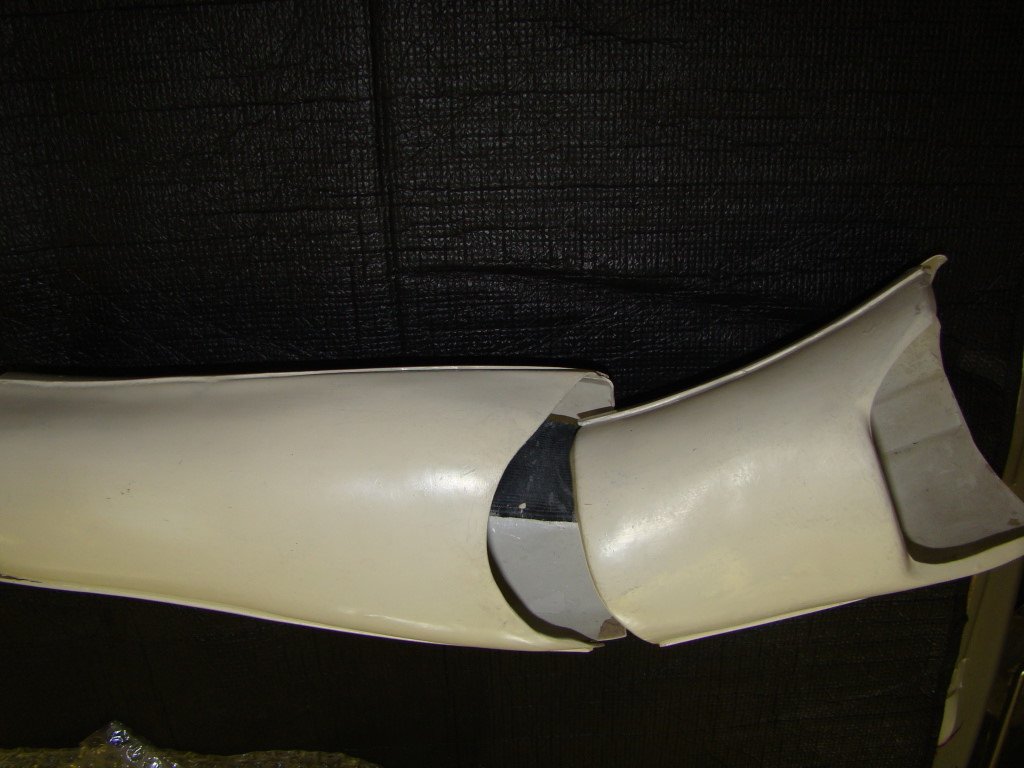
Visual references Forearm to bicep strapping is on top of the forearm
-
Looks awesome, nice work
-
Possible future ESB Stormtrooper
gmrhodes13 replied to CollinB005's topic in New Member Introductions
Hello and welcome aboard, good luck with the research -
Just completed first two troops!!
gmrhodes13 replied to NomadActual's topic in Newly Approved Members - Sound Off!
Congratulations and welcome to the ranks trooper FISD has a trooping award system and tracking, more info: Also here You can also request a trooping commendation here -
2025 Legion Web Infrastructure Fundraising Drive
gmrhodes13 replied to gmrhodes13's topic in Announcements
Because it's no longer active and from 2025 -
Great glossary of terms here AM changed hands and is now Dave's Darkside Depot Type: AM (Armor Master) - Dave’s Darkside Depot Country: USA Contact: [email protected] or https://www.facebook.com/Daves-Darkside-Depot-1188080927989611 Kit: ABS. All body armor components including face piece and ear pieces are .090 ABS. The one piece dome/back is formed using .125 ABS, as this piece is formed over a rather deep mold and anything thinner can cause thin regions which can eventually crack or fracture. White .060 ABS blanks included to cut as cover-strips. TD clips, rubber gloves and black Nomex flight gloves, flexible hand guards and all Centurion level hardware included. Availability: Normally 4-6 weeks or less. Assembly: Comes trimmed out of the box, but you will still be required to adjust for proper fit to your body size. Good choice for large troopers, but can be cut down. Can be ordered completely pre-assembled for an additional fee. Comments: Chest and back molds have been updated to address past concerns, and are now acceptable to Centurion level. They are now including a custom, die-cut Imperial cog themed helmet liner for the helmets, mounting Velcro included. Hovi tips are professionally cast aluminum. Hero helmets are now available. Indeed it is
-
You may find this helpful, in the Getting Started section
-
File Name: Arges Frog - Mandalorian Designer: Galactic Prints Last Update: 24/06/2026 File: https://makerworld.com/en/models/2972549-arges-frog?from=search#profileId-3333873 Description: Meet the Arges Frog, a unique, single-eyed alien amphibian perfect for fans of sci-fi and Starwars. Designed with clean geometry and rich textures, this little creature looks incredible right off the build plate and makes an excellent display piece or desk companion. This model has been fully optimized for clean printing with minimal fuss. Images:
-
- 2
-
-
Congratulations and welcome to the ranks Yes the forum only allows a small amount of images, most use a free online image host, I've just started using Flickr as Imgur is no longer viewable by those in the UK You can request higher forum access here
-
TK-38421 ROTJ TK reporting for duty!
gmrhodes13 replied to JSmails's topic in Newly Approved Members - Sound Off!
Welcome to the ranks trooper, a lengthy build for sure but at least you have finally completed it -
Hello and welcome. Some great info here Good luck with the research and build
-
Please add User ID In the navigation bar post this link https://www.501st.com/member/85421/ and replace 85421 with your TKID then click enter

-
You won't find a better set of files, Bryon also does files of the Rogue One blaster, you should have no issues, here's all his models https://www.printables.com/@TK14082_234773 Just remember no print lines should be showing once painted. 3D printed components must have no visible print lines and must be smooth for a realistic appearance When posting photos firstly try to use the "direct link" option as it will have the file extension .jpg, .jpeg, .png .gif etc, etc. Also FYI folks in the UK can't view Imgur images, I've changed to Flickr for that reason but entirely up to you.

-
Wrong link, that's your forum profile not your membership profile, please also add your user ID Example In the navigation bar post this link https://www.501st.com/member/85421/ and replace 85421 with your TKID then click enter