
Leaderboard


Popular Content
Showing content with the highest reputation since 07/17/2026 in all areas
-
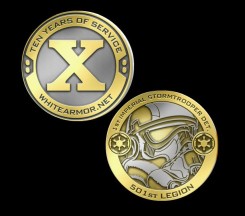
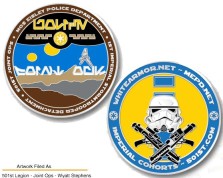
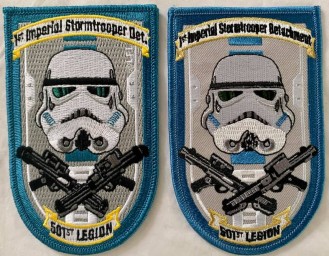
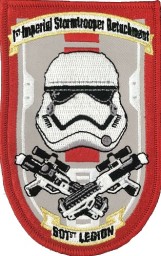
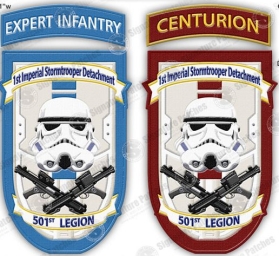
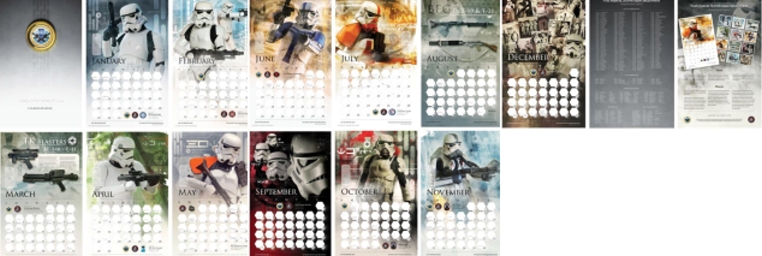
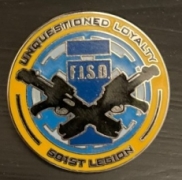
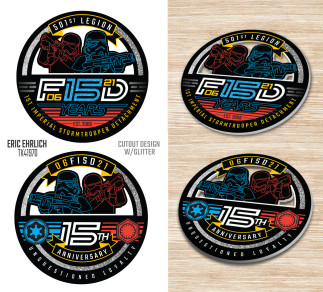
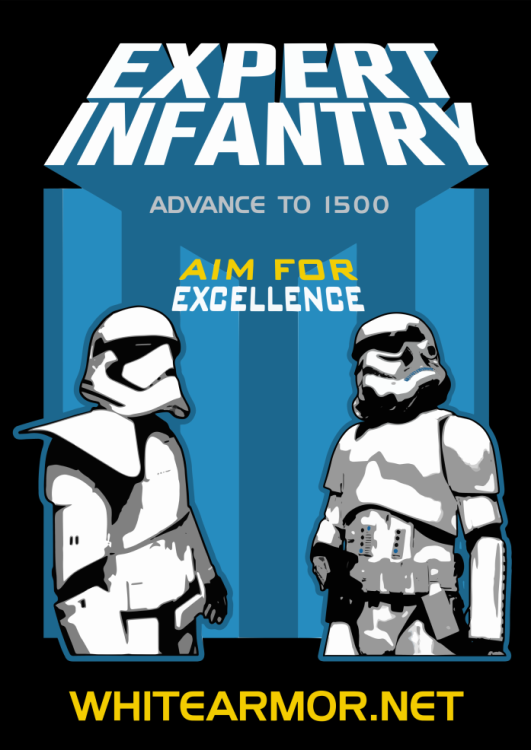
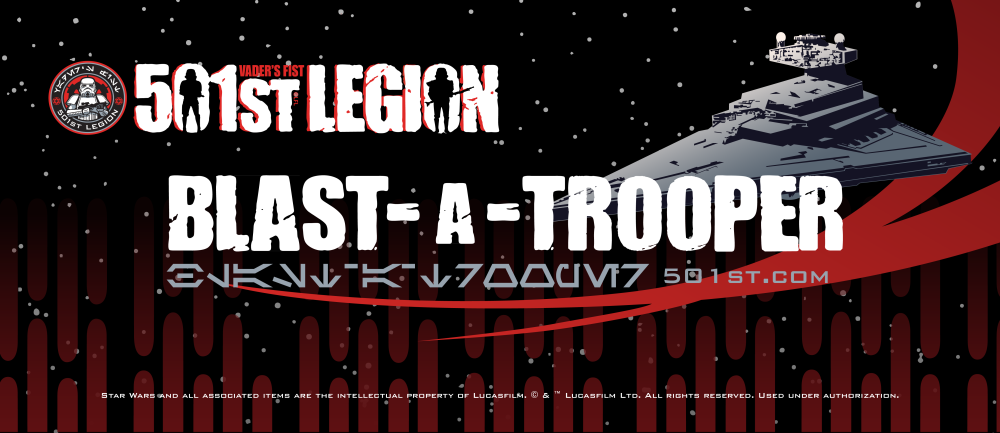
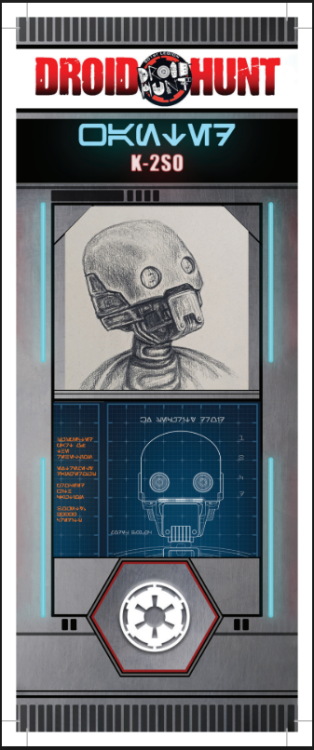
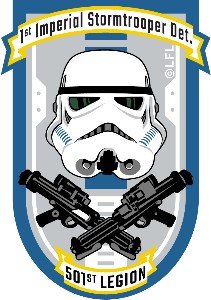
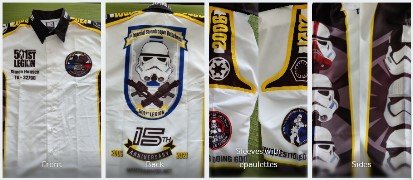
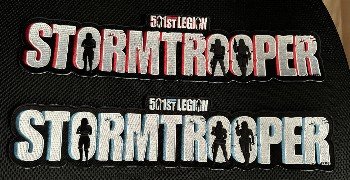
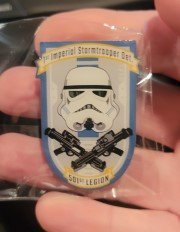
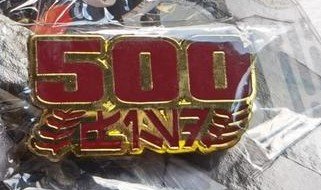
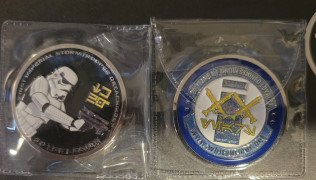
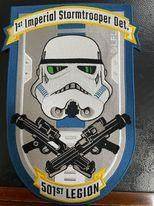
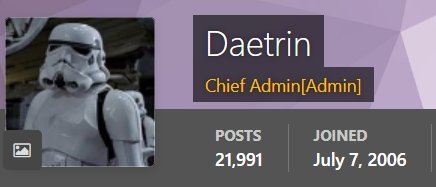
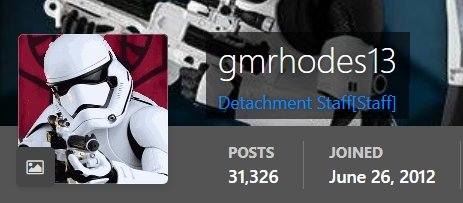
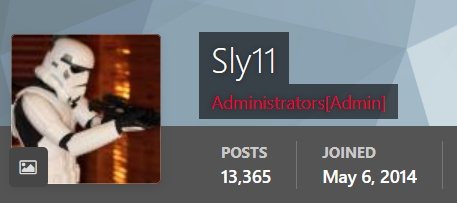
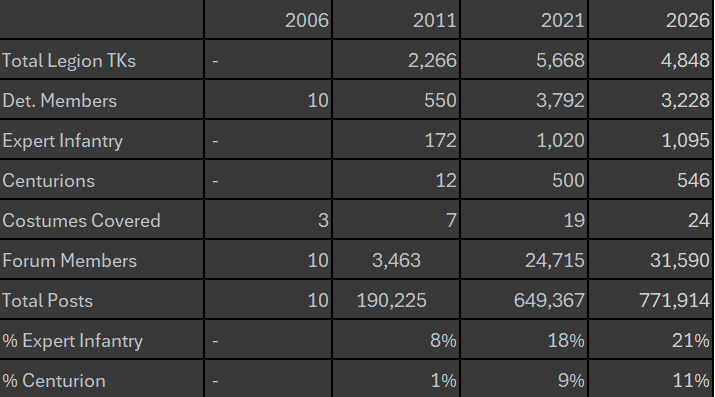
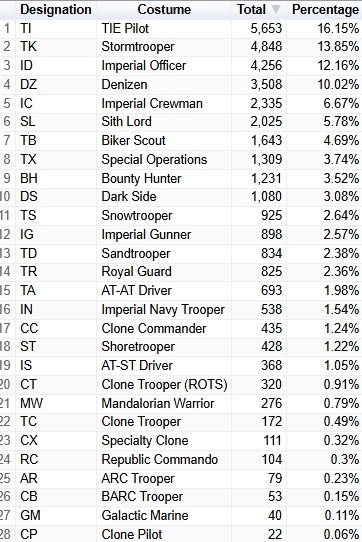
NEW In Memoriam Detachment Leader Executive Officer Merchandise Officer Hall of Fame FISD Meme's Around the Detachment Happy 20th Anniversary FISD INFORMATION & AWARD PROGRAMS FISD Tri-Fold Brochure Common FISD Acronyms and TK Glossary Pre Approval Forum 3D Section Field Exercise Award Imperial Attaché Program Master Armorer Award Fire Teams EIB & Centurion: What do these terms mean? Need Help Ask the Deployment Officers Advance to 1500 Advanced Tactics Awards Social Media Newsletter Editor Staff List 2026 Follow FISD María Belén Izurieta · Darth Traya · SL 19355 Guayaquil, Ecuador Since July 2014, Belén wore the darkness with grace. She was Darth Traya not only in name, but in essence: a silent guardian, present at every charity event, giving her time and her heart to those who needed it most. Guayaquil saw her born. The 501st saw her shine. And we, her garrison brothers and sisters, will remember her forever. Condolences to her garrison, family and friends "Buckets Off" The Northeast Remnant mourns the loss of Matthew A. Dunlop, SL-41772, a dedicated trooper whose passion for costuming, community, and charity embodied the true spirit of the 501st Legion. Matthew joined the Legion in 2016 in the Empire City Garrison before eventually transferring to the Northeast Remnant in January of 2023. Matt brought joy to countless fans and stood as a pillar of strength and camaraderie within our Garrison and many of our surrounding sister clubs. He is survived by his wife, daughter and granddaughter Though his watch has ended, his memory will live on in the hearts of his Legion brothers and sisters, and across the galaxy he helped make a little brighter. Condolences to his garrison, family and friends "Buckets Off" Greetings troopers, This month we celebrate the 20th anniversary of the detachment. On the 7th July 2006 the detachment was founded by @Daetrin. Since then it's been front and centre of the 501st Legion with that familiar white armour we all love. We've seen the costume start with the original FX armour, through to more accurate sculpts and even cast from screen used now being available to us. Something early troopers would probably believed impossible. Over the years we picked up new CRLs, mainly from books or video games but that all changed in 2015 with the release of The Force Awakens. All of a sudden we have new films, new premieres and once again the white armour was front and centre. Since then Rogue One introduced us to a modern interpretation of the Empire era armour, and Ahsoka took it and made it unique again. We even managed to pick up an armour with soft parts, the Imperial Commando. Troopers helping troopers became an unofficial motto. Troopers would go out of their way to help others. The billgram became a common sight, and many troopers still produce images to help guide others to a completed build. In person help has also been a backbone of troopers helping troopers. Armour parties being common through the legion, and we even recognise those who help in person via the Master Armourer Program. Since it's founding we've had a huge number of members come our way. And really it's the troopers who make the detachment. Whilst I will always be hugely grateful for all of the staff members past and present, without the troopers we'd be pretty lonely. Finally I would like to take a moment to remember the troopers we have lost along the way. Buckets off. Congratulations FISD on 20 years. Here's to another 20. With Unquestioned Loyalty Chris Pearson TK-10991 "themaninthesuitcase" Detachment Leader Greetings Troopers, 20 wonderful years of White Armour, quite the milestone when you think about it. Community is the heart and soul that makes FISD work so well, and it's that community who day in and day out supports existing and new people in making their dreams come true. Thank you Paul ( @Daetrin) for creating this wonderful platform of research fun and comradery, and everyone that contributes to making it bigger and better every day. Congratulations FISD and happy 20th Anniversary! With Unquestioned Loyalty Andrew Franke TK-11469 "Sly11" Executive Officer Greeting Troopers! Thank you all for checking out the Merch section of the newsletter. If you haven't already, please consider donating to the FISD Forum fund. We are are currently just short of our goal to fund the forum for the 2026-2027 term. You can find all the information about the forum fund here. Old Business "FISD EIB Coins" I still have a few of the Stepping out Trooper EI coins for new EI members or members the have never bough ten an EI coin. The next EI coin will be a gold version of our 20th Anniversary coin, so if you are eligible to order an EI coin, and you'd prefer not to have an Anniversary edition, grab one of these before they aren't available any longer! In order to buy one, you must have an approved EI costume and you can not have ever bought an EIB coin from any pervious runs. EIB coins are a once and done coin. If you have this one and would prefer one of the older versions, I may have an option for you so please dm me. EIB v11 coin run is still open Pin Run The pin run for Expert Infantry, Centurion and Attaché will begin soon, we are still researching vendors, but we hope to have one selected and get the run open. If you have any questions you can ask @MaskedVengeance, or find more information here. FISD 20th Anniversary Standard Logo Patch run is Closed and the order was placed. You can find updated about the run here. CURRENT BUSINESS There are currently two open merch polls. The first is about our currently approved merch and the interest levels in each item. The second is about the Racing shirt for this term. Please take a look at them as they help me decide when and how many of each item we will have available We have 4 items approved and one pending. We have 1 coin, 2 patches, and the War banner that have been approved. The 20th Anniversary Racing Shirt has been submitted for approval. I will be doing runs for all these items in the next few months, so keep your eyes on the forum and the socials for information. And as always, questions, comments, thoughts, suggestions, are welcome, and please feel free to reach out to either Adam or myself! With Unquestioned Loyalty James Silvius TK-12953 "jsilvius" Merchandise & Branding Officer With Unquestioned Loyalty Adam Wolf TK-89400 "Revlimiter" Merchandise & Branding Officer High five! Please welcome, for the third time, TK-76221 to the Stormtrooper Hall of Fame, June 2026! @Daar Drashaar Troop log can be found here. With Unquestioned Loyalty Jonatan Östling TK-23592 "Nairy" Attaché Ambassador You can find the full meme thread here Tutorials, Tips and How To's Can't load photos to your posts?, use a free online image host (NOTE UK members can no longer see Imgur photos) Blast-A-Trooper Finally after many years of asking the Blast A Trooper files have been shared on the legion forum, sharing here for anyone who may have been looking for them https://drive.google.com/drive/folders/1_W3-wBM3Gsp5EN_juDwPSCVYhLcpv_MD Updated image added 05/09/25 https://drive.google.com/file/d/1gUQPWZGdcPmlHIGTgGu0dsV5KyJw28bn/view https://drive.google.com/file/d/1mJdqi4fBeAp5LHPXutWkQrC9vfBmx3MM/view *NOTE* unfortunately for those of you Down Under due to our PLI (public liability insurance) restrictions we are not able to run Blast A Trooper events as the insurer do not allow the firing of projectiles at our members (I know right, foam darts, ouch ) Thread here Droid Hunt From LPRO: "We’re pleased to announce that the Droid Hunt Badge is now officially available in the PR Toolkit for Legion-wide use. Our thanks go to Kimberly Anderson, GCO of Bast Alpha Garrison, and artist Erik Sanders for creating this new format and sharing it with the Legion." Download PDF here Download logo images here Request Edited Signature Banners/Profile pics/Fire Team Logos Troopers! I want to help out the community and the people that doesn't have the time or have the necessary tools or skills to create a cool Signature banner or have the background of your Action Photo removed, or even if you have a request for a certain Profile picture! I don't know how popular this will be, or what requirements I will need, but we will learn as we go and if it turns out to be popular and it gets too much for me - I'm sure that we can find a few more that are willing to help out! Thread here With Unquestioned Loyalty Jonatan Östling TK-23592 "Nairy" Attaché Ambassador Trading Card Archives For those with FISD detachment trading cards please consider sending two to Paul @Daetrin keeper of our detachment archives. Address and more info here With Unquestioned Loyalty Paul Hoeffer TK-8020 "Daetrin" Detachment Founder Keeper of Archives Then & Now Today 7th July 2026, we celebrate a special day, 20 years ago, the First Imperial Stormtrooper Detachment was founded. We look back on two decades of troopers helping troopers, detailed nitpicking of painstakingly collected reference photos and a whole lot of love for white plastic. We celebrate 20 years of community, of pushing ourselves even further and of becoming the world's most detailed resource of Stormtrooper armor. To everyone who is a member – thank you for your support and your participation. FISD wouldn't be the beloved community that it is today without each and every one of you. Our goal upon being founded was to create an open and respectful forum for all discussions stormtrooper related. To create and foster an esprit de corp for the stormtrooper costume. To create a centralized resource. So here's to another twenty years of discussion, community and love for all things Stormtrooper. Let's look back at some highlights from the last 20 years It's Alive July 7th 2006 forum created announcement (can be found here) What Shall We Be Called What should our detachment name be? Detachment naming contest, July 15, 2006 Some of the top contender names (can be found here) Imperial Knights Imperial Alpha Tantive Assault Detachment Knights of the Empire Stormtrooper Brigade Death Star Detachment The Emporer's Might Vader's troopers, Mean and Clean. Detachment naming contest take II, August 15, 2006 Some of the top contender names (thread can be found here) Tantive IV Assault Detachment (TFAD) 1st Imperial Stormtrooper Division Advance Assault Division "White Lightning" Vader's troopers, Mean and Clean. (VTMC) Rapid Assault Imperial Detachment (RAID) First Encounter Assault Regiment (FEAR) Should we amend the name, August 23, 2006 (can be found here) And the winner was "1st Imperial Stormtrooper Corps" UNTIL: Name change October 16, 2006 (can be found here) From Legion Command: "That the official name include the word detachment, meaning as of this moment we are rebranded - officially - the First Imperial Stormtrooper Detachment. All references must be updated." Detachment Approval Official Detachment Approval, October 24, 2006 (can be found here) We Need A Logo 1st Imperial Stormtrooper Detachment Logo Detachment logo discussion started August 25, 2006 (can be found here) Detachment logo final release February 7, 2007 (can be found here) note "Detachment" was edited to "Det" for patch production Anniversary's 1st Anniversary/Birthday, July 7, 2007 (can be found here) 3rd Anniversary/Birthday, July 7, 2009 (can be found here) 5th Anniversary, July 6, 2011 (can be found here) 5th Anniversary Interview With Paul Detachment Founder, December 15, 2011 (can be found here) Merchandise produced - 11" patch, Trading Card, Coin, Mug 6th Anniversary Post by Our Founder, July 6, 2012 (can be found here) 10th Anniversary Post by Our Founder, July 6, 2016 (can be found here) 10th Anniversary Newsletter (can be found here) 15th Anniversary Newsletter (can be found here) Merchandise produced - Patch, Coin 10th Anniversary Of FISD's First Patch (can be found here) Trivia: did you know that FISD was started in 2006, so the detachment’s actual 10th anniversary is 2016. Our first patch run however was in 2007, and it had the words “2007 Inaugural” in Arubesh along the top as a commemoration of that event. Only 100 were ever made. Glen’s design is celebrating the 10th anniversary of that first patch, hence the design used. 11th Anniversary Post by Our Founder, July 7, 2017 (can be found here) 12th Anniversary Post by Andrew (can be found here) 13th Anniversary - Logo Gets an Update 15th Anniversary - Logo Gets an Update 15th Anniversary Coin (can be found here) 15th Anniversary Racing Shirt, March, 2022 (can be found here) 20th Anniversary Coin, May 21, 2026 (can be found here) 20th Anniversary FISD Patch, May 21, 2026 (can be found here) Notable Dates FISD forum created announcement, July 7th, 2006 (can be found here) Forum header uploaded October 2006 Rose Parade, January 1, 2007, Stormtroopers from around the globe invited by Lucasfilm to attend the event with grand marshal George Lucas (video can be found here) Rose Parade, Stormtroopers in training for the Rose Parade with Colonel Toledo (US Army Reserves). He was brought in by LFL to lead and conduct the training (video can be found here) Rose Parade, behind the scenes training and football (can be found here) First Mark IV Approval , April 16, 2007 (can be found here) only 4 approvals name "Mark IV" (eventually becoming Expert Infantry) First Elite Approval , August 15, 2007 (can be found here) name change from Mark IV to Elite, 61 approvals (eventually becoming Expert Infantry) First Female Elite Approval , May 9, 2008 (can be found here) (eventually becoming Expert Infantry) First Expert Infantryman , May 18, 2009 (can be found here) name change from Elite to Expert Infantryman, from approval 66 onwards FISD Achievement Award Implemented , July 26, 2009 (can be found here) (recipients can be found here) 100th EIB Approval, March 2, 2010 (can be found here) Academy Site Launched, March 5, 2010 (can be found here) FISD at Celebration V, August 12 to August 15, 2010 (photos can be found here) FISD adopts JDRF as it's unofficial charity of choice ,August 31, 2010 (photos can be found here) FISD Is Now on Facebook and Twitter , March 16, 2011 (can be found here) Attaché Program Announced , April 11, 2011 (can be found here) First Centurion Approval , April 23, 2011 (can be found here) First Female Centurion approval, August 22, 2011 (can be found here) Forum reaches 200,000 posts, August 26, 2011 (can be found here) FISD at Celebration VI Orlando, August 23 - 26, 2012 (photos can be found here) EIB and Centurion certificates created Nov 2012 (can be found here) FISD at Celebration Celebration Europe II, July 25- 29, 2013 (photos/videos can be found here) 100th Centurion Approval, October, 2013 (can be found here) First look at Episode VII Stormtroopers, May onward, 2014 (can be found here) We helped a girl who was bullied for liking Star Wars, May 31, 2014 (can be found here) FISD at Celebration Anaheim, April 16-19, 2015 (photos/videos can be found here) FOTK Unveiling (newsletter can be found here) 500th EIB Approval, September 21, 2015 (can be found here) FISD at Celebration Europe III, July 15-17, 2016 (photos can be found here) Rogue One Display (photos can be found here) FISD at Celebration Orlando, April 13–16, 2017 (photos can be found here) First Live EIB approval, Celebration Orlando April 15, 2017 (photos can be found here) The Stormtrooper Hall of Fame Implemented, April 28, 2016 (can be found here) Master Armorer Award Implemented, May 26, 2017 (can be found here) Rogue One Photoshoot (can be found here) Attaché Outstanding Achievement Award Implemented, May 28, 2017 (can be found here) (updated recipients here) TK Pre-Approval Scheme Implemented, January 7, 2018 (can be found here) 3D Contributor Award Scheme Implemented, July 5, 2018 (can be found here) FISD at Celebration Chicago, April 11 - 15, 2019 (photos can be found here) Field Exercise Awards Scheme Implemented, September 1, 2019 (can be found here) 1000th EIB Approval, September 16, 2020 (can be found here) Coin and patch repository and TK trading post implemented, February 10, 2020 (can be found here) First Order Battle Group implemented, May 20, 2020 (can be found here) Newsletter Archive Area implemented, April 9, 2020 (can be found here) Celebration 2020, originally scheduled to take place at the Anaheim Convention Center in California, was officially cancelled due to the global COVID-19 pandemic. Celebration 2021 did not take place, Lucasfilm and ReedPop officially cancelled the 2021 convention, skipping the year entirely, due to ongoing health and safety restrictions from the COVID-19 pandemic. 500th Centurion Approved, Trina TK18112 "Architect18112", April 9, 2021 (can be found here) 501st Centurion Approved, Jonathan TK89054 "Lord_Potato", April 22, 2021 (can be found here) 10th Expert Infantry Awards Recipient, Glen TK85421 "gmrhodes13", Oct 13th, 2021 (can be found here) 10th Centurion Awards Recipient, Glen TK85421 "gmrhodes13", Oct 13th, 2021 (can be found here) Terrell Reber TK-1787 "SuperTrooper", know by many as ATA Affordable trooper Armor has passed away, Dec 2021 (can be found here) FISD at Celebration Anaheim, May 26 - 29, 2022 (photos can be found here) FISD at Celebration Europe, April 7 - 10, 2023 (photos can be found here) FISD at Celebration Japan, April 18 - 20, 2025 (photos can be found here) Detachment Leaders 2006 - 2026 2006-2007 - Paul Hoeffer “Daetrin” TK8020 2007-2008 - Ed DaSilva "Exodus" TK4878 2008-2009 - Terrell Reber "SuperTrooper" TK1787 2009-2010 - Paul Hoeffer “Daetrin” TK8020 2010-2011 - Paul Hoeffer “Daetrin” TK8020 2011-2012 - Paul Hoeffer “Daetrin” TK8020 2012-2013 - Tom Gardner "RogueTrooper" TK5940 2013-2014 - Eric Brager "Darth Aloha" TK9674 2014-2015 - Mathias Rodstedt "Locitus" TK2959 2015-2016 - Eric Brager "Darth Aloha" TK9674 2016-2017 - Tim Waychoff "Dark CMF" TK51878 2017-2018 - Paul Hoeffer “Daetrin” TK8020 2018-2019 - Paul Hoeffer “Daetrin” TK8020 2019-2020 - Sarah Bailey "Alay" TK20466 2020-2021 - Andrew Franke "Sly11" TK11469 2021-2022 - Andrew Franke "Sly11" TK11469 2022-2023 - Andrew Franke "Sly11" TK11469 2023-2024 - Andrew Franke "Sly11" TK11469 2024-2025 - Joseph Pedigo "justjoseph63" TK10963- Mid Term Change Chris Pearson "themaninthesuitcase" TK-10911 2025-2026 - Chris Pearson "themaninthesuitcase" TK-10911 2026-2027 - Chris Pearson "themaninthesuitcase" TK-10911 On behalf of troopers past and present thank you all for your service Forum Posting Milestones Congratulations surpassing 20,000 posts Paul Also congratulations surpassing 10,000 posts Andrew Also congratulations surpassing 10,000 posts Tony and not that far off 15,000 Tooting my own horn at 30,000 Detachment Merchandise First Patch Run, April 24, 2007 (can be found here) note it had the words “2007 Inaugural” in Aurebesh along the top. Only 100 were ever made First Challenge Coin, September 6, 2007 (can be found here) First Patch Run (no inaugural writing), February 19, 2008 (can be found here) FISD Tshirt Run, April 12, 2008 (can be found here) FISD Hoodie Run, May 7, 2008 (can be found here) First Beret Patch Run , April 1, 2009 (can be found here) First EIB Rocker Run, August 7, 2009 (can be found here) Mug Run, January 3, 2011 (can be found here) First Centurion Rocker Run, April 22, 2011 (can be found here) Calendar Run, December 31, 2011 (can be found here) Red Version Detachment Patch Run, May 22, 2012 (can be found here) incidentally for those that thought there had only ever been one run of this particular patch it has been produced four times, another run was in 2013 which didn't close until late 2014 and another in 2015 FISD Lapel Pin Run, April 9, 2012 (can be found here) Second Coin Run, August 30, 2013 (can be found here) Joint Merchandise FISD/MEPD, October 23, 2013 (can be found here) Racing Shirt Run, November 13, 2014 (can be found here) 12" Detachment Patch blue and red versions with larger rockers, April 15, 2016 (can be found here) incidentally this was the only run of the larger detachment shield patches (FYI that makes 4 separate runs of red patches, 3 x small and 1 x large). Also note the larger version Centurion rocker to match the 12" patch FISD Hockey Shirt Run, May 13, 2017 (can be found here) First Order Red Version Patch Run, December 19, 2018 (can be found here) also a run in 2024 (can be found here) 7" and 12" versions OTTK Racing Shirt Run, September 7, 2019 (can be found here) First Order Racing Shirt Run, November 29, 2019 (can be found here) March to 1000 Pin Run, September 7, 2020 (can be found here) Centurion 500 Pin Run, September 7, 2021 (can be found here) 15th Anniversary Racing Shirt, March, 2022 (can be found here) FISD Shield Pin Run, May 5, 2023 (can be found here) FISD Patch Run, October 5, 2023 (can be found here) FISD Banner Patch Run, October 8, 2023 (can be found here) Racing Shirt Run, May 2, 2024 (can be found here) 20th Anniversary Coin, May 21, 2026 (can be found here) 20th Anniversary FISD Patch, May 21, 2026 (can be found here) Detachment patch variations through the years Some of the variations of the Detachment 3 x 5" patch over the years you may also notice some color and size variations due to using different manufacturers, also the updated design from 2019 to present day And this is just a small part of FISD's merchandise over the years, there have been other patches, celebration merch, mugs, lanyards, pins and the list goes on. Detachment Founder Greetings troopers! They say time flies when you are having fun and being able to troop in a stormtrooper costume is one of the more fun things we get to do on these forums is enjoying the camaraderie of our fellow troops while spreading peace and harmony throughout the galaxy. On our 5th Anniversary we compiled a little data and were feeling pretty good that in 5 short years we went from nothing to having 550 detachment members, which made FISD the largest unit in the Legion. And, that 172 troopers had taken the challenge to go Expert Infantry, representing 8% of all Legion stormtroopers. Everyone felt it was a great start given that the detachment started out with only 10 members, the Expert Infantry program was still under discussion and the Centurion program hadn’t even been dreamed of, as our main focus was on creating useful content and, among other things, figuring out what we were going to call the detachment! Here is the data from 2011: 2006 2011 Total Legion TKs ? 2,266 Det. Members 10 550 Expert Infantry - 172 Centurions - 12 Costumes Covered 3 7 Forum Members 10 3,463 Total Posts 10 190,225 % Expert Infantry - 8% % Centurion - 1% One of the leading contenders for our new detachment's name was “Stormfront”, however that is until it was pointed out that this name was being used by a neo-Nazi group. Oops! In 2006 the Legion had also a new requirement which specified that all new detachments had to have the word “detachment” in their name, so the days of calling a sandtrooper detachment by something cool like the Mos Eisley Police Department were at and end, and we had to come up with something else. The "1st" in FISD is a reference to the Army usage of identifying Corps by a Roman numeral, e.g. XVIII is the 18th Corp. I Corp equals First Corp, and we wanted to be at the front of the action. Since we couldn't use "1st Imperial Stormtrooper Corp" and we were already part of a Legion, we settled on the First Imperial Stormtrooper Detachment. Over the past 20 years FISD has continued to grow in leaps and bounds. As of 18/07/2026 Total legion approved costumes 35,009 Total Stormtrooper approved costumes 4,848 Percentage of TK costumes 13.85%, which has seen a steady decline over the last 10 years TK version totals The detachment that we have today would have been unrecognizable 10 years ago, let alone 20. Before the advent of Facebook, the only place to discuss stormtrooper costuming was right here on these forums and so checking in every day or at least every week was a "must" for anyone who wanted to keep up with all that was going on. While some things have changed, what hasn’t is our mission. It is still as vital today as it was when we started. Below is one of the first posts I ever made to the forums on July 10th, 2006. VISION The 1st Imperial Stormtroopers are a Detachment of the 501st Legion, dedicated to the armor and equipment of stormtroopers as seen in Star Wars. They strive for accuracy in costuming and to discuss everything stormtrooper related. Their mission is to serve the needs of both current and prospective members of the 501st Legion, in keeping with their unofficial motto: "troopers helping troopers”. WHAT THE GROUP HOPES TO ACCOMPLISH: 1. Promote the current quality standards for the stormtrooper costume as established by the 501st. 2. Develop and create a higher standard of stormtrooper costume for members to achieve and a "kudo" (e.g. deployed status) as a recognition of that accomplishment (the same way the Mos Eisley Police Department has create a higher standard for MEPD Deployment). The goal of this is not to force people to achieve the higher standard, but rather to demonstrate what the costume can become and recognize those who achieve it. 3. Create an open and respectful forum for all discussions stormtrooper related, regardless of whether or not they are Original Trilogy or Expanded Universe. One major goal of the detachment is to celebrate the stormtrooper costume in all its forms, and the Star Wars costuming hobby in general. 4. Create and foster an esprit de corp for the stormtrooper costume. Some members complain that their garrison is stormtrooper-centric, others that the stormtrooper is looked down upon. By having a central space where stormtroopers can congregate and celebrate their costume, it removes the ?us versus them? mentality that has crept into some organizations, and establishes the stormtrooper costume as one of many equals. Life can be fast paced and can get crazy from time to time, and things do not always changed for the better (pandemic anyone?). It's reassuring to know that one thing doesn't change, and that is the indominable spirit of this detachment, embodied by our official motto "Unquestioned Loyalty" tempered with our unofficial motto, and true calling, of "troopers helping troopers". Some notable information: 1. Ed Da Silva was the first ever DXO, and he and I worked on the detachment logo together. Most of the design elements were mine, but he added a few items of his own too. M'Lord - Mark Fordham - the LCO at the time, did the final render. Ed was also the second DL after myself, and was the person most responsible for pushing the Legion to agree to split the single stormtrooper CRL (at the time there was only one that covered all TK variations) into 3: ANH, ESB, and ROTJ. 2. Carlos "Buttah Trooper" was also one of the original FISD staff as the Sergeant at Arms, and helped ensure that everyone "played nice" on the forums. 3. FISD was the first detachment to have a "where to buy armor" area that the public could access, and the first to have a newsletter. Also, the first to have awards like achievement medals, etc. for outstanding service to the detachment. 4. Expert Infantry was originally called "Mark", e.g. Mark IV TK meant an "expert" ANH TK. It was unwieldy to say the least, and switching to using "Expert Infantry" was me making an executive decision. 5. Did you know: Dean Plantamura's "White Armor Chronicles" website https://tk899.blogspot.com/ was a key inspiration for FISD, along with the MEPD boards? Dean is the "spiritual godfather" of FISD! My heartfelt thanks and gratitude to the thousands of Legion members who have built up this detachment into what it is today. It always was, and always will be, a team effort. With Unquestioned Loyalty Paul Hoeffer TK-8020 "Daetrin" FISD Founder, DL emeritus In Closing I hope you enjoyed this walk down memory lane as much as I did researching it, there has been a lot packed into the past 20 years and this piece only just covers a small part of it's history. If you ever have too much time on your hands take a look back through some of FISD's earlier threads, some amazing info, photos and videos can be found and it will open your eyes to how we have grown over the years. It's a shame a lot of our older information and photos are lost due to third party image hosts and also forum upgrades, if any of you do have images or information from our early years please reach out to either myself or any of our staff as we'd love to update as much as we can. I can't finish this piece without thanking a few people, firstly our detachment founder Paul Hoeffer "Daetrin" TK8020, without him we wouldn't be here. I would also like to thank all those members (too many to list) who stood up and took on a staff role over the last 20 years, working on staff can be a thankless job, it can also take up a lot of our personal life but in the end it can be a very rewarding experience. Lastly but certainly not least I must thank you the membership, without you our detachment could not have grown to where we are today, thank you one and all. "Troopers Helping Troopers" With Unquestioned Loyalty Glen "Q" Rhodes TK-85421 "gmrhodes13" PRO Newsletter INFORMATION & AWARD PROGRAMS For a full list of FISD awards programs head here. *Now Available in Swedish* Want to spread the word about FISD?, you can with our FISD Tri-Fold Brochure. Originally these were done in a limited run by the member who created them, but nowadays, we have moved this to a print your own service making them accessible to all countries around the globe. Files are available to all full 501st members on request by contacting our DL Chris @themaninthesuitcase you can find more info here Currently Available languages: English - Spanish - German - Swedish Are you new to the FISD and wondering what the heck all those abbreviations and strange sounding terms mean? To help you @justjoseph63 has started a list of the most commonly used ones that will give you some insight. If you have ANY questions about a particular term that is not listed or suggestions for new ones please contact Joseph. You can find the list here. Pre Approval Forum allows future Troopers the opportunity to submit photos of their completed build to be reviewed by the Staff, Imperial Attaches and others in preparation for forwarding it to their GML for approval. Any and all advice/suggestions given will be specific, constructive, helpful and respectful. Please note that this program will NOT take the place of your local GML, as Detachments are not chartered for costume approval and can not override a GMLs decision, but is instead a peer review program designed to help you look your best and offer guidance and positive feedback. For more information on this program, please visit the link here. Don't forget to visit our 3D section when next surfing the FISD forums, there is plenty of useful information to potentially help you on your next TK adventure. You might be feeling may generous and share with our community a new TK related 3D file and maybe win yourself a 3D contributors award so check out the details below and be part of the in house 3D community. Here is a link to the FISD 3D Contributor program. Don't forget to create a troop log here on FISD and get awarded for your missions and deployment. The list of accomplished troopers keeps growing, so for the official 501st event where you wore your TK! Once you've hit a milestone count, go over to the "Trooper Missons and Deployment -- Post yourget on board and register your troops today Simply start (or update!) your troop log, keep the running total in the title, and post (at least!) a date and name milestones here" thread to request your profile be updated! Simple, right? Also if you would like your troop photos shared on our social media channels please add the following to the first post of your FISD troop log: I give permission for FISD to repost my photos on social media in an appropriate fashion. Award Recipients June - July TK-9572 "Myna Sturnidae " Kimberly - - - - - TK-13723 "SublimeBW " Brian - - - - - TK-35679 "darthcue" Ted - - - - - TK-62257 "MDeliso" Mathew - - - - - - - TK-18910 "Tee-Kay Fisto" Brian - - - - - - - You can now also request a letter of commendation, more information available here Are you an approved TK that spends more time on the boards than the average Trooper? Do you enjoy using your knowledge to help out future and existing Troopers? If so, we would like to invite you to join the Imperial Attaché program! Members of the I.A. team are chosen to help out not only those here on the boards, but on a local level as well. Our aim is to have at least one in each and every Garrison, Squad and Outpost in the entire legion to be the eyes and ears of the FISD on a local level. If you are a 501st approved Trooper who wishes to join the ranks of the Attachés, please get in touch with me and/or visit: http://www.whitearmor.net/forum/topic/15252-fisd-attaché-program/ For a complete list of Imperial Attaches, go here. Some of the benefits include: Access to exclusive Attaché merch, including patches. You may also be in the running for an Imperial Attaché Award. An award for those attaché's who have gone above and beyond [minimum 1 year of service]. You can find a list of prior recipients here. Imperial Attaché Outstanding Achievement Award Is the Attaché position vacant for your Squad/Garrison/Outpost? Interested in becoming an Attaché? Contact me by PM or apply in the thread below: With Unquestioned Loyalty Jonatan Östling TK-23592 "Nairy" Attaché Ambassador Master Armorer Program FISD has many wonderful programs to help members build and submit costumes for our detachment, whether it be a classic Stormtrooper, a First Order Stormtrooper, or even one of the new Imperial Armored Commandos. While our Expect Infantry and Centurion programs get most of the attention, FISD staff wants to relaunch the Armorer Program (Currently called the Master Armorer Program). What is the Armorer Program you ask? Well, it is a program designed to recognize those troopers that go above and beyond to assist themselves and others in getting costumes built, submitted, and approved. One of the goals of all the detachments in the 501st Legion is to help members build and submit costumes that meet and hopefully exceed the minimum requirements of the Legion’s CRLs. Currently the Master Armorer program has the requirement of helping a minimum of 5 members achieve Expert Infantry status. The member must have spent at least 30min physically helping another member with cutting, gluing, sizing, etc, just because they want to help (no money exchanged). There are 3 levels of the award, FISD Armorer, FISD Senior Armorer and FISD Master Armorer. The new program will add a 4th level at the beginning called the Apprentice Armorer. The point scale will be as follows. 5 points - Apprentice Armorer 10 points - Armorer 20 points - Senior Armorer 30 points - Master Armorer If you love building armorer and love helping fellow members get their costumes built, then this is the program you’ve been searching for. We look forward to awarding more members with this award as we know how much we all love Troopers helping Troopers. More information can be found here Armorer Rocker Patches Rocker patches are now available for the Armorer Program, there is currently just the one patch, and members are eligible to receive two of them once they reach Level 2, "Armorer". More information can be found here Want to setup a "Fire Team? the Fire Team program is completely optional, and is intended to help form a common identity and spirit of camaraderie among 501st Legion Stormtroopers in the same geographic area/garrison that troop together. Fire Teams are not officially recognized by the 501st Legion nor the FISD, although they will be able to access a Fire Team sub-forum on the detachment website. You can find more information here. For those interested here is the original discussion on the creation of Fire teams here With Unquestioned Loyalty Mark Ryner TK-4584 "captsafe66" Fire Team Relations So what exactly are and levels? These programs were designed for those who choose to take their armor above and beyond the minimum requirements for basic 501st Legion approval. It gives you the chance to show a level of dedication and pride that takes your armor closer to being as "screen accurate" as possible, without as much extra work as you may realize! You can find more information on the programs here. For those unaware it is possible to achieve extra awards at Expert Infantry for each additional version costume you have approved, additional awards are not issued with another Expert Infantry number (you are only issued 1 Expert Infantry number) but you will see a star above the award on your profile and the thread title will show [APPROVED] 2nd, [APPROVED] 3rd, [APPROVED] 4th and so on. Multiple EIB award recipients and info here NOTE If you are approved with a "2nd Version" of a particular costume that you are already approved with you do not receive an additional award, there is only 1 award issued for each costume version ie: only 1 x Hero, 1 x Stunt, 1 x HWT, 1 x ESB, 1 x TFA and so on. If you have a second/additional version costume approved you will see "2nd Version" and [APPROVED] added to the thread title, no additional profile stars (more info on profile awards here) For those of you who have a particular issue (or issues) before or after submitting for Expert Infantry / Centurion level approval, in order to get you an answer faster you can now privately contact the entire Deployment Officer team at one time! Questions about fitting, repairs, CRL standards/requirements or anything pertaining to reaching Levels 2 and 3 are not only welcomed, but encouraged. Keep in mind that no question is too small, and that your queries will only be seen by the D.O. Staff. We are here to help in any way we can, so please feel free to send us a message by clicking on this link: @Deployment Officer Team and we will get back to you A.S.A.P.! More info here This area lists all those who have gone above and beyond basic approval toward screen accuracy and obtained EIB or Centurion or both. FOR June - July the 1st Imperial Stormtrooper Detachment would like to congratulate the following. Expert Infantry Badge Award: Justin "Midnight_cosmonaut" TK55582 EIB 1095 GREAT job on your approval, now on to Level 3! Request your free EIB certificate here. You can find a list of multiple award recipients here. Multiple EIB award info here Expert Infantry Honor Gallery here --------------------------------------------------------------- Centurion Badge Award: None this period - - - - - You can find a list of multiple award recipients here. If you see any of these Troopers around your Garrison or Squad, be sure to congratulate them! As always if you have interesting story or troop please share via DM and it may get added to the next months newsletter. With Unquestioned Loyalty Glen "Q" Rhodes TK-85421 "gmrhodes13" PRO, Newsletter Detachment Leader (DL) Chris Pearson (themaninthesuitcase) TK-10911 Detachment Executive Officer (DXO) Andrew Franke (Sly11) TK-11469 Chief Deployment Officer (DCA) Mario Reyes (TKSpartan) TK-48117 Deployment Officer (DCA) José Mª Sánchez (Chemi) TK-30173 Deployment Officer (DCA) Gerald J Gyorffy (Doggydoc) TK-96004 Provost Marshall (DCoG) Steven Sheades (starsaber25) TK-10466 Provost Marshall (DCoG) Caleb Mask (MaskedVengeance) TK-73692 Provost Marshall (DCoG) Arthur Wong (giskard8) TK-39093 FISD Diplomat (DPRO) Tony Jobe (ukswrath) TK-10116 FISD Diplomat (DPRO) Tim Waychoff (Dark PMF) TK-51878 FISD Diplomat (DPRO) Christoph (Danny) Lauber (Ripper_L) TK-55550 Fire Team Relations (DCoG ) Mark Ryner (captsafe66) TK-4584 Merchandise and Brand Officer (DMBO) James Silvius (jsilvius) TK-12953 Merchandise and Brand Officer (DMBO) Adam Wolf (Revlimiter) TK-89400 Trading Card Specialist (DPRO) Eric Ho (Hoda) TK-77520 Newsletter Publisher (DPRO) Glen Rhodes (gmrhodes13) TK-85421 Social Media Relations (DPRO) Luca Hahn (Morgi) TK-66744 Social Media Relations (DPRO) Torben Sobierey (Tall_Trooper) TK-19525 Content Editor Support (DPRO) Jeff Salt (Wingnut65) TK-50297 Attaché Ambassador (DPRO) Jonatan Östling (Nairy) TK-23592 Personnel Officer (DPER) AC (NoVATie) TK-5597 Systems Administrator (DWM) Mathias Rodstedt (Locitus) TK-2959 Systems Administrator (DWM) Eric Brager (Darth Aloha) TK-9674 Systems Administrator/Detachment Founder (DF) Paul Hoeffer (Daetrin) TK-8020 Imperial Propaganda Machine (IPM) Brian Long (Tilheyra) TK-47933 Imperial Propaganda Machine (IPM) Sally Smith (astrosally) TK-76924 Facebook: www.facebook.com/whitearmor - - - Facebook Group: 1st Imperial Stormtrooper Detachment (FISD) Official Twitter: www.twitter.com/FISD501st or @FISD501st - - - Instagram: www.instagram.com/fisd501st Discord: https://discord.gg/FmQZ2qW8gx - - - Bluesky: https://bsky.app/profile/fisd501st.bsky.social On behalf of the 1st Imperial Stormtrooper Detachment Command Staff and the Imperial Propaganda Department
.jpg.a3d8033b70cde50bf4e7a7602ddbaaba.jpg.2645c354185dce9d30f5ff26e880e166.jpg)


.thumb.jpg.a392a8f446725bfa8a053265c305ab34.jpg.4d3cb9a5d1f7f95d1529de209e19dc67.jpg)


.jpg.0f5e1bdc4f407181bf4d31bab1212538.jpg)
.jpg.e45e3e3ebdd380721ed82c406b270f20.jpg)
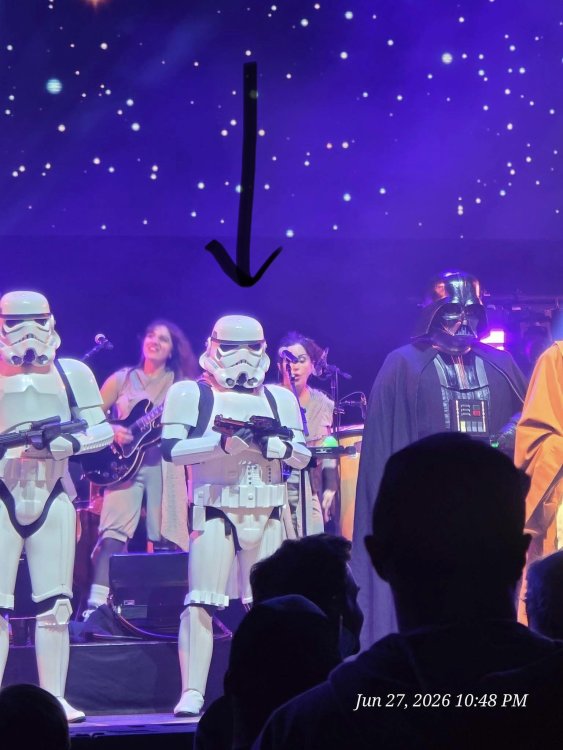
 6 points
 -
I haven't been taking as many photos because it's all just prime/paint/sand etc, but I've painted the calves, spats, thighs, and shoulders: I'm also fixing the last few imperfections in the chest and back: As well as priming the ab, biceps, and finally the helmet/snout: In non-painting news, I dyed the lens and it worked amazingly! I used one packet of iDye Poly, did the first dunk for 5 mins, then a second dunk for 2 mins. One of the lenses got slightly deformed because the water was a bit too hot, but it's thin enough that it can still be installed in the proper shape. (I'm sending one to @zediyeti because we are fellow tiny-TKs and our helmets are printed at 92% and 93% respectively). My grill has a burner so I was able to do it all outside and not risk getting dye all over our very white kitchen. I used these videos as guidance:6 points
-
Today was a rare windless day so I took the opportunity to paint several pieces. Biceps: Ab: Chest: Back: Just as I was finishing up the ab, it started sprinkling! In July! Fortunately just a handful of drops got on it, but it was while the paint was quite wet, so I'll need to sand and recoat. Now that I have been more patient with my painting (several light coats), I've definitely had better results. I also finally primed and sanded the helmet: My plan for painting the helmet is as follows: - Mask off everything but the black satin areas (brow, stripe at bottom, lower trapezoids) and paint them black satin - Once dry, cover the black satin areas with tape - Paint white gloss - Once dry, mask off everything but area around eyes and trapezoids at temples - Paint black gloss - Remove masking on all gloss areas - Spray the entire helmet with 2k - Remove masking on black satin The frown is a separate printed piece and is already sprayed satin black. The snout is also separate, so I can paint it white and spray the clear separately. It's risky to rely on masking and spray paint, but I don't think I'll be able to hand paint the black satin areas and be satisfied with the results. Not pictured, but after they dry, I have also been wet sanding every painted piece with 1000 and then 2000 grit in preparation for spraying the 2k clear.4 points
-
So after a bit of work, abs slurry, putty, filler, sand, sand, sand, and just a couple of the coats of paint to see how it looks. I know it will be covered by the cape, but I want it to look well.2 points
-
Thanks! I'll get to it.2 points
-
got it! you werent kidding! lol, User ID:49814 screenshotting that one2 points
-
File Name: Stormtrooper Fly Swatter Designer: @addicted2create Last Update: 14/07/2026 File: https://makerworld.com/en/models/3051236-stormtrooper-fly-swatter-star-wars-the-empire?from=search#profileId-3432563 Description: May the accuracy be with you (or not)! The only fly swatter with a built-in excuse! Miss the fly? No worries, the Empire has your back. With the Stormtrooper fly swatter and the ironic handle print "Imperial Precision", every miss becomes a cinematic inside joke. Material: PETG (highly recommended for the necessary flexibility and durability when swatting! PLA breaks too easily). Images:2 points
-
1 point
-
Hi Joe, Thank you for your EIB application. Your armour looks great and is close to EIB level, but we are going to need a few changes before we can go ahead and approve it. Lets start at the top and work our way down. Please feel free to reach out if you have any questions. Helmet We are going to need a bit of paint cleanup on the frown ear bars and vocoder. This should be a fairly quick fix with a toothpick dipped in varsol or mineral spirits to carefully scrape away the over painted areas. DO NOT USE ACETONE FOR THIS AS IT WILL MELT THE PLASTIC ON THE HELMET. Your paint on the frown is extending up onto the gums in several areas. Please take a few minutes to clean this up. CRL Basic: Frown is painted gray and does not leave the teeth area. A total of 8 cut outs in the teeth area of the frown are present. References For your ear bars, the black outline will need to be cleaned up a bit as well. References Similarly, your vocoder paint needs to be cleaned up a bit to give more of a defined outline for each of the stripes. Again, this should be a fairly easy correction with a toothpick and some varsol or mineral spirits. References Shoulder straps The white elastic under your shoulder straps is being pulled out by the shoulder bells. This can be corrected by placing some velcro between the ABS shoulder strap and the white elastic one that is being pulled out. This will also bring your shoulder bells in a bit more and achieve the level 3 criteria. References Biceps Your biceps armour pieces are rotating somewhat when worn, this is likely caused by them being a bit too large. This can be corrected by padding the inside with some foam to help keep them aligned with your arm, or by trimming down some of the size for a better fit . References Forearms Your forearms are sitting a bit too high, creating a larger gap than desired at the wrist area. For a more screen accurate look, you want to try to adjust the strapping between the biceps and forearm to create similar sized gaps between the biceps and forearm and forearm and hand plate. References Abdominal Armor The lower edge of the abdominal armour should align with the edge of the cutout notch in the kidney armour. This should be a fairly easy correction and take a few minutes of trimming and sanding. References1 point
-
Also adding in that KeepTrooping (who also sells the flight suit, boots, and gloves) sells a pretty solid neck seal. It's a "one-size-fits-most" application, so it'll need some taking in compared to one more custom tailored to you; but could be more cost effective. There's several Etsy seller's too that specialize in the New-Era/Non-Saga seals as they do differ from those found in the OT armor which appears to be the speciality of the sellers mentioned above.1 point
-
Thanks!! Email sent to Darman'S1 point
-
You could try Geeky Pink FB https://www.facebook.com/GeekyPinksPhantasticGaskets/ Or Darmen1 point
-
Hey Dan, I'll answer your questions first. 1. Yep, exactly. I cut the nylon to whatever length and width I needed and put the snaps in then glued those onto the armor in the spot where I measured they needed to go. I used E6000 through out. I would use clamps and leave them clamped for about 24 hours to make sure it all dried in place. 2. I think I was able to open some of them carefully. I believe I got the rivets in the RS Strapping pack. Otherwise you could probably just get some from a local hardware store? If you take them out and are able to get one out clean, just take that to the store and see if they can match it up. I think it is a pretty standard rivet. Understood about the buttons needing replacement. Keep up the good work!1 point
-
Here’s the results! Definitely a lot better.1 point
-
Although maggots are mentioned in a few builds I haven't seen any actual examples. I think I would keep them a realistic color. Personally I would glue with E6000, would be much stronger than hot glue. Some info from wiki but unfortunately no images A maggot was a type of creature. The muscle maggot was native to Rattatak, while the grain maggot was a food eaten by Hutts. The screw maggot was native to Haruun Kal and gravel-maggots lived on Tatooine. The Diptera maggot was used by the Yuuzhan Vong.1 point
-
TK ANH Stunt Snowtrooper Tusken Raider ANH - 501st & RL approved Death Watch (The Mandalorian) - 501st & RL approved Patrol Trooper Staff Officer (Black) Warrant Officer Navy Trooper Dress Uniform Military Officer (Non-Saga) Security Officer (Non-Saga) Navy Trooper (Non-Saga) Dress Uniform Army Trooper (Andor) Security Trooper (Andor) And WIPs: ROTK/TK Non-Saga FOTK TLJ FOTK TFA Sergeant Hound Phase I 501st Battalion Phase II 501st Battalion Phase II 332nd Division Tusken (The Mandalorian) ISB Officer (Non-Saga) ISB Attendant Senate Officer So I'm working on being TK/TS/TA/TB/TC/CT/CX/DZ/ID/IN/NUTS.1 point
-
I’m ready to sew for you as you are ready good sir! Yeep. I’m excited! [emoji175] Sent from my iPhone using Tapatalk1 point
-
Good luck, trooper!1 point
-
Welcome to FISD!1 point
-
Unfortunately I didn't take any photos during the process so I'm not sure it'd be a very effective how-to.1 point
-
My profile images is 48.0 KB (49,152 bytes) and 150 x 150 pixels if that helps. Unfortunately our forum only allows a certain amount of attachments due to our vast member base and size, we literarily do not have the space to host so many members images. Many of us use online image hosts, upload your images there then post a link to the images into your posts. Use "direct link" or link with full file extension ie: .jpg, .jpeg, .bmp, .gif, .png etc etc. Here is one of many free hosts available and How To Many of us were using IMGUR but unfortunately UK members can no longer access those images. Flickr is what I have been using https://www.flickr.com/ If you need help with a signature or other image information hit up @Nairy who is available to help with images1 point
-
If it matters, this is PETG but I believe the package says it should work with acrylic as well.1 point
-
This would make a great addition to the How To area, when you get some free time1 point
-
Front ab plate. Good thing about the powder is, it'll show you where scratches are located.
 1 point
 -
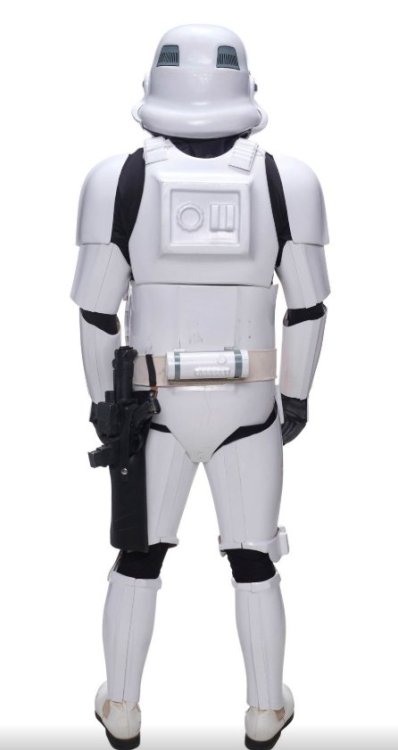
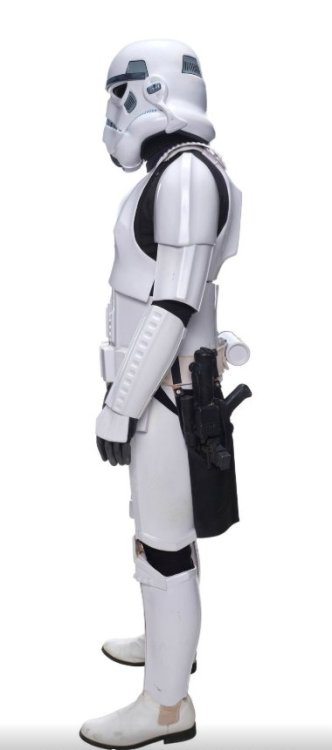
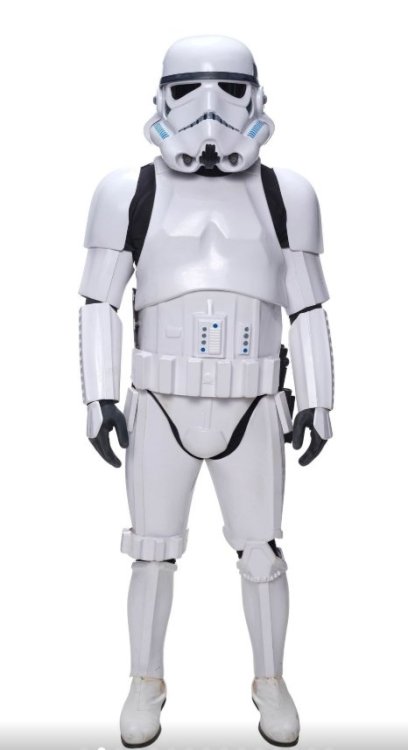
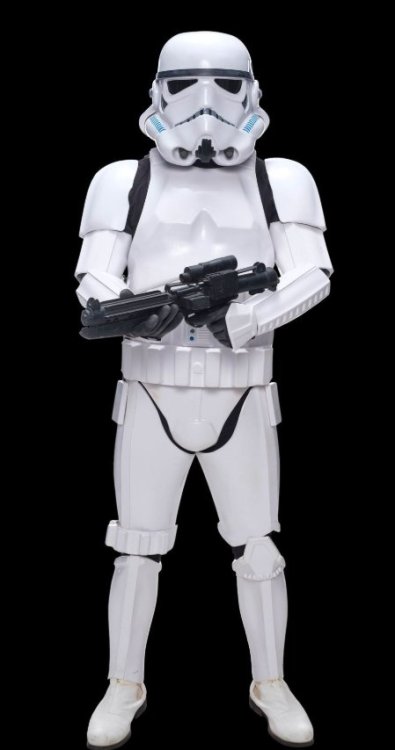
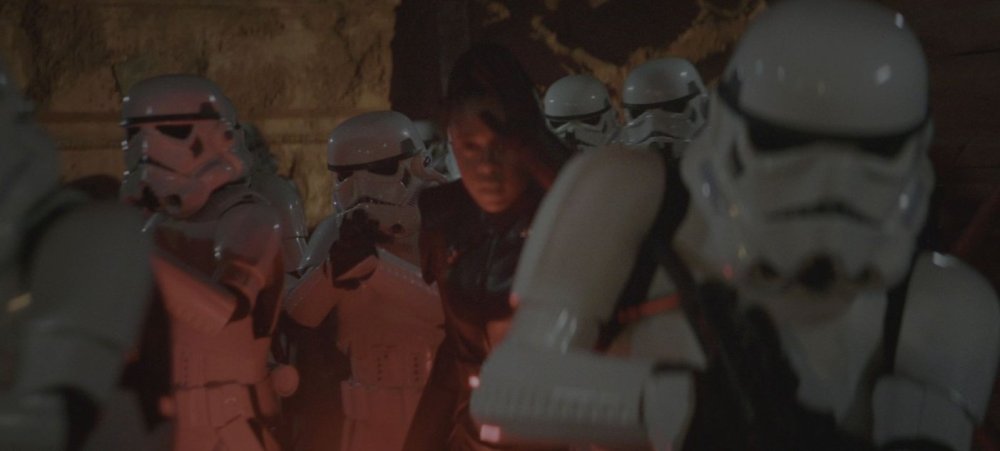
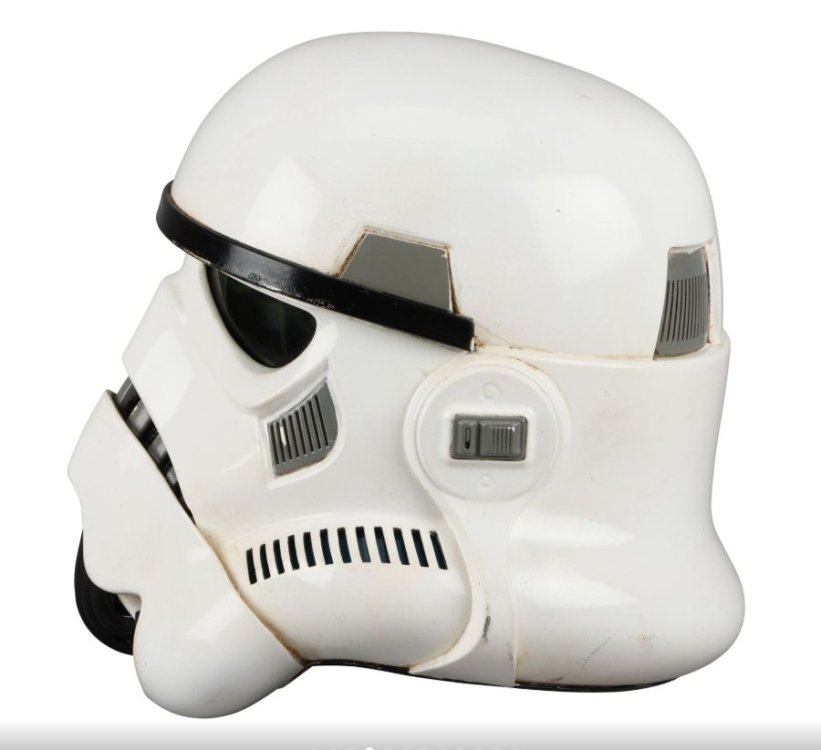
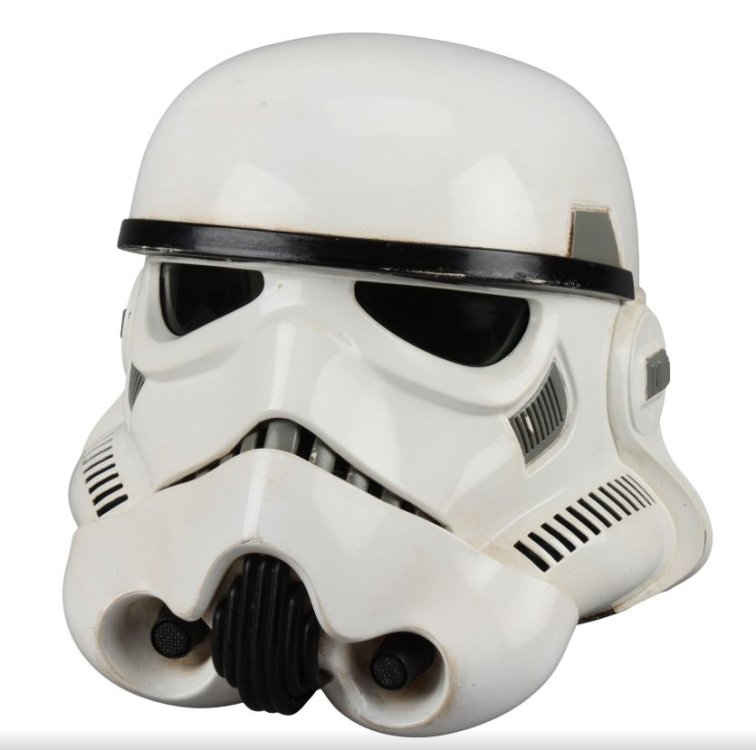
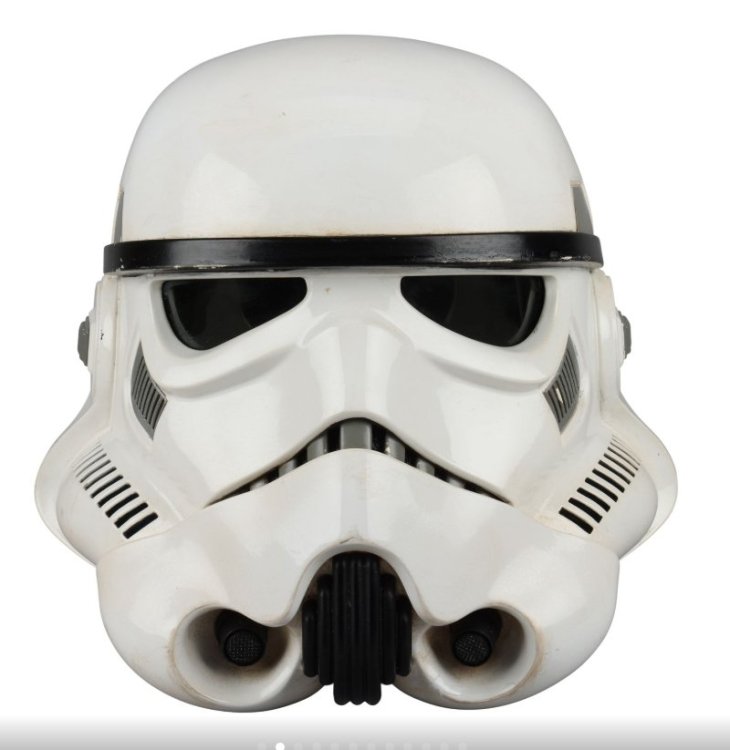
OBI-WAN KENOBI (2022): Stormtrooper Costume Ensemble with E-11 Blaster Propstore https://propstoreauction.com/lot-details/index/catalog/449/lot/157243/389-Imperial-Stormtrooper-Costume-with-E-11-Blaster-OBI-WAN-KENOBI-2022?url=%2Fsearch%3Fpage%3D2%26key%3Dstormtrooper%26xclosed%3D0 Estimate $15,000 - $30,000 Sold Price $18,000 (1 bid) An Imperial Stormtrooper costume with an E-11 blaster from Deborah Chow's Obi-Wan Kenobi. Imperial Stormtroopers wore their uniforms when they brought a large twin-barreled hover cannon to blast through the doors of the Path base in Jabiim in the Season 1 episode "Part V." One of the most anticipated new series of 2022, Obi-Wan Kenobi became the most-watched series premiere on Disney+ in its first weekend. The series was nominated for five Emmy Awards®, including for Outstanding Fantasy/Sci-Fi Costumes and Outstanding Limited or Anthology Series This costume was created by a member of the 501st Legion, a fan group dedicated to creating screen-accurate Star Wars villain costumes and whose members also portrayed many of the Stormtroopers in the series. Consisting primarily of white vacuum-formed plastic components, it includes a hand-painted helmet with a green-tinted visor; front and back chest plates; front and back abdominal plates with decorative gray and blue buttons; a pair of vacuum-formed pauldrons with a connected elastic strap; upper-arm, forearm, hand, thigh, and leg armor plates; an off-white belt with vacuum-formed dropboxes and a black holster; a removable thermal detonator; and white leather Chelsea boots. The underlayer of the costume consists of a black ribbed neck polyester dickey; a black long-sleeve polyester shirt; a black polyester/nylon belt with a plastic buckle; black polyester pants; and black gloves with silicone grip texturing. Also included is a resin foam E-11 blaster. The costume comes mounted to a mannequin for display. This costume exhibits scuffing, minor marks on several armor components, and discoloration on the boots, chipped paint on the blaster, white discoloration, adhesive residue, and loose pieces, including the Hengstler counter box. Dimensions: 33" x 18" x 72" (84 cm x 45.75 cm x 183 cm)


 1 point
 -
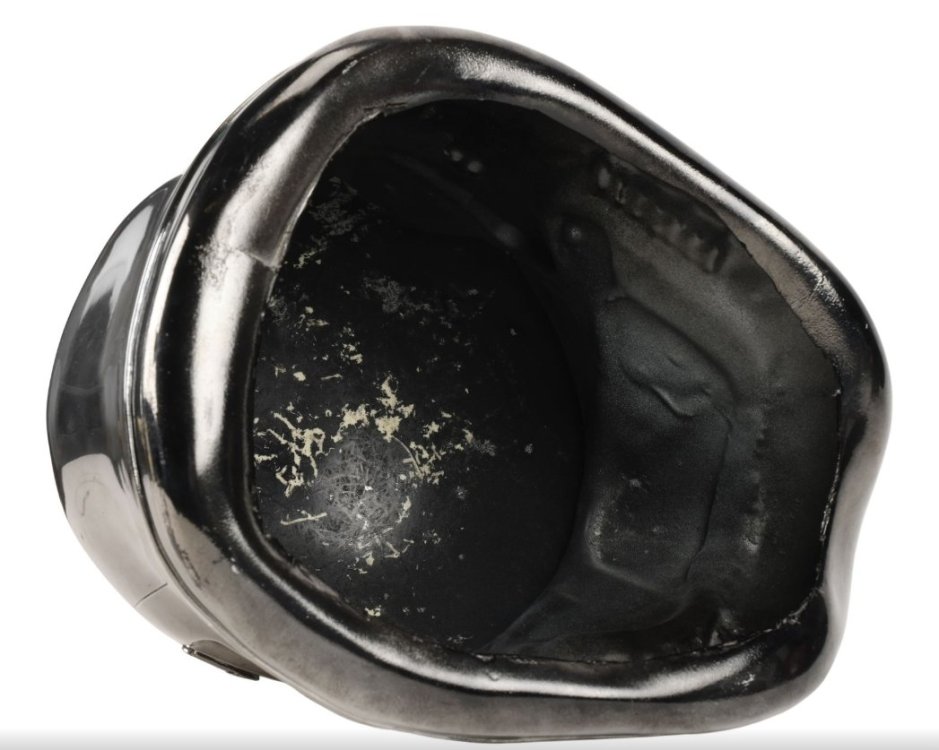
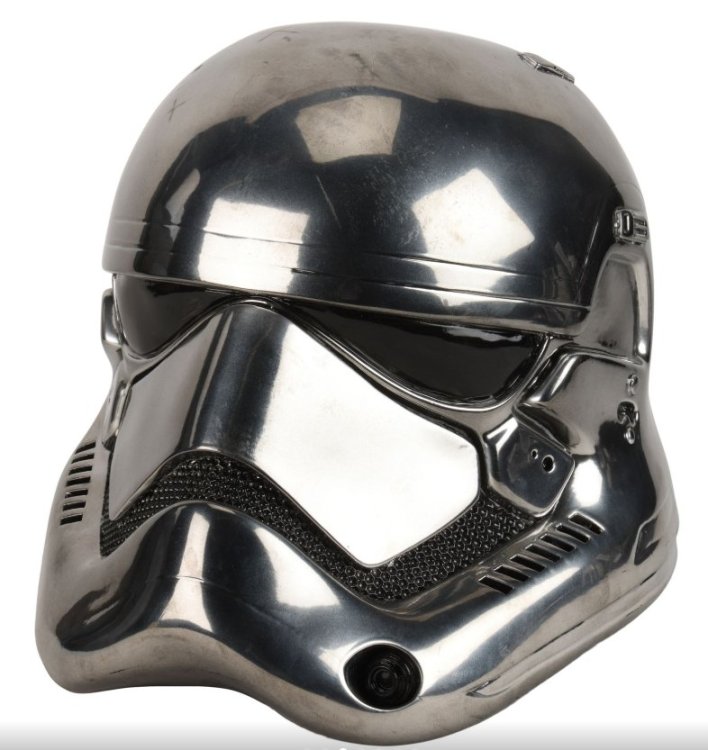
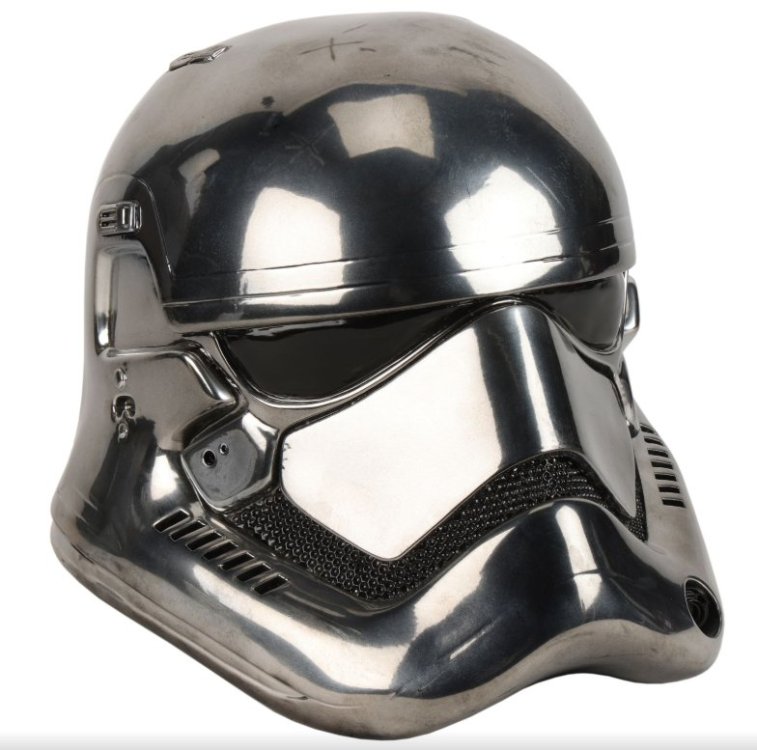
First Order Stormtrooper Helmet Chrome-Plated: SEQUEL TRILOGY (2015-2019) Propstore https://propstoreauction.com/lot-details/index/catalog/508/lot/197726/366-Chrome-Plated-Stormtrooper-Helmet-STAR-WARS-SEQUEL-TRILOGY-2015-2019?url=%2Fsearch%3Fkey%3Dstormtrooper%26xclosed%3D0&sc=449 Estimate £1,000 - 2000 Sold Price £6930 (24 bids) A chrome-plated First Order Stormtrooper helmet from the production of the Star Wars prequel trilogy. First Order stormtroopers were the infantry soldiers of the First Order, a fascist military group. The helmet is made of chrome-plated resin and was produced as a workshop sample which was ultimately unused on screen. Dimensions: 27 cm x 28 cm x 32 cm (10.5” x 11” x 12")


 1 point
 -
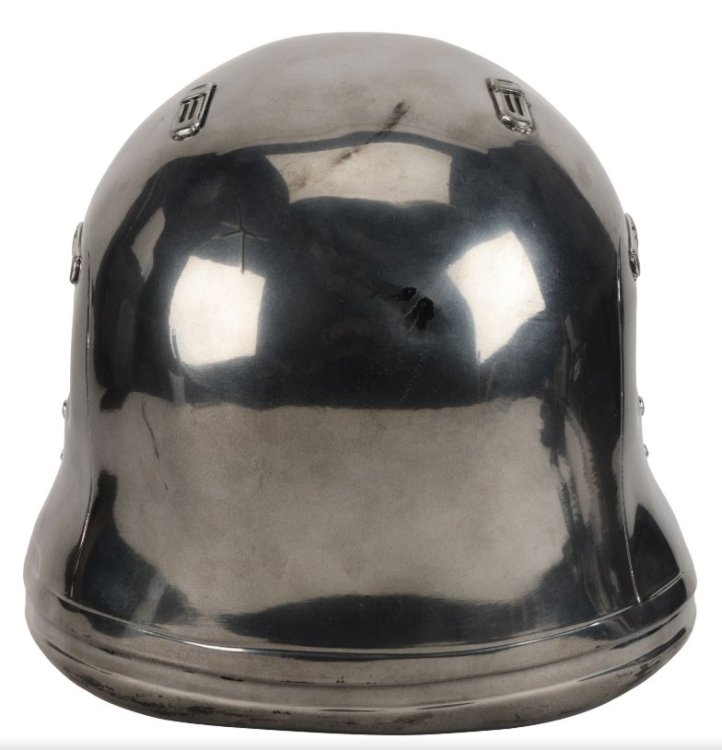
STAR WARS: TROS (2019) - Set Dressing Stormtrooper Helmet Propstore https://propstoreauction.com/lot-details/index/catalog/508/lot/197721?url=%2Fsearch%3Fkey%3Dstormtrooper%26xclosed%3D0 Estimate £2,000 - 4000 Sold Price £44,100 (26 bids) A set dressing Stormtrooper helmet from J.J. Abrams' Star Wars: The Rise of Skywalker. When Rey (Daisy Ridley) searched the Death Star ruins for the Sith Wayfinder, original Stormtrooper helmets littered the floor. The original Stormtroopers were part of George Lucas' earliest concepts for Star Wars, which he conveyed to seminal designer Ralph McQuarrie, who memorialised them in a series of concept sketches and production paintings before the famous costumes were produced. The presence of original Stormtrooper helmets in the scene mentioned above is a subtle yet significant nod to the original films that die-hard Star Wars fans would have spotted. This helmet is made by slush casting fibreglass and resin, which involves pouring the liquid form of the material into a mould, then rotating it to form the finished shape. It was designed specifically for set dressing rather than for use by an actor. Dimensions: 30.5 cm x 31 cm x 30 cm (12" x 12.25" x 11.75")


 1 point
 -
I am slowly making progress on painting and priming. I might have to let go of perfection and decide what is 'good enough' or I may never finish the build. :) Besides the painting, though, I learned a new skill today - vacuum forming! I could definitely have just pasted a curved face shield piece inside of the helmet for lenses but I thought it'd be fun to try my hand at vacuum forming. I considered making my own, but I found this one from Etsy that was very inexpensive, even with shipping from Spain. https://www.etsy.com/listing/4452485131/vacuum-forming-machine-a4-vacuum-former The files I have come with a flat lens stencil as well as a 3D vacuum forming shape. However, it's not really designed for vacuumforming since it's the exact shape of the lens. So I first copied and pasted the lens shape a bunch of times in tinkercad and cut the bottom flat to fill out the inside of the lens, and printed it. I printed the lens itself upright for better quality: It still wasn't exactly what I wanted for vacuum forming, though, because there wasn't really going to be a way to attach the lens to the helmet itself since there's no flashing. So I used some EVA foam to build out the buck and made it slightly shorter than the lens so that when I pulled it, I'd have an edge that was inset that I could use to attach the lens to the helmet. I went to Goodwill this morning and found a cheap toaster oven which thankfully still worked, and coincidentally exactly fit the frame for the plastic that came with the vacuum former. The plastic itself I ordered from McMaster-Carr. Here is the video from my first ever pull, which worked surprisingly well: https://photos.app.goo.gl/BhXqtgQBVicZDv7eA However, the protective plastic melted against the EVA foam, so I pulled it again. The second time I removed the bottom plastic so it didn't stick to the buck, but the wrinkle pattern from the top layer of protected plastic caused defects on the lens, so I pulled it a third time, this time with both sides of the protective plastic removed. Third time's a charm! I am planning on dying the lens to darken it.1 point
-
Welcome to the FISD David. Glad you're here !!!1 point
-
Look who’s back. @TKNick8350, @jsilvius is correct. I retired last year due to a myriad of issues and my increasingly busy life, but a sudden resurgence of interest in New Generation Armor has brought me back from the dead. There’s some incredible things going on right now and I’m excited to see what pans out. Regardless of my current status, I’ve still been helping people with their builds and frequently respond to DMs. If you want some assistance, please reach out and I’ll be happy to help.1 point
-
Welcome aboard trooper!1 point
-
RS just dropped a cool new video showing his team building TK suits in time lapse. It was so fascinating, I had to slow it down. Ngl, it's been many a year since I built a TK, and these guys just make it look easy. My hat's off to these gentlemen, masters of their craft.1 point
-
Its a great film and shows the great work that goes into our tremendous armour, proud to wear it and stand together1 point
-
Welcome to the FISD David1 point
-
Welcome1 point
-
Thank you to everyone for you help. We have now met our goal.1 point
-
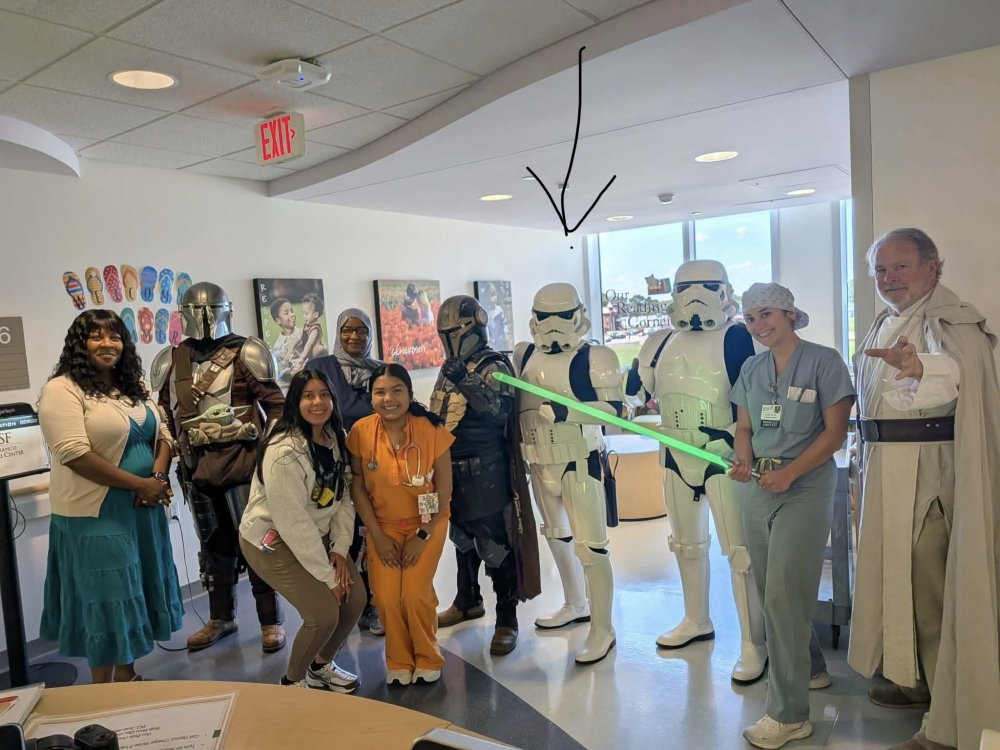
First troop was with Midwest Garrison 332 Blurrg Squad to visit OSF children’s hospital - the very opportunity I joined 501st to participate in! Second chance was on stage with Weird Al Jankovic at United Center in Chicago infront of an audience of 20,000 - quite the start to my 501st experience! I worked SWCC crew in 2019 and got to attend the 501st ball - from then on was my goal to join.
 1 point
 -
I was looking for a good undersuit for my stormtrooper and messaged all the vendors I saw on the list. I messaged Sheev's Emporium prior to reading that he was not a reliable seller and what he messaged me was INSANE. I asked him for the undersuit and the price just to get a reference, and he then sends me a FULLY AI response that barely responds to my question, then has the AUDACITY to ask for $3,800 for just the undersuit? Absolute show. I'm most likely going to order an undersuit from KeepTrooping or DarkSideCloset if they respond so if anyone knows how long it normally takes for an undersuit from one of these two to arrive I would appreciate it, thanks.1 point
-
I am one of the lucky ones who received their product (an FOTK undersuit), and while I will say the quality of the craftsmanship is quite good... if he spent as much time working on product orders as he does posting on socials, he'd be in a lot better position with the community. I can't currently recommend either.1 point
-
NEW In Memoriam Detachment Leader Merchandise Officer Hall of Fame FISD Meme's Around the Detachment Fundraising INFORMATION & AWARD PROGRAMS FISD Tri-Fold Brochure Common FISD Acronyms and TK Glossary Pre Approval Forum 3D Section Field Exercise Award Imperial Attaché Program Master Armorer Award Fire Teams EIB & Centurion: What do these terms mean? Need Help Ask the Deployment Officers Advance to 1500 Advanced Tactics Awards Newsletter Editor Staff List 2026 Follow FISD Marcia Lucas, the film editor who won an Oscar for editing “Star Wars,” directed by her former husband George Lucas, and shaped several influential films of the 1970s, died Wednesday in Rancho Mirage, California, she was 80. The family’s attorney confirmed she died of cancer. “Marcia will be remembered as a brilliant storyteller, a trailblazer for women in film, a loving mother and grandmother, a generous host, and a loyal friend whose humor and sparkle filled every room she entered. Her influence on film is indelible, but those who knew her best will remember the way she made life feel more vivid, more beautiful, more fun, and more full of love,” the family statement said. “Her work was known for its emotional intelligence, rhythm, and humanity — a rare ability to find the truth of a scene and bring heart, momentum, and clarity to the screen.” Condolences to her family and friends "Buckets Off" It is with a heavy heart and sadness that Star Garrison announces the loss of one of their own. Robert Nuelle Jr TI - 62126 There's so much that could be said about Bob. He was an entomologist and studied bugs since he was a kid. He knew a lot about wildlife and took his family out fishing and to collect bugs often. He and his son Robert had been on numerous trips in Arizona, New Mexico, Texas and parts of Mexico to collect moths. His children, Liz and Robert, and Bob’s grandchild loved fishing with him. Bob’s loves of his life were his family. He was married to his wife Rosemary for almost 41 years, and he dedicated himself to being a wonderful dad and grandfather. He was so very proud of the family he and Rosemary built. Bob was also an outspoken advocate for other families of crime victims. His advocacy for others was spurred by his desire to save other people from the pain his family experienced. He spent so much of his time not only being vocal about his hope for justice for his daughter Liz, but in trying to help others find justice, too. Bob joined the Legion in June of 2021. He was the father of Eternal Legionnaire Liz Barraza. After Liz’s tragedy Bob stated to me that it was the Legion that gave him hope and helped him get through that very difficult time. He enjoyed the charity aspect of the 501st. Bob has positively improved victim advocacy in Texas. He worked with Crime Stoppers and Parents of Murdered Children, as well as other groups. Most recently, he brought forward a project that dedicates benches to victims and their families. The project is sponsored by county commissioner Tom Ramsey. Bob pitched the idea and helped get the program running. It includes planting a tree and placing a bench nearby with the victims name on it to give families a place to remember their loved ones. Bob worked with the Mayhew Foundation establishing a charity in Liz’s memory. Bob was in a constant state of seeking justice for his daughter Liz. He is now united with her. We will miss you Bob and we can only hope to emulate your positive light. Condolences to his garrison, family and friends "Buckets Off" It is with heavy hearts that we remember and honor Rob Mires TR-12928 — a fellow trooper, friend, and member of the Star Wars community whose presence made our garrison and squads stronger. Rob was part of the North Texas Squad of Star Garrison. Rob embodied the spirit of the 501st through his dedication, camaraderie, and willingness to bring joy to others through every troop, event, and interaction. Behind the armor was someone who made people smile, welcomed others, and helped create memories that will never be forgotten. Rob’s dedication to his family was unmatched and he often brought his sons with him to events to share in his joy of trooping. The impact he had on those around him reached far beyond the costume. Our thoughts and deepest condolences go out to Rob’s family, friends, and fellow troopers during this difficult time. Rest easy, trooper. Your watch has ended, but your legacy will remain with us always. Condolences to his garrison, family and friends "Buckets Off" On 24 May 2026, we said goodbye to a dear friend, Lewyn TKID-4663 of the Singapore Garrison. Through a shared love of Star Wars, Lewyn became much more than a fellow trooper. He was a friend who brought warmth, laughter, and kindness wherever he went. Whether helping others, bringing happiness to children and families, sharing stories about his beloved collection, or simply enjoying time with friends, Lewyn left a lasting impression on everyone fortunate enough to know him. He will be deeply missed, but his stories, friendship, and spirit will continue to live on in our hearts. May the Force be with him, always. Condolences to his garrison, family and friends "Buckets Off" On 25 May 2026, our dear friend and trooper, Willis TKID-9746 of the Singapore Garrison, passed away. Willis brought joy, kindness, and friendship to everyone around him through his love for Star Wars and the countless smiles he helped create. His generosity, positive spirit, and willingness to lend a hand touched many lives, and he will be deeply missed by all who had the privilege of knowing him. Though he is no longer with us, his memory and the impact he made on those around him will remain with us always. Condolences to his garrison, family and friends "Buckets Off" Some people leave an irreplaceable mark on our hearts, and Rheila Montes-Uy TI31086, was truly one of them. Deeply cherished, someone we looked up to, and a beautiful soul who was always so incredibly generous of spirit, she passed . Her time with us, the 501st Legion Philippine Garrison, she shared her wonderful presence— organized meaningful outreach and charity. Through her gentle kindness and boundless generosity, we were able to reach out to many lives, bringing comfort and hope where it was needed. She was, and always will be, an inspiration to all of us. Though she has taken her final rest and has become one with the Force, the legacy the dream of hope, care and love that she weaved, will always be a part of the wonderful world we live and echo across the stars. Our armors feel heavier, and our broken hearts are hard to mend, the light and the beauty of her inspiring spirit lives on through us. Condolences to her garrison, family and friends "Buckets Off" Greetings troopers, Whilst we're over half way to our goal we still need your help in funding the forum for this year. If you have found the forum helpful to you we would really appreciate even a small donation to help us cover all our costs. If you are able to make a donation then details are available here: This month we were also able to award our 2nd Senior Amourer award to @TheRascalKing. Congratulations Justin on your award. If you regularly help new troopers with their builds pleas check out the Master Amrourer program, and maybe we could be awarding you too soon: https://www.whitearmor.net/forum/forum/182-fisd-master-armorer-program/ As the days get longer, for most of us, we're entering peak trooping season. It also means it's warming up. With this in mind make sure you look after your self, no need to be the hero. @kmwilson343 has written a great post on heat in armour and how it can affect you. Read it here: With Unquestioned Loyalty Chris Pearson TK-10991 "themaninthesuitcase" Detachment Leader Greeting Troopers! Thank you all for checking out the Merch section of the newsletter. If you haven't already, please consider donating to the FISD Forum fund. We are still roughly $400 short of our goal to fund the forum for the 2026-2027 term. You can find information about that here Old Business "FISD EIB Coins" I still have a few of the Stepping out Trooper EI coins for new EI members or members the have never bough ten an EI coin. The next EI coin will be a gold version of our 20th Anniversary coin, so if you are eligible to order an EI coin, and you'd prefer not to have an Anniversary edition, grab one of these before they aren't available any longer! In order to buy one, you must have an approved EI costume and you can not have ever bought an EIB coin from any pervious runs. EIB coins are a once and done coin. If you have this one and would prefer one of the older versions, I may have an option for you so please dm me. EIB v11 coin run is still open Pin Run The pin run for Expert Infantry, Centurion and Attaché will begin soon, we are still researching vendors, but we hope to have one selected and get the run open. If you have any questions you can ask @MaskedVengeance, or find more information here. 20th Anniversary Coin Run This run is complete. There are still a few members that haven't paid. Please check the post for updates. Updates can be found here. CURRENT BUSINESS FISD 20th Anniversary Standard Logo Patch run is still open. The patch run opened on May 4th, and was extended until 15 June. We are short on the minimum for the Oversized Patch (11") You can learn more about the patch run here. The LFL hold on merch is over, but we are still waiting for approval of our latest submissions. There is a 2nd 20th Anniversary Coin and Patch that will both be going up for sale after they are approved, so keep an eye on the forum for these items. The FISD War Banner from last year is the next run, I am working with the vendor to finalize pricing and ordering information, please keep a watch on the forum for that announcement. The 20th Anniversary Racing Shirt is still in design, but it will be opening once it is completed and approved. And as always, questions, comments, thoughts, suggestions, are welcome, and please feel free to reach out to either Adam or myself! With Unquestioned Loyalty James Silvius TK-12953 "jsilvius" Merchandise & Branding Officer With Unquestioned Loyalty Adam Wolf TK-89400 "Revlimiter" Merchandise & Branding Officer At his post, at the movie premiere! Please welcome TK-15021 to the Stormtrooper Hall of Fame, May 2026! @Thiboterham Troop log can be found here. Congrats Thibaut! This month was really difficult to choose, so many awesome pictures, but this one pretty much sums up what every trooper will remember from May 2026! With Unquestioned Loyalty Jonatan Östling TK-23592 "Nairy" Attaché Ambassador You can find the full meme thread here Tutorials, Tips and How To's A few new additions to the How To area Request Edited Signature Banners/Profile pics/Fire Team Logos Troopers! I want to help out the community and the people that doesn't have the time or have the necessary tools or skills to create a cool Signature banner or have the background of your Action Photo removed, or even if you have a request for a certain Profile picture! I don't know how popular this will be, or what requirements I will need, but we will learn as we go and if it turns out to be popular and it gets too much for me - I'm sure that we can find a few more that are willing to help out! Thread here With Unquestioned Loyalty Jonatan Östling TK-23592 "Nairy" Attaché Ambassador Trading Card Archives For those with FISD detachment trading cards please consider sending two to Paul @Daetrin keeper of our detachment archives. Address and more info here With Unquestioned Loyalty Paul Hoeffer TK-8020 "Daetrin" Detachment Founder Keeper of Archives Blast-A-Porg You can find the full story here With Unquestioned Loyalty Glen "Q" Rhodes TK-85421 "gmrhodes13" PRO, Newsletter Forum Fundraising It's that time of year where we need to pay our bills. As last year we moved away from the temporary legion hosting and on to our own systems we have an increase in costs to cover. As a stretch goal we have also included a proper backup solution into the costs. Currently this is managed manually and a proper solution would be a great addition. We would like cover the next 14 months of costs if possible. This means next years admin team are not thrown in with suddenly having to run a fundraiser. All members who donate will also have the 2026 supporter banner added to their profile, as with the earlier email costs fundraiser. If you would like to make a donation you can find the fundraiser thread here INFORMATION & AWARD PROGRAMS For a full list of FISD awards programs head here. *Now Available in Swedish* Want to spread the word about FISD?, you can with our FISD Tri-Fold Brochure. Originally these were done in a limited run by the member who created them, but nowadays, we have moved this to a print your own service making them accessible to all countries around the globe. Files are available to all full 501st members on request by contacting our DL Chris @themaninthesuitcase you can find more info here Currently Available languages: English - Spanish - German - Swedish Are you new to the FISD and wondering what the heck all those abbreviations and strange sounding terms mean? To help you @justjoseph63 has started a list of the most commonly used ones that will give you some insight. If you have ANY questions about a particular term that is not listed or suggestions for new ones please contact Joseph. You can find the list here. Pre Approval Forum allows future Troopers the opportunity to submit photos of their completed build to be reviewed by the Staff, Imperial Attaches and others in preparation for forwarding it to their GML for approval. Any and all advice/suggestions given will be specific, constructive, helpful and respectful. Please note that this program will NOT take the place of your local GML, as Detachments are not chartered for costume approval and can not override a GMLs decision, but is instead a peer review program designed to help you look your best and offer guidance and positive feedback. For more information on this program, please visit the link here. Don't forget to visit our 3D section when next surfing the FISD forums, there is plenty of useful information to potentially help you on your next TK adventure. You might be feeling may generous and share with our community a new TK related 3D file and maybe win yourself a 3D contributors award so check out the details below and be part of the in house 3D community. Here is a link to the FISD 3D Contributor program. Don't forget to create a troop log here on FISD and get awarded for your missions and deployment. The list of accomplished troopers keeps growing, so for the official 501st event where you wore your TK! Once you've hit a milestone count, go over to the "Trooper Missons and Deployment -- Post yourget on board and register your troops today Simply start (or update!) your troop log, keep the running total in the title, and post (at least!) a date and name milestones here" thread to request your profile be updated! Simple, right? Also if you would like your troop photos shared on our social media channels please add the following to the first post of your FISD troop log: I give permission for FISD to repost my photos on social media in an appropriate fashion. Award Recipients May - June TK-15310 "ronhoffman2" Ron - - - - - TK-16428 "zediyeti" Micah - - - - - - TK-47933 "Tilheyra" Brian - - - - - - TK-77751 "bpieroni" Bob - - - - - - TK-18188 "FUZZMA" Calvin - - - - - - You can now also request a letter of commendation, more information available here Are you an approved TK that spends more time on the boards than the average Trooper? Do you enjoy using your knowledge to help out future and existing Troopers? If so, we would like to invite you to join the Imperial Attaché program! Members of the I.A. team are chosen to help out not only those here on the boards, but on a local level as well. Our aim is to have at least one in each and every Garrison, Squad and Outpost in the entire legion to be the eyes and ears of the FISD on a local level. If you are a 501st approved Trooper who wishes to join the ranks of the Attachés, please get in touch with me and/or visit: http://www.whitearmor.net/forum/topic/15252-fisd-attaché-program/ For a complete list of Imperial Attaches, go here. Some of the benefits include: Access to exclusive Attaché merch, including patches. You may also be in the running for an Imperial Attaché Award. An award for those attaché's who have gone above and beyond [minimum 1 year of service]. You can find a list of prior recipients here. Imperial Attaché Outstanding Achievement Award Is the Attaché position vacant for your Squad/Garrison/Outpost? Interested in becoming an Attaché? Contact me by PM or apply in the thread below: With Unquestioned Loyalty Jonatan Östling TK-23592 "Nairy" Attaché Ambassador Master Armorer Program FISD has many wonderful programs to help members build and submit costumes for our detachment, whether it be a classic Stormtrooper, a First Order Stormtrooper, or even one of the new Imperial Armored Commandos. While our Expect Infantry and Centurion programs get most of the attention, FISD staff wants to relaunch the Armorer Program (Currently called the Master Armorer Program). What is the Armorer Program you ask? Well, it is a program designed to recognize those troopers that go above and beyond to assist themselves and others in getting costumes built, submitted, and approved. One of the goals of all the detachments in the 501st Legion is to help members build and submit costumes that meet and hopefully exceed the minimum requirements of the Legion’s CRLs. Currently the Master Armorer program has the requirement of helping a minimum of 5 members achieve Expert Infantry status. The member must have spent at least 30min physically helping another member with cutting, gluing, sizing, etc, just because they want to help (no money exchanged). There are 3 levels of the award, FISD Armorer, FISD Senior Armorer and FISD Master Armorer. The new program will add a 4th level at the beginning called the Apprentice Armorer. The point scale will be as follows. 5 points - Apprentice Armorer 10 points - Armorer 20 points - Senior Armorer 30 points - Master Armorer If you love building armorer and love helping fellow members get their costumes built, then this is the program you’ve been searching for. We look forward to awarding more members with this award as we know how much we all love Troopers helping Troopers. More information can be found here Armorer Rocker Patches Rocker patches are now available for the Armorer Program, there is currently just the one patch, and members are eligible to receive two of them once they reach Level 2, "Armorer". More information can be found here Want to setup a "Fire Team? the Fire Team program is completely optional, and is intended to help form a common identity and spirit of camaraderie among 501st Legion Stormtroopers in the same geographic area/garrison that troop together. Fire Teams are not officially recognized by the 501st Legion nor the FISD, although they will be able to access a Fire Team sub-forum on the detachment. For those interested here is the original discussion on the creation of Fire teams here With Unquestioned Loyalty Mark Ryner TK-4584 "captsafe66" Fire Team Relations So what exactly are and levels? These programs were designed for those who choose to take their armor above and beyond the minimum requirements for basic 501st Legion approval. It gives you the chance to show a level of dedication and pride that takes your armor closer to being as "screen accurate" as possible, without as much extra work as you may realize! You can find more information on the programs here. For those unaware it is possible to achieve extra awards at Expert Infantry for each additional version costume you have approved, additional awards are not issued with another Expert Infantry number (you are only issued 1 Expert Infantry number) but you will see a star above the award on your profile and the thread title will show [APPROVED] 2nd, [APPROVED] 3rd, [APPROVED] 4th and so on. Multiple EIB award recipients and info here NOTE If you are approved with a "2nd Version" of a particular costume that you are already approved with you do not receive an additional award, there is only 1 award issued for each costume version ie: only 1 x Hero, 1 x Stunt, 1 x HWT, 1 x ESB, 1 x TFA and so on. If you have a second/additional version costume approved you will see "2nd Version" and [APPROVED] added to the thread title, no additional profile stars (more info on profile awards here) For those of you who have a particular issue (or issues) before or after submitting for Expert Infantry / Centurion level approval, in order to get you an answer faster you can now privately contact the entire Deployment Officer team at one time! Questions about fitting, repairs, CRL standards/requirements or anything pertaining to reaching Levels 2 and 3 are not only welcomed, but encouraged. Keep in mind that no question is too small, and that your queries will only be seen by the D.O. Staff. We are here to help in any way we can, so please feel free to send us a message by clicking on this link: @Deployment Officer Team and we will get back to you A.S.A.P.! More info here This area lists all those who have gone above and beyond basic approval toward screen accuracy and obtained EIB or Centurion or both. FOR May - June Expert Infantry Badge Award: No recipients this month - - - - Request your free EIB certificate here. You can find a list of multiple award recipients here. Multiple EIB award info here Expert Infantry Honor Gallery here --------------------------------------------------------------- Centurion Badge Award: No recipients this month - - - - Request your free Centurion certificate here. You can find a list of multiple award recipients here. As always if you have interesting story or troop please share via DM and it may get added to the next months newsletter. With Unquestioned Loyalty Glen "Q" Rhodes TK-85421 "gmrhodes13" PRO, Newsletter Detachment Leader (DL) Chris Pearson (themaninthesuitcase) TK-10911 Detachment Executive Officer (DXO) Andrew Franke (Sly11) TK-11469 Chief Deployment Officer (DCA) Mario Reyes (TKSpartan) TK-48117 Deployment Officer (DCA) José Mª Sánchez (Chemi) TK-30173 Deployment Officer (DCA) Gerald J Gyorffy (Doggydoc) TK-96004 Provost Marshall (DCoG) Steven Sheades (starsaber25) TK-10466 Provost Marshall (DCoG) Caleb Mask (MaskedVengeance) TK-73692 Provost Marshall (DCoG) Arthur Wong (giskard8) TK-39093 FISD Diplomat (DPRO) Tony Jobe (ukswrath) TK-10116 FISD Diplomat (DPRO) Tim Waychoff (Dark PMF) TK-51878 FISD Diplomat (DPRO) Christoph (Danny) Lauber (Ripper_L) TK-55550 Fire Team Relations (DCoG ) Mark Ryner (captsafe66) TK-4584 Merchandise and Brand Officer (DMBO) James Silvius (jsilvius) TK-12953 Merchandise and Brand Officer (DMBO) Adam Wolf (Revlimiter) TK-89400 Trading Card Specialist (DPRO) Eric Ho (Hoda) TK-77520 Newsletter Publisher (DPRO) Glen Rhodes (gmrhodes13) TK-85421 Social Media Relations (DPRO) Luca Hahn (Morgi) TK-66744 Social Media Relations (DPRO) Torben Sobierey (Tall_Trooper) TK-19525 Content Editor Support (DPRO) Jeff Salt (Wingnut65) TK-50297 Attaché Ambassador (DPRO) Jonatan Östling (Nairy) TK-23592 Personnel Officer (DPER) AC (NoVATie) TK-5597 Systems Administrator (DWM) Mathias Rodstedt (Locitus) TK-2959 Systems Administrator (DWM) Eric Brager (Darth Aloha) TK-9674 Systems Administrator/Detachment Founder (DF) Paul Hoeffer (Daetrin) TK-8020 Imperial Propaganda Machine (IPM) Brian Long (Tilheyra) TK-47933 Imperial Propaganda Machine (IPM) Sally Smith (astrosally) TK-76924 Facebook: www.facebook.com/whitearmor - - - Facebook Group: 1st Imperial Stormtrooper Detachment (FISD) Official Twitter: www.twitter.com/FISD501st or @FISD501st - - - Instagram: www.instagram.com/fisd501st Discord: https://discord.gg/FmQZ2qW8gx - - - Bluesky: https://bsky.app/profile/fisd501st.bsky.social On behalf of the 1st Imperial Stormtrooper Detachment Command Staff and the Imperial Propaganda Department


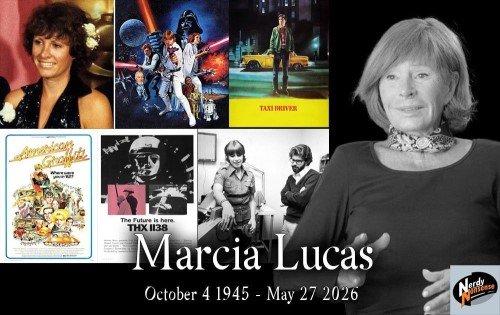
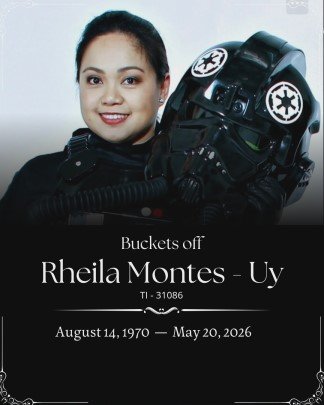 1 point
 -
I sewed some nylon strapping into the inside edge of my shoulder straps and it helped a ton. It's totally hidden by the plastic bridges. No black can be seen when wearing it. Very novice hand sewing. I also added E6000 to the void areas. It's very strong and can't get stretched out of shape anymore. The shoulder alignment results! They're always perfect now.1 point
-
1. DM me and I'll get you a new download link. But, I just realized that I didn't make the proper changes to the Mimban shield, so if you're wanting that as well, it'll probably be another week before I can get to it 2. I apologize, I completely forgot about that. But considering I'm calling a permanent moratorium on further mods, I should have some time to give it a go.1 point
-
To put a bookend on this whole thread, I'm finally approved! I got approved about a month ago, and wanted to wait until my first troop to post some photos of this kit in action. It was so fun to finally be a part of the 501st Legion and I can't wait to get out more. And finally, thank you to everyone that has helped me along the way, from here on the forums, as well as the Southern California Garrison where I first got in contact with the Legion, I couldn't have done it without all the troopers that have helped me along the way. Thank you!1 point


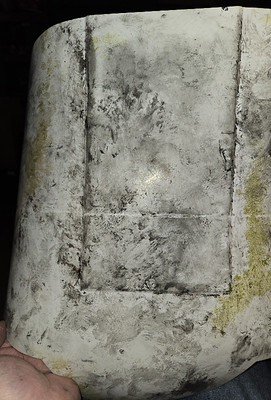
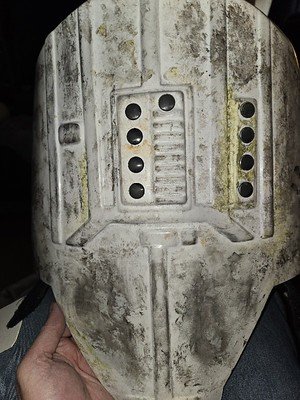


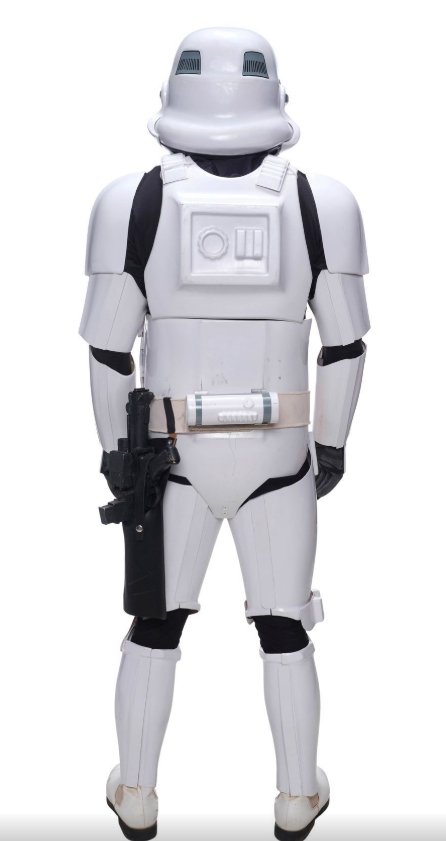
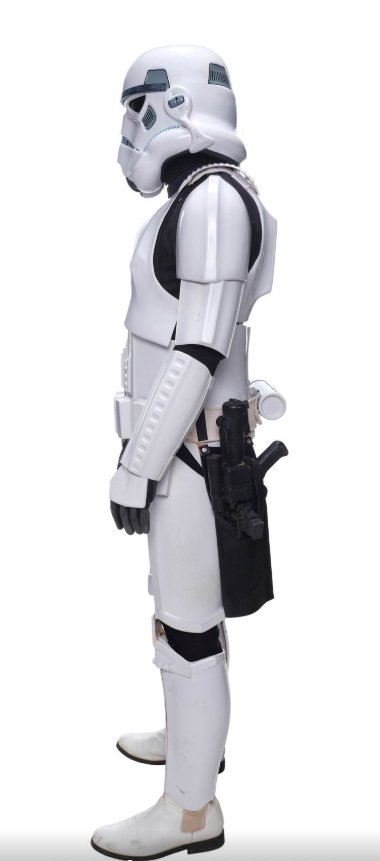
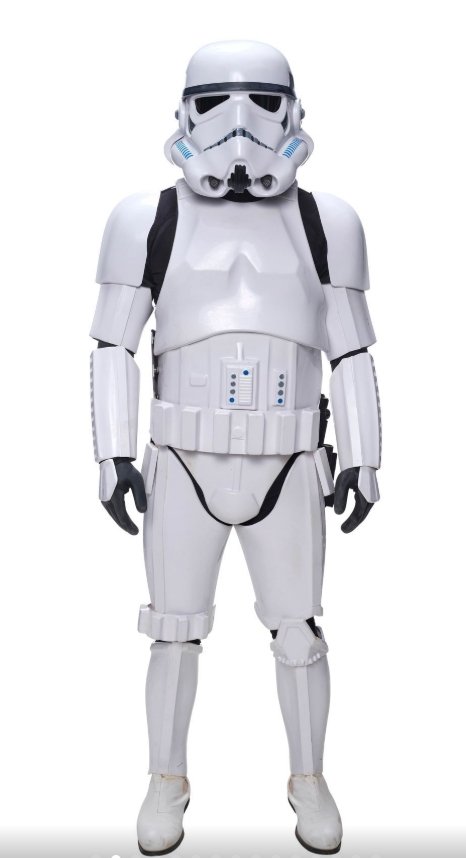
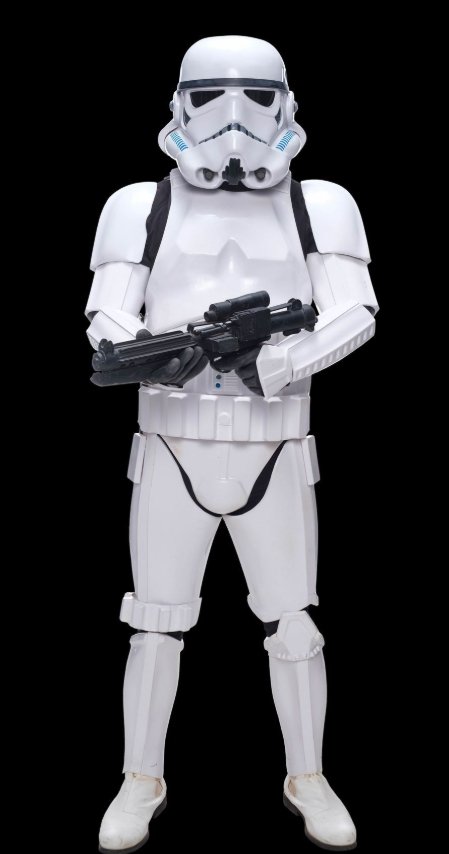
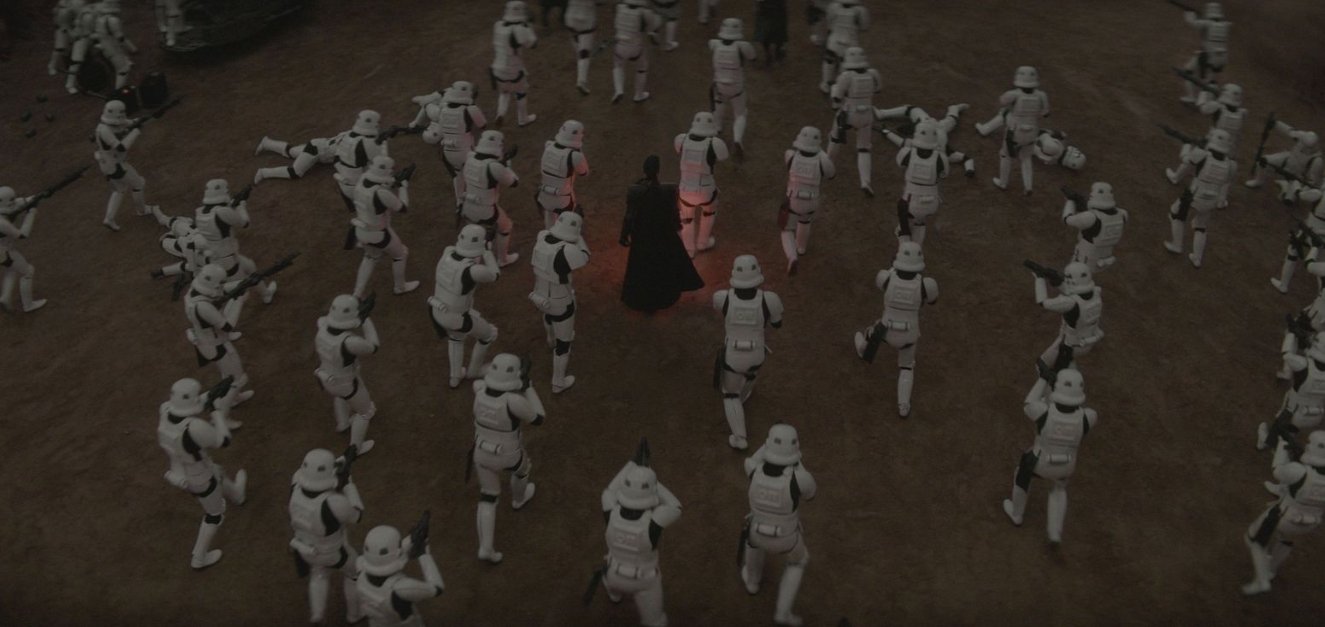
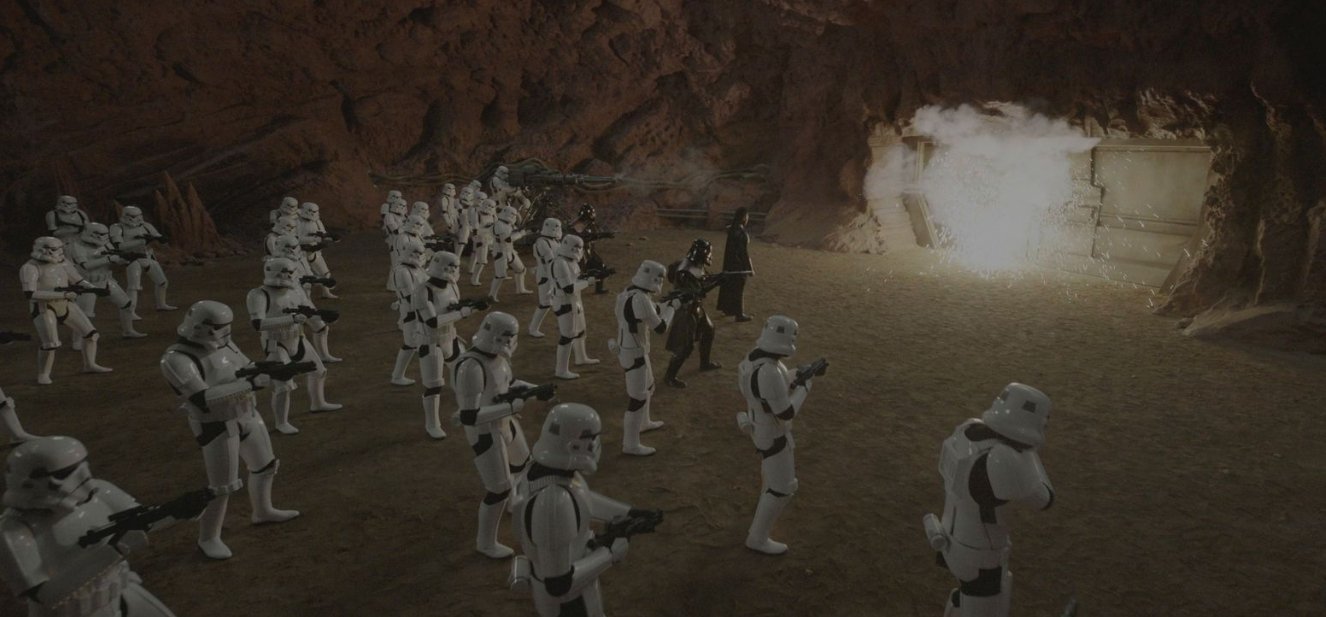
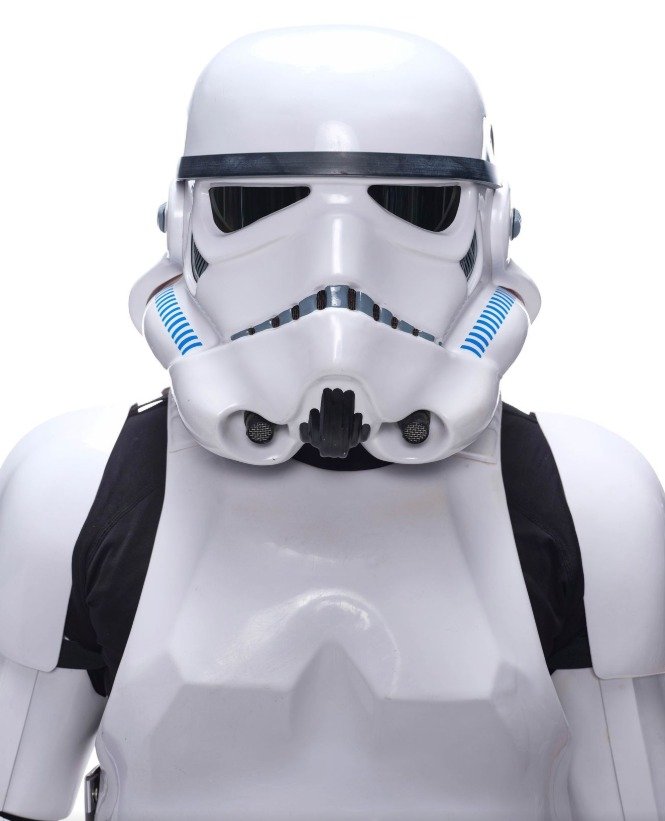
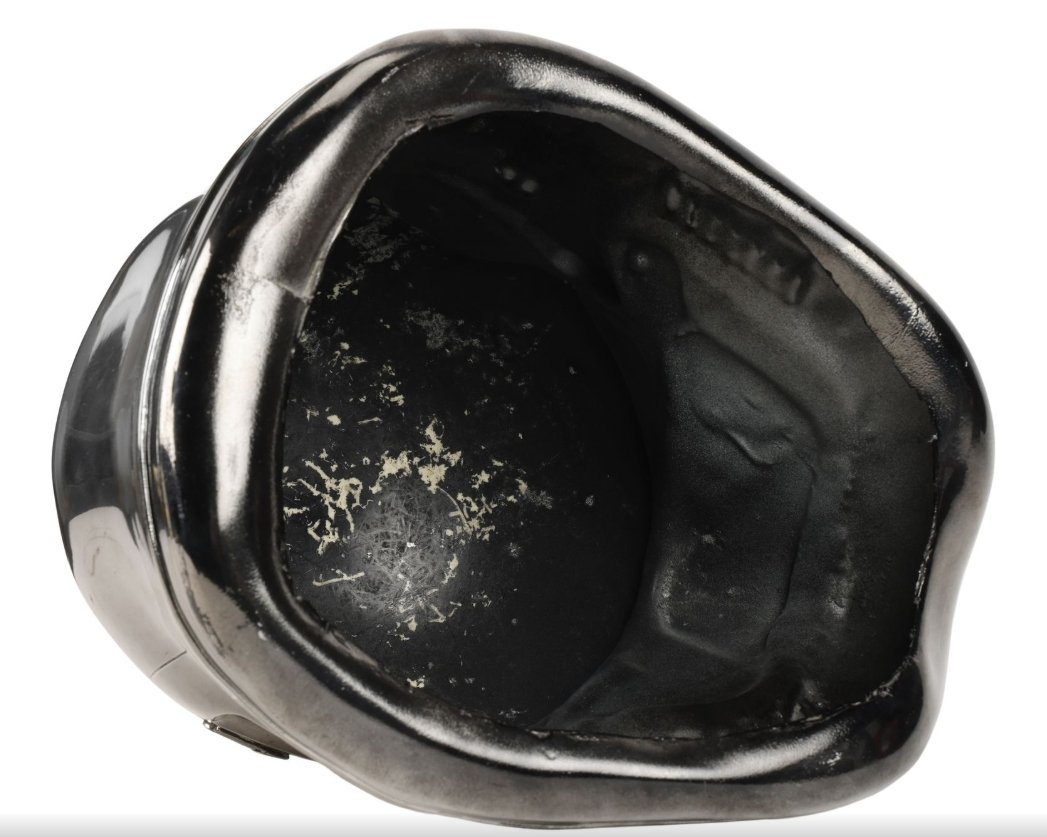
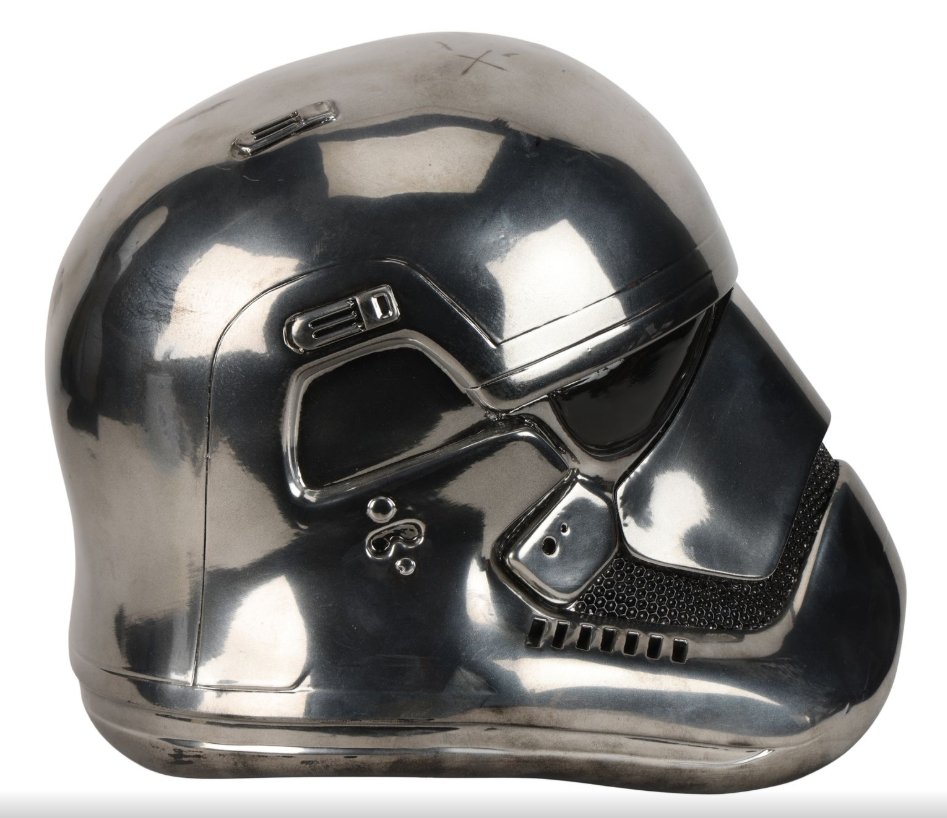

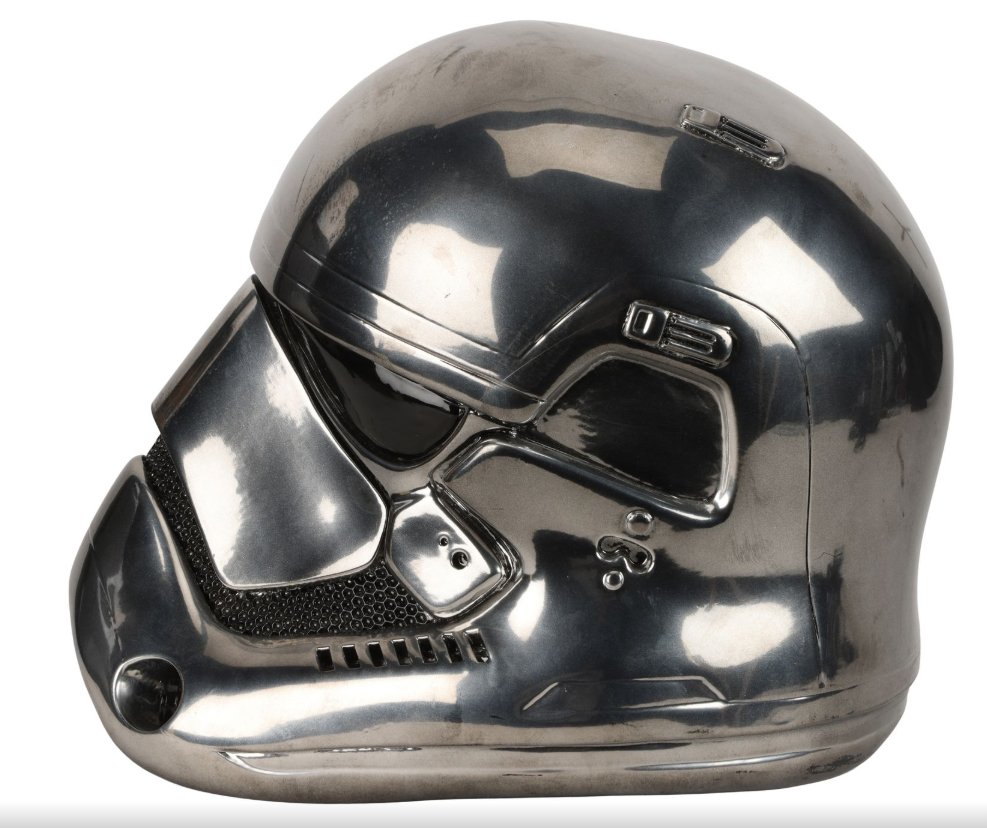
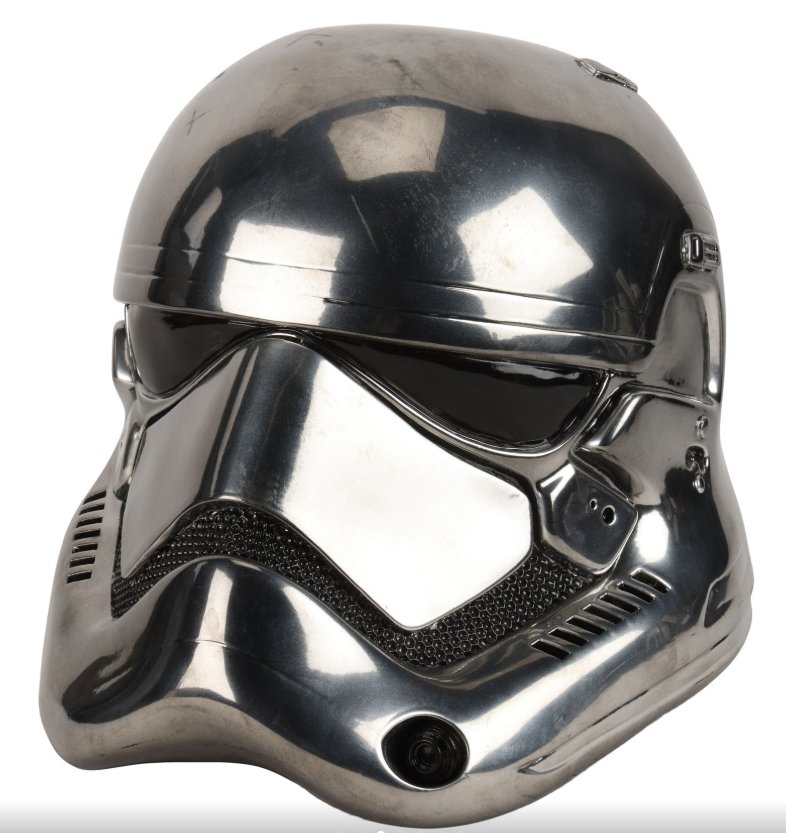

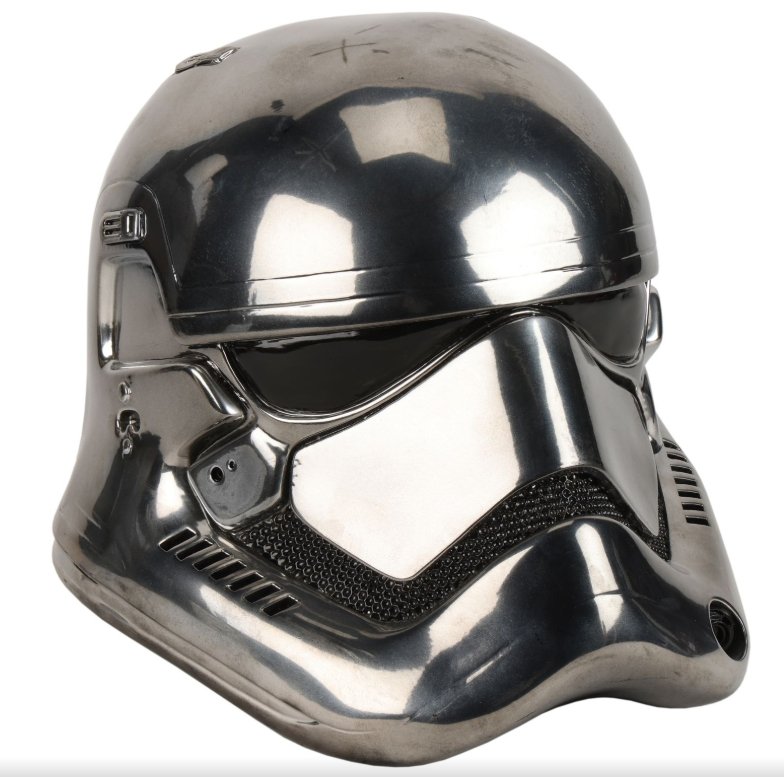
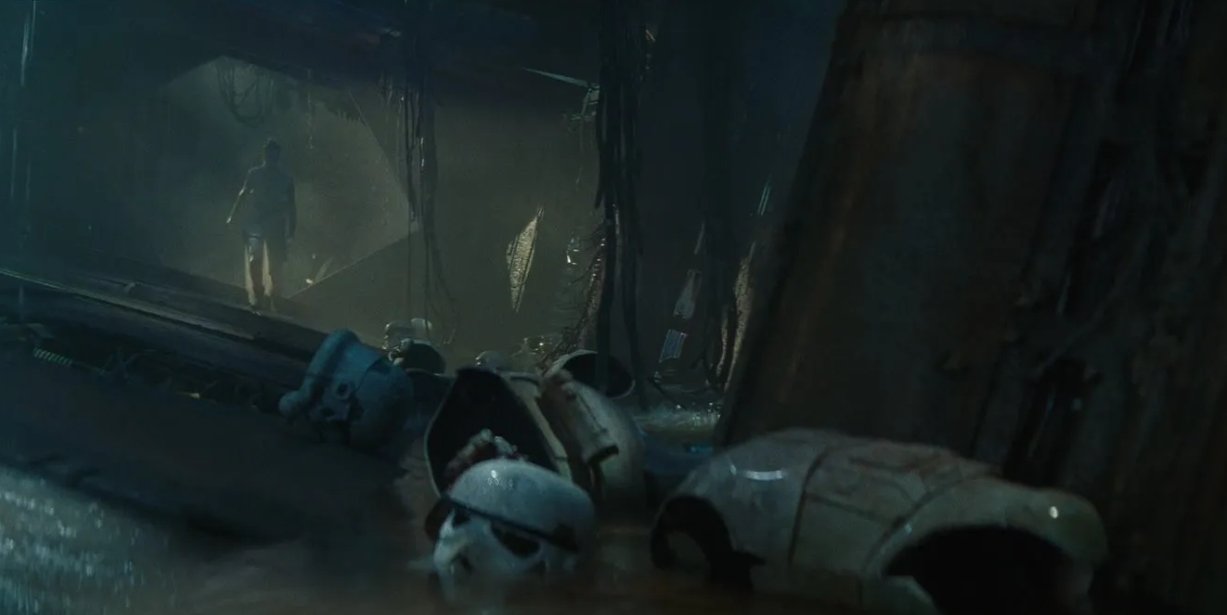


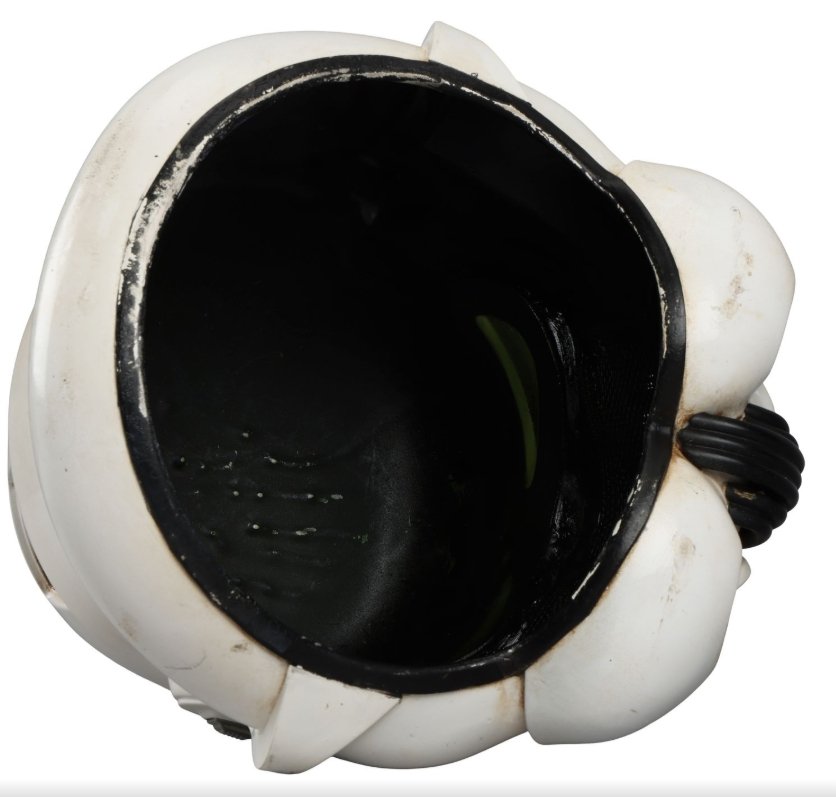

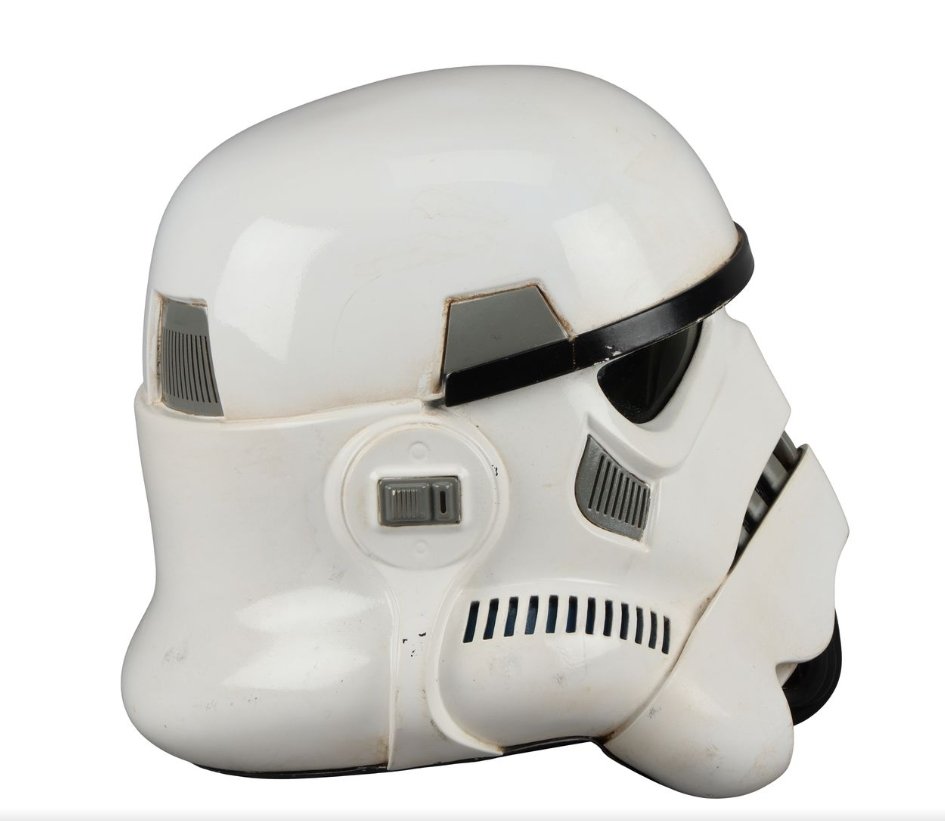
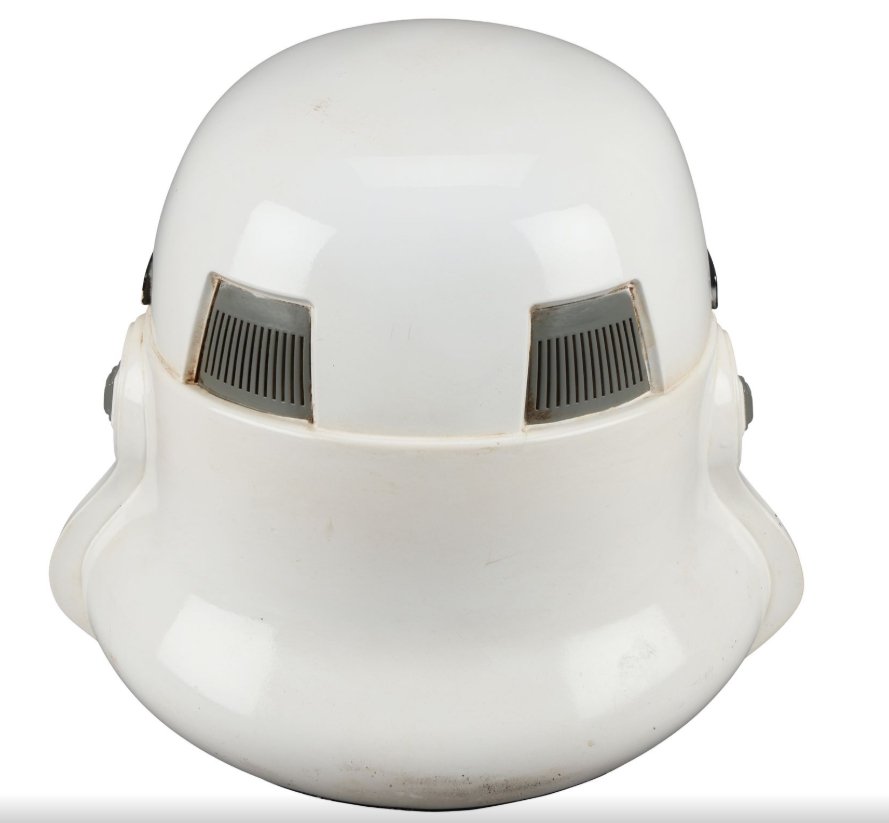


.thumb.JPEG.090a51d263498dd94183c8dca58c9ff4.JPEG)


