Leaderboard


Popular Content
Showing content with the highest reputation on 11/30/2020 in all areas
-
Hey all As the title says I’m stepping down from my role as Detachment Staff. Stay safe everyone4 points
-
16 Left and going fast, folks. A hearty congrats to Ken (TK88667) for becoming # 484. WOO HOO!3 points
-
TK-70017, a Rogue One Stormtrooper, reporting in! My journey started back in February, when I met up with a trooper and he showed me his costumes and the forums. I was hooked! I ordered my fiberglass R1TK bucket from Jimmiroquai and started working on it in April. In June I ordered his armor and two-piece undersuit. I finished just in time for Halloween and was approved as the 14th R1TK!! Let's see some more R1TKs!! My build thread and lessons learned: - I selected Jim's flexible fiberglass because I liked the crisp lines and thickness. It sounds more substantial than ABS when the pieces knock together, in my opinion. - Lots of sanding, spreading putty, and more sanding... - I spray painted with Rustoleum, about 6 cans of primer, 5 of satin white (for the interior), and 15 cans of gloss white. - I had issues with gloss clear overcoats, so I didn't do it, but that might've protected it better from some chipping that has already happened. - I used E6000, and then CA glue (when that started peeling away) to attach the ammo boxes to the belt. I may have to rivet them in the future... - The Gallery is insanely helpful in finding reference images! - In the words of @gmrhodes13, "Measure twice cut once (or in this case, trial fit then trim)." No blaster yet, but I'm looking into a 3D printer and will make an E-11 one of my first projects... A huge thanks to @11b30b4 and @TheRascalKing for documenting their R1TK processes, but especially to @gmrhodes13 for the constant and reliable insight!2 points
-
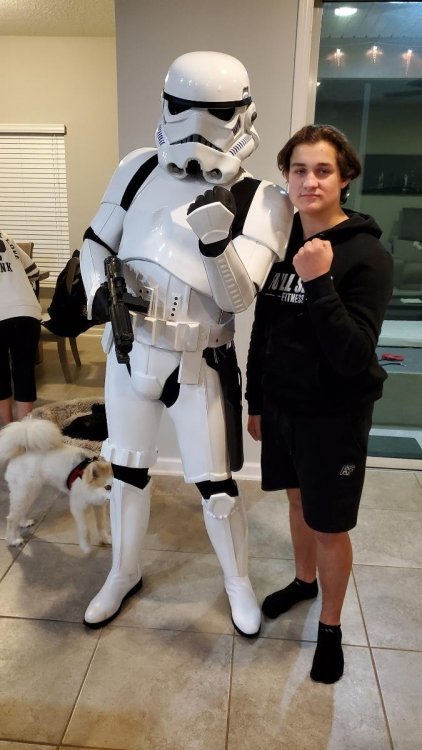
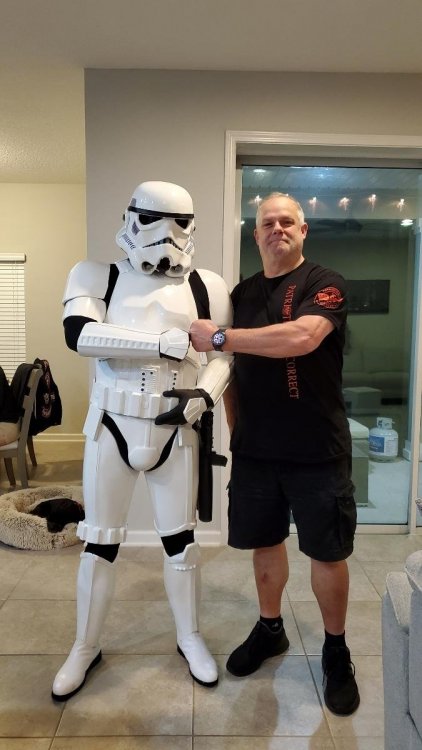
My journey to join the 501st began over 2 years ago when I saw for the first time the Tampa Bay Squad at Star Wars night at the Amalie Arena for a Lightning Game. I have always been a huge Star Wars Fan and especially a fan of stormtroopers and Darth Vader. I remember standing in line in Miami and getting be amongst the first who saw Star Wars May 25, 1977. I was mesmerized. That has remained a constant in my life no matter how old I get. The feeling (being giddy) when you see a group of stormtroopers, hear the imperial march, the sound of blasters, the theme song being played and so on. I look at my pics of me in my armor and still cant believe that I am now a member of this awesome group. Every member that I have been able to interact with has been amazing and helpful. I look forward to the journey ahead of EIB and then Centurion. I look forward to getting involved, trooping, bringing smiles to others and bridging the generational gap of watching the youth be captivated by me and fellow Legion members as we show up at various events. I am grateful to be here and look forward to the future with the 501st. LONG LIVE THE EMPIRE... Pics of me with my nephew, my brother and me enjoying Thanksgiving, TK Style!
 2 points
 -
Hi James, Thanks for your application and for the fixes with the hovi tips, paint, and shin. Those weren't small fixes, so we appreciate you taking the time to go the extra mile. CRL and EIB Application Requirements All required photos are now in and, after review, we are pleased to welcome you to Expert Infantry rank. On behalf of the DO team and myself, many congratulations! Other-Armor Fit/Assembly In this area we review observations made by your fellow troopers and the DO team. Some observations may lead to suggestions to improve the overall look of your armor. Note that we consider both text (CRL) and pictures (screen caps/reference images) when reviewing submissions First, a couple dressing issues. When getting dressed, ideally the left and right sides of your armor are as symmetric as possible. In your photos, your biceps are sitting at different heights, making your left forearm lower than the right, and it runs into your left handplate. Obviously everything is going to shift around once you start moving, but we like our EIB and Centurion submission photos to represent the ideal state of your armor, so keep an eye on those when getting dressed, and adjust any strapping as necessary. Reference Image: Next, as was already pointed out, your thigh armor is sitting quite low, leading to pretty large black gaps at the top of your thighs. Ideally we want minimal black showing, but when there are gaps, it helps to have them even. The current thigh position could be necessary based on the shape of your body/mobility, but if you can bring them up further, it would even out the gaps between ab/thigh and thigh/shin, leading to a cleaner look. Reference Image: Next, on the screen-used suits the ends of the TD clips are squared off, and the screws sit closer to the end of the clips. Obviously to correct this it would require getting new TD clips, so it's not a big deal but worth mentioning nonetheless. Reference Image: Moving along, your butt plate is sticking out a bit. You might consider tightening the strapping at the sides of the butt plate to keep it closer to your body. Reference Image: Another small issue is that on the screen-used suits, the sniper knees tended to be trimmed in a more angular manner, rather than rounded. Finally, really nice job on the coverstrip fix on your shin armor. As was already pointed out, your cover strip is a bit long so should be trimmed. Reference Image: Centurion Requirements In this section we prepare you for Centurion. More photos may be requested in the future that allow us to make better decisions on possible adjustments. If there are any areas of concern they will be discussed here. Because Centurion photos show much more detail than EIB, items to pertaining to Centurion might be seen there and not here. We try to point out all that we can from what is seen, but the final accuracy is the responsibility of the trooper. Starting from the top, the L3 CRL states: There should be a minimal gap between the shoulder armor and the chest/back plates. Yours actually look quite good, but we'd like you to try to reduce the gap even further, especially at the top. You can tighten the strapping holding the bells on, and I also noticed that your lower return edge on the shoulder bells is quite thick; trimming that back or completely off will really help bring the bells closer to your body. Reference Image: Next, the L3 CRL states: The top of the ABS ammo belt should sit at or just above the bottom of the central and vertical abdomen button panels. Yours is sitting just a bit too low. On my own kit I added two small strips of Velcro to keep the front of the belt from sagging. If you check out the reference images, you'll notice that the ABS belt should touch or even slightly overlap the bottom ab button. Reference Image: Next, you've done a nice job on your left-side rivets; unfortunately the placement of the lower rivets are too low. The L3 CRL states: Three rivets, approximately 5/16"(8mm) diameter, are present on the left side of the abdomen armor. Rivets are equally spaced along the depth of the armor and about 10mm from the edge. Looking at the reference photos, you'll see the lower rivets are a good bit above the ridge separating the ab/cod so yours will have to be moved up. Note that once those are moved up, you may also need to move up the middle rivets as it could throw off the spacing. You don't need to take the measurements in the reference image as hard measurements (we won't take a ruler to your armor) but it they should look correctly spaced. It will require drilling out the rivets, then filling the holes with ABS paste. A good bit of work but many troopers have done it successfully. Reference Image: The last issue we're going to have you fix before applying to Centurion is your bicep and forearm sizing. There isn't anything specifically called out in the CRL text, but we use reference photos to do our reviews as well, and compared to the screen-used suits, your arm armor is very large compared to your body. Fortunately, this should be a relatively straightforward fix. You should be able to remove the cover strips, then trim the armor equally where they meet. A hot water bath to reshape them may also help. Reference Image: There are a few fixes necessary for your Centurion application, but we have every faith in your skills, and the DO team as well as a whole army of troopers is here to help you along the way. Please feel free to reach out if you need anything. Until then, please accept our congratulations on reaching EIB!2 points
-
This is one of the many good threads we have on power cylinders2 points
-
@11b30b4 Please add Sheev's Emporium to the soft parts vendor list at your convenience. They have started consistently providing undersuit gaskets and they look excellent! https://www.facebook.com/sheevsemporium2 points
-
Name: Colin Adams TKID: TK-25622 Forum Name: OddViking327 Garrison: Golden Gate Garrison Height: 72.5” Weight: 198 lbs Armor Maker: AM 4.5 - Dave’s Darkside Depot Helmet Maker: AM 4.5 - Dave’s Darkside Depot Blaster Type: Imperial Arms 3D - E-11 V3 (with modifications and improvements) Boots Maker: Imperial Boots Canvas Belt: Rob Kittell Hand Plates Type: Flexible Silicone by Just Joseph Electronics: Speakers and SHA by Ukswrath, fans by me Neck Seal Type: Imperial Boots Holster Maker: Darman’s Props EIB approval thread: https://www.whitearmor.net/forum/topic/50259-tk-25622-requesting-stormtrooper-anh-stunt-eib-status-1007/ Armor Build Thread (page 3 shows my Centurion updates): https://www.whitearmor.net/forum/topic/49991-oddvikings-anh-stunt-build-am-45/ Blaster Build Thread (the last half details a modification for Centurion): https://www.whitearmor.net/forum/topic/50223-imperial-arms-3d-e-11-version-3-kit/ Photos Full Body: Helmet: S-curve: Details: Blaster: Thanks for the consideration, and the very helpful suggestions in my build threads that got my kit to this point! For the Empire!1 point
-
Hellos to all members of the 501st ...My names Stuart i live in the UK it Was in the 70s I remember my bro showing me Starwars, my first comment after seeing the big guy in the black outfit was i am going to work for Vader when i grow up ( i am 50) okay a lil more then grown up now , depends who you ask lol, so yes i have my RS Prop masters Suit that was built to my measurements with the stunt bucket, i am soaking up all the info i can. i look forwards to getting my suit passed for centurion level and get ready to troop, that's when we can that is, sadly. Thanks1 point
-
Thanks for sharing the info1 point
-
Great info. Thanks for making the call and sharing your findings with the detachment. Sent from my iPhone using Tapatalk1 point
-
Ohhhh man!!! Holy cow, I never even realized my arm was outside!! I already redid my left shin.1 point
-
Thanks guys. Yes it's a bit discouraging but I'm plowing forward. I didn't realize those were meant to be ground back that much on the ears. I figured that was just more detail but I guess I haven't spent enough time looking at ears. I'll definitely trim them back after the paint dries. I'm looking forward to getting my DA hero. Unfortunately (kind of) he only had 2mm kits on sale and the originals were all 1.5mm so details will be ever so slightly softer but, for the price of $150 CAD shipped I absolutely can't complain.1 point
-
Congrats! Everyone is killing it! And big clap for the team working through approvals. Sent from my Imperial Comlink1 point
-
Sorry to hear of your paint issues, I have in the past used a portable heater to heat up an area before painting which has helped when it's been cold. I also use automotive acrylic paint, dries a lot quicker and is less likely to run.1 point
-
Honored to serve with all of you. Who's next? Congrats to all who have made it here before me, and to all those making their way here, you got this. With this support team - anything is possible!1 point
-
Hey trooper, Sorry to hear the paint went a little south. Once it’s fully dry, you should be able to sand it down and have another go, if you wanted to. You’ve picked up a good deal on the DA Props helmet. I think they come with two sets of ears, so, if you wanted to, you could try trimming the ears a little more. As below, your current helmet has quite thick ears. When you look, you can see the intended trim lines on the ears (approximately marked in the photos). If you did trim them a little closer to the mould lines, you would lower the ears a little to better fit the helmet.1 point
-
The title of this post is "a little too authentic" So. After trimming the teeth back a bit I noticed that the paint on the underside of the "chin" area still hadn't dried even after a about a week. I must not have mixed the paint well enough. So easy enough, I figured I'd just wipe it away with mineral spirits. It would reveal more of the "HDPE", which was protected by a clear coat, and I'd be done with it. Not so. The spirits ate right through the clear and khaki paint revealing the ABS again. No good. I set about repainting the chin with khaki and after applying a thick coat of clear I got ready to re spray the white. This is where things get really hairy. I mixed up the paint and begin spraying in my garage. By now, here in Canada, it's gotten quite cold; and cold and paint, as you may know, do not mix. The paint started to "fish eye" and glob out of my gun. In a panic I rushed everything into the furnace room and set up to try and salvage the job. I sprayed and sprayed while warming the helmet with a heat gun. It appeared to work! I got the helmet looking nice and glossy again. A few drips here and there but no big deal as that's perfectly scree accurate. All was well with the world. Until I came back down stairs a couple minutes later after cleaning up to find HUGE drips all over the helmet. the heat from the furnace room must have warmed up the surface fully making changing the paint viscosity allowing it to run freely everywhere. Originals had drips, yes but they didn't look like they were melting. What a disaster. a little friendly advice: DO NOT spray when it is cold even if you think you can get away with it. oh well, live and learn. What now? This stunt helmet will become a practice helmet. Maybe I can salvage it in a few months when the paint drips finally cure and I can try sanding and polishing them out. We'll see. In the mean time, DA Props on Facebook had a Black Friday sale and I bought a hero helmet kit (NO SPRAYING!) so that's what the plan is moving forward. Make this a hero build instead of stunt. Stay tuned...1 point
-
Thanks Daniel!!!! Best wishes... Stay Safe!!!1 point
-
The ears work wonders on a TK helmet1 point
-
Thanks for your service and help.1 point
-
o7 its me saluting take care mate1 point
-
Another trip home, and some more (slow) progress on the helmet. Installed the padding and played a little with the positioning of the fans. I've settled to install the fans as shown in the picture but - as can be seen on the right - the cable isn't long enough to reach the Anker, so I'm gonna have to add some length to the cable first. I ordered an E-11 from ImperialWarfigthers on Friday, and it's set to reach me just before christmas My plans to build an E-11 myself aren't canceled, but merely delayed, due to the lack of a doopydoos kit. Unfortunately there have been no news on my garrison application so far, but it shouldn't take much longer now. Now it's time for me to browse ukswraths fancy electronics section1 point
-
Thank you for all your help! Hope I can see you sometime later at a troop!1 point
-
added, thanks for the information.1 point
-
Congratulations Ken, and welcome to the ranks.1 point
-
Congratulations and welcome aboard.1 point
-
WOOOOOOOOOO! Great job, Ken!1 point
-
If screen accuracy is your thing then RS and TM like Glen said is by far the best options. RS has the extra advantage of beeing cast from a screen used suit, not all the parts though but the majority of the suit is. TM is by far the best fan sculp out there and has continued to tweek his molds. Shipping is always a killer unless you are fortunate to live in the country of goods wanted. I belive black friday is usually the one time RS has a sale but I could be mistaken. TM as a 25% off from his regular price and that has lasted the entire year, not sure if he plan to extend that to next year but you could always reach out to him and ask. Best of luck Oh! and it´s totally worth the money1 point
-
Sorry to hear Daniel, with everything going in these days I/we completely understand. Thank you for your service to the FISD and its community1 point
-
Congratulations Dennis, and welcome to the ranks.1 point
-
RS and TM (Troopermaster) are the most screen accurate armor available, both from the UK. I have ATA which is Canadian and it's a little thicker plastic than other armor makers so it lasts a lot longer. At the end of the day it's what do you want, screen accuracy or longevity. Being from down under I pay the price on shipping no matter where it comes from1 point
-
Thank you for your service to the community Daniel1 point
-
Congratulations Dennis welcome to the rank. Sent from my iPhone using Tapatalk1 point
-
Sorry to hear this, Daniel. I hope to still see you around the boards here and there. Best wishes Dan :-)1 point
-
Congratulations and welcome to the centurion ranks trooper, that extra bit of work was well worth it1 point
-
Only 17 spots left, folks! A big congrats to Dennis (AradunFF), TK 60446 for becoming number 483. Way to go, brother, and welcome to the ranks!1 point
-
Hi Dennis, and thank you for your submission for ANH Stunt Centurion, CRL and EIB Application Requirements: All required photos have been submitted, and on behalf of the entire D.O. staff we are pleased to welcome you to the rank of Centurion. Congratulations! Other-Armor Fit/Assembly; In this area we review observations made by your fellow troopers and the DO team. Some observations may lead to suggestions to improve the overall look of your armour. Note that we consider both text (CRL) and pictures (screen caps/reference images) when reviewing submissions. What can I say, brother? This is one of those rare instances where I am speechless, lol. The way you not only jumped on those requests so fast but did it in fine style has done you proud, so all I can say at this point is well done, sir. Well done indeed Centurion #483!1 point
-
Congratulations and welcome aboard1 point
-
Congratulations and welcome to the FISD Trooper Sent from my SM-G981B using Tapatalk1 point
-
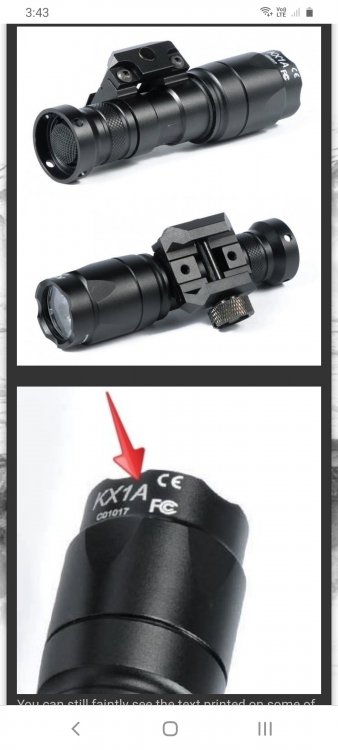
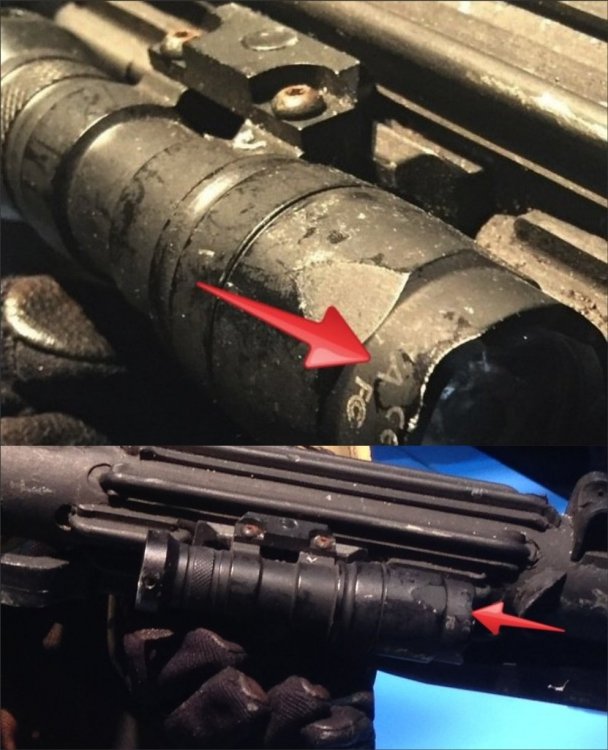
If they are the same as Rogues One then the flashlight used is an Element M300A Mini Scout Light which is actually an airsoft replica of a real SureFire M300 Tactical Flashlight
 1 point
 -
Sorry no updates for the blasters but looking for information on measurements for the power cylinders. I am in the process of making my own set of power cylinders and looking to buy resistors that are located behind the main baseplate. I have read through Playfulwolfcub's info but can't seem to find the correct resistors to order. I don't want to waste lots of money ordering possibilities so if someone has the correct size I can refer to that would great. I think Usaeatt2 listed the specs on the resistors he used but it does not seem to guarantee the sizes when ordering. He said they were about 9.2mm in length? The power cylinders are certainly not easy to make. I am making lots of guesses on the dimensions to keep these original as possible and not rely heavily on Playfulwolfcub's (Andy's) research too much out of respect. Most of the materials are locally purchased items so the measurements are restricted to what I can buy here. The only things that I need to source from outside Japan are the resistors if I can't find them here and the 10BA bolts and nuts from the UK. Any help here is greatly appreciated.1 point
-
Congratulations Trooper !1 point
-
Welcome to FISD Buzz, what a great looking armor !! looking forward to see your EIB and Centurion APPs in a nearest future !!1 point
-
Welcome aboard trooper1 point
-
Dennis Mueller 60446 EIB Letter Size justjoseph63 http://www.whitearmor.net/eib/certificates/60446-eib.png1 point
-
Thank you so much for making time for my review for centurion. I have already corrected the frown issue so we can start smiling again soon. Blaster is a non issue and the fault lies in the photo angle. I believe the Counter is placed in the correct place. Will upload those photos when I’m near a PC and can access my Imgur account. (Silly cel phone) Been in contact with RTMOD and I am waiting for cost of parts and shipping quote. A new ammo belt, button covers, and ab button covers will be obtained. In addition I gotta order a new belt from Kittell because the one that didn’t make the cut, has 5 years of troops on it and the inner parts that keep it firm have deteriorated. Yep, the whole thing is getting redone. I’m hopeful these fixes will not take very long, but I’ll get them corrected and knock this out of the park!!1 point
-
You can also check out the vendors list1 point
-
Update: Got some of the heavy lifting done on the helmet. As I've said before I'm going for a fake HDPE look on this one Here is what's been done: I was really happy with this colour for the HDPE The biggest disappointment so far is the ears. The ones included in the kit were just wonkey for some reason and I couldn't get a very good fit. No two TKs are the same so I'm just going to carry on Next update will be painting. I'm going to spray Tremclad oil paint through my spray gun and lay it on like originals. Possibly create a few drips.1 point
-
Just started wiring stuff up and testing. Is there a way to use two screens; one for Hengstler and the other in the scope? Sent from my sorrosuub C1 comm link device using Tapatalk1 point