Leaderboard


Popular Content
Showing content with the highest reputation on 11/03/2020 in Posts
-
Hello, all. My name is Eddie, I’m a healthcare worker in Chicago. I’ve been a SW fan since ‘77, and remember drawing TKs for my friends in elementary school. Could never get that TK frown just right. Last Thursday, a big rectangular box and a much smaller cube-shaped box was delivered to my apartment with contents described as “Fancy Dress Costume.” This is my second full commission TK, my first from RS Propmasters, who have created an INCREDIBLE work of art, a vast improvement from my previous TK armor, a “full commission” store-bought Ben Cooper TK Halloween costume back in 1979. During the past few months, I’ve been browsing the forums for general costuming ideas and information on the 501st and what they do. I was impressed by the organization’s camaraderie and support, but mostly by their purpose of “bad guys doing good,” and it’s something that I would love to be a part of. I have some past experience with creating period clothing for Renaissance Faires, and I am aware of the impact a costume can have on the wearer as well as the individuals he/she encounters. No matter how young or old you are, there’s a certain magic in meeting a character from a different place or time, or in this case, a different galaxy far, far away. It encourages people to dream, escape the mundane and doldrums of everyday life, or simply puts a smile on someone’s face. I am looking forward to hearing your stories, sharing advice and experiences, and eventually joining you all in putting a smile on someone’s face, because we all know that the world could use a few more smiles right now!2 points
-
Yes. Had to take a short break but I’m back at it. I’ll post pictures this week. All armor should be painted by then. Sent from my iPhone using Tapatalk2 points
-
I have submitted for EIB, and while taking those photos, I set up some lights and got an action shot with a red rim light. This is what the armor looks like edited into an appropriate setting:2 points
-
Welcome Paul. This is a good place and time to focus on your suit build. It can be therapeutic for some people too. Sent from my iPhone using Tapatalk2 points
-
End of the road. Here it is... I know I write long posts, so bear me, this one's going to have a lot of content. Honestly this will serve as a summary of the end of the build as well as me spelling out my 3d printed TK lesson's learned. I'll start with what I call "the glory shots" and then bring everything back around to a post Halloween damage assessment. The following shots were prepared for my armor submission; the trained eye will be able to pick apart some details, which I'll try to point out as this post goes along, but I'll cover my overall assessment later. First a few shots that tie up a couple loose ends: The new stainless steel mesh that @11b30b4 steered me towards came in and the difference is night and day. Stainless on the left, Michael's aluminum mesh on the right. Thanks Jeff! I also did my strapping last Sunday, but kind of got in a flow and forgot to take pictures. We discussed PC-7 previously and this was the result after some shaping and curing: I also went a little rogue (no pun intended) and rather than connecting the buckle to straps extending from the abdomen, I took one of my old Marine Corps Martial Arts belts and rigged this up: I did this mostly because the thighs are tight and only go up so far. Additionally, the suspenders I have are very stretchy and were already working overtime to hold up the abdomen, belt, cod, and butt piece. The belt can't be seen under the armor, but it's really uncomfortable. I'll use something similar for my clone build, but it needs to be worked on. The glory shots. Sorry, the lighting makes some of the pics look kind of weird: Gloves: Endor Finders https://www.endorfinders.com/. $55.00 + $3.95 shipping. They're awesome. That's all that needs to be said about that. Boots: Imperial Boots https://www.imperialboots.com/ $119.90 + $30.00 DHL Shipping. Very nice and sturdy. The insole is garbage, but that's an easy swap. Undersuit: The Dark Side Closet https://www.facebook.com/TheDarkSideCloset $230.00. A little pricey, but it was a gift. Amazing quality and even better customer service. Without going into details, I contacted them after receiving my order and they took care of me in a day. I can't overstate how good they are and I'll definitely be buying from them again. I wouldn't troop in this shirt during the summer months though, it is HOT. The material they use is very thick and I was sweating like crazy up until I got outside. As it dropped into the 40s tonight, I was very, very happy I had this suit. I also wore my cycling pants under the knee gaskets and they worked perfect together. Helmet: Modified Nerdforge Designs 3d Print; Etsy. $8.00 STL file. Hovi Mic Tip and gap between vocoder and chin Blue fabric behind tube cutouts, black behind tears and traps. Hand plates: Rogue One style, recess present in front. Forearms: Closed with Velcro on one side, elastic on the other. Will re-think the elastic side for future builds. Back plate/ kidney armor/ trauma plate. Tabs present for belt alignment. Modified back armor. 8mm circular indent, top of box wall indentation, O cog has 16 spines, 5 raised bars on the 11 bars, and rectangular tabs on rear shoulder strap trapezoids. The tabs are a little big, and I should have attached the trapezoids much sooner, before paint. This would have eliminated the gaps. Chest armor with shoulder strap trapezoids, black gloss side extenders, outward swooping pectoral outline and rib cage flare. Chest should probably be "taller" with a more aggressive flare on the bottom. This was one of the first things I asked the designer to correct, which they did, but I think we could have "leaned" the armor out a little more. I still love how it turned out, but maybe just a little more tweaking. Abdominal armor and belt. I forgot to attach the drop boxes on for this pic, but did later. Closeup showing separate belt boxes, trapezoid on middle box, and teeth on top of belt. What color is the rectangular recess supposed to be on the middle greeblie? It's not noted on the CRL, but the picture appears to be a grey outline. Other than that, I can't find a clear pic, but I think I've seen others paint the inside blue. Rear belt, thermal detonator, and kidney/ trauma plate. The contrast is a little off, so the trauma plate kind of blends in with the rest of the back. For brevity's sake, I'll skip the rest of the "glory shots" and go straight to the things that pain me: First, I touched on this in my previous post, but soon after going crazy with the PC-7, even it was no match for my lower legs. The sound of the shins cracking was quickly silenced by the moans of frustration coming from me. If the paint looks sloppy and rough, it's because after these broke, I decided to do a quick spray and cover-up for Halloween. Additionally, until I go through a re-design with Akira-Yuming, these shins just won't work. First, the bell-bottom is not nearly big enough which means that my boots won't fit under cleanly. Next, the wall thickness is way too thick; there's absolutely no flex to the armor especially after putting on the sniper knee plate. I have already sent the designer some ideas, but ultimately it's going to have to be a total re-design with thin walls. By comparison, I printed out Sean Fields' Shoretrooper shin for my Mando build and it has a lot of flex and fits perfect, I've already spoken with the 850 Armor Works guys and will likely buy a set of shins from them for this costume. But, I will still print off a set of whatever Akira-Yuming and I come up with for my 100% 3d build. So, for pictures I went outside like this: Also, I mentioned previously how thick the Darkside Closet undershirt is. I actually had to modify my forearms to get them to close. My wife decided to take over my Mando armor, so while that costume would have been a good fall-back, I already promised it to her for tonight. Also, it's my size not hers, so if there's any Mando fans out there, please don't pick it apart. She got a lot of compliments when we went to Target. Post Halloween trauma: Scrapes scratches and dings were the most common issue. A lot of these are in places that just confuse me honestly. The above pic shows some pretty bad scratches that occured below the chest and back armor. Essentially, this wasn't touching anything and still got dinged. Overall, the abdominal armor still looks good and the scratches can be touched up, but the cod got a huge gouge in it from when I tried to sit down (this was pretty funny by the way). Also, I previously mentioned that I forgot to show the drop boxes in my "glory shot" so here they are. They're way too big. Since I originally scaled my abdominal armor to 105%, I did the same with the belt and boxes. However, when I remade the belt with HIPS, I re-scaled the belt boxes to normal size but totally forgot about the drop boxes. Since I forgot them during the "glory shots," I didn't notice the size difference until I put the armor together yesterday. And this one broke my heart. When I was closing my forearms, I kind of reached out in front of myself with both arms simultaneously (imagine Lou Ferrigno in his famous hulk flex). While I'm no Lou Ferrigno, the pressure from the biceps pressing against the chest from both sides just made it crack. What sucks so bad about this is that I was real happy with how the chest was holding up and it ultimately stood as a sign to how careful you have to be with 3D armor. 3D Print ROTK Summary: After three months of printing, and building I've performed these final calculations. Total weight of armor raw (no paint or filler): 7.12kg (15.67 lbs) Total weight of finished armor: 8.9 kg (19.58 lbs) Price of filament + Tax $19.95 per kg. Total price of armor @ $19.95 per kg: $142.04 Waste (pile of lesson's learned): 5.25kg Price of lesson's learned: $104.74 (ugh) Paint/ primer: $200 approx. Filler/ sandpaper/ supplies: $100 approx. Total Cost of armor: $442.04 + waste = $546.78 Total Cost of Armor/ Soft Parts/ Boots: $880.89 + waste= $985.63 So, with all that said, my opening statement on August 9th was "Throw my name in with the other ROTK threads, but let's do this with a 3D printer, and finish the project." Ultimately, other than the inaccurate stuff on YouTube, I had seen several 3d projects that were started, but none that had been finished. In the beginning, my wife and I were curious if it could be done to an acceptable standard with a 3d printer. While I did break the shin armor, I finished my project and would have submitted pics this week, had the mishap not occurred. In the end, I think it's at an acceptable level, but that's mostly due to the help you all have given me. I've decided not to submit pictures of this armor set to my GML. I do like how it looks, but the 3d print settings need to be overhauled before it's "troopable." Basically, I feel that after I clean it up and get rid of the Halloween damage, I'd be able to take some pretty good "studio" shots, and probably be accepted, but then not be capable of doing the things that drew me to the 501st legion in the first place. I really want to get out there and start participating in events, but I think I'm going to have to wait for the BBB like everyone else that's assisted me through this project. Jimi sent me his price list this week, and of course, I've already spoken with the 850 Armor Works guys. Also, while there is a Din Djarin CRL out there, and I could put together some pre-beskar armor pretty quick, I linked up with the 501st to be a Stormtrooper; the other stuff comes later. Overall, through this project, I learned a lot about this hobby and the ROTK armor. By the time I'm able to start building a new set, I'll be well prepared to build towards the Centurion Level set and join the ranks. While I'm waiting to start my next project, I'll continue being active on the FISD forum and learning as much as I can. Additionally, I'll be sitting on another 3d printing forum next month with Garrison Tyranus' Inferno Squad and use all of this as valuable information to pass on to the viewers. I'll post information about that as soon as it's solidified. Lastly, we're one episode into the Mandalorian season 2 and haven't seen any Stormtroopers yet. I'm still hoping for some Remnant Stormtroopers, like in season one, to come out (ROTK Armor with OT Helmet). For me, it would be my dream CRL. I don't know why, but the armor combination with the weathered look just works. I've already put my email on the Anovos interest list and will be picking up a helmet kit regardless. In the meantime, I'm collecting as many reference pics as I can and will gladly help out however I can. Thanks again for everything.2 points
-
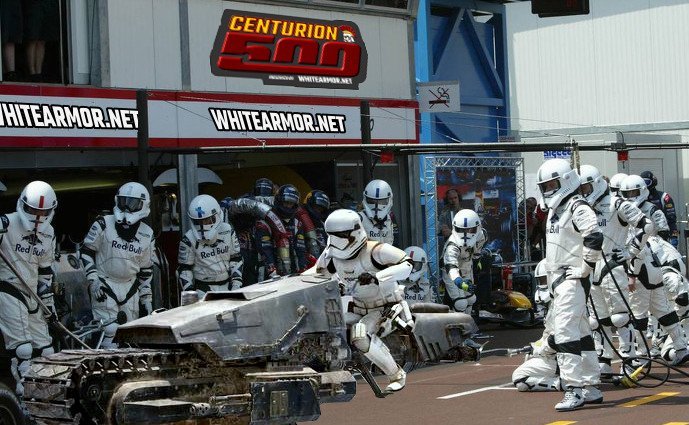
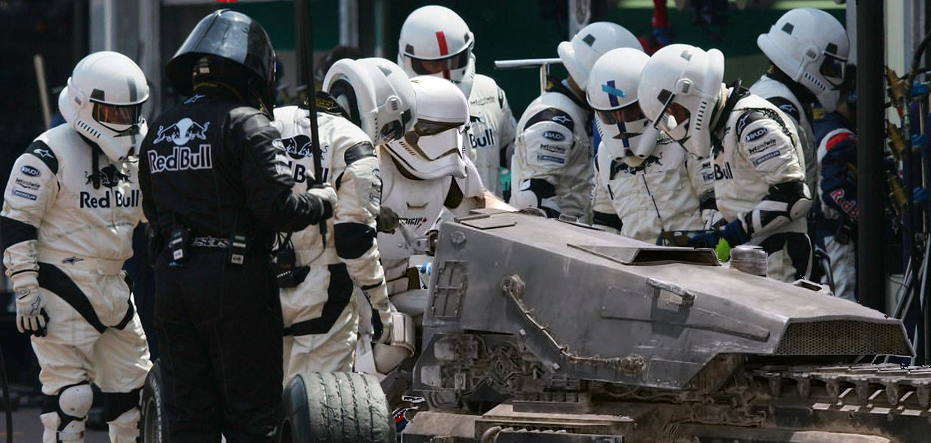
Hot off the heals of our Victory1000 celebrations, FISD are proud to bring you our next target event. We are fast approaching another milestone and another chance to celebrate victory as we hit 500 Centurions approved. This miles stone will also come with another special Centurion only piece of merch for the first 500, in the form of a pin to match the Expert Infantry exclusive. Our very own gmrhodes13 (Glen) has outdone himself yet again and put together the perfect introduction for this milestone event so without further adieu, FISD brings you. THERE ARE ONLY 7 POSITIONS ON THE GRID, SO IT'S TIME TO HIT THE ACCELERATOR, SHIFT INTO HYPER-DRIVE AND HELP US BLAST ACROSS THE LINE! Now that we have reached 1000 Expert Infantry, It's time to once again become part of FISD history and enter the "Centurion 500" We are aiming to have 500 approved Centurions by the end of the year. We only have 7 to go, so in order to reach that goal we are asking that you read over the CRLs for your particular armor, (this thread will help) make any necessary adjustments and post up your submission! Photo Checklists - Link here Apply here Questions: 1. Not sure if I have what it takes to reach Centurion- You don't know until you try, and you have not only the D.O. staff but an entire Detachment to help! 2. I need some repairs/fixes first- This is why we are here! We honestly want you to succeed and are here to help in any way we can. 3. I am happy with the way my armor looks, so why bother?- It not only makes you look more screen accurate, it instills a sense of pride and "esprit de corps"! 4. What if I don't make it? No worries, we will provide detailed suggestions on how to reach your goal! Benefits: 1 Bragging rights for being one of the "Original 500" 2. You get a cool badge under your name here on the FISD (full forum version) 3. Access to Exclusive Centurion500 pin for those in the original 500. 4. Certificate for your accomplishment. 5. You will have a more screen accurate looking set of armor. Now that the entire Staff and those who have reached Levels 2 and 3 are here to help in any way we can, you are more than welcome (and encouraged) to ask any and all questions you may have here on this thread, or contact Joseph, Sha Sha or Mario. Let's get up to speed, push that throttle and prepare for lightspeed, you can do it troopers Your Deployment Officers, Staff and the whole detachment crew are standing by ready to assist If you'd like to show your support on FB here is the link to the Centurion500 profile frame www.facebook.com/profilepicframes/?selected_overlay_id=331320651285964

 1 point
 -
Here we go! Couldn't take any photos yesterday as the power went down, but here we are! *UPDATED PHOTOS* Name: Jonas Andersson 501st ID: 22423 FISD Forum name: LEGOeatPokemon Garrison: Nordic Garrison Armor maker: SDS (Modified) Helmet maker: SDS (Modified) Blaster maker: SDS (Modified) Boots maker: SDS? Canvas belt: Imperial Issue Hand plates: @justjoseph63 Electronics: @ukswrath bracket fan system Neckseal type: SDS Holster maker: SDS (Modified) EIB application: Armor: Old and new: Action shot: Helmet: Old and New: Details: Old and New: Details: Old and New: Forearms: E11:1 point
-
Funny thing happened on my way to the Death Star.... I started down this path over three years ago, and its been a long, weird journey. Full disclosure, ever since I was a tween, I repeatedly and annoyingly told my parents that the only thing I wanted for any type of present for my birthday/holiday/whatever was a Stormtrooper suit. I continued to do this into my adolescent adulthood with no success, and eventually I gave up on the idea. But, for some reason, when I saw the trailer for Inferno Squadron in the Battlefront II, I was taken right back to being 10. I researched everything I could find, thinking there was a way to hand build this myself. The further I dug, I suddenly came to realize that my original desire to be a character from my childhood was not only possible, but semi-affordable. So I took the plunge. There were several issues I chose to ignore. 1) I'm 6'3-6'4" not 5'10" as the original troopers were; 2) I'd never worked with plastics in this manner; 3) I didn't know a soul who'd built one before; 4) finding someone who made taller trooper armor at that time was very, very difficult. Finally settling on a kit from the UK (DA Props) which had a strong following and a host of taller troopers in the UK garrison advising me the kit would work, I purchased. The fact that I'd never done anything like this did not dissuade me from convincing myself I could assemble my armor in record time and be ready to trick or treat with my kids two months away. Obviously, this did not go as I optimistically planned. From the outset I made error after error, miss-cut after miss-cut and eventually convinced myself that I'd flushed too much money down the armor rabbit hole. There were starts and stops as work and family put the kit on the back burner. But I kept at it and the wonderful folks on this board kept giving advice and support for my build. When Celebration finally came to my hometown of Chicago, that finally pushed my to complete my armor. Now I'm fearless with a heat gun, aggressive with CA glue, unafraid of ABS paste, and don't even blink at the prospect of too much sanding. In short, I'm still as dumb as I was at the outset, but now I've got "experience" on my side. While it's not yet perfect, and I've got mods I need to accomplish to satisfy my own OCD, my Stunt TK was approved for trooping by the Midwest Garrison and I was approved a TK number. As an aside, I still can't believe "Bullseye" wasn't ironically taken as a handle. My thanks to everyone for their help. Look forward to trooping with you soon. Dave TK 84098 "Bullseye" (Troopin' with my boys this Halloween)1 point
-
Rudi, Thanks for the advice. I've actually just started trolling around the other forums, but really haven't been too active other than looking up Mando stuff on the BH Detachment pages. However, I just left my first post on the Pathfinders forum and saw some of your posts there. I haven't looked at the Spec Ops forum yet, but I'll definitely take a look since I've been tossing around the idea of either a Shoretrooper and Deathtrooper for my next build; I didn't realize people were printing TX kits. I'm leaning heavily towards Shoretrooper, but we'll see. Also, I have experience with UV resin, but at a very small scale. I'll dig into that a little. Glen, Thanks again for the input. Opening a case and finding crushed armor would absolutely... crush me. Stupid pun, but it's the only word that fits. Something similar happened to me Christmas 2000. I got a new guitar as a gift out in California and the airline made me check it for my flight to Virginia. As I was sitting on the plane waiting for people to board, I looked out my window just in time to see something that looked like a guitar case fall off the baggage cart. When I picked up my luggage, I opened my case to find the body of my guitar had shattered. It was replaced by the airline, but if the same thing were to happen to armor that I had worked on for three months, I'd be livid. Adding resin to the chest piece is definitely something I'll be doing in the future. One of the guys here in Inferno Squad showed me his pre-beskar Mando chest piece and he had absolutely covered the back side in resin. With my Mando build I'm not too worried about it because the armor Velcros to the flak vest, the TK armor is entirely different. Initially I was only concerned about parts that require a lot of flex, but after wearing the armor for a few hours, I understand the additional stress the parts are under. Also, after looking at @11b30b4 Jeff's Shoretrooper build, I've got some good ideas for my scrap HIPS.1 point
-
Nice work trooper, a couple of things before the DO's chime in and these are only suggestions for a better look. Watch the placement of your TD. Not sure what is going on with your left rear thigh cover strip, appears it may be lifted on the left. Perhaps try to reduce the padding in the helmet, you have quite a big gap at the back of the neck. The cover strip on your left calf back appears to be on an angle. S trim closure does not appear central to the helmet. You also have a safety pin on your lower neck. You do have quite a large gap on one of your ears, although gaps are allowable this gap is quite large. There have been conversations in regards to hovi tips not have white rim on Hero's going on screen references Thread here Appears your middle teeth one is larger than the other side. Brow trim appears to drop down in the middle, when looking at the white section under the trim Smaller ab plate could be trimmed a little more "Han" snap could be closer to the edge Looks like you may have a gap on the end of the sniper plate, thumb appears to be behind the plate? Plate is also not quite following the angle of the snin. You could also have your TD screws closer to the ends of the clips Could you also post a few other photos. Front panel on the detonator Close up ab/kidney rivets Good luck with approval

 1 point
 -
Hi Jonas!!! Good luck with your application!!!1 point
-
Pictures posted. Finally figured it out.1 point
-
Thanks Glen.1 point
-
Hi Jonas, great to see your Centurion APP. Added to the processing line1 point
-
Great to see your progression all the way to the top with your SDs kit! A fine amount of work you’ve put into it, and it’s paid off! Sent via Imperial Tapatalk Comms1 point
-
Congratulations trooper!1 point
-
Thank you so much @justjoseph63! I’ll get the bells closer in to my shoulder bridges. Any tips for getting a nice snug fit? The Han rivet is unpainted but it’s hidden under my chest plate in these photos. I’ll have a play with it today to see if I can fix the massive overlap though... maybe I need to trim down the edges of the abdominal plate more? Thanks again sir!1 point
-
Working on storm trooper currently. I have deadpool and kylo ren.1 point
-
Congratulations Trooper!!! Amazing story , well done.1 point
-
Hi Colin, thank you for your EIB app. one of us will be with you shortly.1 point
-
Hiya Wow i found this today - http://www.sciencefictionarchives.com/en/collections/124/original-stormtrooper-costume-from-star-wars-episode-iv-a-new-hope Wish they had more pics. Thats a new one at least for me...! Cheers Neil1 point
-
Overall a good looking build, Garrett! I see a few items that may affect you at different levels, but nothing that can't be pretty easily remedied. 1. It may be the lighting but the teeth look to be gray instead of black as required for all levels of approval. 2. Your bucket is sitting pretty high, and it may be due to padding inside the top. Padding is not required at any level and removing it may actually help you see better by dropping it down more level with your eyes. This will not affect approval at any level, but is just a strong suggestion. 3. You are good to go for Basic and even Level 2, but the gap between the shoulder bells/shoulder strap will need to be be reduced for Level 3. 4. A tiny bit of overlap is fine and dandy, but for higher levels we prefer none. It may be the photo, but it appears as if your "Han snap" (if that's what it is.. hard to tell) is painted white and is sitting way to close to the corner of the ab. 4. Just a simple strapping fix here.. The left thigh is riding up pretty high and cold stand to come down a bit to match the right one.1 point
-
Good work Mark! Sent from my SM-A520F using Tapatalk1 point
-
Great story Dave. I am happy for you, in the end everything worked out. Wishing you a lot of fun with your TK armor and your boys. Maybe some day they want their own armor and you can troop together...1 point
-
Hey Colin, congrats on a beautiful build. Glen's notes are solid place to start. Beautiful build and look forward to seeing your approval and moving it up to Centurion.1 point
-
What a great story brother and congratulations. Welcome to the ranks brother. Have fun.1 point
-
I'm in sacramento bro you ever want to link up exchange notes or what not it's all good.im working on a build also.1 point
-
I sincerely appreciate all the kind, supportive words, troopers. Been a rough time, for sure. But on a positive note, I do think it's time to push forward again with the build this week. I guess now I have someone to dedicate my build to...onward and upward!1 point
-
Sorry to hear of your loss Paul. there is no rush, and we aren't going anywhere so get back to it when the time feels right for you sir.1 point
-
Congratulations! Great Story! Have fun out there!1 point
-
Just got my power cylinders and tee tracks from 3dprops. I have seen S&T's on ebay, have to decide on one of those or go with Blaster Factory.....decisions....decisions.....1 point
-
Congratulations Bullseye Dave1 point
-
For my first foray into the TK world, 6 of us did an amazing patrol Halloween night in downtown Culver City. Keep the area Rebel free and handed out 2500 pieces of candy. you can see a video of the patrol on my FB page (KC Grim) and on the SCG FB page. Had a ton of fun and only discovered one pinch point that I have already taken care of. Looking forward to officially TK trooping. Was a bit less comfortable than my Scout, but definitely doable.
 1 point
 -
Should be able to finish TKSpartans list by tomorrow!1 point
-
Sorry to hear about your loss1 point
-
Congratulations and welcome to the ranks trooper1 point
-
Sorry to hear that Paul, hoping everything turn ok for you and your family.1 point
-
I’m sorry to hear about your personal loss. This has been a very difficult year, and my family has not been excluded from the trials as well. Thoughts and prayers for you and yours. Things will turn around for the better! Sent via Imperial Tapatalk Comms1 point
-
Brian's scopes are the best!1 point
-
Hi Sven, welcome to the FISD and great to have you here. You already made a good choice with RS Props and don't worry, even fully finished suits often require some adjustments from the owner. Once that is done (and to be absolutely sure), you can request TK-Pre-Approval here, before officially submitting for basic approval with the German Garrison. For correctly posting photos you will need an online-photo hosting service like Flickr, imgur and so on. Please have a look. Regarding the length of your arms: I would suggest to use straps and snaps to connect the biceps to the should bells. This will help keeping them in place and also lifts your lower arms. You are located in NRW, so once you become a member of the 501st Legion, you will be part of the White Shadows Squad. @Freduster and me are your local Attachés in this squad. Feel free send a PM as it might be easier to help you in German language. Looking at your first photo in armor, I would kindly suggest to bring the helmet down as far as possible. This helps reducing the gap between shoulders and helmet and also helps with your body height. 1.83 m is pretty tall for a Stormtrooper, but nothing is impossible. Simply remove the inner foam padding from your helmet and it will look much better.1 point
-
Let’s go Troopers! For the Empire! Sent via Imperial Tapatalk Comms1 point
-
Not that I'm aware but someone may have, it could work but it may also give more gap between them and the chest/backplate as they would be wider but loose thickness. you will find some armor have larger bells to others, RS are quite large compared to say ATA, RS and others1 point
-
Sly11, I keep hearing people refer to the FO Stormtrooper armor whenever we learn something new about the Rogue One armor. Id be willing to go out on a limb here and say that there is more in common than different from the ROTK and the FO Armor kits.1 point
-
That's fantastic news! Thank you for everyone's feedback and support. This community is truly an amazing resource and I wouldn't have made it to Centurion without the help from my fellow troopers. I am still blown away from the amount of information and knowledge of all things Stormtroopers that is shared here. It's a lot of fun to be able to share the same niche passion for Stormtrooper armor with people all around the world. I have had the goal of reaching Centurion ever since I joined FISD 4 years ago, ordered my armor 3 years ago, joining the 501st last year, and finally making the adjustments to reach the next level. I am quite proud of my armor and it remains on display in my living room whenever I'm not trooping. It's definitely the coolest thing I own, and I made it! And how cool is it that I was EIB #966, and now Centurion #466 awarded on 6/6! Order 66 anyone?1 point
-
I have a Facebook page that has some photos and videos on it. It's called " Traveling Helmet Museum" look it up https://www.facebook.com/groups/2201053330208373/?ref=share1 point
-
However you decide to attach the lenses, do NOT us CA (super) glue, as it will permanently fog up the insides of the lenses, (trust me on this one). I would go with @T-Jay's method and Dremel out a recess.1 point