Leaderboard


Popular Content
Showing content with the highest reputation on 06/29/2020 in all areas
-
Yay! Ledge averted. When blazing the lights and having your neighbors wondering if you are doing "burning man" in your yard, use some bug lights. You are going to be attracting a few new buddies that would love to "join" the armor. Use your box fan as well to direct them around the painting area(think of the wind deflectors above automatic doors. Put the fan so that it is blowing over the lights away from the armor, this will send the bugs downstream. I also recommend that your husband video tape because this is going to be a sight4 points
-
Okay, I've stepped off the ledge. Solid advice there, Lou. Thanks! I know there are other things to work on for this kit, but they aren't nearly as much fun as getting that gloss white on the parts. Ah well, time to get to building snaps and whatnot. Hey, thanks for that, Daniel! Much appreciated. I'll just have to be more patient! I can totally use that kind of thing, and I don't own any. Well... now I do. This was a great suggestion for sure! Halogens get too hot for my liking, so I picked up something similar over on Amazon with LED lights instead. They should be here before the weekend (yay!). Soon I'll be outside painting at night, with nothing but the fireflies to keep me company. I spent the rest of my afternoon shifting gears and wiping down all my armor parts again, especially cleaning that back plate. It had all sorts of smudges from the ABS and aluminum dust work yesterday. And I realized that I still needed to mount the thigh bracket on the thigh before painting anyhow, so now I'm actually glad that I didn't pull the trigger yet on painting (ha, see what I did there?). I drilled the holes all the way through the layered bracket first. One last test fit over the area where it will be attached. Everything lines up, so it's a GO for glue! Glued into place with e6000 and secured with tape as the glue cures. I will be further securing the bracket to the thigh with M3 and M4 hex button screws after painting (so there will be no issues with the holster staying put). And now it's time to get my plans for strapping this kit in order.4 points
-
Opened up the eyes all the way... Got my cut line marked out on the AM handguards... they come super big. How's that look? Also disassembled the Hovi mic tips for a lick of white paint on the interior, and prepped the ears - opened up the holes to fit Joseph's slightly larger countersunk hardware, and decided to add extra rank bars. I use vinyl stickers because I can't freehand paint worth a d*mn and rock the "Captain" style since I occasionally like to wear an orange pauldron for funsies if there a ton of TKs at a troop... so even when I'm not canon, I'm accurate lol And got the mic tips holes drilled out to fit Tony's bolts. Progress! Reassembly soon...3 points
-
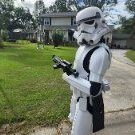
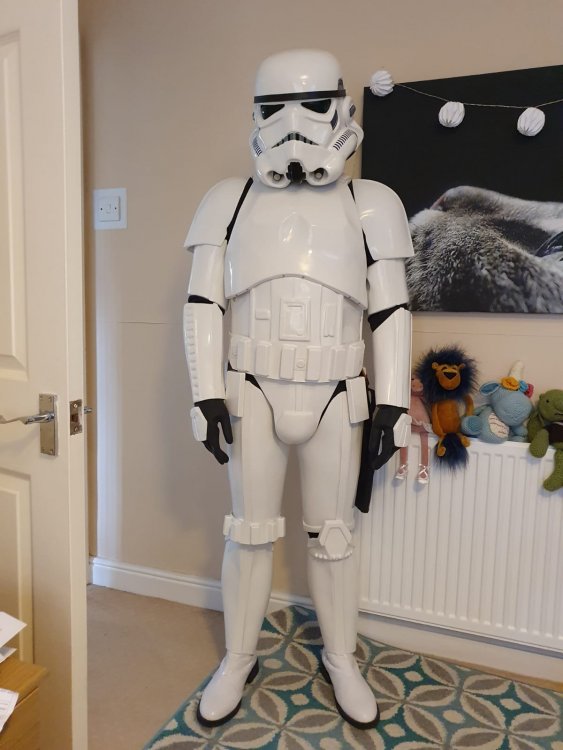
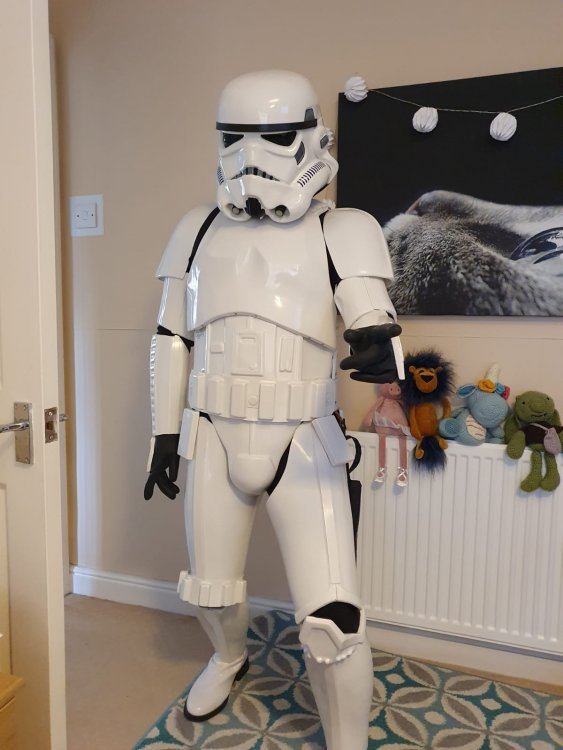
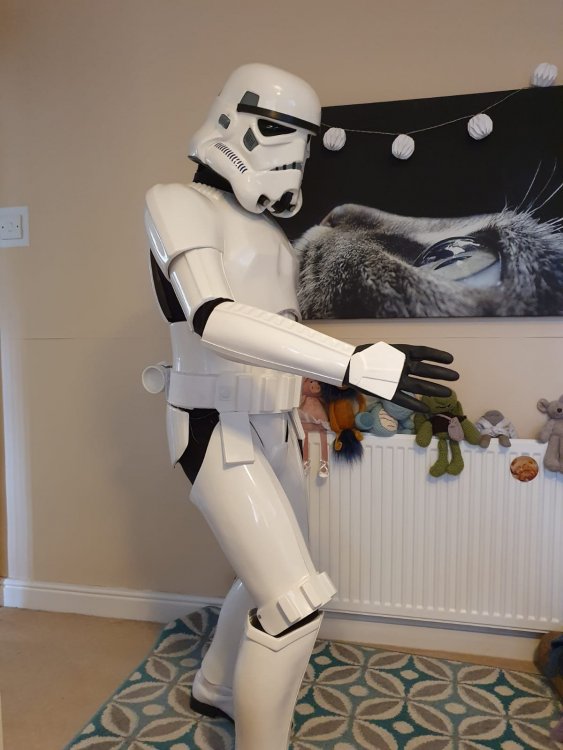
Helmet mock up Sent from my iPhone using Tapatalk2 points
-
@TheSwedeand @TKSpartan thank you so much for the replies. I will probably go the route of self-building as I want the experience of building it out and I do have the name of a local builder that's part of the squad, that I could reach out to, if I needed the help. Thanks again! Now on to saving some $$$.2 points
-
I think it came out good! Definitely has some orange peel, but I expected that. It's very light in most places and maybe approaching medium in a few, but not a dealbreaker anywhere. Same with the white coverage - couple of tiny spots I missed, but overall pretty darn even and smooth. I'm happy with it. Might cut and buff the chest but otherwise I'll leave it be. Definitely no weird reactions, runs, or cracks. My prep largely paid off, it looks like. Sweet. You know, I sprayed just a matte black primer on the vocoder and it looks pretty good for "rubbery"... probably just that, I guess! Brought all the pieces inside this morning - will attempt to re-prep the garage and spray the rest today or tomorrow so they can dry and I can paint the colored details!2 points
-
For TLJ looks like they went to black: (from this post by @gmrhodes13)2 points
-
Sure! That came from @The5thHorseman F-11D 3D print build PDF. He is a stickler for accuracy. Trust Germain, you must!2 points
-
Still plugging away between work and home projects. Got the speaker to sit in the breech and point forward Order came in, now I can extend the wires. Started the painting process, everything has one coat but the white takes forever to cure. Once I finish the final wiring, I will break it down and put on a finish coat.2 points
-
Sanded the abs paste and found bubbles, used glazing putty to fix the imperfections. Some slight cracking that still needs to be filled after primer/filler added.2 points
-
I since I’ve already started my build I figured I would start this so I can get some help through the process given it’s different from the other armor I have done.
 1 point
 -
Wanted to share with you all my Millennium Falcon model (don’t tell Vader). Finished it a couple years ago and I maybe obsessed a little too much on getting every detail from the original 5ft ANH filming model. If my house was on fire (knock on wood) this would probably be the first thing I try and rescue lol.1 point
-
Hello!!! This is my fisrt armor that i build. A thousand apologies for my english (i am using the translator ) . I hope everything is correct and i can be part of the top 1000. Thank you very much and greetings from Spain!! Name: Daniel Carmona Username: Chamu TK-19587 Spanish Garrison Height = 1.77m Weight = 85Kg 501st Legion Member Page: https://www.501st.com/members/displaymemberdetails.php?userID=32574 ARMOR INFORMATION: Armor Maker = AF Props - Kit Helmet Maker = AF Props - Kit Blaster Type = E-11 Made by AF Props Boot Maker = Dakota Boots Canvas Belt and holster= AF Props Kit Hand Plates = Rubber latex plates with Rubber Gloves Neck Seal = AF Props(leather)1 point
-
Sold all my trooping equipment years ago to dedicate my time to the family. Now that I have some time to spare I decided to build a fresh set of White Armor. Ordered a set from Ata Works and its in transit as I type, still no luck with locating Boots . I was a member of the Everglades squad when it first started in South Florida , don't know if they even exist anymore. Anyway I'm going to be hanging around trying to get back into the swing of things.
 1 point
 -
Hi, here's a few pics of my WIP TK RS Prop masters Stormtrooper armour. I purchased this about 6 weeks ago as a lockdown project, I already had a helmet & few other accessories so just needed a set of armour to complete the outfit! Lol! I still have a few bits & pieces to do before it's finished then I'm hoping to submit it for basic approval ( I may go up another level at a later date ) sorry I don't have any build pics as I've also been quite busy doing DIY as well during lockdown! Lol! hope you like them. Cheers Darren
 1 point
 -
Hola Daniel. Unas pocas fotos como te dice Mario y ya está, tendrás tu nivel de Experto de Infantería bajo tu nombre. No es necesario ni que te pongas la armadura para hacerlas. La armadura se ve espectacular. Un muy buen trabajo. Estoy seguro de que estarás dentro de esos 1000 primeros EIB y formarás parte de la historia. Y luego a por el nivel centurión, eh? Un saludo y buena suerte con tu solicitud... Hello Daniel. A few more photos as Mario tells you and that's it, you will have your Infantry Expert level under your name. You don't even need to put on the armor to make them. The armor looks spectacular. A very good job. I am sure that you will be within those first 1000 EIB and you will be part of the history. And then, for the centurion level, huh? Greetings and good luck with your request ...1 point
-
I was able to glue 3 of the 4 forearm inner cover strips but ran out of clamps. Biceps are done drying and ready for cleanup and outer cover strips!1 point
-
@ticopowell look at this Ab / kidney connection1 point
-
Well Lou beat me to it, exactly what I was typing up regarding the bug lights.1 point
-
The 421s from Imperial Boots are white leather.1 point
-
Torso Assembly Continued-Continued Progress-to-date and changes made with torso assembly and improved pictures Additions and changes: Non-functional rivet in cod installed Removed AM butt tab and reinstalled poppers (Mostly) finalized strapping First informal fitting Items for this that remain to be done: Snap attachment for shoulder bells; pictures of shoulder straps show new version with Tandy Line 24 snaps and I doubled the thickness. Will mark for shoulder bell snaps at next fitting. Key resources consulted: AJ's AM ANH Stunt build (https://www.whitearmor.net/forum/topic/40831-ajs-of-am-20-build/) LTM's AM TK ANH Stunt build (LTM's AM TK ANH build) TK-32568 EIB Submission (https://www.whitearmor.net/forum/topic/46507-tk-32568-requesting-anh-stunt-eib-status-am-892/) TK-32568 Centurion Submission (https://www.whitearmor.net/forum/topic/46815-tk-32568-requesting-anh-stunt-centurion-status-am-432/) Andrew H, TK-14023, who has helped directly with advice and fittings and material components. Chest and back plates Strapping and shoulder bridges: Collar reinforcement: Edge reinforcement: Back strapping: Ab and cod Ab-cod with button plates and belt snaps: Button plates close up: Ab and cod-kidney-butt closures Rivets, left side: Han snap, right side inner: Han snap, right side outer: Kidney-butt strapping: Left tab: Right tab: Right slot: Left slot: Cod and butt closures Overview: Brass rivet, outside: Brass rivet inside: Poppers, outside (tab removed): Poppers, inside (tab removed): First test fit! Coming soon: can't skip leg day!1 point
-
Get some halogen lights, Harbor freight sells some that come with 2 lights on a tripod, if that isn't enough light to paint with i'm not sure what is... https://www.harborfreight.com/detachable-dual-head-halogen-shop-light-62565.html1 point
-
Just want to say a big thank you for the very nice visual upgrades to the forum. I really love the new section banners. They pop nicely and make scrolling through even better. Great work to the individual or team doing this!1 point
-
I love ‘em. Thanks for the hard work, @gmrhodes13!1 point
-
So let me get this straight........... First they were changing bucks, then they were in production and posted pictures of the rough pulls then they were on a ship, then they were stuck in customs, then they were in a container, then they were being inspected by Disney/LFL, then they were in the warehouse. And now the bucks are not being released from China and they will be made in Texas? Wake up fellow troopers!!!! When are you going to realize it is just one lie after another. Nothing they have ever said has been true so why should we believe them this time?1 point
-
Agree with everybody. Great work @gmrhodes13.1 point
-
Great work @gmrhodes131 point
-
Why print something twice when you can print it three times! The change to the helmet part reminded me of the TD issue I had. So I've done the same thing, and also worked out how to get a bit of a better result at the expense a really slow progress bar. The results is still not perfect, you can see where there's some artefacts caused by Meshmixer reducing the mesh after the cut, you get to watch the progress bar of it ruining your part . I wish it wouldn't but I don't know how to turn it off. Also it would seem luck is on my side, maybe, need to print the part and check first. This is some standard UK guttering down pipe. You might remember it from such uses as the Shoretrooper Pringle cans, and OTTK TDs. And its about 1mm smaller than the hole *should* be, aka perfect. Obviously I need to actually hold parts and try it first. Yesterday I printed the tube stripe sections of the helmet. I was a bit nervous of these but due to cutting the helmet up to account for them I was able to orient it so they came out super clean. I also got all premature and got out the airbrush. The fit test got me all excited so I've started prepping them for a metal paint look. First job some gloss black primer. You can still see some of the tiny DLP layer lines in a few places and some grit that only appeared when painted, after they were air dusted and brushed down before painting However no ones going to be sticking the face as close as I do to them so I doubt you'll see them. Next stage will be some Alclad High gloss black then some Alcad Chrome. I am also considering moulding and casting one of them after the high gloss stage and trying an aluminium cold cast. And by considering, I know I will I just need to buy some silicone that's not about 18 months old. Maybe the stuff I have will work, I might get lucky but twice in a week seems like pushing it.1 point
-
Hi Jose, Welcome to FISD With ordering a fully commissioned armor you are gaining time, if you have no time or don't want to build it your self, you skip the process of trimming, gluing, measuring etc. Obliviously it has an extra cost. For a fully commission , You just need to send the vendor some Body measures and they make all the work for you. As @justjoseph63 pointed in a previous response to this post : "Hi Carlos, and welcome to the TRUE home of shiny white armor! Your decision to purchase a commission from RS is a wise one... you really can't get any more screen accurate, and their customer service is second to none! What I would suggest at this point is that once you get your Big Brown Box from them, try on the armor (you may need help with this) and post up some photos in our "Pre-approval" thread" located here. We can will help you with any details so that when you apply for Basic 501st approval you should pass on the first try. Note that RS builds their commission kits to Centurion level, so I hope you will consider taking your armor to the next level(s) by applying for the Expert Infantry Badge after initial approval and Centurion Level after that! " Good luck with your project .1 point
-
Pretty much if you also get the strapping kit. I would suggest to ask around if someone could help you build it as that would be a great experience and actually be done faster. An experienced builder would have it finished during a weekend1 point
-
I agree, absolutely love the banners, so clean and look really nice. Thank you Glen for making these, they look spectacular!1 point
-
That’s too bad :/ If it weren’t for huge delays in shipping I would happily paint it for him, hopefully someone nearby has the ability to help with indoor painting1 point
-
Step away from the ledge! :-) You have time, I know what it is like to want to be done with a step/project. No trooping for the immediate future, but you know if you get it professionally painted you will be worried about touch ups (and there will be scratches). Better to do it yourself and be able to deal with the fix-ups. So take what you have now, and start the strapping while waiting for better painting conditions.1 point
-
Are you painting in the garage or outside?1 point
-
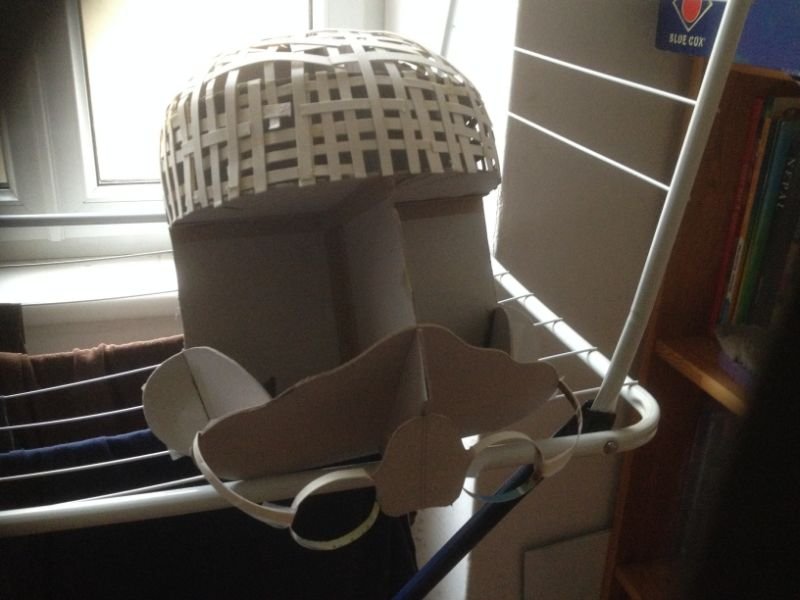
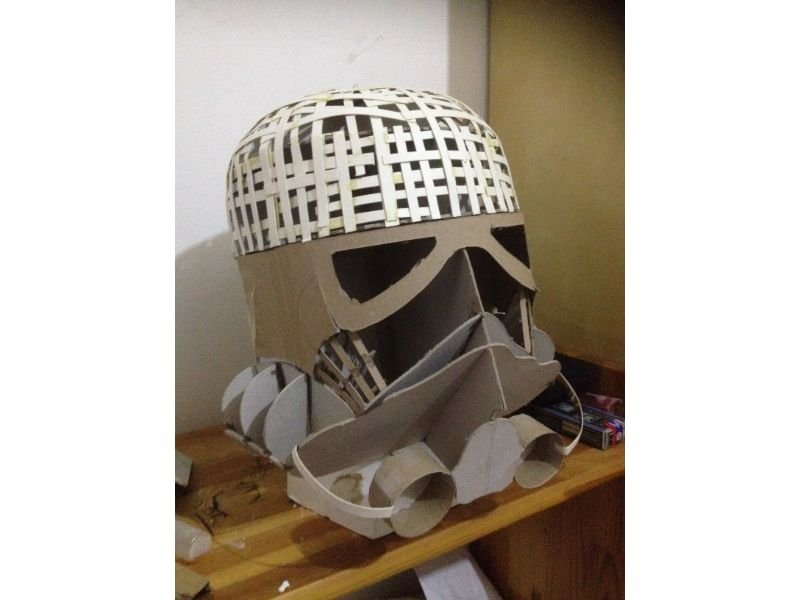
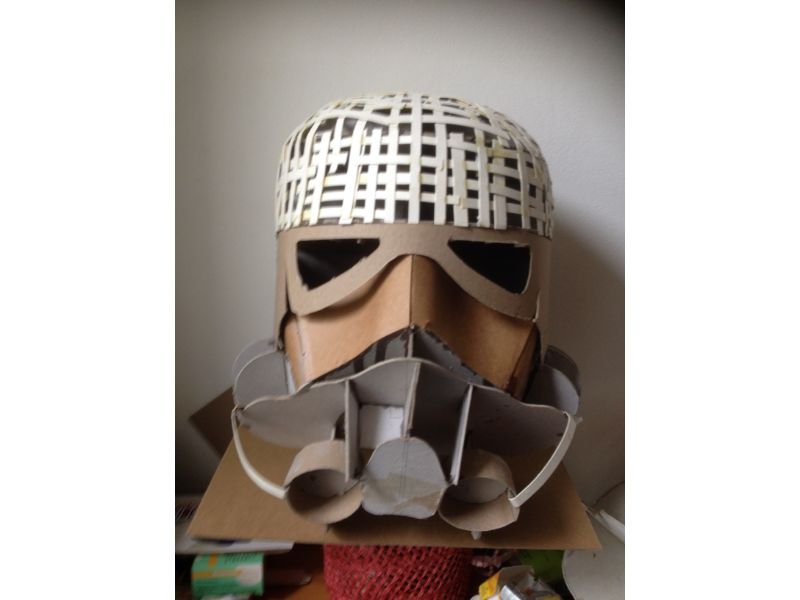
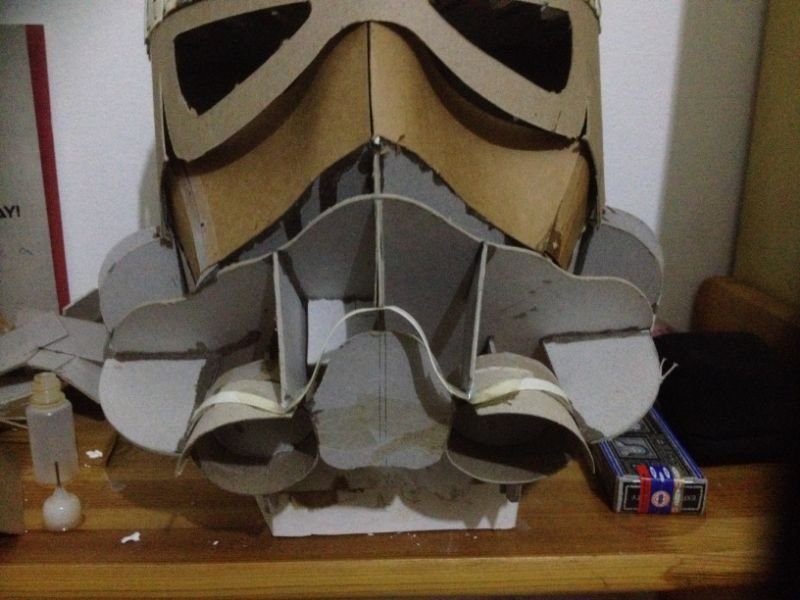
Hello! A few years ago i decided i wanted to build a full size stormtrooper helmet using basically card, glue, wallpaper paste, and whatever else seemed usable. I have a background in design (I did Furniture design at uni) so i am pretty skilled with my hands. I knew it would be a serious challenge, I wasnt wrong! So i started with a small prototype I suppose, which was more really to check out materials and build methods. You can see this build here: https://www.therpf.com/forums/threads/my-anh-trooper-from-scratch-build.269715/ So then I started my full size attempt. I'll just post the images, i think they show how this build progressed. A very steep learning curve! But basically by the final pic, which was about a months work, i decided nah, i wasnt happy - and decided to start again!! So this was attemp #1. More to follow! Cheers

 1 point
 -
Picture or it didn’t happen1 point
-
Perhaps asking a paintshop if you could use their shop to paint yourself or better yet, borrow your sons School workshop1 point
-
All design cred goes to Glen for these banners. It was an election promise to give the forums a fresh coat of paint and that's exactly what we are fulfilling. I'm glad you like them Brian, and I hope so far this term we are living up to the members expectations.1 point
-
They are getting there slowly, a few more have been added today, may need some tweaks on coloring once they are all up, glad you are looking them1 point
-
I placed placed only two but it depends on you I think they worked for me. Snap or Using E6000 on one side could work well.1 point
-
My armor is showing some battle damage. My TD clip is rubbing up against the armor. I need to add more soft velcro to the metal clip to prevent further rubbing. Any advice on how I can fix this?1 point
-
Impressive. Most impressive.1 point
-
Dear Lord Vader help me, it's happening... DarthBiscuit put the fear of God in me (staying away from the Plastidip after all!) but I tried shooting final gloss white and clear today on about half of the parts in my garage. It's drying now after 2 coats of white (10 min between each, then a 30min break) and then 2 coats of SprayMax 2K gloss clear... man I hope turns out okay! I didn't have enough positive ventilation, so the ground is all white and sticky in my garage. Not my finest idea, but at least I masked the walls, table, and my crate I used to place some of the smaller items on. Fingers crossed! Arms, legs, barrel, and helmet in a day or two.1 point
-
Freed from sewing that neck seal, I set to tackling the shoulder brackets. I relied exclusively on Tony's tutorial here, and it was extremely helpful! Thanks @ukswrath as always for blazing the trail for us and leaving a map! I started using his measurements as a guide, knowing I'd have to size it down anyhow. Here is my paper template cut to size, but you can see it's too big. So I pressed it into the space and made marks. Here are the measurements I ended up with. I omitted the little tab thingies on the outer edge because I don't really need them as reinforcement. The chest/shoulder/back area on this print is quite strong. I used this aluminum sheeting for my brackets. It's thin enough to cut with tin snips, but also strong enough to hold the shoulders up. I have a lot of this on hand because when I bought it through Amazon, it only came in a 6 pack. Lots of material in case I mess things up! I traced my template on the aluminum and cut it out. I bent it slightly and tested it for fit. It looked good, so I made the opposite side bracket. I then took the leap and made holes into the shoulders. This part was so scary for me!!!! But it worked out, and the brackets fit nicely. I made all three holes on each side, and marked the brackets with where I needed to attach the snaps. Drilled those holes out. (This was easy!) Set the snaps. Verified fit. Again. Scuffed up the side that was going to get the glue, and stuck the brackets on. I'm too lazy to drill a bunch of holes in there. I'll let everything cure over several days. I'm really glad that I haven't finished painting yet. Those holes look somewhat messy, and I know I would have been gutted to mess up the paint! This piece of armor is pretty dirty after all the cutting and trimming. Will give it a good cleaning before painting. Weather still not looking to cooperate with me for at least another week now. Ah, well. More time to think about other strapping that I can tackle in the meantime!1 point
-
thanks, guys. Appreciate the feedback. :-)1 point
-
Finished the other cloth box today. Let's just say that sewing boxes is not my thing. These turned out adequate for my liking. The additional layer of fabric involves an extra level of challenge that I neither anticipated nor enjoyed. Glad they're done. And assembled on the belt. Good enough, I think! I still need to sew in closure fasteners for the fronts. They're too small for an amp or trading cards, unfortunately. And I'll be adding some foam blocks inside to help them keep their shape. I bought three HUGE sheets of EVA foam last year from The Engineer Guy (a local FX supply store here in Atlanta), so I've got more than enough to stuff these pouches. Seriously, the EVA sheets are larger than a standard Twin sized bed. Two of them are 1" thick each, and are different densities. My husband asks me from time to time if he can get rid of them out of our basement, and I always respond, "But... PROJECTS!!!!". See, I can make blocks now.1 point
-
I'd like to do the helmet first! Michigan had a ban on certain products issued due to COVID 19 so I have yet to obtain my paints and glosses to use. I want to start, but due to COVID I am out of a job, so I've been focusing my time on alternative income with my 3d works. I also am in contact with someone who might be able to 3d print my Phase 0 darktrooper armor I modelled out, so perhaps after this is all over..... I'll have two kits i have to build! haha1 point
-
1 point
-
Matthew, I would say they are a touch on the small side - too small for Centurion? - I don't know. this is what I did: From my TK build: for the buttons I traced a 7/16" circle on the button for guidance. 7/16 might be a little small, but 1/2" seemed a little large and these were the only sizes I had. to get the template to sit flat on the button, I had to sacrifice one and cut it up. For the Empire... I used a very small brush to do the outline of the buttons. Coat one of the grey paint done.1 point