Leaderboard


Popular Content
Showing content with the highest reputation on 07/18/2019 in all areas
-
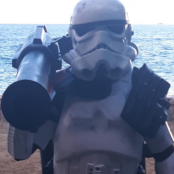
SDCC Costume Display Video4 points
-
Has a nice video showing some close ups https://variety.com/2019/film/news/star-wars-sith-trooper-rise-of-skywalker-1203271394/?jwsource=fb&fbclid=IwAR1rq5ZKJrGZ_E8nusBAur2uHhPc8_opsu_ahYiKJ6R6rPmN5nfLa663QzA3 points
-
A few years ago, I bought a Sterling SMG Mark IV L2A3 parts kit. My plan was to create molds to reproduce accurate parts to build a few blasters. My efforts were only partially successful. Frustrated, I abandoned the project and set the kit aside. Fast forward, and last year a friend of mine bought a 3D printer. By trade, I am a mechanical designer with access to a very nice piece of modeling software, SolidWorks. I decided the way to move forward on my quest to acquire an extremely accurate E11 blaster would be to develop 3D models by measuring parts from my kit and having my friend print them. I researched information on the accessories that transformed a Sterling into an E11. Lots of good stuff out there. I bought a replica 1943 M38 tank scope and modeled that. Same for t-tracks and power cylinders. The only thing I couldn’t find a satisfactory level of detail on, was the Hengstler counter. In full disclosure, I borrowed one from Thingiverse. I am attaching some pictures of the complete model. I would appreciate any feedback you could offer. TK-14082 Carolina Garrison Sent from my iPhone using Tapatalk2 points
-
Check out this fan film featuring First Order TKs. Well, Vader and Kylo mostly but we all loce the white armor best right?2 points
-
I am following a few build threads, messed up the cover strip. Made it 25mm instead of 20mm. Will adjust. Sent from my iPhone using Tapatalk2 points
-
Waiting time is always a good time to do research. Talked to @Ripper_L I had the pleasure to troop with in May and send a picture of my calves to our GMOs... In the meantime I started to paint the buttons... and felt like a monkey holding a brush for the first time. It's not like I have shelves full of Warhammer Miniatures with freehands and all the tiny details... Maybe I should have painted the imperial insignia on that button... But it's on the ab and doesn't look that bad. It's the typical thing I've with my miniatures, too. And while the Legion's bureaucracy takes time, it came to my mind (like very often) to scroll through EIB and Centurion applications and look for the calves of RS armors. Well... More or less diagonally coverstrips everywhere. Can someone do me the favour and hit me with a sign that says "LOOK AT OTHER APPLICATIONS!" when I run into things like that? Thank you...2 points
-
I would recommend placing the mounting tab right underneath the "pec" ridge and running the longest straps you made (that will still of course have it hang right). This give you a bit more ability to have your chest plate be able to slide over your ab when you bend forward and will increase your range of motion. I would bring your back to kidney straps in a bit and use three (or move them out at least) between the kidney and posterior. You can also trim quite a bit off the cod and posterior tabs at the bottoms for comfort. Shoulder bridges definitely need to be bent so they're rounded too. Would have been easier to do before attaching... Shin coverstrip looks too wide as well - should be 20mm. Back of shin is 25mm and only half glued on. Just to confirm, you're following a build thread, ya? Hope all this helps, glad to see the progress man!2 points
-
HWT's don't need no stinking TD's2 points
-
Get your orders in today, 3 month waiting period, honest. Sent from my iPhone using Tapatalk2 points
-
Once the review of this CRL comes round I'll be lobbying hard to remove the TD from it altogether Sent from my Pixel 3 using Tapatalk2 points
-
I had the pleasure of meeting you in Tampa a few years ago, but didn't realize at the time that I was standing in the presence of a film legend. On behalf of the countess TKs who continue to purchase and wear your armor design to this day I salute you, and thank you for allowing us to live the dream of actually becoming a living part of the SW family.2 points
-
A few more pics coming through ----------------2 points
-
Here is my take on this, and I'm glad you brought this up. As per the CRL, the pack is mandatory, as it is not listed in the "Options" area so this can obviously be confusing. While some HWTs have the room to wear a TD, most do not because of the room that a pack takes up on the back. The TD does NOT take the place of a pack. In the past, I have seen those who identify as a HWT simply because they carry a T-21 and have a few pouches. This is NOT a HWT, which is why we changed the CRLs . The argument came up that "Well, not all Sandies wear packs". Well, HWTs are not Sandies. We wear packs. Period. If built to specs, they weigh less than 4-6 pounds, so wearing them for extended periods is no problem. Becoming a Heavy Weapons Trooper is not inexpensive because of the additional costs of the pack build and accessories, but I feel it's worth it. I will be requesting a change in the HWT CRLs to eliminate the TD entirely, so please take note. If there is anything I can do to help you with your HWT build or any questions you may have, please feel free to PM me!!2 points
-
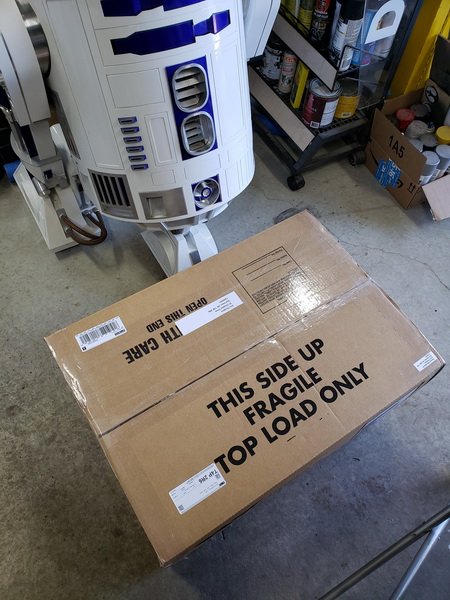
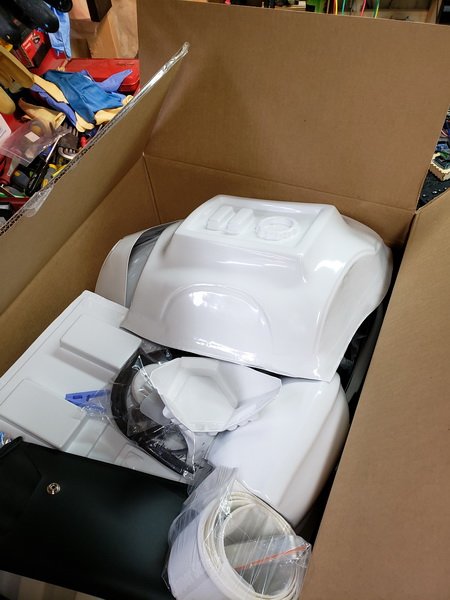
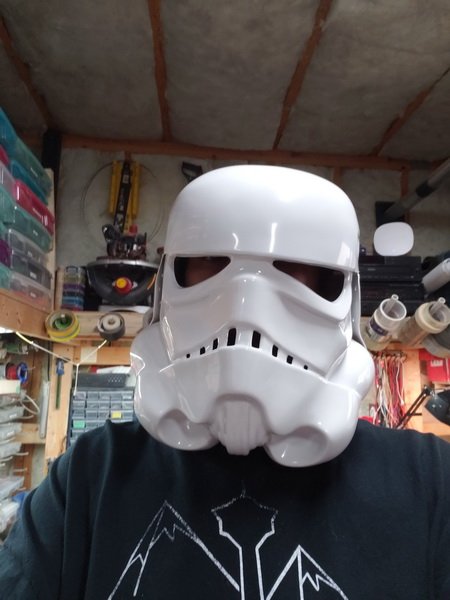
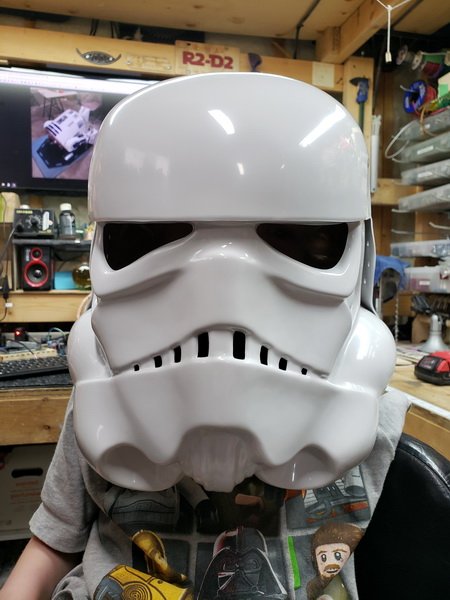
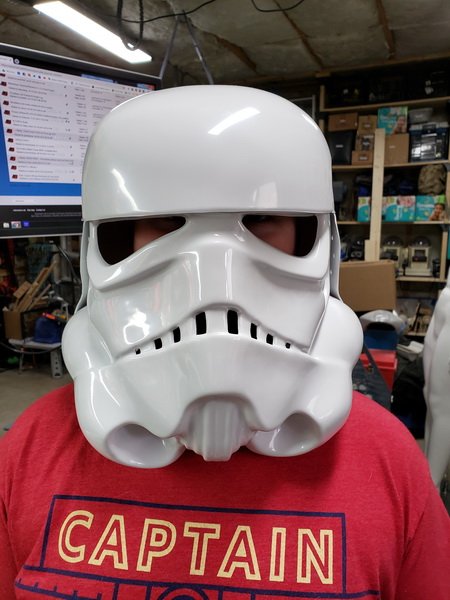
BBB Day!!!!! Arrived a week early too! Myself, Ben and Luke had to try on the helmet!!!! So excited!!!! Now my biggest fear... building it! Be prepared for stupid questions i'm sure y'all have answered a hundred of times! Kris
 2 points
 -
I am building this to be 100% accurate with the Battlefront 2 (2004) Shock Trooper, which is what I think the heavy weapons trooper should be in general I recently comissioned WoodChuck to build me a fantastic Minimag PTL Launcher ------------- This HD version was based on the First Trike Mod's PTL Launcher. Since the PS2/XBOX versions were low detail, I had woodchuck make a much sharper version based on the Battlefield First Strike mod Painted it And now I am just awaiting my backpack for the final submission photos.. Thank you for viewing1 point
-
I'm building Jim's kit, but this is my first build and I have very little experience with fiberglass, so this should be an adventure. BBB day will hopefully be arriving soon... I've done a fair amount of research/browsing, but I'm always open to advice! On a related note, has anyone used ImperialBoots' TK or EZ straps?1 point
-
I just did the bottle cap challenge. I think I did pretty well... What do you guys think?1 point
-
Sweeeeeet! My EF gloves here yesterday too! They feel amazing cuz they're lined, but I hope they're not too hot here in SoCal... Did yours come with a string connecting them, and with opposite velcro on the backs of the hands (one hook, one loop)? Just curious! And of course the thing I want most (helmet) is delayed... hahaha1 point
-
Hey everyone, I have another question for you. I have three full suits that are all cloned of each other. So whatever changes I made to my EIB suit and to my Centurion suit, I made to the others as well. So the question I have is, I would like to have the option of Hero as well as Stunt. The changes that I am aware of are of course the helmet which is not a problem at all, and the Holster which is not a problem at all. Are there other changes? Could I add those two items to this thread and also get the Hero approval since the armor is the exact same armor I would be using? Or would I need to upload a whole new request? If I do need to do a whole new request, can I use the existing photos from this Centurion and add in the items that are different? Thank you everyone for all of your help and guidance. What an insanely awesome community to be a part of and honored by it. Ardeshir Radpour TK 421281 point
-
Front sight guard finished. It was difficult to trim it : I didn't want to remove to much material but I wanted to keep accuracy. Not perfect but I'm pretty happy. Paint will mask the excess of material. And the front sight guard is stronger.1 point
-
Awesome! That looks really good!1 point
-
You could also paint the bracket screws Buttons look great but if I were to nitpick the smaller plate could be a tad smaller, could be the angel but it appears to go over the top of the mounting area.1 point
-
Welcome to The Legion and FISD!1 point
-
Looking sharp! Ready to hunt some Rebels?1 point
-
LOL! I am actually not sure which version I have, since I got it second hand and I am not sure how long he had it before I got it... It's definitely earlier than 2017, cause that's when I bought it, but it sounded like he had it for a while as well, cause he *started* to work on it and put it back in the box... But I do consider myself lucky, based on some of the horror stories I have heard!1 point
-
Looking good!1 point
-
You might try a combo approach- one of those headlight polishing kits. It consists of a more abrasive start to grind away impurities, then a lighter one to smooth, then you buff it with a polish and filler/sealant. Maybe in between, like after the abrasive layer, dry the whitening stuff from TrooperBay- you put it on, put it out in the sun, and basically sun-bleach it with added chemicals to assist in the bleaching process. I mean it's worth a shot- it might just make it lighter or less noticeable, but it's still a start. If it doesn't work, then you might already be in paint territory anyway so you just lost some time and effort.1 point
-
Honestly I think the only long term fix would be to paint the armor. I've done the whitening job about 4 times on my backup ESB helmet and it comes back every time. It's okay because I don't really use it. But my armor is the same plastic as that helmet and I've done the whole suit twice now. So I'm almost to the point that I will just be upgrading my armor this fall. My armor is already 5 years old. I will also say it certainly comes down the type of plastic that was used. I got my first helmet from troopermaster which is over 5 years old and it has not yellowed at all. My ESB helmet and my everyday armor is MTK. If I stand next to a newer set of armor you can really tell how yellow I am.1 point
-
I too have used the gel to help restore the white back to my yellow armor but like you say it's a quick fix and not long lasting. I found it's effect lasted for the next troop and then the yellow came back very quickly. I was wondering if I should try the gel again or admit defeat as to get the gel shipped to the UK from trooperbay would cost me $26. I don't want to derail the thread but has anyone else on here had long term successful results when they used the gel to whiten their armor? I thought I might drop trooperbay a message to see his take on whether it's worth trying again to get a good result long term.1 point
-
Dammit! That was a good spot. You know - I know which way around that piece should be. I've studied the ref a gazillion times. I swore it was the correct way round when I read your post on my phone... But it wasn't! For some insane reason, I had indeed glued it totally the wrong way around. Pleased to say I did a great job of fixing it in, making it completely robust. Which meant, that to get it out it snapped into multiple pieces and I had to drill the rest away to get the fixing bolt out. Time to source a new one/scratchbuild a new one from aluminium. Thanks...I think...1 point
-
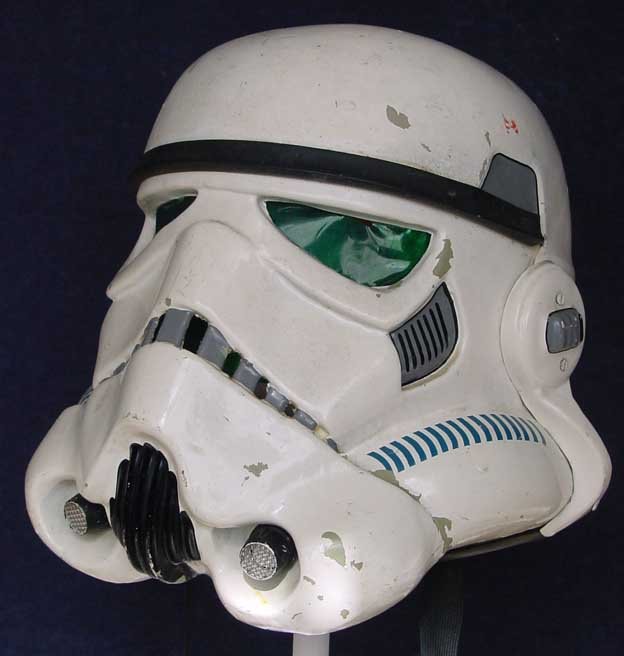
Many of the movie stunt helmets left ear sits lower creating same gap on top near rubber trim, this is mainly because of the assymetries of the molds, the right and left ear are completely different in shape so is the helmet. Check www.starwarshelmets.com you can see many stunt helmets with gap in the same exact spot
 1 point
 -
Needs some around the boots. Sent from my iPhone using Tapatalk1 point
-
Anovos booth, SDCC1 point
-
That's it lol ^^^1 point
-
Looks like troopers will be walking around -------------1 point
-
Very shiny, nice work1 point
-
Like these Troopers did:1 point
-
Wasn’t happy with the front sight guard witch was too much forward on the muzzle. Furthermore, it wasn’t right in the axis of the main tube. I tried to correct this problem with pliers without disassembling the muzzle. Very bad idea. I broke the little hook that maintains the guard Aluminum is fragile. I think this part should be in steel (Chris, if you read me ) So I decided to sold it on the main tube with bi-component glue (after it was filed and adjusted - won't make the same error 2 times !). Tomorrow, I’ll trim it.1 point
-
More of the helmet1 point
-
Thank you for the compliment. Hopefully those other plastics have another way to erase a seam (ABS paste is just one of many possibilities... the goal is erase the seam, not specifically to use ABS paste or bust), otherwise larger troopers who aspire to L3 might want to consider a different kind of armor that either fits them without need for a shim, or which is easier to alter to L3 requirements.1 point
-
Thanks for the feedback, pulled bucket apart and drilled more holes earlier today, without reinforcing (woops). I can get the angles right but I have created a new issue with the ear gap particularly on the left now being pretty big 4-5mm and showing the join below. I’ve tried to drill the lower screw to try and reduce the gap, but I don’t have much space there. Sent from my iPhone using Tapatalk1 point
-
Found these for ya. Mine are based on the same diagrams, but I use two Line 24 snaps and 2" black elastic for all the body connections and 1" for the sides and arms. Some places like the legs and left side of the kidney attachment, I use 1" black *nylon webbing where I don't want it to stretch. I'd also be cautious of using snaps actually set into the armor for anything load-bearing, as it just adds stress and stress makes cracks. I'll try to find a good photo of one of my kits too so you can see.
.jpg.eb7e38d792b70d04eee2a83a43af97b1.jpg)
.jpg.8ae4eadeef24d7790ddd45a9501b6764.jpg)
.jpg.cb33f6ce8fe249cf1190603e8f85d060.jpg) 1 point
1 point -
Looking good! Remember to align the forearms from the TOP (elbow area), since you'll have no return edge and can trim from the wrist to even them out. You can take MOST of the return edge out of the biceps since they're barely visible, which will help a lot. Your strapping layout looks good, though most guys only run two straps from the back to kidney. And you'll need to move the outside kidney to posterior strapping in a bit to make room for the kidney notches, should you choose to run them. I actually make strapping kits if you're interested, or I can at least show you how I do mine, which should help a bunch. Find me on Facebook and send me a PM? Justin Reed.1 point
-
Thanks! Did a test run today! The pic is cut off at the waist because my boots haven't arrived yet and some of the strapping wasn't finished. I've finished strapping up the armor since this picture was taken, so it's pretty much done! My boots and voice amp should be arriving within the next few days, so I should have a completed photo soon!1 point
-
I can confirm it does not remove these stains. I’ve used it to whiten my armor in which it does a good quick fix. It’s not long lasting and the armor will yellow again within a month or so. But if you do pull your armor out for a troop and it’s yellow you atleast can try and whiten it the day before and have it white again.1 point
-
Not sure if anyone has tried Trooperbay's ArmorWhite gel for this particular issue, but it could be worth a go. I have heard several positive comments on it's ability to remove yellow from ABS. I would be interested in seeing if it works on these type of stains. https://trooperbay.com/trooperbay-armorwhite-plastic-whitening-gel1 point
-
Dang, that's unfortunate. I've had this happen a bit before, and I think that polishing may also help a bit. I've personally used Meguiar's Polishing Compound. Takes quite a bit of elbow grease, but it should help, especially if you plan on sanding it. Good luck!1 point
-
Boom! I should off put this in a different post.. still going to tweak my thighs etc will go for EIB then!1 point


.thumb.jpg.ee449555c0122db250a94b412c07cd87.jpg)