Leaderboard


Popular Content
Showing content with the highest reputation on 03/19/2020 in all areas
-
Got my sugru today, stuck the visor on: Tomorrow is maybe the last day for this build!3 points
-
Gentlemen, can I request that any discussion of the group is done elsewhere. This is a research thread. If you wish to remain open and transparent about it by all means start a new thread (or I can split this one), though please remain courteous.3 points
-
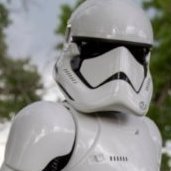
I’ve taken another photo just now so you can get a better look at the frown. Sent from my iPhone using Tapatalk2 points
-
Good news is indeed a rarity from Anovos. I see they also claim they have Mandalorian helmets available again.2 points
-
In other news, they did ship out some Pauldrons today. Small wonders!2 points
-
Nice work, you may want to reduce the amount of paint on your ab buttons, also appears you may have trimmed off the plate on the large ab plate. You could also trim the smaller ab plate a little more You will need to adjust your right shoulder and equal the gaps at your forearms/wrist area You could trim the excess material from your belt, normally they end just at the end of the TD You have a lot of shoulder strap on the rear and not enough on the front, you could move it down on the chest. Normally on the front it is 1 large tab and 4 to 5 smaller tabs BUT ATA straps are short so I could only have 2 1/2 small tabs on my fronts. Appears you have attached the holster straps in the wrong spot, should be on the lower part of the belt not in the middle. They should also start closer to the plastic belt section. You need to add black line around your ear bumps. Angle of your ears are a little off and too far back. Frown paint should taper a little more on the ends Tube stripes on your left are not straight on your left, should be same distance along the cheek, a pencil width You could also add a little more paint to the steps of the vocoder Side ab snap should be a little higher. Screws on the TD should match both sides, in type and position You could trim a little more off the top and bottom of the plastic belt section (its a little jagged) as well as the ends. Also reduce the gap to the drop boxes. A few adjustments and you should be good, best wishes.1 point
-
Every day brings you a little bit closer to the goal. Great work Chris, those 2 weeks should bring the progress along nicely.1 point
-
Congratulations! Been following your build for a bit. Good luck on your approval pics. Looks great!1 point
-
So I saw one of the KB guys post this on IG just now.. not sure where he got this but it’s the close up of the guard I was looking for. Such an interesting character. Too bad they didn’t get more screen time like Snoke’s guards did. Sent from my iPhone using The Force1 point
-
Glad to hear you made it home safely, 14 days at home, what will you do1 point
-
Here’s a shot of the rivets from the inside of the ab/kidney plate. Sent from my iPhone using Tapatalk1 point
-
Just waiting for the glue to dry, Dam you E6000 Sent from my iPhone using Tapatalk1 point
-
Here are some more designs that I came up with, as well as cleaned up the overall design a bit. Hope you like them!1 point
-
Hola Chemi! Apologies for the delay. Like you in Spain, we here in the Bay Area in California have had our lives turned upside down due to COVID-19, so I was not on the boards for a few days. I will be taking a look at your application today. Thank you for the quick fix with your ab buttons!1 point
-
Yes, basic should be easily achievable, I’m sure. The other points are just things to do if you fancy a challenge/project later down the line. :-)1 point
-
I guess for this build it's just putting on the d-ring, I will probably get a better one some other time. This blaster is just for basic clearance.1 point
-
Awesome info post! Thanks Joseph!1 point
-
Additionally to the things that Dan already pointed out, there is one mistake on this blaster: the magazine is inserted the wrong way. Here is how it should be installed:1 point
-
Or perhaps a variant. As has been noted, it's been part of the ANH-H CRL for many years now. It's kind of like our unofficial "mascot" as we have used it on our 5th year coin, trading cards, and even has been on the "face" of our coins since our initial run. As long as there is canon evidence, it will get in as an option. Otherwise no one says you can't troop with it at casual events. Heck, not a single TIE pilot in the movies has ever worn a side arm but its very common to see TI's trooping with more hardware than us.1 point
-
That's what I planned to do next. I think this will get the best result. As I wrote, I'm not a fan of painting the whole armor. Over the time the paint will crack or even chip. About the belt, I didn't know it has to sit over the traumaplate. Thanks for this hint. And thanks for liking my work so far.1 point
-
I don't recall anything official, but I'd be in favor of them being a separate CRL.1 point
-
Almost there, great work.!!1 point
-
1 point
-
Thanks guys, in response to your helmet suggestion about the grey paint I have attached a photo with the areas marked. Can you just confirm this is what you mean please? Here is a close up of the rivets for kidney/ Ab connection, let me know if you want to see the inside aswell? With regards to the TD brackets, this seems to me a bit tricky to file a curved corner to a straight one, I’m worried that I won’t be able to get it to the desired shape and lose some of the length. Would you be able to give any tips on how to get around this please? Sent from my iPhone using Tapatalk1 point
-
Clean them a up a bit, do you think this is better Sent from my iPhone using Tapatalk1 point
-
Hey trooper, I believe the SDS is likely to pass with many GMLs for basic. Good start. As you’re aiming higher with your armour, here’s some bits that you could tweak if you wanted to. The SDS blaster is missing the cocking handle. You could source one of these and add it, if you wanted to. The power cylinders on the SDS appear closer to Rogue One style than ANH. Replacing these could be an option down the line. The Hengstler counter is quite far back. You could try moving this forward a bit. The wires were not commonly seen in ANH so these are up to you if you keep them. :-) For fitting the D-ring, do you have some detailed pics of the end cap? I’d imagine your have to drill a hole through the end cap, then separate the d-ring where it meets in the middle and carefully insert it.1 point
-
Another thing I've done is to clean out the holes on the bottom of the blaster and the folding stock. I am using a screw with shrink wrap over the threads to hold it underneath the barrel. I have a couple small pieces of barrel shaped and flat aluminum for the ejector and i'm about to work on the serial numbers.1 point
-
No problem! Glad you were able to find some!1 point
-
Thanks so much for the link to the gasket material! I was able to find some at a Joannes near me. Awesome WIP thread!1 point
-
I have no idea what brand mine are, but having a pair or straight and a pair of curved-blade lexan scissors definitely helps get in all the tight spots. Plus maybe a large pair of like tin-snips for the straight-aways/long cuts. A plastic cutting wheel in your Dremel works wonders too. I usually rough cut with the cutoff wheel or tin snips, tighten my cuts on the belt sander if it's available (or Dremel sanding wheel/lexan scissors if not), then final shape using an aggressive sandpaper (or sanding block/sponge - they work GREAT for ensuring straight, smooth lines - like a 80 grit for actually removing material and a 200 or so for smoothing out gauge lines). Brand isn't important and you can get way cheaper sandpaper/blocks off Amazon than the 3M brand... they're essentially disposable after a while anyways. Magnets are your best friend, just be SUPER careful with them. You want the extremely high-pull neodymium ones, in about the 18mmx3mm size - just right for coverstrips. They can JUMP almost 18" to clatter together and explode, as well as pinch and give you gnarly blood blisters. Be careful. Slide them apart and clean any excess E6000 off before stacking them again. The more you have though, the more you can build at once! I usually use spring clamps on the ends, and magnets every 2" or so (try to alternate the polarities as you place them so they aren't tempted to jump together. Lay them out spaced apart and add them slowly). Use blue tape or additional stacked magnets for areas that don't want to stay. I also recommend an 18" metal ruler - you can lay it against the cut line you want to make, then use magnets on the backside of the armor to hold it in place! This will give you super straight cuts to shoot for, and will make all your pieces line up better during assembly. Darman is top notch stuff, I'm sure you'll be happy with them! Hope some of those thoughts help!1 point
-
Congrats bro !1 point
-
I’ve read that they are the sturdiest blasters that money can buy. I believe that they are hard rubber. Hopefully I can get the funds to get my hands on one soon enough. They are also more detailed/accurate than Hyperfirm blasters (One of the founders of Hyperfirm made Praetorian). It’s something you ought to look up if you are interested, cuz’ I sure know I am!1 point
-
So at this point, I am done with the hard armour parts, and have sent them to the painters. Will probably take 2 to 3 weeks. In the meantime, I will be trying to do the other stuff as much as I can. Unfortunately, I screwed up a bit of my timeline, and while I have my 3D printed blasters, I had ordered BlastFX kits, and they are not here yet. I am intending to do a SE44C, F11D and F11D Heavy Rifle. I could probably work on a few parts that do not require the electronics for now. I am also going to do a bit of the rubber gaskets from Imperial Gaskets. Test gluing, etc. Stay tuned, but progress will be slower for now.1 point
-
Onwards an upwards!1 point
-
So I emailed them and lol they did bring the corona virus into their reply lol Sent from my iPhone using Tapatalk1 point
-
For the most accurate appearance, the insides should also be white. To get the most realistic look, I’d suggest painting the insides white, too, not just the rims. If you want to be EVEN more accurate, paint them completely white. Then, paint only the outsides and rim black (leave insides white). Then, gently weather the black away on the rim to reveal small amounts of white. (Light sanding). :-)1 point
-
Technically, SE-14R has been an option for ANH Hero for a while now1 point
-
FYI, if you trim ~1.5mm off a split rivet you can set it inside a line 40 snap:1 point
-
Nice work Chemi, good luck on your application1 point
-
Fixed...I'm sorry for the inconvenience...Regards...1 point
-
OMG!!!!...Nobody see it before jajajajaja...I can't believe it...I'm working on it...Thanks...1 point
-
I just got approved! Here are my approval photos:1 point
-
OP (MV) Post #13: BBB DAY ARRIVED YESTERDAY! Unboxing and obligatory laid out photos incoming. Yes, I'm wearing rebel scum "It's a trap" socks. Note that, as is the case with all my photos posted on FISD, they may appear a bit fuzzy embedded in posts due to poor web and forum compression. Clicking on each image will open them in a high resolution format for maximum clarity. Initial thoughts. These pieces are larger and more firm than I was expecting. Of course that will change a bit once I trim them and remove many of the return edges. Now where to start. I'm not sure I want to tackle the helmet first since that's such a prominent piece with tiny details. Perhaps I will go with taking off the return edges on the wrist side of the forearms, since that will be a requirement for level three. Are there any other suggestions for starting points? Perhaps the chest, back, or ab pieces? I tried to lay the pieces out in the fashion I expect them to be upon assembly, but the shins were the only ones labeled, so I may have gotten some of it wrong. Am I correct in understanding that the biceps (both with thumbprints) and forearms are interchangeable? If I recall correctly, the shoulder bells are to have the swoosh facing forward, correct? I believe the left side thighs are also intended to be a little shorter than the right, to accommodate the sniper plate, but please correct me if that's not the case. That's all for now. The journey is finally getting real!1 point