Leaderboard


Popular Content
Showing content with the highest reputation on 09/12/2018 in all areas
-
Thanks for the suggestions.....I managed to fix the little crack forming in the corner of my right shin. Here we go: Chop Chop Chop... Poured in some acetone. Spilled some on my cutting mat and immediately lost the paint off the mat. Wow, this stuff is strong. I waited a few hours, splashed in a bit more acetone.....waited longer.....mixed with a stir stick.... At this point it was getting late and the ABS paste was still pretty lumpy so I splashed in a bit more acetone and covered it to sit overnight. The next day it was nice and pasty... I quickly put a blob of ABS paste on top of the crack and below it. I was amazed how quickly it started to set. You have to work fast. Then I waited a little more than a day to make sure it was hard. The next day I sanded and polished the ABS Blob. Wow, good as new.... Next I heated up a small piece of cover strip material and shaped it to fit the area. I glued this in place to help re-enforce the shin hopefully stopped that area from continuing to flex when I am putting on the shin. It's not the prettiest but you can't see a thing from the top or front. It's all inside the shin and will be covered by my leg. :-) Mark2 points
-
Nice work on the helmet paint. I preferred my mic tips to point out straight so I cut some rubber hose, one side straight and the other on a slant, you can then put this between the mic tips and the helmet and when you turn it the angle will change. Something like this (without the huge hole in the middle of course)2 points
-
Nothing better that a BBB full of shiny white, good luck, looking forward to the progress2 points
-
I would not add return edges at the bottom of the shins. They will push up even more. No requirements for a return edge at the top of the thigh. Might make things less comfortable. Ultimately your call. Heat sealing iron will indeed work if you do need to recreate a return edge.2 points
-
That's definitely what it is. It's a dim light but it's there. Well if Anovos ever gets their act together I'll be building a TFA FOTK, this build was supposed to keep me distracted from the delays on that kit. Now that it looks like I'll probably be done before they ship I might begin working on the Phase II Clone Trooper that I've started hoarding parts for. Trying to decide between a Shock Trooper or a 501st Battalion Clone. Meanwhile my wife decided she wants in on this fun (but without armor) and wants to do an Amidala Pastel Lake Gown, so I may need to help her start working on that too.2 points
-
Update, Well I did some dry brush rust on the barrel shroud, collars and front sight. Next I installed the barrel cooling fins and spacer. Next I installed the stock and made the sling. I did some dry brush and wash painting with silver on all the receiver and feed tray parts. The roll marks are visible but they are not as prominent as I would have liked. I glued on the grip scales with E-6000 and they are still curing when I took these pics. If anyone else is looking to do the mask and sand blast method, you may want to paint the feed tray and rear sight first then sand blast and then touch up the paint and they should stand out more. Anyway here are some pictures of how she looks so far. So I will do a black wash tonight and then let it sit for a few days then apply the clear coat everything. After the clear has cured, I will add the “D” gasket and she will be done. One thing I did notice was that the cocking lever in Spool86’s kit is on the right side of the receiver and I have seen several videos of it on the left side. Either it is ambidextrous and can be switched or some models of the Lewis have it on both sides. I am not sure which it is, but it is just a small detail that I am not too worried about. Additionally, in all the pictures of the Lewis I have seen, there are no visible grip screws that hold the scales on the receiver; however, in the two videos I have seen of CGI Lewis guns disassembly, they show screws for the scales? I just glued mine on but it got me thinking, how are the actual grip scales attached? Anyway, just another detail that is not a big deal. So that is the update, thanks for the interest.2 points
-
Carrying on with the shins, I made all of the magnet covers I needed using my Super Advanced Magnet Cover Jig Thingy. Freshly pressed: Magnet test fit: And after a nice round of surface sanding here's the group. I need to re-sand inside the recesses to prepare them for gluing (the surfaces were sanded before pressing). The shins definitely need a little reshaping via a hot bath, but I'm going to give them both the full 72 hour cure time before I subject them to that heat. Remaining to-do list: Drill/install snaps in ab for belt Build Belt Glue on Shoulder Bridges Glue Shoulder Bridge elastic in place Glue in straps for Shoulder Bell to Shoulder Strap connection Glue in snap plates for Shoulder Bell to Bicep connection Reposition Bicep Hooks Reshape Shins Glue in Shin Magnets and Covers Final thigh test fit for upper thigh trimming Glue in snap plates for Thigh Garter System Install Sniper Knee Plate () Submit Application/Pictures to GML Submit Member Application Hopefully be able to sign up for 9/28 troop () Make any necessary changes & submit EIB Application Make any necessary changes & submit Centurion Application Start next build2 points
-
https://www.diversityprops.com https://www.facebook.com/DiversityProps/2 points
-
Hi Ryan, Just a little tip. It’s always recommended to do your test fitting with your undersuit on. Also, a finger’s width around the majority of parts can be helpful to allow movement (if possible). :-)2 points
-
Please avoid the heat gun. Hold them in boiling water a bit longer if 30 seconds doesn't soften them up. Pull it out of the water and place on a counter top forcing the edge flat with the palm of your hand like so. Before in the background, after in the foreground.2 points
-
This is a bit of a retroactive build thread. Only had 19 days to get the TK built while my wife was out of the country. Live in a townhouse that doesn't have a shop space, so took over the kitchen and used the balcony for cutting and sanding. Day 1 - August 30 - BBB day. Had used the list in the thread to make sure I had all tools, snaps, rivets, strapping, and glue ahead of time. AM pre-trimmed so that saved a lot of time. Started Arms first, legs next, body, then did helmet last. Sent from my SM-G955U1 using Tapatalk1 point
-
As Tony said they will work fine as long as it has pressed over the post. I do find if you use a Philips head screwdriver and tap on the post lightly it will help to spread out the post, then when you use the setting tool it will spread better, worth a try.1 point
-
Normal1 point
-
Cover strips are great for concealing imperfections . Sorry to hear about the crack. If reinforcing it isn't your thing you can always remove the return edge past the crack, it's not required.1 point
-
Wow.. great news Thank you Dan Ohhh am i your first centurion too Sent from my HTC One M8s using Tapatalk1 point
-
Hi Dave, Welcome back to the advanced tactics section. It looks like you’ve made some of the suggested tweaks since your EIB, such as the shoulder bells and back/kidney gap, and it shows in the overall appearance. Nice work, sir. Now, let’s get to your review… CRL and Centurion Application Requirements: All required submission photos are now present. Tony, Joseph and I are excited to welcome you to Centurion rank. Excellent job, Dave! This marks a couple of firsts - the first RWA armour to reach Centurion featuring RWA’s new “big boy parts” and my first Centurion review as a Deputy DO. Cheers to both, Dave. Other-Armor Fit/Assembly: As per your EIB review, just keep an eye on the front alignment of your thighs and shins. It looks like your left thigh wants to twist outwards to line up with your shins. Also, watch the alignment of your calves (when velcro-ing up). Now, get back to your post, TK73076!!1 point
-
Coming along nicely, nice idea with the magnet recessing1 point
-
Yay! BBB day for you now it is popcorn time. Good luck. Sent from my VK815 using Tapatalk1 point
-
I redid the pop rivets after measuring again and the belt works fine now. Sent from my iPhone using Tapatalk1 point
-
Definitely take off any return edge on the bottom of the shins, will save them from scuffing your boots. Return edge at thigh is up to you, I left some on mine as I have really skinny legs so helps the return edges helps them to stay centred1 point
-
Yes that's how they come1 point
-
That's a great tip! Some places it is very tricky.. My trooperbay decals were way bigger too. I think i'm just gonna go the masking tape route. Mask up a bigger area, paint the black then let it cure and then mask off and tape the remaining gray Oh yeah I definitely see it. Will get right on it! Or else it's gonna bother me forever1 point
-
I'll add individual piece pictures a bit later for review. Successfully could wear it by September 11th. Had a gap between the Chest Plate and AB plate opening up, likely due to the chest brackets being too short so it made the chest sit too high. Didn't make the brackets, so don't think I'll attempt to make longer ones. Instead, I put in a couple of snap plates and stick a stop strap between the Chest snd AB plate to keep them seperating too far. Tested it and worked pretty good. Will post updated pictures later. BTW: Can't believe the touchscreen on my phone worked with the rubber gloves on. Bonus! Sent from my SM-G955U1 using Tapatalk1 point
-
Beautiful work sir!1 point
-
I got the "B". Ill modify it a bit.1 point
-
Did you get the "B" grade?1 point
-
I'll do a retroactive build thread. Finished most of my build in 12 days, and took a few pictures, but didn't take the time to do a build thread. Had to get it done fast before my wife gets back from her trip since I was using the kitchen as a shop since I live in a townhouse. Only had 19 days to get this all done really. Got a stop strap with snap plates installed already and it stops the chest from pulling up too high. So that's 'fixed' for now. What I think is the real issue is the top brackets that go onto the chest plate ridge might be too short. If they were a centimeter or two longer it'd keep the chest down over the abs much better. Might eventually try and make my own longer brackets, but the stop strap seems to work really well for now. I'll get build thread started and post anything more over there.1 point
-
I ordered mine last Wed, and yeah got the same message on lead time. 10-14 days, so it should arrive next week. I'm guessing tracking number will be forthcoming.1 point
-
Yaaaasss!!!!1 point
-
LOL When a trooper starts making the "to do" list, you know they are starting to see the light at the end of the tunnel. So, what's the next build?1 point
-
Thank you! Sent from my iPhone using Tapatalk1 point
-
Congrats on achieving Centurion!1 point
-
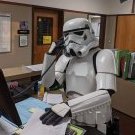
Helmet painting, would like to get some feedback at this point if you can before I finish up the interior. I think the teeth are painted all the way down Is there a preferred angle on the hovi tips? How does the black paint look (my free hand kinda sucks) Ear paint look correct?1 point
-
Helm - Mod in progress Armor - Ordered, Not shipped Boots - Ordered, En-route, Due for Delivery Today!!!!!!!! E-11 - Ordered, En-route (Hasbro, Going to order a hyperfirm, which I should have done in the 1st place.........) So quick update, I managed to snag a pair of boots from TK's Boots, super excited about that. Did some more work on the bucket last night, Full disassembly and ran though a few Ideas in my head. It looks like I'm going to be able to pull off the removable face plate, by combining a few peoples idea's (Cricket if your reading this, I couldn't have come up with a design with out your posts) The reason for using the R1 Helm just comes down to size. I will probably build the AP helm after the fact just to have a second bucket Ready For paint Hovi Mic tips, Still need to build the insides and paint Frown Screen in (Really liked how this came out More sanding, Think I'm just gonna go get some bondo........1 point
-
Perfect! Thanks, and I will be with you shortly, sir!1 point
-
EIB #850 I am EXTREMELY PROUD.... but NOT DONE [emoji736] YET !!! Sent from my iPhone using Tapatalk1 point
-
I *think* they are a bit small. Reviewing references and other commended builds, like you said, they all seem to be bigger, and go all the way to the edge of the indented area. It is tough since it's a soft pull. (Also weird, because mine has a fairly distinct ridge. I guess pulls vary even with the same maker.) I'd paint to where it begins to really ramp up at the edge - your brush may even want to find that groove if you let it. Speaking of brushes, you mentioned your hands shaking. Mine aren't terribly steady either, so what I usually do (material allowing) is rest my forearm/wrist on the surface I'm painting on, then drag the brush along using just the bending of my fingers. Makes for some pretty smooth lines. (Or maybe everybody does this... sorry for being obvious, if so!)1 point
-
Yeah Mikes video were a huge help for me as well. Sent from my VK815 using Tapatalk1 point
-
Quick update. Trimming still going slowly - completed shoulder bells and thighs. Still have a bunch more to go! I've decided to leave the chest for last as that's one piece I'd like to be most practiced for. Also, the videos from TK1636 helped a lot! (I particularly liked how he went over trimming the chest piece and not following the cut lines as they were too thin.) Also, TK Boots arrived! They look awesome1 point
-
Nope that looks good for some re-shaping. Sent from my VK815 using Tapatalk1 point
-
so finally got a chance to trim them down, they are at a nice taper, might be hard to see, did the best i could now i believe it is time to reshape, if there are any other comments id love to hear them before i commit to reshaping haha.1 point
-
Detonator redo done. I’m happier. Will get the correct screws in there when I can get my hands on them but caps and panel resized and I tweaked the homemade clips as well Sent from my iPhone using Tapatalk1 point
-
Okay, so the cuts have been made, and interior has been temporarily strapped with gaffer's tape. Remember, the only cuts for my height have been to the chest and back plates (the ab/cod/kidney/butt are full size in the pics!). I have to say, I'm kind of pleased with how the front is coming along! I still may do a little more trimming at the neck and move the chest plate up a little. But on the right track, methinks! And the back view... Hm. I'm trying to get that back plate to sit more square on the kidney. Looking closely, I can see it's not the back plate that is the issue. It's the kidney. Now, I have done nothing to the kidney aside from heat shaping the curves on the sides. That kidney is taller on the left side than on the right, which causes the back plate to shift up a little bit. I've sanded the back plate down a bit on the left side, and that seems to have helped square up the OII box. In that pic, I still hadn't trimmed down the top of the back plate at the neck yet (this also causes the back plate to look a little 'off'). I ended up trimming the back plate at the shoulder straps to shorten things there, too. The whole back plate in general needs some heat adjusting for sure. And I'll be doing some more shaping to that kidney. Even though the torso as a whole fits me, the kidney is still too wide for my liking. I know I can get it tapered in a bit. Time for another pot o' Trooper Stew!1 point
-
According to the tracking number, it arrives tomorrow.1 point
-
Auto-correct is a wonderful thing so I will let this one slide ”work”...oops I couldn’t Don’t be mad, I am knee-deep in abs paste and the acetone is clearly getting to me...1 point
-
Test fit! The amount of absolute dread I had approaching this moment was second only to the amount of absolute dread I had before making the first cut in the plastic. Terrified to actually do it. But since I have to put the armor away for a couple of weeks, I couldn't possible put it to bed without a test fit. So here goes. From the front: Holy yikemoly, look at me -- I have Stormtrooper pants! As a bonus, I get to flaunt common decency by wearing white after Labor Day. OK, let's take a look at the back: Again, looks pretty not bad. Yeah, I don't have the Shins closed properly -- hell, I'm lucky I was even able to get this on by myself much less get those things closed -- but it looks like the strips all line up nicely both front and back. I think I might need the Shins to come down just a bit as they feel pretty high over my knees. Not much, maybe a 1/2" - 3/4" trim from the bottoms. Also, from the front view above they seem high at the ankles, so when I have a second person to lend a hand I'll get those closed properly and tugged down where they belong and reassess how high they are at the knees. I also think the Thighs need to come up, as I can feel them scraping the front of my knees. I think I at least need to trim the tops -- although you can't see it in the photo, the peaks at the Thigh fronts are banging the bottom of the Ab, and the insides are really rubbing against each other something awful just below the Cod. You can see that from both the front and rear view. One thing I'm noticing on this my first time wearing it is that I almost have to keep my back arched so the garter keeps the Thighs up. If I lean forward even a little, they come down and rest on the tops of the Shins. Need to do some adjusting to that, but I think maybe trimming the Thigh tops may help there, too. As an aside, wearing this for the first time is the weirdest feeling thing I've ever felt. The armor feels like it's going to fall off at any moment. I can't move at all. Plus, it all seems so "fragile," for lack of a better word. But again, this is only the first time ever that I've put these one, so I'm hoping that after tweaking the Shins and Thighs a bit that it'll feel a little less weird. Man, you should have seen the comedy show it was of me trying to get this on. Thighs first, of course, but when I bent down to get the boots the garter lets the Thighs sag five or six inches when bending forward, pretty much putting a splint on my knees which, because they wouldn't bend, I couldn't put the boots on. I finally had to unattach the Thighs and let them flop around my ankles as I got the boots on. Then it was the same thing trying to get the Shins on -- when I leaned forward I couldn't bend my knees to get the Shins on. It was a nearly half-hour laugh riot of loosening this so I could tighten that, then loosening something else so I could do another thing. Took forever, but I finally just slapped the Shins on and hoped for the best, because I couldn't bend to reach the closures. I literally had no idea what they looked like until I took the photos. That's it for my build for a little while, as I gotta get to work on an assignment with a really tight deadline. However, I wanted to get this step done first and let you all take a peek. A.J.1 point
-
The pics no doubt show the new Anovos helmet. Like Mr Timberwoof said: If the price is right for you and you feel the seller is to be trusted. You can however get pretty much any helmet you want for that price. Anovos is good but if it were me I´d rather go with the RS or TM helmet - But at that price they will be in kit form though to build yourself. Your choice of course1 point
-
Seems legit. The helmet looks like a newer version of mine, with the same way of attaching the green visor on the inside. The dealer has lots of sales and good reviews. If the price is right…1 point
-
Congratulations brother!1 point
-
I did the same. $0.50 of chain from Lowe's gave me enough links to add d rings for about 8 blasters. (minimum they'll sell is one foot) Two minutes with a hack saw and 1 drilled hole later, and I had a d ring. Black lamp chain so I didn't even need to paint it!1 point


.thumb.jpg.9e934f6d8fe42c9336611e829a1973bd.jpg)