Leaderboard


Popular Content
Showing content with the highest reputation on 05/11/2018 in all areas
-
I just heard from BSP and my build group is transitioning to their FOTK pre-order with estimated shipping dates in June. Once my paypal claim from KB is settled, we'll route all the money to BSP in Taiwan.3 points
-
Thanks guys I am going to work on the elastic straps which may be the problem. I did take care of most of the rest of the issue on the pictures already.3 points
-
Just got my TK ID yesterday and I can't wait to start trooping. Also shooting for EIB soon and hopefully Centurion! Thank you to all the friendly troopers who answered my questions during the build and have made this such a great experience. Hopefully I can repay the hospitality to upcoming troopers just as well!2 points
-
I still enjoy every collectible merch I got from you I hope sometimes we can pave the way back for you. You've done an outstanding job over all these years of service.2 points
-
Thank you Wyatt for your years of service and outstanding merch quality and designs.2 points
-
Thanks for all the cool merch Wyatt and most importantly - for allowing me to throw away my ANOVOS “trashkets” and start enjoying my FOTK. Sent from my iPhone using Tapatalk Pro2 points
-
Greetings fellow Troopers, A few months ago, I finished a T-21 scratch build using templates from Pandatrooper. He did an amazing job on both the templates and the instructions. I was looking for something similar for the DLT-19. As many of you know, there are some blueprints available. These schematics do a nice job showing scale and detail, but they didn't provide piece by piece cuts. I guess I was looking to be spoon fed. Using these blueprints, I made my own simplified templates that can be applied to wood and PVC pipe/couplings. My goal was to construct a sturdy DLT-19 using standard hand tools with parts that are readily available. You will notice that there are some details missing, such as a trigger, sights, T-tracks, and other small greeblies. I left the trigger and sights off because I plan to troop with this thing and it will get thrown around. I was afraid those parts would snap off or get caught on something. If you decide to construct a DLT-19 with these templates, perhaps you can improve on the design. I've seen a few other scratch builds on here that are MUCH better than mine. I guess you can consider this a simplified version. If you find ways to improve the build, please share with the class! Before we jump in, I'd like to give a shout-out to Astyanax here on whitearmor.net. I used some of the ideas from his build (found here). Specifically, the mouthwash cap for the endpiece, and shelving brackets for the bipod. The trooper that drew up the MG34 blueprints is also a member here. If you are reading this WizardOfFlight, thank you for the awesome blueprints! Without them, I wouldn't have known where to start. Instead of writing up a bunch of steps with photos, I made an instructional video. It gave me a chance to play dress-up and incorporate some cheezy special effects. It's a DLT-19, there's a lot going on, so the video weighs in at 30+ minutes Here is the video: Here are some pics of the finished product: Here are the ingredients: DLT-19 Wood/PVC/Plastic templates http://wp.me/p6OqN2-1se FREE 1” x 10” x 6’ (actual: ¾” x 9-¾” x 6’ ) premium board http://low.es/2kW8vw5$10 1-¼” PVC pipe (2 feet) http://thd.co/2lCSM43$4 4 x 1-¼” PVC couplings (Home Depot couplings were more uniform on outside) http://thd.co/2kz0yMo$3 1” x ¾” PVC adapter http://low.es/2l3hUnX$1 (Lowe’s has wrong pic on the site...product number in the link is correct) ⅞” wood dowel http://low.es/2kksX7O$4 Plastic sign http://thd.co/2l3qALi$5 Shelving brackets http://thd.co/2kGRszu$6 ½” type LB conduit body http://thd.co/2kki7Pc$3 ¾” corner braces (2 packs) http://low.es/2hID3hB$4 Mouthwash cap (large) local Grocery/Pharmacy ~3$ 1-½” PVC conduit clamp http://low.es/2l8Uj4Z$2 ½” #8-32 flathead machine screws and nuts http://low.es/2iIIyOZ$1 2” #8 wood screws http://low.es/2kksAuj$1 2” #10-24 round machine screws and nuts http://low.es/2kgC3ra$1 ¾” #12 oval-head sheet metal screws http://thd.co/2kH4pJV$1 ¾” #6 oval-head sheet metal screws http://thd.co/2kktXJa$1 #6 finishing washers http://thd.co/2lEocYK$1 ½” mending plates http://low.es/2lCRczh$4 #10-24 rubber well nut http://low.es/2kWn9Dv$1 ⅜” #6-32 round machine screws w/ washers & nuts http://low.es/2kgDxl9$1 ½” #4 pan head sheet metal screws http://thd.co/2h4Ikox$1 ¾” chicago bolts x 4 http://low.es/2kH3EjY$4 ½” chicago bolt x 1 http://low.es/2kkq1Z7$1 ⅝” or ½” #8 oval head sheet metal screws http://low.es/2l7O8yd$1 1” #6 oval head sheet metal screws http://low.es/2lD7zfr$1 ½” #8 machine screws, nuts, and finishing washers used to fill the holes in the shelving brackets $1 Approximate cost of materials: 66$ Finishing Materials Bondo E6000 adhesive Elmer’s Wood Glue Sandpaper (60, 120, 220, 400 grit) Friction tape #0000 steel wool Graphite powder http://amzn.to/2lFq4R7 Rustoleum Painter's Touch gray primer spray Rustoleum Painter's Touch flat black spray Rustoleum Painter's Touch metallic aluminum spray Satin clear spray Polyurethane in satin finish Tools Jigsaw http://amzn.to/2klqxGd Dremel http://amzn.to/2lFpfrB Drill http://amzn.to/2klyStp Drill bits http://amzn.to/2kluKtE Hacksaw http://amzn.to/2l8Vl0R Files & rasps Screwdrivers Lexan scissors http://amzn.to/2klB5Fi Star Wars pencils! http://amzn.to/2l4wHz0 Airbrush (optional) http://amzn.to/2l4x7VV Hope you guys can improve on the design. If I add any additional templates for the build, I'll put them in the zip file in the d/l link. Thanks for looking! This build does take some time and patience. Your hard work will pay off in the end, the DLT-19 is a beautiful weapon!1 point
-
Fixed. Good Catch!1 point
-
Any time great to see you’re going for higher levels and I looked over your app and the TD screws need a little black paint but other than that you should be good for EIB - great work and good luck1 point
-
I understand you are eager to get approved (as we all are)please be patient and the team will sort you out as soon as they can - usually within a week or less1 point
-
Satin gloves are allowed so you are good to go OPTIONAL Level two certification (if applicable): If rubber gloves are worn the hand plates are affixed via an elastic strap over the palm. If silk or satin gloves are worn, the hand plates have the correct visible stitching pattern using black cotton, with a five point/star pattern, equally spread out with 2 on each side and 1 in the middle front, and needs to be double stitched at each point.1 point
-
Very unfortunate to hear. I will be hoping for the best for troopers waiting to become a FOTK.1 point
-
Nice! That makes me want to get going on mine!1 point
-
Hey Sean we'll be with you shortly. While you're waiting please post photos of the green helmet lens and back of the waist belt (armor side) Thank you1 point
-
Jim For the thighs I would suggest you get a garter belt system so thighs are seperate from armor so when you walk it wont pull down on armor Garter belt system ideal for thighs https://www.whitearmor.net/forum/topic/29991-thigh-garter-system/ Mark (AP)1 point
-
Thanks Preston!1 point
-
Glad to hear it and we look forward to the help of passing the knowledge. Sent from my iPhone using Tapatalk1 point
-
Congrats! Good luck with EIB and centurion. Sent from my Pixel 2 XL using Tapatalk1 point
-
TK-82214 reporting for duty! So, now my next journey begins: EIB/Centurion TK AND EIB/Centurion HWT. I will be getting a better blaster for higher levels, most likely a Hyperfirm. They are a little shorter on detail than some other makers, but the fact of how durable they are makes up for that in my eyes. I'd like to get a DLT-19, but I figure that is pretty heavy for trooping, especially after extended periods of time. If I'm not mistaken, an ANH E-11 is approvable for HWT. I'll be weighing my options over the next little bit. I have my leather MP40 magazine holders on order and still need to order secondary ABS and cloth belts. The orange shoulder pauldron, too. And of course I'll need to begin a backpack build for HWT this summer. But my first priority at the moment is to get that blaster and submit my EIB application ASAP.1 point
-
Congratulations! Well done and welcome to the Legion Trooper1 point
-
Only kit I know of that doesn't need paint is MIMIC's kit. You can find him on therpf.com I have half my kit in and it's beautiful. There is one spot open on the run and you probably won't be waiting near as long as I have been. My garrison mates that are doing KB kits just got clear kits and planning to paint with Kyron Gloss White I think1 point
-
Congratulations Zac! You should be proud. I look forward to seeing your EIB application. If you need any help with it, feel free to reach out. Good work trooper!1 point
-
Oh, interesting! Great build so far!1 point
-
Looks great! It is obvious a lot of time and effort was spent on this kit. Only things that I may see them asking is for more detailed photos of: 1. Rear of your blaster to see the D-Ring attached to the blaster That is all I can see that they may request. Good Luck trooper!1 point
-
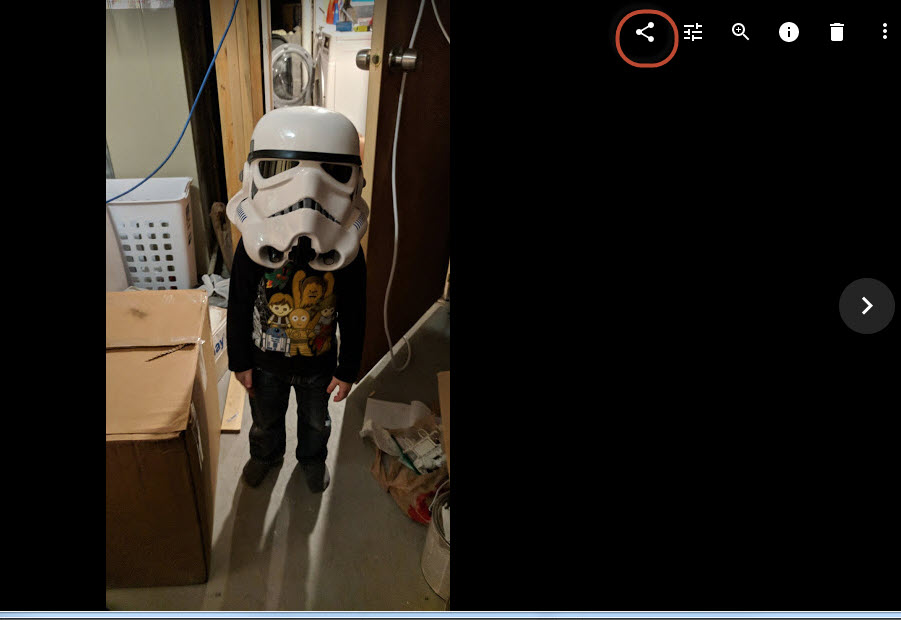
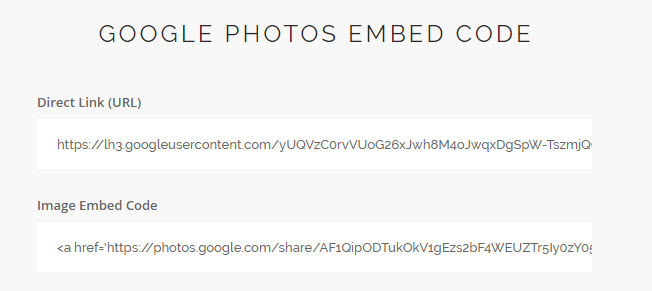
Hi Troopers. Thought I would share how I have been adding my photos from Google Photo if anyone wants to use google photos as there image hub. First you find your photo that you want to use and click the share icon (circled in red) Than click get link And click copy From there go to https://ctrlq.org/google/photos/ and paste the link where it states paste google link here and click on generate code The webpage will perform its internet magic and provide you with a link below Copy and paste into the direct link into whitearmor forum of your choice and you have your picture! <a Hope this helps everyone!


 1 point
 -
should be fine now1 point
-
I have the AM suit as well and I ruined my forearms because my measurements where only taken with my arms resting. As soon as I tried to bend them I had no room in the forearm or biceps. Make sure you measure your forearm and biceps flexed or in a position that you hold the weapon in - once you cut you can’t put it back on Good luck Sent from my iPhone using Tapatalk1 point
-
Lou, It's looking fantastic so far! I sent you a PM re: forearms with photos. Keep up the great work! Sean1 point
-
Apparently not, because I forgot a couple and just added them to the in-progress list, LOL! TFA/TLJ First Order Lieutenant/Captain Heavy Weapons Trooper Brother from another mother!1 point
-
Brien you should request to have this posted in this months newsletter. It needs to be seen by the masses. Wyatt has done many great things for this detachment and the legion. We'll hold the fort until he comes back.1 point
-
Looking good just ensure the drop boxes are aligned with the out most edge of the ammo belt.1 point
-
Looking good1 point
-
Eric @Tolo has been with FISD a long time, including stints as DCOG and most recently as DXO. As things happen, Eric's personal life has changed for a positive for him, but for us it meant that he couldn't do what he needed and stay on as DXO. Eric - Thank You! for all you've done for FISD and we wish you the best. Fortunately on FISD, we believe in staff development, e.g. taking on new people to staff roles, and then grooming them for higher office, either here on FISD or elsewhere in the Legion. Many former FISD staff have gone on to be GCO/GXOs, SLs, and DLs. Continuing in that fine tradition, Andrew @Sly11 has graciously agreed to step up in to the XO role. Many of you know him from his solid work as a Deployment Officer, which he as rocked. Please join me in congratulating Andrew for a promotion well deserved. With unquestioned loyalty, TK-8020 "Daetrin"1 point
-
I want to thank Eric for his years of dedication and hard work in all the positions he held within FISD. You will always be a valued member and hopefully can find the time to pay us a visit every now and then. Congratulations on your work life promotion which I believe is very well deserved and I wish you all the best. Thank you for your service.1 point
-
Hear, hear. I have always gotten the nice merch I have ordered. Getting that envelope with the trooper on brightens any day.1 point
-
Thanks for all you've done and continue to do!1 point
-
I'm feeling the love! It's been a pleasure serving you. (most of you) I've had lots of emails from members in support of me. People are just too afraid to get involved. I can't say I blame them; The new sheriff shoots first. It also looks like the deputies are in charge of this one and are calling the shots for him. I also want to mention Mrs.tk4205. I lost count of the sandwiches she has made for troopers at events. Cookies too. The old timers can tell you about bantha patties. The Mrs. took food to almost every major event our garrison did for many years. Few people know that these days, as so many of our old-timers have been ousted. I myself have only trooped once or twice a year for the last couple of years due to the unwelcome feeling we get from our CO and his little group of noobs. We'll see what happens this year, but there is always next year to look foreword to. I'm not going to let a few egomaniacs turn me off of what I love. I've been through a few bad commanders in my years and I always seem to outlast them. I've gone up against worse too. You guys are worth fighting the good fight for.1 point
-
On a sidenote: my team won 2-0 woop woop Anyways.....finished the shins and here is were I deviate from RS as I´m not a fan of the two "outer" pairs (2 outer right and 2 outer left) one gets with the kit, so I bought some TM Shins. Sniperplate is RS though so one can safely say the plastics match1 point
-
Blaster has been finished, used a lot of different parts to create an accurate but "durable" or "fixable" trooping blaster. Master Blaster 3D print Real Sterling folding stock (gives it some heft without being too heavy) Tramp scope and electronics (now with more pew-pew) Functional slide with battery hidden in the slide Master blaster speaker and location1 point
-
Thank you, Brien, for giving us the opportunity to stop and think about this for a moment, and for paying respects to a person who - as you said - gave so much, and truly epitomized Troopers Helping Troopers from the very beginning of that motto's existence. Thank you, Wyatt.1 point
-
You only have to look at the replies on Wyatt's merchandise threads from happy customers who have received their orders1 point
-
Agreed! Sent from my iPhone using Tapatalk1 point
-
Excellent tutorial. I would like to highlight Josephs comment about not skimping on snaps. USE GOOD SNAPS! I bought some run of the mill snaps at a fabrics store and have had to replace nearly all of them over time with good sturdy snaps (Tandy in my case). Cheap snaps are not well shaped and made of weak/thin materials that WILL give out on you. Having snaps crumble and fail during a troop is not something I would wish on anyone. I cannot stress this enough.1 point
-
And now the brackets on the rear pieces are done, time to call it a night1 point
-
And....my game-plan was to rough trim everything before any assambly work...that worked out great1 point
-
Got the bucket built and painted....couldn't use AP's decals except for the tubes. I've seen a fan made schedule for ear rankings. Are there a lot of troopers who follow that? I'm torn between marking the furthest back 'bump' per ANH or using the fan based schedule and add another bar for captain. Thoughts? The helmet was definitely an easy build....and painting (outlining) was a little harrowing at first but I definitely had lots of fun with it. I felt better having the 'polish remover of nyeel' by my side I hope the rest of the kit is just as enjoyable1 point
-
I put mine right behind the ab button plate (I'm skinny and have a lot of room in my armor). I formed a piece of ABS and glued it on so that the speaker could clip onto it. I'm also using a bluetooth mic (the bluetooth receiver is in the picture). The extra velcro was when I had a larger wireless receiver and icomm which I don't use anymore.1 point
-
Ah, so tapatalk finally did it to me, to me, to me. For those who can relate with me via the 80s1 point
-
This is normally done with snaps and black elastic or nylon strapping. Some use Velcro, but I don't recommend that for frequent trooping. You should check out some of the Centurion submission threads here for ideas and photos: https://www.whitearmor.net/forum/forum/72-request-centurion-status/ Here is a diagram of a strapping system using the "double snap" system which works great:1 point
-
This addition to the Centurion CRL was was added recently so only applications older than a few months ago were passed without it. If you are careful, it will look great. If you wanted to take it up a notch, get a hobby iron and make return edges to really give it that pre molded look. Or Terrell can just ad it to the mold1 point