Leaderboard


Popular Content
Showing content with the highest reputation on 02/09/2018 in all areas
-
Nice work Jeff. If you're concerned about the difference in alignment between the ears you can always use this technique, align the upper and lower ear screws with the rear line of the front traps. Edit: Btw it doesn't have to be exact.3 points
-
I made my First Order forearms in PETG and I had no problems painting them. As long as the prepping job is done well, there shouldn't be any issue. However sanding PETG isn't easy indeed, but not that much more than PLA which doesn't take sanding well either.3 points
-
Good luck with the build Michael. Looking forward to seeing yr progress pictures! I was a bit worried about doing mine but with the Blaster Reference that Dan shared and all the other threads on here there’s plenty of visual references. Also, don’t be afraid to ask questions, the wealth of knowledge and experience on here is phenomenal! Sent from my iPhone using Tapatalk3 points
-
Thanks Daniel! Membership application was sent and TK number is reportedly inbound. I can finally finish the counter on my E-11 I love the smell of "approved" in the morning. It smells like... victory.2 points
-
Thanks Aaron! Got your message... so thank you for that too! Approved! I have some EIB application pics to do this weekend.2 points
-
Trimming Ears, we all know it is a struggle and I may have only messed up on the left one time and the right two times, but I was lucky enough that in my WTF kit I was supplied with three ear pieces. I decided I would try for the really close fit but if I didn't get it no big deal as gaps are screen accurate. I will skip the messed up ear documentation and follow what worked for me With my left ear I trimmed it out, and lined it up on the bucket. Than I took my dremel with the sanding drum and sanded/carved out where the tube vent is to get a general shape Getting closer Sanding the ears down really is a task of what you do in the front can change how it sits in the back. I would hold the ear in place where the top two screws would go and see where I had my large gap and needed to come down. Sometimes I needed to sand more in the back to bring the front down and other times I needed to take more off the bottom and top to bring the middle closer to the bucket. Left Ear Right Ear Straight on My left ear I ended up moving back as I felt it was a bit too far forward (pic to be updated soon) I think I am going to sand a bit more of the front of the left ear to match the gap of the right ear a bit. I think the gaps will give it a bit more uniquness to the build as not everyone will have the same gap. "This is my gap, there are many like it but this one is mine. My gap is my best friend. It is my life"2 points
-
I’ll fix the image references later — was having problems with Tap a Talk’s interface getting in the way and unable to see my message after uploading a photo. Sent from my iPhone using Tapatalk2 points
-
Haha! Exactly the problem I had! When I finally got to fitting them the first time I’d got the polarity wrong. Then I had to try pull them back out of the green stuff, clean them off and try again [emoji23] Sent from my iPhone using Tapatalk2 points
-
Definitely wear glove inners, I go through a few sets in a troop, they are cheap so I always carry plenty of spares, nothing worse than putting back on soiled, wet gloves2 points
-
Roger that, two and two. Ah, the trials and tribulations of builds; making mistakes is part of the process. I seriously would have given up along time ago if it wasn't for green stuff. I'm on my third pack! Ok, I"ll stop staring at your trigger guard about now lol2 points
-
Ok, I'm officially starting "A.J.'s O.F. AM 2.0 Build." So, why "O.F.?" You’re probably thinking I'm dyslexic and meant First Order. Nope. That stands for "Old Fart." Or, in keeping with ANH canon, I guess maybe that should be "Old Fossil." Either way, I'm probably one of the older noob armor builders and 501st aspirants you're likely to trip over. In viewing all my armor spread out in my shop, my wife noted how pleased she was that I'm enjoying my second childhood. That's nonsense, since I’m nowhere near finished with my first one yet so the joke's on her. In any event I'm certainly older than most of you -- likely old enough to say, "Luke, I am your father" to a lot of you and have it be accurate. Well, except for all the genetics, of course. I've been reading the build threads (and pretty much everything else around here) for several weeks now, and while my abject terror at making the first trim cut is no less than it was when I first started researching, I'm fairly confident that I'm as prepared as I can possibly be. To that end, as soon as I post this I'm heading down to my shop to get started. Before that, however, a word about TrooperGear and the AM armor. First, I'm beyond impressed with this stuff. In going through the many, many builds I'm stunned at how nice AM armor is. The preliminary trimming work is top-notch, the ABS is thick and shiny, and the look of everything is simply beautiful. I'd also like to compliment TG (does that guy have a name?) directly. His correspondence with me before purchasing was complete and packed with information. His responses to my incessant questions were speedy. When I ordered, he was more than willing to ship my BBB around my busy travel schedule so I'd be sure to be home when my UPS guy dropkicked the box from the street to my porch. (All UPS drivers deliver this way, right?) Further, when I discovered a crack in the helmet components -- probably thanks to Mr. UPS -- he quickly and without questions shipped replacements. In fact, when I emailed to verify that he'd gotten the photos I’d sent of the parts, I was pleasantly surprised to learn that he'd already shipped them. Also, I couldn't get started without saying just how awesome all of you are here on White Armor. Your willingness to help is nothing short of amazing, and there are no words for the value of the copious amounts of info to be found here. In gathering stuff for my build I’ve even bought stuff from a few of you -- Ukswrath, Pencap, Darman -- and your gear is not only great, but your communications back-and-forth before buying are just as rapid as your shipping. Outstanding! A little about me -- I'm a full-time freelance writer/editor living in Williamstown, W.Va., and have been in the publishing industry in one manner or another full-time since the mid-'90s . Before that, I was a radio broadcaster for a few decades. (The two careers actually overlapped.) I've been a Civil War re-enactor for 20 years, and have written two books on the subject of making authentic reproductions of wooden items from the 19th century. In that regard, I guess I'm not a complete noob when it comes to making exact copies of things from a long, long time ago. If you're not already bored, check out some of the things I've made and written on my website, www.ajhamler.com. Haven't updated the site in a while, though. Gotta do that Real Soon Now. Let's see, what else? My passions include my 4-year-old grandson Jed (who, naturally, I call "My Young Jedi"), gourmet cooking, hiking and a really good IPA. Oh, and I'm also an Old Fart. So anyway, if you’re still with me after all of that, welcome to my build! Next post will be the first item on my build list: the Thermal Detonator. A.J.1 point
-
Right!? lol1 point
-
Be gentel....;0) Enviado desde mi Aquaris E5 mediante Tapatalk1 point
-
[emoji23] go for it mate...have a beer..or two! I was gonna have a night off tonight but ended up doing the end cap clip and adding the strip to the bolt [emoji849][emoji23] Sent from my iPhone using Tapatalk1 point
-
Thanks Wayne! I think I deserve the weekend off1 point
-
Wow! A lot of effort going into this Jesse! Very impressive work! Sent from my iPhone using Tapatalk1 point
-
Hold on I’ll be right over with you. Sent from my iPhone using Tapatalk1 point
-
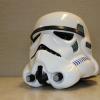
More time to work on the helmet today - first thing I did was use a heat gun and a pointy-metal-thing/spare carpet spike from my speaker to enlarge the holes in the ears so the screws would sit flush when countersunk completely (the original Anovos screws were pan head): I also picked up some cap nuts to completely eliminate any risk of exposed threads scratching up my face. I then cut down the frown mesh, and cut up some craft foam so I could go with a sleeker install: Lastly I re-assembled the helmet - still need to get the visor/lenses installed as well as the new helmet padding and fans:1 point
-
So, I don’t even have my TK id yet and I’m already over at MEPD researching this: Sent from my iPhone using Tapatalk1 point
-
Epoxied the Chicago screws base to the inner of the helmet and allowed to dry. then i layed the lens over and used a black sharpie marker to jot where to drill the holes. finally used the screw to secure.1 point
-
Nice job on the selector switch, I wasn't brave enough to try that, will do on my next build tho! Sent from my SM-G925F using Tapatalk1 point
-
Absolutely epic work mate and I look forward to seeing those EIB and Centurion approvals - I have no doubt that you can do it, and then I can add you to our Advanced Tactics Wall of Recognition!!! Rock on Trooper [emoji869][emoji38]1 point
-
Superb, Greg. Well deserved. :-) Sent from my iPhone using Tapatalk1 point
-
I put my armor on my dressform yesterday afternoon to see how it all looked together. It all looked good, shiny, white, no problems! This morning, things looked very different. Going into my office, I found my armor had been embellished by my kids. I think they're rebel spies. Something must be done!1 point
-
Congrats Greg!1 point
-
I have an ATA helmet and a RS full kit. The color of the ATA is more of a bright white. The RS is more of a screen-accurate off-white color. (I prefer the off-white, but that's just me!) The RS kit is quite a bit larger than ATA overall. So if you have a larger body size, the RS might be a better option for you. The RS helmet is noticably larger than the ATA lid (I have both). I received my RS kit within 2 weeks of ordering it. The customer support from the RS Props team was OUTSTANDING. Whenever I had problems during my build, Rob got back to me very quickly with help. They were also very generous in sending out replacement parts quickly when I needed them. I received my helmet kit from Terrell within a week or so of ordering. I had an armor kit on order with him, and was given a 12 month wait. When my wait approached the 14th month of waiting, I finally gave up and ordered a WTF kit (also a great choice for speed of delivery and customer service!). If the wait is just 3-4 months now, that's a good thing! Terrell was always friendly to work with when I had questions. FWIW, the ATA and WTF kits are both the same shade of white.1 point
-
More I meant I wasn't sure if they'd be able to be added to the group needed, but seeing as they have been I guess I was wrong!1 point
-
Congratulations trooper and welcome to the Centurion ranks1 point
-
Undersuit I use a 2 piece compression pants and top, really comfy and helps keep cool, I use for both OT and FO. If you want to go for centurion you could take my option and get some shiny shorts to wear over the pants, worked for me :D. I did look at the stormtrooperundersuits.com they are very nice but I have heard a couple of people mention the shinny area has rubbed off in spots, may have just been there's, but for me it was mainly the price and shipping, most things cost a bit shipped to down under but the actual conversion of pounds to Australian made me fall off my chair I have an Anovos neckseal and am very happy with it, but it was an early version1 point
-
My kit came from TM.1 point
-
Absolutely stellar build thread Greg! Your review process is under way - and you should be hearing from me very soon !1 point
-
Would love to have pictures to accompany your post; pictures aren’t showing up - I found easiest way is to upload using tapatalk Sent from my iPhone using Tapatalk1 point
-
Congrats Joe!!! You have done an awesome job! Welcome to the Centurion ranks!1 point
-
That’s probably the answer I was looking for. Thanks. Sent from my iPhone using Tapatalk1 point
-
Most of our guys here use PLA, they say it prints easier than ABS. I have a FOTK sidearm which I have been trooping with for the last couple of years which is PLA and had no issues with it. Even drilled and added screws for holster mount and they are solid.1 point
-
Ok, now that my minor crisis has been averted I can get back to it.... Just before I continue with the Front Sight I thought i'd mention that I ground off the large resin screws at the front of the blaster and replaced them with the hex screws from T-Jay's kit. I also installed the bayonet lug. I strengthened the lug by inserting a piece of a nail into the lug and into the body of the blaster. Ok, back to the front sight... Update - Front Sight (Part 2) Once the sight pin was assembled, I spend quite a bit of time grinding away at the original sight frame from the Doopydoo's kit. Eventually I got all the inner resin removed so I was left with just the sight frame. Next I held a piece of sandpaper against the tube and sanded the bottom of the sight frame to better hug the curves of the main tube. And then came the task of cutting the hourglass shaped channel into the main receiver tube. I sketched off the shape and started with a large flat file. Then later moved to angled needle files. Checking constantly to see if the sight would slide in yet. (Some of these photos are out of order. For example, here I hadn't actually cleaned out the T-Track holes yet.) Next I used "green stuff" to add the texture grip to the sight frame... And here's what it looks like.....nothing glued in yet.... Mark1 point
-
I used two in each as well. Also like Wayne, I had such a headache getting the dark things the right way round with blaster polarity!! Plus they kept snapping together, such a nightmare lol Sent from my SM-G925F using Tapatalk1 point
-
Thanks Jesse! I used two in the mag and two in the housing. Had to get my head round installing them the right way round because of polarity. Would be just my luck to get them stuck in only to find they repelled rather than attracted! [emoji23] I made the trigger guard out of a thin piece of aluminium I managed to scrounge from the mechanic at work..I’m really pleased with how it turned out. Sent from my iPhone using Tapatalk1 point
-
You’re far more organised than I am. I still haven’t printed anything! I have my certs and a couple of images I really like I need to get printed and framed (IKEA RIBBA FTW)1 point
-
Ok, so I got a little frustrated with the very slow progress and I claimed from the start that I wasn’t going to try break any boundaries with my build. With this in mind I decided to start putting the pieces together and worry about painting later. Tonight’s progress as follows [emoji4] Sent from my iPhone using Tapatalk1 point
-
Now that’s thinking outside the box.... nice one Christine [emoji3] Sent from my iPhone using Tapatalk1 point
-
Dears, Here is the prototype approved for the CRL and ready for further production starting in March.

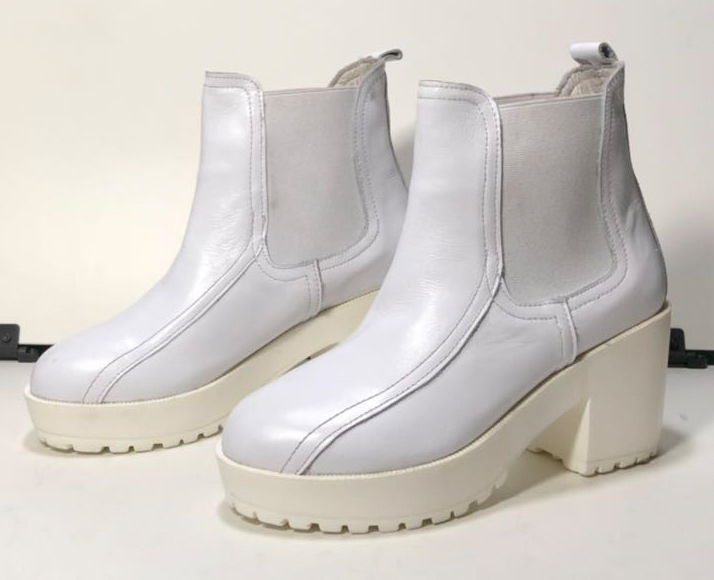 1 point
 -
How can you tell? Oh yeah, I keep posting pictures of it. I'm pretty stoked about it, to say the least. Makes all those "ah, fu...!" moments during the build seem trivial. Thanks again, Dan! But I will admit, I was lucky with some of it - I was pleasantly surprised when I looked at the pictures for the first time. I have a lot of respect for the troopers who make this armour fit on a body frame that is either smaller or larger than the 'cannon' body size.1 point
-
Thank you, Sir!!!! Yes, that’ll be the next challenge!!! Pleasant week to ya! Alban Sent from my iPhone using Tapatalk1 point
-
Exactly! Thanks for all the congrats.1 point
-
Hey Lionel thanks for your patience, Andrew or myself will be with you shortly1 point
-
Yes, The suspenders will support the weight of the ab/kidney/butt/thighs better on my shoulders and they will be easy to put on like a pair of shorts. An added bonus is that I can adjust the height of the whole assembly easily by just adjusting the straps of the suspenders.1 point
-
Stormtrooper Ranch Members like to help other clubs and probably 75% of our members are also 501st like myself. Glad I could help you out Cameron1 point
-
Thanks for the extraordinary Eric thing1 point
-
This is exciting to see, shared in my local garrison to push interest as well. The legion needs more FO Troopers, KB makes a fine product and with their new setup I'm sure they will be able to hook ya'll up well. Wouldn't be shocked if ya'll were done by end of year. Long live the supreme leader!1 point


.thumb.jpg.a76e0f48e0bb54184765760e710c5f96.jpg)