Leaderboard


Popular Content
Showing content with the highest reputation on 07/10/2019 in all areas
-
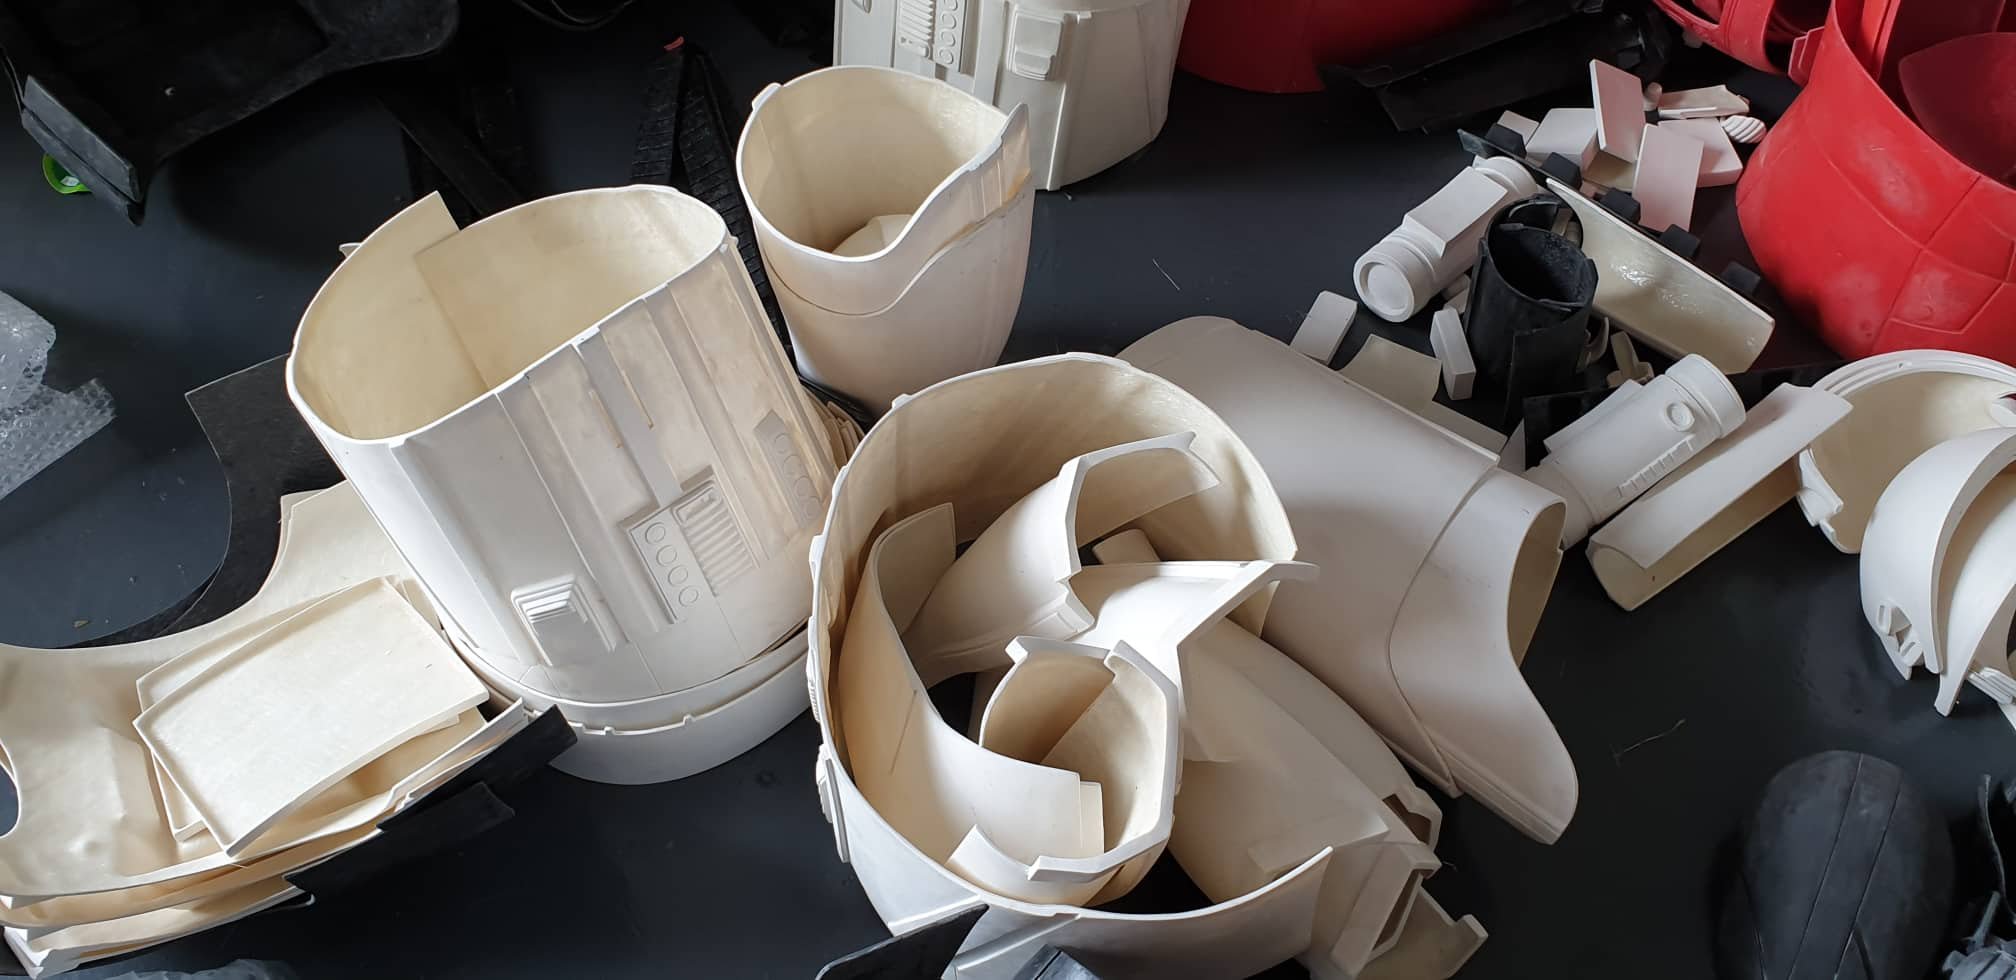
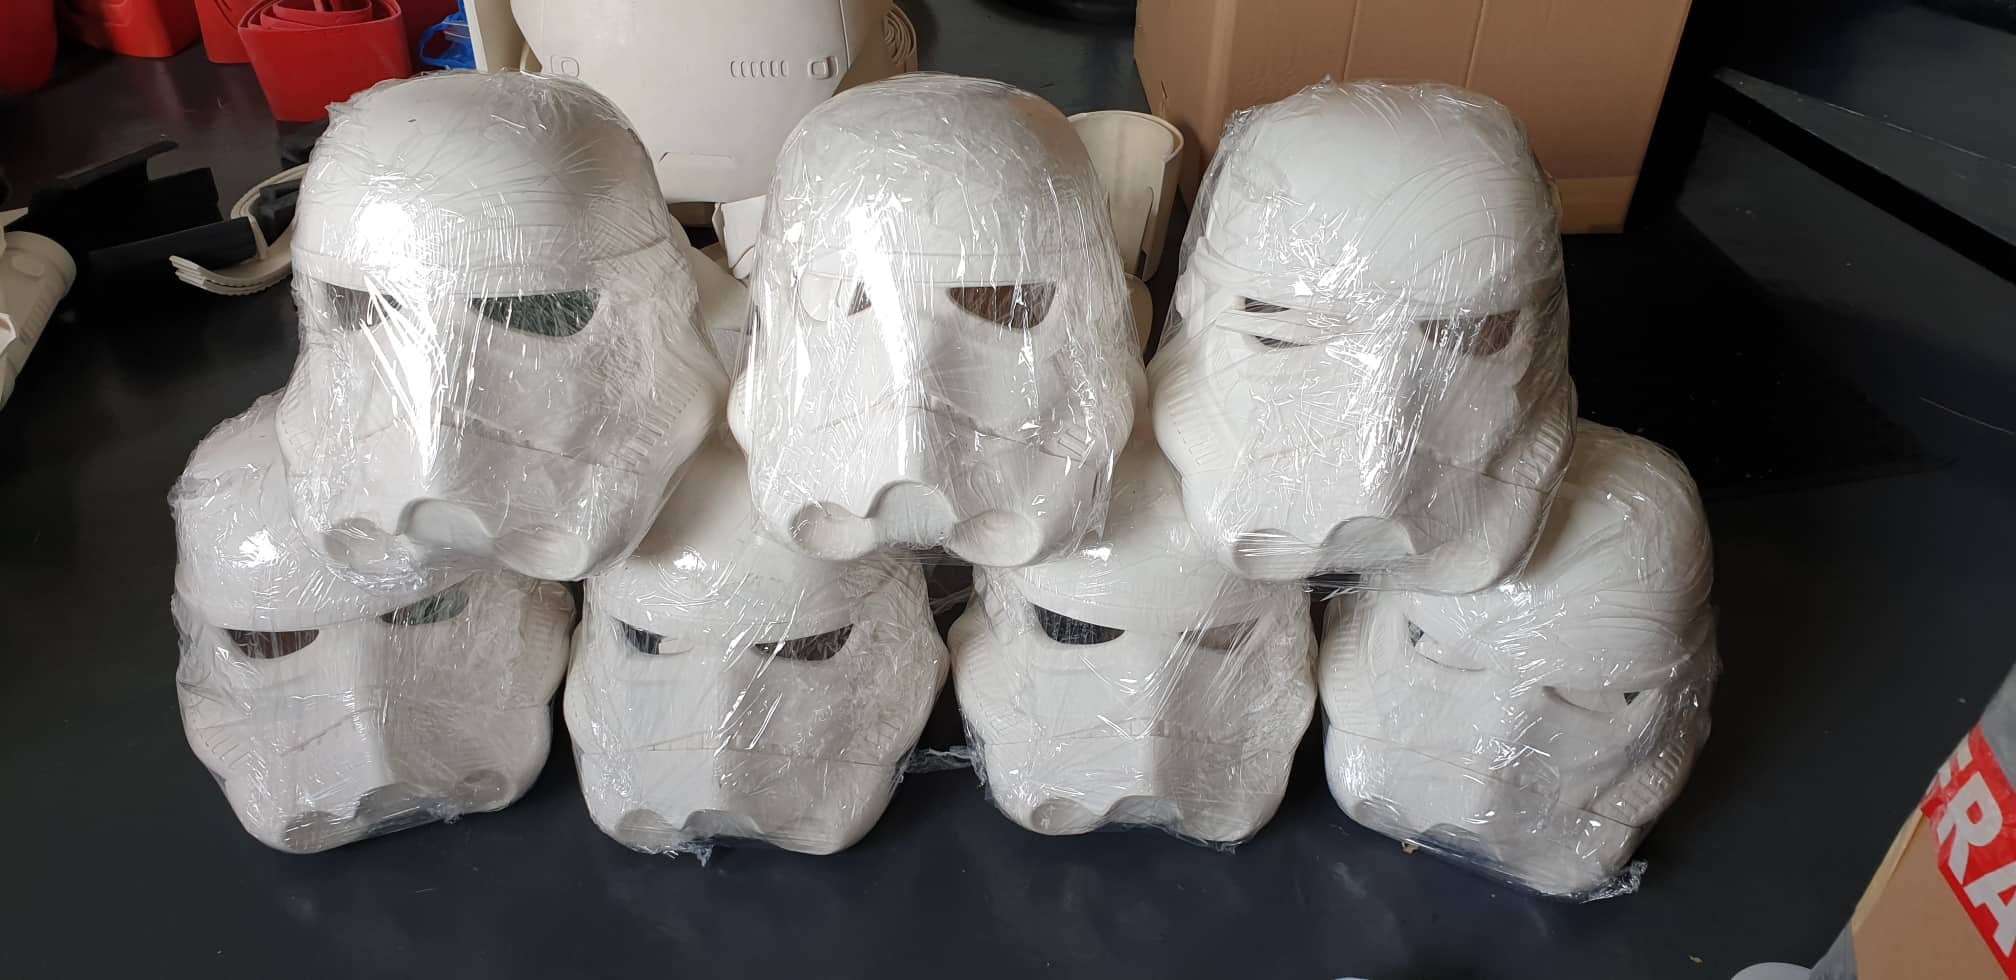
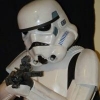
Hey party people, Justin "TheRascalKing" R. here. My Anovos ANH-S TK is starting to show some wear and tear after 3 years of trooping in it pretty frequently, and I've decided that it's finally time to start moving towards retiring it. That being said, I'm a stormtrooper through and through (Centurion #396, TK Mentor for SCG, working towards Armorer), so I knew I had to replace it with something else white and shiny. After some research, (at time of writing) it looks like Jim Tripon ("Jimmiroquai") from the Philippines' kit is the only high quality one currently available (aware of 850AW soon at least). But I liked the idea of flexible fiberglass and I was very impressed with some of his Praetorian Guard suits that SCG members have. Plus, it looked most similar to the material used for the suits I saw on set (recycled from R1 and Solo). I already knew shipping from the Philippines was expensive and group buys were the way to go, so I started reaching out to others in my Garrison to see if we could get something going. Turns out another member was already starting to do the same and we were able to get together a group buy of at least 7 suits! Parts are starting to come off the line and Jim has been great to work with. I'll post back with more when BBB day comes, but I thought I'd start a thread and get things going. I'll do my best to document our build, as there isn't much out there on these suits yet. We have some experienced builders and we plan to loop in some master Clone builders as well, as this almost has more in common with a Clone or FO build in many ways. Teamwork makes the dream work. Planning on getting Jim's undersuit and having it tailored if needbe, and having a friend who has his own paint business spray the kit for me (he mostly does motorcycles, but has sprayed helmets in the past for me and does top notch work). Boots from Imperial Boots, gloves from Endor Finders. Excited to get started and I'll post more soon! Thanks for the interest and keep checking back!

 2 points
 -
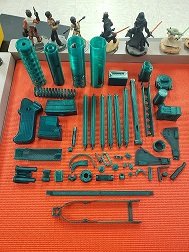
More progress. As well as tidying up the teeth, the first two coats of oxide red primer are on. After a quick wipe down with some isopropyl alcohol, two coats of paint around 10 minutes apart.2 points
-
I trimmed and shaped the shins then glued the front cover strip on So once those cured, I was finally able to do a full suit up Still have to finish up the shins (I'm going to follow Cricket's magnetic shin tutorial), attach the sniper knee plate and trim down the tops of the thighs and I think I'm almost ready for approval!!!2 points
-
Ugh, that totally sucks. My neckseal did that to my armor when I threw everything together in the bin after one of my first troops. I was shocked at how much bleed there was, and this was after I'd washed the neckseal a few times. It took wet sanding with 400 grit sandpaper, then moving up to finer grits until I reached a polish level to remove the stains. A lot of time and elbow grease were necessary to eliminate the purple discoloration. In my bin now, I keep all of my black goods in separate old white pillowcases just to be on the safe side. Good luck!2 points
-
As a few of you may know, I semi-retired, sold my house and bought a new 5th wheel to hit the road! Finally got my "TK man-cave" organized, but needless to say at 10 ft x 8 ft. it's tiny! While it's probably what most might would definitely consider TK overkill, it makes me happy so I thought I'd share a few pics.1 point
-
So here it is! My kit is being packaged and shipped as we speak. In anticipation for my BBB I figured I'd start my build thread. I was able to go to my first troop last weekend at a local comic book fest and see how thing are done. This was a great experience! TK55933 showed me the ropes and I think I'm going to love every minute of this ride! A little background on me. I have always wanted to be a trooper, but I've also always been unable to do this due to my weight. On July 30th of last year I had Gastric Sleeve surgery. This saved my life. Being obese led to high blood pressure, sleep apnea, and pre diabetes. My BMI was 41 and there were nights I didn't think I would wake up. Now I'm a year out from surgery and I've lost 120 pounds and I haven't felt this good since the late 90's! Now that I'm at perfect trooper weight it's time to join the ranks. I set myself a goal during this whole thing. To join the 501st. Today officially starts that goal being a reality! I knew my kit was being made and I got a little excited and couldn't sit still. So I started 3D printing my E-11 Blaster. With a little luck I should be able to post some pics this weekend. I welcome all suggestions and look forward to bombarding all of you with questions! Thank you all for helping make my dream come true!
 1 point
 -
I was just recreating the cover to the user handbook for the Sterling and I thought this would be fun! I am not finished yet. As you can see the sterling needs scope, t-tracks and so forth. But I though y'all would like to see it.1 point
-
Looks great!! Nice work on those cover strips. I found the thighs to be one of the harder parts, yours turned out beautifully! Looks like you've still got some return edge left on your biceps and forearms, at least on the elbow-side—you may find that uncomfortable, return edges can dig into the skin something nasty. Ultimately it is your call—the "thicker armour" does look cool—but many troopers elect to remove most, or even all, of those edges for the sake of mobility and comfort. You certainly don't need any return edge on the "outer" biceps, because the shoulder bells will be covering them anyway. The only return edge that needs to come off for accuracy's sake is the wrist-end of the forearms, which from earlier posts it looks like you have taken care of. I can't quite tell in these recent photos but I'm sure your next round will show em off. Keep it up, trooper!!1 point
-
@justjoseph63 said everything I was going to say. Awesome job! Minor tweaks and you're solid!1 point
-
1 point
-
an honor to help another trooper.1 point
-
K cool. Thank you!1 point
-
Mario, thank you very much brother. It is an honor. Appreciate all of your help and guidance.1 point
-
1 point
-
Wow been a while since my last update. Work and family life has limited my posting of updates to the forum but I have been working in the background on my armor. I’m pretty active on Facebook with my garrison brothers and sisters who have been point me in the right direction. Let me know if you notice anything glaring before I move on. I will be working on the snipper knee and thigh ammo this week and gathering elastic and nylon. lost the photos of the completed pieces due to a phone failure so I’ll be retaking those and uploading them soonest. Thanks. Keith Biceps Thighs and forearms Forearms little test fit of the thighs1 point
-
Yeah!! Looking great. Easy pass Greg!!! Hoping to look your approval soon and Just a little steps and minor adjustments for higher levels.1 point
-
Great build trooper!!1 point
-
We have our yearly convention coming up at the end of June and I'm always looking to build something new for the public to see and as many of us down under won't get the opportunity to get to see Galaxy's Edge I thought it could be nice to replicate a few thigs we've seen so far. 709th legion banner and also the new Star Wars style aurebesh Coke and bottles. Reference Now this was a bit of work, of course I couldn't find any fonts that exactly matched so I had to photoshop a few different versions together. FO Emblem and helmet weren't an issue as they are standard and I was able to find them on a google search, shame I couldn't find larger versions though as they are just a little soft/pixely on the edges. I prefer using the pull-up banner stands rather than flags as they are self standing and don't require any fixings but I'm thinking I may still do a flag in case there is hanging room. Have a fellow member who works at an Officeworks store who can get printing down at discount which saved some $'s and here it is. Coke reference So the first thing was to replicate the font, again it was a matter of photoshopping a few different fonts as well as using the iconic Coke font. Had to print a couple of pages to get the right size, roughly measuring from computer screen. I was pretty happy how they turned out, not exact but pretty close. Next was to find orbs, half an hour walk around the shops and found some plastic orb solar garden lights roughly the right size, $4 each. Indecently we've never had the Coke round bottles here but did notice while searching they've been a thing at some Christmas's in the US. Next was the tops, no way I could have found these locally so it was time to put the new 3D printer and software to work. Enlarged the images with the girl holding the bottle on screen and roughly sized and designed from there, next printed just under 2 hours each, not exact but I'm pretty happy with them. Painted the orb's with a base silver, once dry added strips of black decal sheet to emulate the dark lines (I gather these are clear and can see the Coke inside). Next cut out the printed wording, added clear tape on top, gave them multiple cuts on the ends to help them bend and applied. Lastly the paint, I used acrylic water based paint, found them really easy to use when weathering my Sandy so used the same principals with them. Once rubbed back and weathered I sealed them with a clear coat so the weathering won't rub off. That done I tried find a box similar, no way I was going to find the exact box and I really didn't want it that big. Happy with a similar box I gave it a light sand and applied a few coats of red enamel, once dry in was on to weathering. While drying I made a couple of bent strips of aluminium, when you take of the lid you can turn it around and with the aluminium strips you can stand the lid up showing the logo. That I made once again merging fonts, printed out on paper, the cut out, traced around those on white decal sheet and then cut out and applied, was a bit of work but nice way to spend a rainy day inside. Also made a base plate for inside the box so I don't have to completely fill the box, covered the plate in chrome finish decal sheet which should help reflect the fake ice I'm waiting to arrive. I've also got some blue EI wire which I may use underneath the fake ice but will have to see how much it shows through before final fitting it. All in all I'm pretty happy the way it all turned out, I wish I'd taken more photos but I was just head down an too busy building. Will update once the fake ice arrives. Got a few more things I am thinking of putting togther but we'll see how the design stages work out, works in my head1 point
-
Looking great there Greg. Can't wait to get you approved.1 point
-
Great to hear that you are considering going HWT, Eriberto! Yes, the CRLs changed a few years ago. The MP40 pouches must be "Leather or leather-like" and can no longer be of the canvas type. Good news/bad news, though... They are available online, but they aren't cheap. Also, you have to order a set, so you are stuck with one extra. (You should be able to sell it pretty quickly either on here or the MEPD site, though). These are about the least expensive sets I've found: eBay If I can be of any help, just let me know via PM!1 point
-
That depends on your height. The original ANH shins were not the same length left and right, with the smaller left shin having the sniper knee plate attached, so you won't really notice the difference. That is unless they are much different in length, not just 10mm or so. I have never handled a WTF kit before so I really don;t know how long they are.1 point
-
EXCELLENT job on that Anovos kit, Greg, and I honestly can't see anything holding you back from basic approval. It's obvious you put a lot of care into this build, and it certainly shows! I am guessing you should have your TK number very shortly, and once you do I would suggest applying for Expert Infantry level with this armor. There are a few small details that will need some adjustments, but nothing you can't handle for sure. Here are a few suggestions when you get ready: 1. For a sharper look, the cover strips should line up as seen in the CRL photo. This can be achieved by some simple strapping adjustments. 2. Your ABS belt could stand to come up a bit. Reference images 3. The inside edges of the Hovi mic tip should be white. (Easy fix)!! Reference images There are a few other small items, but you have done a fantastic job on this armor and I am hoping you will consider taking it to the next level!1 point
-
Can't wait to get our builds started!1 point
-
None of the armor parts from the Disney-era troopers close at the back with velcro. That includes forearms, biceps, shins, and as you'd expect thighs. However, the system used is difficult for us to recreate as it relies on the use of a flexible material but combined with the benefits of injection molding.1 point
-
Mike, regarding helmet, I just realized, that comment was made on the helmet pre-adjustments. If you look, I uploaded a new series of photos. I will put that link here as well. I got that angle as close to it as possible. I couldnt move the one screw, so only that one screw is slightly off center. This right side photo is with the adjustment made to the helmet ear and the bottom photo of the helmet right side as well. Thank you very much.1 point
-
Hi Ardeshir, Thanks for your application for Centurion. Its always great to see someone wanting to take that extra step and make their armor look that much closer to screen accurate. CRL and Centurion Application Requirements All required photos are now in and, after review, we are pleased to welcome you to Centurion! On behalf of the DO team and myself, many congratulations! Other-Armor Fit/Assembly In this area we discuss areas that could benefit from additional improvement. Note that we consider both text (CRL) and pictures (screen caps/reference images) when reviewing submissions and some of the suggested changes are minute and the tiny little details. Just like in your EIB application i will start from the top & work my way down. We touched on it a little in your EIB application but Anovus like to place the ears with the screws vertically when in fact they are on an angle following the trap on the temple. The one on you left side is really close but the right seen stright up & down, nothing a little ambition and some abs paste cant fix. Reference Photos Reference Photo Also watch your alignment when suiting up, Have your fellow Troopers give you a once over or take a look in the mirror to make sure your forearms are in the right positition and it also looks as if your left bicep could come up a bit. Your action photos look better so just something to keep in mind. Reference Photo Other then that I have to say this is a great looking build, I can tell you have taken everyones advice and took all the steps necessary to bring your armor to a whole new level! - congratulations trooper and welcome to the ranks of Centurion! 1 point
-
I will. Thanks!1 point
-
Ok. Here is the initial fitting with just the torso pieces. Not too happy, but it is acceptable for first time on with the brackets and straps. There are no white elastic shoulder straps installed yet as I wanted to see how everything fit. This probably will change the way the armor hangs on me. Questions / findings: This may be a silly question, but how much is the cod piece supposed to "coddle" you? If I pull the armor up so I am, ahem... "supported" the chest piece raises up about 2 or 3 inches and floats above my shoulders. It is comfortable as is right now. The shoulder and back tabs are almost touching. Should I trim? One of my belt snaps easily pops off the ab snap. I think I can remedy this. I used elastic to join the left and right Ab to kidney. I may have to rethink this as the Ab armor sags down slightly, pulling everything out of alignment a bit. I made the elastics a little long just to give me some room. I could shorten the elastics (or replace with webbing) a bit to give a more snug look. The shoulder straps are just held / taped in place. Good angle and such? Damn trooper butt... The shoulder straps will sit flat and even to armor sides when glued.1 point
-
Some photos of the paint work. Almost done! Enviado desde mi SM-G955F mediante Tapatalk1 point
-
I would second all the above. Also if you want check out building with tk1636 on YouTube he has an excellent series of videos with a complete anovos build. I also have an anovos kit and contusion. It's easy with patience and remember almost anything can be fixed if you make a mistake. Sent from my VK815 using Tapatalk1 point
-
6) "Weird Al" Yankovic1 point
-
I heard from ATA today. My new Hero ear pieces, thigh ammo pack and an additional plain ABS sheet (for internal reinforcing strips) will be shipping soon. Excellent service. The thigh piece is the only thing holding me back from applying for Basic level. The Hero ear pieces will let me step towards Centurion level (when I get to it). Once I'm done everything to the SDS armor the only thing holding me back will be the gap between the Ab and kidney armor. I have about 1" to 1 1/4" space. I am hesitant to put in a spacer piece. We'll see. SO, the latest update is: Bracket system and left side strapping installed. I am gluing the single right strap right now, as well as the S snap on the right shoulder. Left forearm finished. These are some comparisons with the basic right one (overlap joints front and back) Some minor glue cleanup to be done. It may look like it cause of the flash, but there is no return edge on the left finished forearm1 point
-
June 29th 2019 - Kingsport, TNROB-CON 2019 Had another great year at one of our local conventions, ROB-CON 2019! Great turnout of 501st, Rebel Legion and Mando Mercs. I love trooping with this group. I also managed to land on the opening page for the local newspaper, the Kingsport Times News! Full article here: Rob-Con Convention 2019 Kingsport Times News1 point
-
Roughly 25mm for the calf closure, 20mm everywhere else on the legs. That said nobody is going to make you drag out a ruler if you're a mm or two off. Uniformity is key1 point
-
Ahhh! Shingate!!! There was some lively debate about the WTF shin pairings here a while back. You might want to check out the discussion before assembly. https://www.whitearmor.net/forum/topic/41887-robs-wtf-anh-stunt-build/?tab=comments#comment-567552 FWIW, I assembled my WTF shin halves as long+long, short+short.1 point
-
I wasn't satisfied that the bolt could not move in the main tube. This kit is near perfect, so why the bolt shouldn't move ? I decided to sold the part that connect the folding stock on the main tube. I used a bi-component glue for metal, not to wrap the main tube with soldering. I used the screws to maintain the parts during the process. Two days after, the result seems to be very strong. I trimmed the parts and I cut the screws so they don't stick in the tube (5mm less). I'm very happy with the result. I took the opportunity to fill the little hole near the "S" selector.1 point
-
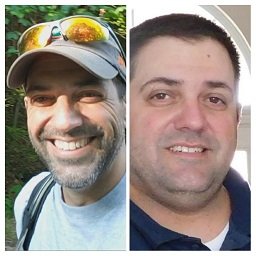
Arthrogryposis Multiplex Congenita(AMC) Conference July 5, 2019 at the Hilton in Norfolk, Virginia.1 point
-
Just a little bit of video from Supanova setup 1/2 hour before the doors open, it was a shame the 25 meter space we had been told we would get was only 19 meters so had leave a bit of the display out, would have loved to expand the Galaxy's Edge section but people still seemed to enjoy it, and the Coke section definitely caught a few out 3.30 am (stupid pain) and day 2 is 6 and 1/2 hours away, going to be a long day.1 point
-
I'm probably in the minority..but I still prefer the TFA lid. Must be the ROTJ TK fan in me- love a nice fat black frown! Sent from my SM-J320FN using Tapatalk1 point