
Leaderboard


Popular Content
Showing content with the highest reputation on 01/09/2018 in all areas
-
To kick off this program, I am offering an incentive for the first one to post in this forum requesting a pre-approval review and then receive basic 501st approval. Once your armor has been reviewed here, submitted to your GML and you receive your official 501st TK I.D., simply sign up for Legion access here at the FISD (link below) then PM me with your information and I will send you a set of flexible hand guards and any hardware you may require to reach Centurion level if you should wish to pursue that. If you already have these items, I will send some cool swag. Good luck, future Troopers! https://www.whitearmor.net/forum/topic/16-501st-trooper-status-requests-include-link-to-your-501st-profile-in-your-request/ --------------------------------------------------CLAIMED-------------------------------------------5 points
-
WHAT THIS PROGRAM IS: A dedicated forum where members can submit their completed stormtrooper costume for peer review prior to formal submission to their GML. Your armor will be reviewed and suggestions made by the FISD Staff and Imperial Attaché team, but detachment members can also provide peer review on any submission. All feedback provided will be specific, constructive, respectful, and helpful. Any feedback that is deemed negative, derogatory, inflammatory, or otherwise offensive will be deleted, and the poster can be subject to account suspension for repeated offenses. You may also be provided suggestions for attaining the rank of EI (Expert Infantry) and Centurion levels should you wish to pursue higher levels of screen accuracy. WHAT THIS PROGRAM IS NOT: This program is not a replacement for the GML approval process, as Detachments are not charted to approve costumes for membership. While a costume that passes Detachment peer review should be in a state to be accepted by a GML, Detachments cannot override a GMLs decision, nor are GMLs bound to accept the ruling of a detachment costume approval. That said, as a general rule the goal is that any costume that passes peer-review approval should be accepted by a 501st GML. WHAT YOU WILL NEED TO SUBMIT: You will need to post up various high quality photos of your armor/accessories on the list below, as well as the basic information listed next to it. We realize that this is more information than normally required for basic approval, but we want you to look your best! Also, please include the name(s) of any approved Trooper(s) who have significantly helped you with your build. Yes, we are asking for more photos and information than are normally needed for basic approval. The reason being is that we feel it gives us a better overall view, and we can catch things that may be missed should the recruit want to move to level 2. PHOTOS: INFORMATION: 1. Front view (arms down) 1. First/last name 2. Back view (arms down) 2. Future Garrison/Squad/Outpost or local area 3. Left side (arms raised) 3. Armor maker 4. Right side (arms raised) 4. Helmet maker 5. Ab plate close-up 5. Cloth belt maker 6. Helmet close-up (front, left and right sides) 6. Neck seal maker 7. Detail photos of any parts you have questions on 7. Boot maker 8. Interior strapping (optional) 9. Blaster maker (if applicable 10. Gasket maker (if applicable) 11. Height (optional) 12. weight (optional) 13. TK type (ANH Stunt/Hero. ESB, ROTJ. TFA etc.) 14. Name(s) of any Trooper(s) who significantly helped with your build. INSTRUCTIONS FOR POSTING YOUR REVIEW REQUEST: 1. Go to the Request Pre Approval thread: https://www.whitearmor.net/forum/forum/193-request-tk-pre-approval/ 2. Click on Start New Topic. This is located on the left of the blue "Reply to this Topic" option near the top of the page. 3. In the Title area, post the following information: (Fisd screen name) Requesting Pre Approval Review, followed by the armorer who made your kit in parentheses. Example: MegaTrooper123 Requesting Pre Approval Review (Anovos) 4. Post all required photos/information (as listed above). HELPFUL LINKS: 1. Where can I get in touch with my GML/Garrison? http://www.501st.com/members/displayUnits.php 2. Where can I choose my official TK number? http://www.501st.com/members/search_avail_ids.php 3. How do I join the 501st Legion? http://www.501st.com/members/join_form.php 4. What do I do once I am approved? https://www.whitearmor.net/forum/topic/16-501st-trooper-status-requests-include-link-to-your-501st-profile-in-your-request/ ____________________________________________________________________________________________________________________ WHY WE ARE DOING THIS: Not every garrison has responsive GMLs, and even those that do are not always experts in the stormtrooper costumes. Costume peer review provides members with a supplemental feedback on items that need to be fixed prior to approval, as well as other feedback that will help the overall fit and finish. Catching errors earlier will result in increased confidence a build will pass GML review and thus save GMLs time. It will also provide GMLs insight in to a sounding board beyond the GML peer review area on the 501st boards. Additionally it provides non-GML forum members the opportunity to learn about and gain experience in the costume judging process. This is valuable because it can provide people considering being a GML real-world experience before accepting the role, and provides GCOs a potential pool of people experienced in costume judging who may not have yet served as a GML. ADDITIONAL INFO: 1. Any feedback that is negative, derogatory, inflammatory, or otherwise offensive should be reported immediately, will be deleted, and the poster may be subject to account suspension for repeated offenses. 2. Feedback should follow the same format that Deployment Officers use, e.g. for each item to fix they will be marked as “must fix”, “should fix”, “could fix”. 3. “Approval” only covers base 501st acceptance (aka L1). Expert Infantryman (L2) and Centurion (L3) standards can be cited only for “could fix” items and are never “must fix”. 4. For GMLs, this is intended to catch errors early to make your lives easier. This is not a replacement for what you do. Additionally, since detachments can't approve costumes, there is no concern that a Detachment will override a GML decision. 5. For GCOs, an advantage is that a 501st member in their garrison can gain experience in the costume review part of being a GML before they take on the role officially, and this may also for their Garrison provide an outlet for people considering being a GML, and a pool of experienced members should they need to fill that role. 6. For FB users, other TK Facebook pages can offer advice on their site that may or may not be correct. FISD is the official Detachment run by experienced 501st costume approvers the world over, and this is a service we can provide prospective and current 501st members that a FB group cannot.3 points
-
Second round of filler, first had a few air pockets. Sanded up to 320, will let it dry some more and then sand 400- 800 followed by polishing.3 points
-
All that confidence I was feeling before kinda slipped away this morning as I was painting the stripes. I know I can get this done but wow, it's hard. I'm sure I could become quite good at this after, say, 20-30 helmets. My OCD is getting the best of me this morning. That's ok. I'm learning. One thing is for sure, I'm gonna be good at clean ups by the time this is done. First, I measured the length of the stripes, 22mm, on the stickers I removed. I also measured the distance from the bottom of the sticker, 7mm. The stripes on the stickers have a somewhat square end so I decided to tape the top and bottom as a guide. I made sure the spacing was correct. I penciled in the 12 lines I needed to paint. And...clean up in aisle 7. Some aren't too bad. Some need a bunch of work. It's just the first pass. Getting this done before Thursday is going to be tight.2 points
-
Thanks Dan. I have just applied now.2 points
-
This is going to be a very helpful program to many of the new recruits. I can't wait to see who the first participant will be!! Everyone have some fun with this and remember we are troopers helping troopers!2 points
-
Been busy with work and haven't been able to post any updates. Now in the painting and weathering stage for many of the parts. Hand brushed the harder to reach areas Had some mesh to add First coats Stock assembled Scope glued onto the rail2 points
-
I got my blaster kit today and thought I'd share it's progress during the build. Will try my best considering my work schedule, but I'm sure it won't take me too long since I'll need it to eventually go for Centurion. I'm not sure if he has a website for the kits, other than eBay. But you can check out his demo video here: https://www.youtube.com/watch?v=QJbuJFXcrrM&t=14s The online instructions for the building of this kit is found here: https://www.dropbox.com/s/snajmo4wxtklq9w/UBER BLASTER KIT INSTRUCTIONS.pdf?dl=0 For tools, I have pliers, exacto knife, metal needle files, gorilla brand super glue, and varying grits of sandpaper. I first looked over everything once I got it back home and out of the box. The receiver section isn't shown because i had already started the assembly before thinking of taking pictures. lol The two sections joined and the supports in the bolt channel removed and sanded down. While i waited for the glue time to dry, I spent some time on some parts in the next steps. Cleaned up the mag well and release button and set them aside for now. I then started to clean up the other barrel section, making sure i hit the inside areas the best i could. Since I am going to include the electronics I needed to sand out the inside of the barrel itself so the LED assembly can be installed inside as easily as possible. Testing with the LED holders until they slide through completely. Before attaching the barrel section, I noticed the tab had broken off during shipping. It was an easy fix to glue back in place before joining the two parts together. Sitting them to the side to let the glue dry before removing the tabs with pliers and an exacto knife. For me the pliers worked well enough on their own and the knife was used to scrape off any excess glue or plastic bits from the tabs and from the 3D printing. Give it a quick sanding to smooth out the edges from joining the sections together and to begin smoothing out the surface the best I can. I never worked with 3D printed items before but it definitely requires a lot of sanding for each part to get a somewhat smooth and uniform surface. I will most likely do the best I can and hit it with a coat of primer before paint to hopefully fill in some of the imperfections of the surface.1 point
-
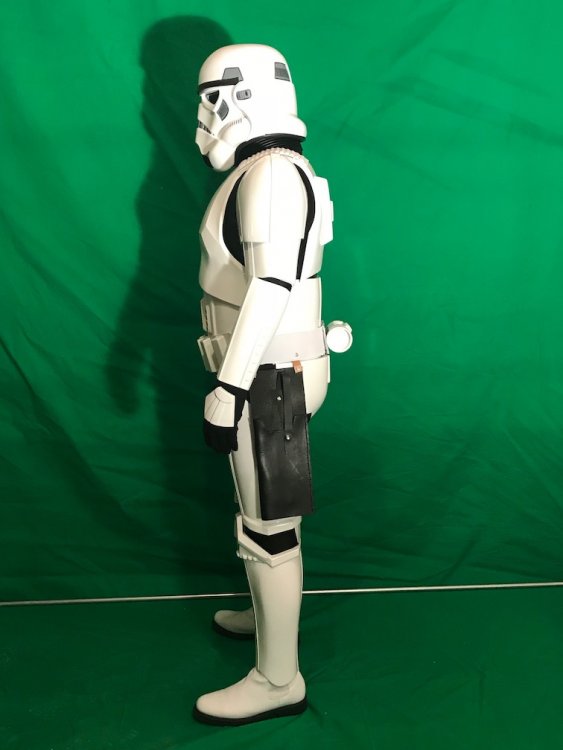
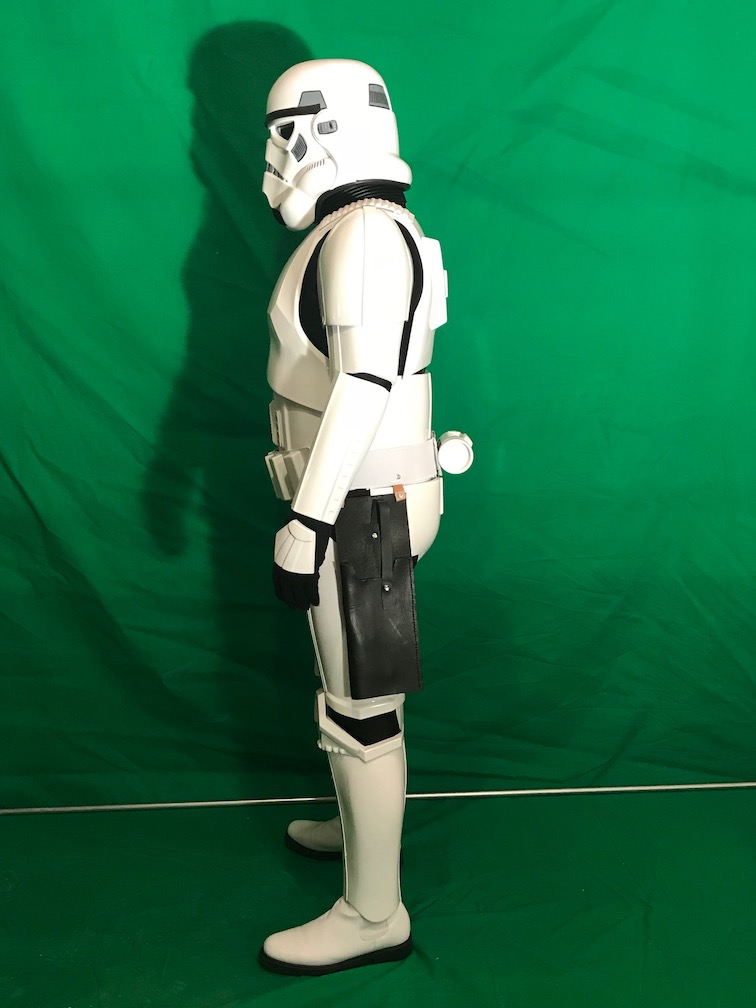
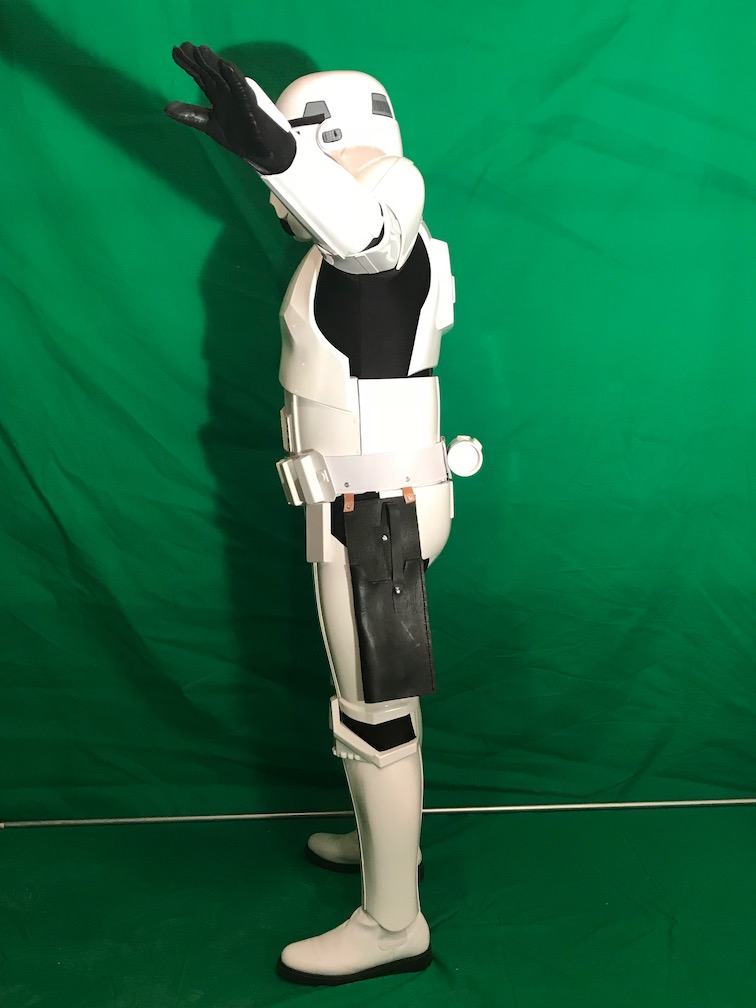
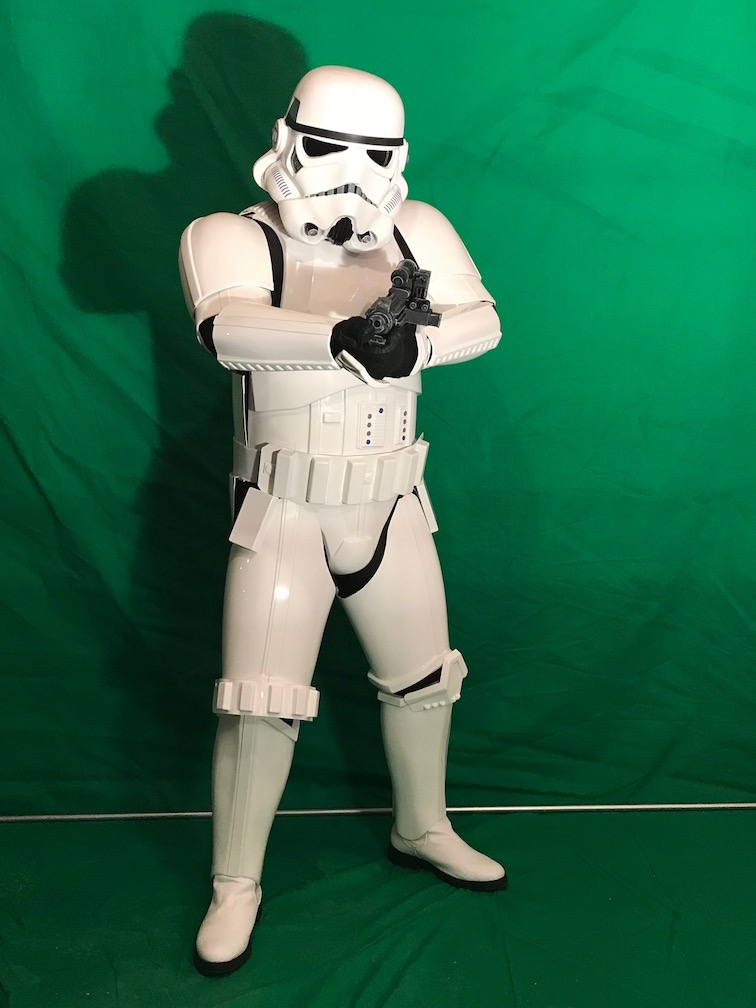
Name: Rowan Read Height: 5'8" Weight: 144 lbs FISD Name: zebedee Legion ID#: 12111 Profile Page: 501st Profile Garrison: UK Garrison Build Information Armor Maker: Anovos Helmet Maker: Anovos Boots: Imperial Boots Gloves: Imperial Boots Electronics: ICOM + Aker Neck Seal: Anovos Blaster: 3D Printed Build Thread: UKG Build thread1 point
-
Great job!!!!! Mark (AP)1 point
-
Not sure about this one. The CRL doesn't mention brass, and the latest approved Centurion submission had a nickel plated, not brass, cod rivet.1 point
-
Yes, I don’t miss the frustration of putting on my sniper knee plate- awesome job! If you like, you can fill the underside using white silicone to fill that space. ( to smooth it out you can use a damp finger [spit or water - take your pick]) Sent from my iPhone using Tapatalk Pro1 point
-
Excellent work Sean1 point
-
Looking really good Mike. My thighs are different sizes too. Weirdos, huh? Your sniper knee looks really good. That was, perhaps, the hardest and most frustrating part of my build. Great work.1 point
-
Sean! Nice work! Sent from my iPhone using Tapatalk1 point
-
Nice Work Sean!1 point
-
If you are having issues with your bicep armour slipping down, look up a tutorial for Han Hooks. They can help with that. ukswrath makes them in one of his build threads, and they are approvable up through Centurion if you decide to take it that far.1 point
-
That looks awesome!! Nice work! Who needs stencils? Oh wait... I do. Sent from my iPhone using Tapatalk1 point
-
I posted this information to my Garrisons web page. Its a great idea.1 point
-
Looking good Anthony. You have done a fine job building this set of armor. Go get that TK number!1 point
-
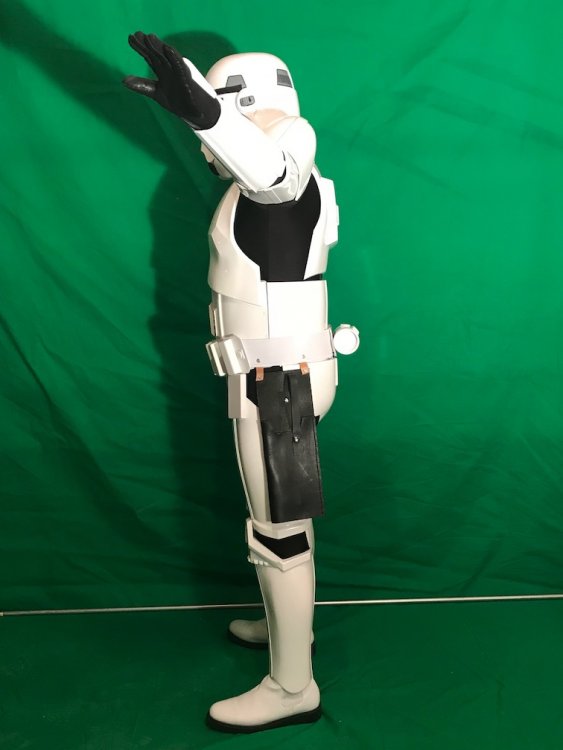
Your armor looks great. Do you have your bicep armor secured in any way to your shoulder bells? I only ask because it looks like it might be slipping down on your arm which is not a basic approval problem, but could cause pinching and arm movement issues. Great work trooper!1 point
-
Thanks bro! Those sniper plates don’t fit! Lol...but I love it! Thank you for the constant encouragement! I’m almost there! Sent from my iPhone using Tapatalk1 point
-
Looking good so far, Anthony! Please take a moment to look over the required photo/information list here, https://www.whitearmor.net/forum/topic/43831-tk-pre-approval-program-overview/ and we will be better able to help you. If you are having trouble posting photos, let me know via PM. Thanks!!1 point
-
Having trouble posting pictures. I have all the pictures asked from the very helpful post one of the members directed my towards before. Everyone has been so helpful. Going to try leaving a link with the pictures below.

 1 point
 -
Hi Rowan, we will be with you shortly, thank you for your patience1 point
-
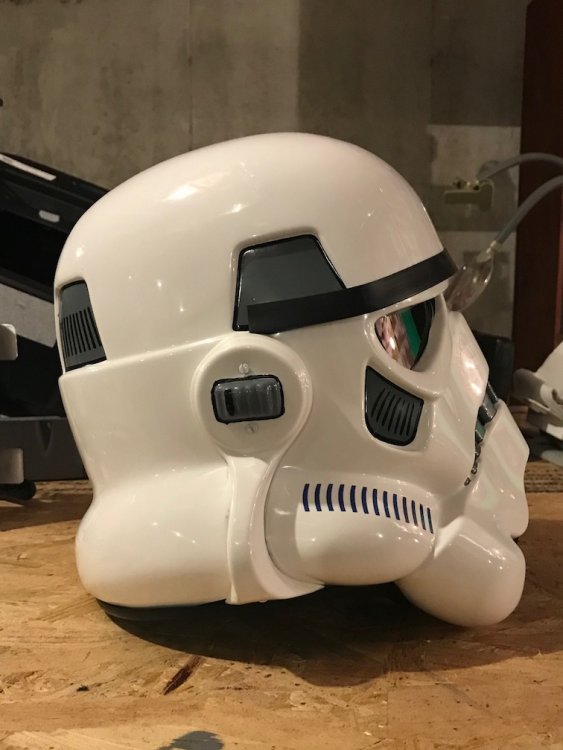
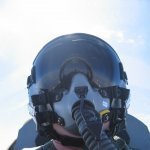
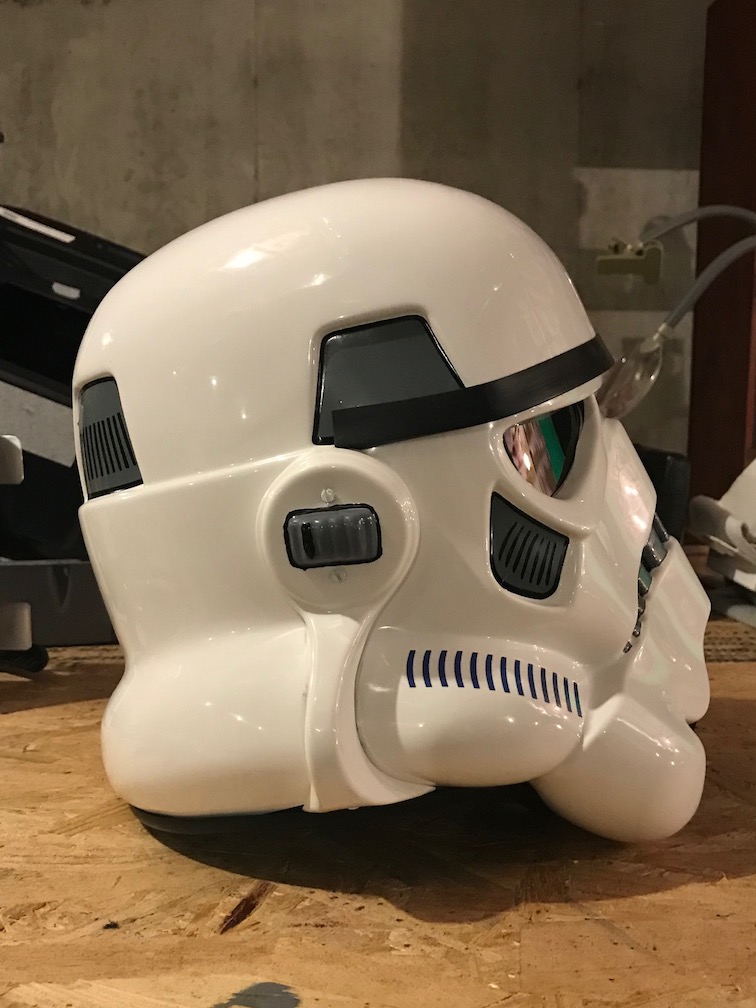
The funny part... or not ! Add the speaker system (from Ukswrath !), fans, inside padding, lens...1 point
-
1 point
-
More work tonight. 1st tube of E6000...I feel like I’m getting somewhere!1 point
-
Looking good!1 point
-
I haven't been able to do much in the last few days. I did get the knee plate on though. I cut a little plywood block and glued it on at just the right angle to push it away. I'll paint it white later. Also got the back of the thighs glued together.1 point
-
This will be a great resource for people! I remember a few weeks ago when I submitted my initial photos to my GML and I was sweating it pretty hard. This would have made it a little less nerve wracking.1 point
-
This will be extremely helpful for the applicants and the GMLs, and will probably also encourage more people to go EIB and Centurion. Hopefully you'll see my thread here, soon.1 point
-
Well said1 point
-
FISD is pleased to announce the addition of a new area in the Advanced Tactics forum dedicated to those ready to submit for basic 501st TK approval. This section will allow future Troopers the opportunity to submit photos of their completed build to be reviewed by the Staff, Imperial Attaches and others in preparation for forwarding it to their GML for approval. Any and all advice/suggestions given will be specific, constructive, helpful and respectful. Please note that this program will NOT take the place of your local GML, as Detachments are not chartered for costume approval and can not override a GMLs decision, but is instead a peer review program designed to help you look your best and offer guidance and positive feedback. You will have the opportunity to ask questions about your completed armor, weapons (if applicable), accessories, etc. and get accurate information from the experts here at the FISD.. the definitive home of TKs worldwide. For more information on this program, you can find the following: TK Pre-Approval Forum Area: https://www.whitearmor.net/forum/forum/193-request-tk-pre-approval/ TK Pre-Approval Overview: TK Pre-Approval Requests: https://www.whitearmor.net/forum/forum/193-request-tk-pre-approval/1 point
-
Excellent!1 point
-
I've painted the first layer of grey. I started cleaning up the black and found some places still a little tacky so that will have to wait until tomorrow. I will go over the lines with a very thin brush tomorrow to straighten everything out. Overall, I am pretty happy with how this is turning out. I think I might have these two done by my troop on Thursday. After that I will pull the cheek and brow stickers off and paint those. My final troop of the month is on the 21st so I should have time to get it all done for that.1 point
-
I modified my butt armor and cod plate just like yoshix... Sent from my iPhone using Tapatalk1 point
-
Can’t wait to see how it turns out. Sent from my iPhone using Tapatalk1 point
-
Wohoo! The force is strong with this one1 point
-
You are a truly dedicated trooper, Sean. Sent from my iPhone using Tapatalk1 point
-
I blame Greg and Daniel. Peer pressure. I just couldn't take it any more. I can't believe I let you two talk me into this. Something I've been thinking about for a while now. Yup. Painting time! The stickers come off easily enough but now I'm committed. First one. And the second one. A little clean up with a toothpick when this dries and the grey goes on. I guess I'll need to keep these for reference when I hand paint the stripes with no stencils. I just hope I can get this done before my troop on Thursday.1 point
-
1 point
-
Look a similar design to The Last Jedi Although TLJ had lights1 point
-
I modeled a lot of stuff now and I know how much of a pain it is by only going after reference pictures. I have recently finished the young Boba helmet from the animated series and that took me about a week. As for your idea about the yoke being an extra inner chest plate... that is actually not a bad idea. It would add stability as well. I might do that.
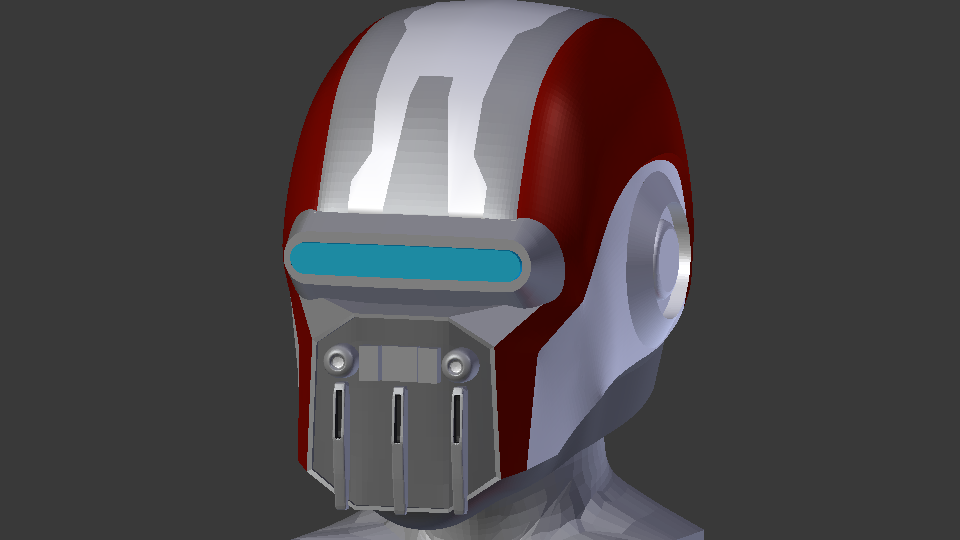 1 point
 -
Home stretch and completion post! Starting with the fit of the electronic components Battery fit test Once everything fit, the trigger group was glued in place. I started gluing on the t-tracks that I painted with a rubberized undercoat paint. The pistol grip soon followed. I'm using a 2 part plastic epoxy for these parts since it will support the rest of the blaster and will need to hold up to the use. While i sat the body aside, I began to work on the counter and rail mounts. First attaching the mounts to the rail and then glued on the counter. After attaching the rail to the body, I began fitting the coils. Instead of using the supplied plastic coils, I had some wire from my chainmail project that was the same thickness and already coiled. Took a bit of time to bend the ends to shape but overall a secure enough fit that I decided not to use glue. Added on a few layers of paint and done. Glued the hex screws in place and weathered Finally I attached the stock and completed the build. (will add numbers when I can get a TK number)1 point
-
Progress has been slower during the week due to work, but I've still worked on it little by little each day. The d-ring assembly is easy and I didn't experience any problems with it. Filled in several gaps with the modeling putty, then installed the d-ring assembly Quick coat of primer My next set of parts was for the folding stock. I didn't think to take photos of them during the sanding and assembly of the stock pieces, but it only required some slight sanding to fit. Filled in gaps with putty, then primed and sanded smooth again. The parts got a wash and then painted the next day once they were dry. I gave several light coats, letting each coat dry before applying another. The list of remaining parts is getting smaller now. Sanding down the scope parts, trigger group, pistol grip, and power cells. The grip and scope parts didn't give me any issues. Printed out the scope reticles provided in the instructions, then laminated them. When sanding down the two halves of the trigger group, the two small plastic posts broke. The ones within the lettering for the selector switch. unable to find the pieces themselves, I made new ones using a toothpick of all things. sanding down the post to shape, cutting off a piece, then gluing in place. Once dry I sanded it down flush. I chose not to use primer so the lettering wouldn't be filled in and decided to go straight for paint after cleaning the parts to remove any remaining dust. I also opted to carve/sand out the recess for the selector switch. I will also paint that area silver, as per instructions and reference pics. Next up was the power cells. These are the last parts needed to be glued to the main body before I can paint it. These were trickier to sand smooth. I had to make use of the files to get into some of the tighter spaces, but didn't spend too much time on those areas since they won't be seen. For the caps, I had one of the posts break off, again, as soon as i used my exacto to trim off some excess plastic. The small piece was quickly lost in time and space; so I made a new one using the same toothpick as before. Once it was dry and sanded how I wanted it, it got a coat of primer and another light sanding. Removed any primer from the area on the magazine well and then glued on the power cells. The instructions are unclear to an exact location so I used difference reference pictures to put it in a general area. Not letting the 'support beam' edge hang over, keeping distance from the main body so it doesn't interfere with the scope rail, and still allow access to the magazine release pin/button. Assembly of the Hengstler counter Final parts added and hit with some paint before spraying1 point
-
Well after I posted I decided to switch over to the electronics. Took a few hours to do as I tried to follow along with the videos and make sure I didn't mess anything up. Thankfully everything worked as it was suppose to. Pew Set to stun Back to the build. I started today by cleaning up the holes in the barrel shroud. Some of them came out oddly shaped from the printing so unless I made them even larger it was impossible to get them perfectly round. I started sanding by hand but wrapping some sanding paper around a drill bit made quick work of what was turning into a tedious process. I installed the magazine well onto the side of the receiver then moved onto the magazine itself. The magazine latch assembled pretty easily. I made sure to reinforce the inside since you're bending the plastic when you install or remove it from the well. It snaps in quite securely which is nice. Moving onto the sights; I ran into a bit of a mishap when the front cover broke in two while removed the plastic filler. I sanded down all the parts before gluing them back together. The front sight post is an easy enough piece to glue on. The instructions mention using a dremel to cut a groove in the bottom sides to match the actual prop. Since I dont have a dremel i used my exacto and some files to get the same affect. I placed some sandpaper against the shroud and slowly sanded the sight cover to create the same curve for a smoother fit before gluing in place. The rear sight was also a rather easy assembly. Much of the time spent on each step is sanding and getting the plastic as smooth as possible. When removing the filler from the bottom its easy to mistake the small post as part of the plastic to remove. This is needed when gluing on top of the receiver. Having the file set really is coming in handy and made it nice and easy to clean up the grooves and make the edges look more crisp. The flip sight needed to be sanded down quite a bit in order to fit. I made sure to align the edges with the small circles on each side; normally where a pin or screw would be to allow you to flip between the two sight apertures. As I glued it into place i made sure to try and align it with the front sight before the glue set. Usually only giving me a few seconds at most before it wants to stay in place. Sanded down the two guards and the small post on the opposite side and installed those in place. For the guards I used the same technique to sand the mating surface to the same curve of the receiver/barrel before I glued in place. Gives a nice, flush finish. I gathered up the next handful of parts to begin sanding: end cap and ring, release clip, bolt, and muzzle tip. The end caps took quite a bit of work. The notch in the receiver end was much smaller than the one on the ring. My flat file was pretty close to a perfect match and made it easy to measure when the notch was the size it needed to be. It still took some fine tuning to get the ring to fit onto the end. I managed to get it to a snug fit before gluing in place. I also filed down some of the material in the "J" sections which are used to lock on the end cap. I wanted to give the tabs more plastic to catch on since it will be under heavier spring pressure when pulling the bolt back. Mostly when showing off how cool your blaster is. Once the glue had dried for the ring, I installed the clip on the small flat cut out, making sure it was straight before the glue set. The bolt was a bit tricky to fit in place as well. The two "rails" inside the receiver are a bit of a pain to reach once you glue the sections together. In hindsight I should have sanded it all down first. Oh well. I still managed to roll up some sand paper and get my fingers in the cut outs and sand along the inner areas. Sanding along the back side of the bolt was also needed. Once it could slide in place I dropped the spring in behind it. Gave the inside of the cap a quick sand to remove the small bits of excess plastic and smooth the surface. Slide on and then turn to install. The spring pushes it back into the hooked area. Since I already test fitted the LEDs, I next installed the muzzle tip. Using a round file to open the holes on the back side, until they matched the ones in the cover. This is to make it easier to install the two hex screws. (after paint)1 point
-
Another tip, if you feel the fore arms are too long once assembled, trim out all of the return edge at the elbow end as well as the wrist end. It gives a touch more movement at the elbow joint and is screen accurate. Sent from my iPad using Tapatalk1 point
-
Traditionally the arm's are 15mm coverstrips. Meaning each half is trimmed to 7.5mm. Make sense? Sometimes people need to go wider because you have to get your hand through opening at wrist. Which all return edge is removed from. For the rest of armor coverstrips. thighs front and back and front of shins are 20mm and back of shins are 25mm coverstrips glued only to outside half of shin in back. Hope this helps.1 point


.thumb.jpg.a76e0f48e0bb54184765760e710c5f96.jpg)


.thumb.jpg.fe734c2874fe147a5789e833ad00772e.jpg)


