Leaderboard


Popular Content
Showing content with the highest reputation on 08/14/2020 in all areas
-
Received mine today3 points
-
I plan to get basic ASAP prior to getting the blaster and then taking all required photos to post to EIB application and adding the blaster once it arrives.3 points
-
Hey everyone! Today I want to introduce a kinda different WIP. Realistic Commander Pyre I dont know yet, if this will ever be CRL ready, but I still want to do it. After doing a damn nice Captain Phasma last year, I need a chrome dome for myself. There is actually a „deeper“ meaning behind that project. I mean, a freakin gold chrome Stormtrooper is damn cool on its own. But when I found out, that Mr. Liam McIntyte voiced him, I NEEDED to do that costume. I’m a huge fan of Liam’s work, his role in Spartacus in particular. When we first back in 2013 and I had the luck to talk to him for like 30 minutes behind the stage. He told me there how much he’d love to do something for Star Wars. Which happened and I am really happy for him. Liam is definetly one of the nicest celebrities I ever met, he is super down to earth and just an amazing human being. And when I contacted him, if he’d like to see the costume project, he was amazed and wanted to see it. And well. He supports it with video messages. Like. WHAAAAT! In all seriousness, I’m hyped, super happy and super motivated to get this costume done. I used a Phoenix Props TFA style helmet as a base, got it painted in gloss black and got it gold chromed in the UK. The problem I have is mixed ref. In the animated series, Pyre has black bands around the helmet, but theres no black brow present (also not at the normal TFA TKs) . The realistic HASBRO figure has NO black brow and NO black bands. So thats kinda .. mixed. If necessary for CRL, I'll need to get it chromed again, but for now, I'll leave it like that. I actually like it with the black details as it gives more contrast. There's also a YouTube video of the making, including Liams message. I have an ANOVOS pauldron in red, but need it in black. Either I find someone, who's willing to trade or sell, or Im going to paint the red in black. Further, I have an old BETA Anovos First Order TK armor set. Pyre is technically a generic TFA TK, although there are some minor changes, like 2 bars at both lower leg armor. All the best Dino2 points
-
Hello all, Just a quick introduction. My name is Cley and I live in Western Canada. Currently having Dave's Darkside Depot create a set of ANH stunt trooper armor for me so I can take the next steps to join this prestigious group. Looking forward to my own BBB day so I can show off my new armor to you all. I already have most of my soft parts ordered (boots from Imperial Boots and an undersuit from Amazon). Just looking for a good neckseal. Found a few on Etsy but making sure they conform before I buy. Anyway, hello all. Looking forward to meeting you all and becoming an active member.2 points
-
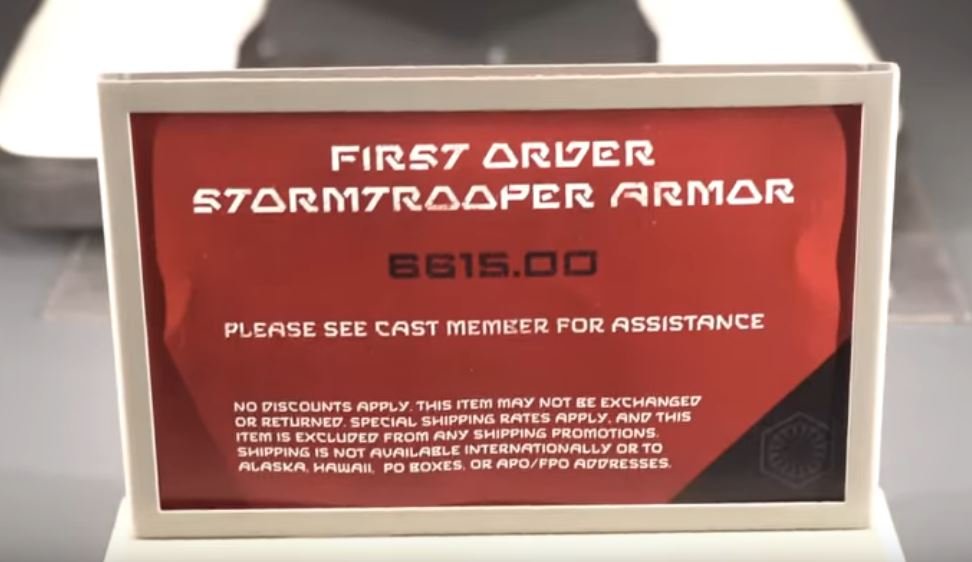
Good afternoon! I signed up a few weeks ago and have been intently studying the forum ever since. I started posting stuff last night, but just realized that I neglected to introduce myself (I think I overlooked this because I had just introduced myself to my local garrison). Anyways, my name is Jason and I'm from Stafford, Virginia. It's hard to define exactly what Star Wars means to me. All I can say is that one of my earliest childhood memories is my family searching for a theater that was playing The Empire Strikes Back. The funny thing is that I was only 3 1/2 years old when that happened and the memory is still vivid to me 40 years later. From that day forward, Star Wars has always been huge to me. Let's put it this way, when I visited Galaxy's Edge at Disney World last year I almost cried. I decided to go about this adventure slightly different from most. When we were at Disney, my wife saw some FOTK armor that was selling for $6,615 (see pic, LOL). We both nearly collapsed. Of course, I searched around and discovered that this was the exception not the rule. But, since I'm a huge fan of episodes 4-6, Rogue One, and the Mandalorian, I started looking around for TK armor from one of these rather than the First Order. However, because I like to make things difficult on myself, I decided to 3d Print my first TK. So far, I love how it's turning out, but will need some community help along the way (please see my recent post at https://www.whitearmor.net/forum/topic/49811-need-help-with-thighs/?tab=comments#comment-697082 ). Well that's a lot of info. I look forward to speaking with and meeting as many people as possible.
 2 points
 -
You can get basic approval without a blaster, it's an option2 points
-
So, you got a set of ROTK vacuum formed armor and you are not impressed with the level of detail for the hand guards… Not to worry, I got you covered. If you are not familiar with a product called Sentra, Sentra is a brand name for PVC foam board. This is not craft foam, it is rigid like a PVC plastic pipe; however, it is also a thermal forming plastic. This means you can heat it with a heat gun and shape it. There are numerous videos on YouTube on how to work with Sentra. In addition to being a 501 member, I am also a member of the Mandalorian Mercs Costume Club (MMCC) and we use Sentra extensively in making Mandalorian armor. There are a lot of other bands of PVC foam board and it is available at most plastic supply stores as well as thicker version at most Home Depots and Lowes but this thickness is normally ¾” thick and too thick for use as armor. I recommend 3mm (1/8”) for this application. Here is a 12” x 12” x 1/8” thick PVC board available on Amazon for $6.99, this is more than enough to make the hand guards. https://www.amazon.com/Expanded-PVC-Sheet-Lightweight-Displays/dp/B079NWDW8F/ref=sr_1_3?dchild=1&keywords=3mm+pvc+foam+board&qid=1597343357&sr=8-3 I have made a template for this tutorial that is scaled and will print out properly on an 8.5” x 11” sheet of paper., look for the template as a pdf attached to this thread. Other things you will need: · Xacto knife · Ruler · 220 grit sandpaper · CA glue (Super glue) · Glazing putty or Bondo · Primer paint · White Gloss spray paint or whatever you used on your TK If you have any of these other things, it will make the process easier: · Band saw · Belt Sander · Foredom or a Dremel with a 1/8” (#194) carving bit Let’s look at some reference images of the ROTK handguard. And these are some images of my Jimmiroquai ROTK handguards. Things to note are the curves where the hand guard conform to the back of the hand. There is a sharp angle portion between the index finger and thumb knuckles. First you will need to print out the template and cut out the parts. You can just cut out one top and one bottom section if you want and just mirror them on the Sentra. Once you have the templates, make sure they will fit your hand, make any alterations on the template as needed. Next, trace the templates on the Sentra with a pencil. Now you can cut the Sentra in half and tape the two haves together to render two of both parts (the main part and the top part. Once the parts are taped together, cut the two parts out with a band saw or use the ruler and Xacto knife. You should now have 4 parts. I transfer the bend line and alignment lines to all parts. Note that the top part is oversized. This is because you will need that extra material when you bend the parts. Next, sand the top parts. Once they are glued on to the main part, it will be harder to sand the sides of the top part. Next, use a hot air gun or hair dryer to heat up the main part along the bend line. Be careful to not overheat and cause the Sentra to curl, shrink, or burn. Wearing some work gloves and using a spare board and a flat surface, bend the Sentra on the line at about a 30-40 degree angle. Next, apply CA glue to the underside of the top part and align it on the main part and clamp or tape it in place. Note, because we have not bent the top part it will protrude over the angled section on the main part. Next, remove the clamps and tape and gently heat the handguard along the back edge on the top and bottom then gently curve this section to the handguard conform to the back side of the hand. Next, gently heat the top part that overhangs the angled section and using a spare board, bend the top part to conform to the main angled part and hold in place till it is cooled and set. Next, gently pry the two angled parts open enough for you to apply some CA glue then clamp and let cure. Next, trim the top part so that it matches the main part then sand the handguards with the 220 grit sandpaper. I choose to round all the sharp angles since the screen used had guards are rounded. Next, using the Foredom or Dremel, carefully hollow out your indention on the font of the handguard. Since this part is not 6mm thick, just shoot for center and only go about 1/8” deep. If you don’t have either a Foredom or Dremel, it is possible to do this with a 1/8” drill bit and an Xacto knife but it will be difficult to make it look good. Just take your time. Next, use the sandpaper and Xacto knife to clean up the indention. Next, use the glazing putty or Bondo to fill anything that needs filling such as the separation between the main part and the top part or any imperfections you may have caused with the clamps or tools. Next, lightly sand and blend the filler then prime the hand guards. Next paint the handguards. Once they are cured, you can apply Velcro to the back side and mount them on your gloves. I hope you found this tutorial helpful. ROTK handguards.pdf2 points
-
Getting so close to finishing my TK build. E-11 is supposed to ship by the weekend. It’s getting down to the wire and my fingers are crossed and anxiety level on high...lol2 points
-
I saw that one too. I actually really liked their helmet and was originally going to buy that file. The only issue I had was they didn't seem willing to work with me on correcting a few small things. That's not a huge issue though, I'm just some random dude hitting them up asking them to change something they probably worked pretty hard on. They have some awesome models in their store; the b-wing helmet is phenomenal, but their prices were a little steep. Jeff, I love the 300x300x400 build volume, but I'm already looking at picking up a CR-10 Max or a CR-10 S5 around Christmas. As much as I love this printer, I love the idea of printing out my ab armor without slicing it into 4 parts even more. What's cool though, is right now I have a Mando helmet (my next build) printing off in one piece, and next week I'll be printing off a Phase 2 Clone helmet for my Commander Bly build. The clone helmets are huge, but still fit on the build plate. For the second part of your post, when I saw that the ammo boxes are supposed to be separate, I also caught the detail on the top of the two boxes. I reached out to my favorite designer again (akira-yuming) and they shot this over to me in less than a hour. I can't recommend them enough. So, progress slowed a little after the great helmet debacle of 2020. But, I was able to find an accurate vocoder and have started working with the designer of my helmet file on a few minor changes. The helmet I posted earlier is probably going to find a new life as a Jeddah Sandtrooper. So, as much as it pained me to do so... It's back to urban camouflage. However, now that I've grown used to these long 2-3 day prints, printing a new helmet doesn't phase me too much. Especially now that I understand how to do it in one piece. I needed to get going on this project, so I printed the chest armor off in a few different pieces. While I felt this made the most sense, I really don't like "welding" the pieces back together. Additionally, filling the seam isn't much fun. If you look down in the lower left corner of my print bed, I created some alignment pins to help me get this thing perfect, but I ended up tossing them. Also, if you look closely, you can see that I have the entire chest printing in one shot here. I have the right side sitting directly behind the left. I think this was a 48-60 hour print. For this print, I should have kept the chest together, and just cut off the sides. This would have allowed me to fit it at a 45 on my print bed. While the print worked out, a person should not situate big prints like I did. The Y axis is the most "jerky." I think I got lucky, especially since I'm printing at 180mm/sec. This would have been a better slice. Also, when you separate shells, this automatically separates the shoulder strap slots. I totally forgot to take a picture of the chest armor covered with Bondo, so here's a sub: Really, it was almost identical to this. As always, I sprayed the chest with my favorite gold paint, which seemed to work perfect on the seam, but for some reason, I kept getting these small cracks, no matter what I did. If you look at the bottom right where I sanded through the paint, and directly in the center, you can see what I'm talking about. Then, I remembered a video by Nikko Industries https://youtu.be/PcAd0kxbI4I where he discussed using Alex Flex spackling on flexible filament (TPU). Unfortunately, neither HD or Lowes had any, but on a whim I put some Alex Flex caulk on the cracks and it worked like a miracle. I also got the side "extenders" (not sure what they're called) sprayed in gold. On these, I didn't use Bondo. This was sort of a trial to see how the filler primer would work at getting out the print lines. I would only advise doing this on flat surfaces that aren't as highly visible, but in the end, they turned out great. Yes, I got a "booger" up by the pectoral, but the cracks were immediately eliminated. Really happy how this turned out. Here's the chest and extenders together: I think it's good, when I can see the reflection of my basement in the pic. Finally, since I mentioned it earlier, here's Mando just getting started. I needed to do something since I'm done printing my TK armor. Also, I threw on a mirror for the print bed. I heard great things, but I didn't want to try anything new until I was done printing out everything else. Take care!2 points
-
Small update for today. Belt Boxes: Got the molds for the front boxes finished and cast the parts. Reasonably happy with these. I cast Chicago screws into the white pieces so they there will be a strong mechanical connection through the black spacers and into the belt.2 points
-
Final reveal: As you can see, my helmet is more of an "inspired by" piece than a near exact replica of the original. Here are some more shots: This was a really fun project and an excellent learning experience. I'm thinking of a scout or AT AT next but maybe I'll try out another TK/TD. Thanks for following along. If anyone has any questions I'd be happy to answer them as best I can2 points
-
Yep, we are down to only 12 spots left to become a part of FISD history... to be one of the original 1000! Who knew lo these many years ago that we would have so many dedicated troopers who would take the time to bring their armor to the next level of screen accuracy! For those who have already been approved, and those about to step up and set themselves apart, I salute you!2 points
-
I am not sure where to post this, but I am starting a Captain Cardinal Build, since the Black Series figure is coming out in September. Since the current pictures do not show his boots or blaster, the new figure will make it possible to complete the build and hopefully get a CRL approved. At this time, i have a KB Props TFA almost complete (personal kit). I am going to modify it and use an Anovos TFA Helmet. I have on that has some finish issues, so it will be a prime candidate for repainting. I will only be able to take this so far, until i get my hands on a figure, but there are things I can start on and post some of the reference photos and book excerpts that contribute to the details of the armor.1 point
-
Hi there. I’m new here, but not to costuming, I have a 501st approved (UK Garrison) TD and am currently building the Remnant Incinerator Trooper from the Mandalorian. I have received my R1TK kit from 850 Armor Works, and am printing a Nico Henderson lid. I am also printing the flamethrower and backpack. I have ordered the following to finish off the parts list: - Boots from Crowprops; - Gloves from Endor Finders; and - Undersuit and knee gaskets from Darkside Closet. Any tips or advice would be greatly received and is there likely to be a CRL available in the near future? I am following the R1TK CRL at the moment.1 point
-
Hey there troopers, I was thrilled to receive a package yesterday, (a MBB: medium, brown box), generously sent to me by the team at RS Prop Masters. What an honour. :-) So, I did a little unboxing as it’s been a long time in the making. And, I was not disappointed. More updates and a full build thread to follow. [emoji1303] Sent from my iPhone using Tapatalk1 point
-
Hello All, New to these forums. As with most, trying to get into the 501st. Still a ways to go. I've built a legacy TK already (Anovos), though I need a proper blaster still. Presently working on my First Order TK (KB). My Anovos Tk on the right.
 1 point
 -
Hi guys!, This is TK-26590 reporting from the Spanish Garrison!, I'm officially a ANH Stormtrooper! I just got approved and I'm so excited to start being part of this great organization that is the 501st legion. Looking forward to start trooping quite soon1 point
-
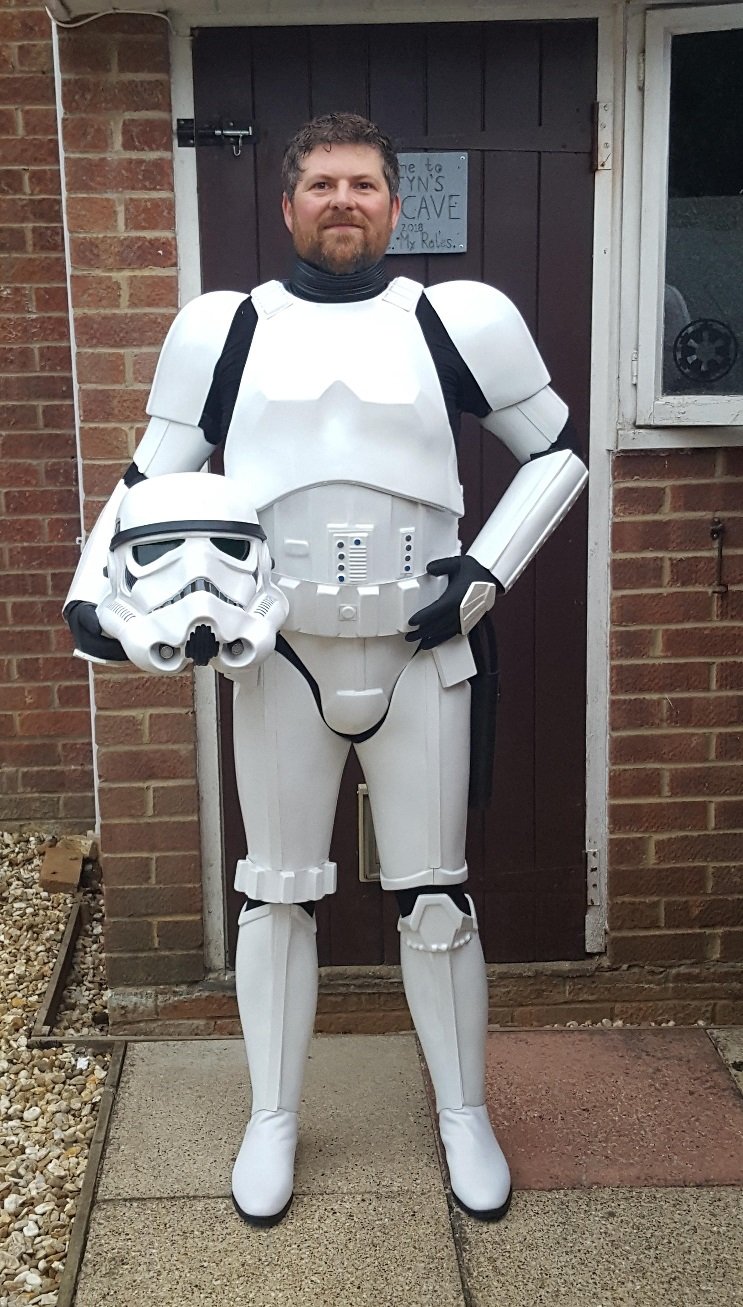
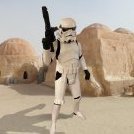
Wow...I have finally done it! My name is Martyn Scully (Mar2D2) from Northamptonshire, England and I can now say that I am a proud member of the 501st Legion UK Garrison. This has been a dream come true for me. Like most troopers on here, I have wanted to be a Stormtrooper since I can remember and wanted to be part of the elite group known as the 501st Legion, "Bad Guys Doing Good"!! for the last 5 years. Here is my Story: As a life long fan of Star Wars, I have always wanted to own a full set of Stormtrooper armour from the original films. They are so iconic that even non star wars fans (BooooHisssss..) can recognise what a Stormtrooper is. "Not so long ago, in a Galaxy not so far away......" It was at my nephews 5th Birthday party that three members of the 501st UKG (2x TK's & 1x Crew) accepted the invitation to make his dreams come true as a massive star wars fan himself. A day that we (his family and friends) would never forget. At the time of his 5th Birthday my nephew was receiving chemo therapy treatment for Leukaemia. My nephews name is Ryan Scully and on the day was made an Honorary Stormtrooper for his dedication to the Empire. Through his own bravery, his determination, love and support from family, friends, doctors, nurses, the kindness of charities (such as the ones the 501st support), the 501st UK Garrison and many other positive aspects within his life (the list goes on). We can now lovingly say, with open hearts "Thank you" as Ryan has beaten this awful disease, fully recovered and is Cancer free. Ryan will be 10 this year which 5 years ago we couldn't even think that far ahead. The 501st is what has inspired me to want give back and share the same hopes and joys to others fighting their own or loved ones personal nightmares. Now some tips and things I have learned during "my journey to the Dark side": 1. The best form of reference when creating your costume is the Movies themselves. It's easy to follow other build threads in the forums. We all make mistakes, so don't allow someones error to also become yours. 2. Measure Twice (5, 6, 10) times before cutting. 3. Listen to advice from others who have already made this journey. Ask any questions, no matter how small or silly you may think they are (Troopers helping Troopers) there is so much great advice, builds and ideas within these forums, so take your time, read and learn from others who came before you. 4. With family, work and other personal commitments, you may struggle to find the time you want to work on your costume. this is fine! as i was once told "don't rush, it's a marathon and not a sprint". There is probably a lot more I could say, but i have waffled on enough for now!! I really look forward to meeting you all in the future (if and when COVID-19 allows) and to serve the Empire for the greater Good. Long live the Empire, with unquestioned Loyalty! Cheers, Martyn Scully. (TK17210) (Mar2D2).
 1 point
 -
Hello fellow troopers, I am TK 36770 and I was recently approved AHH Stunt Trooper! I am stationed with Garrison Titan in Washington St. I have been a life long Star Wars fan my entire life. Some of my favorite Star Wars memories growing up was when my stepdad would grab me from school and take me to see the prequel movies on opening days. I have been wanting to join the Legion as a trooper and finally got permission from my commanding officer (wife) to pull the trigger and begin the process of joining. I am very excited to be apart of this community and participating in some troops once Covid settles down.1 point
-
Being a Star Wars Fan from the beginning on, as child there were no costumes or anything like that. Like all the other kids, I played with the figures we had these days. As I grew older, toys were sold, so my collection of figures and vehicels. Just my snowspeeder stayed. At the Begin of 2020 I finally bought my first Helmet. A Black Series Rogue One, as I was stunned by the Film. It didn´take long that I decided to become a Stormtrooper. A dream since I was a kid. So I ordered a R1 Kit from 850 Armor Works. In the meantime I registered to this forum, where I found plenty of Infos in the WIPs. I made contact to T-Jay, who provided me his completion Kit for the E11 Blaster, which I wanted to build as I waited for BBB. Time went by, I finished the Blaster and the armor arrived right on time. BBB had come Now the adventure could begin. I costumized the helmet to be screen accurate and began working on the armor. Always following the CRLs and Level 3 Requirements. I never worked with ABS before, but found it very easy. My deadline was set to the 4th of May. You know why After some setbacks with painting the bucket, this goal was reached. Yeah, and it was Corona who ruined everything. But I think, I´m not alone with that. Knowing there would´nt be official events taking place, on Fathersday here in germany, I made my own. I patroled the whole day in my driveway. People driving by were excited to see a real Stormtrooper. Many stpped and took pictures. Even the local Police asked for a foto. A so called " Cocktail Taxi" also stopped and offered me a free cocktail of my choice in exchange with a selfie. That was a fun day, which made me even more wanting to become a member of the 501st. And here I am.1 point
-
I've used JB weld on a few cracks and it's pretty solid, also sandable. I would try to grind a V into the crack to give something for the JB weld to hold on too. I just find the JB weld holds better than a fibreglass fix.1 point
-
I think you will find once your handplates are glued on they will look better and bend a little to conform to the hands. I can get in a medium but went large so I can wear cotton liners inside, does get pretty sweaty in rubber gloves1 point
-
This is the video I watched that made me curious about flexible filament https://youtu.be/96mIEBRZvNY Rigid, yet flexible. Of course it's out of stock, but I definitely intend on picking some up once it comes back. The only issue with the flexible stuff is it's difficult to smooth and paint. If I'm able to get some, I'll try it out and post some pics.1 point
-
Andrew, Thanks for asking, I neglected to add this to my post. Initially, I tossed around the idea of using fiberglass/ resin on the inside of pieces that rub a lot, but decided that I would only do it to pieces that flex. I'm more than likely going to do this with the abs and when I do, I'll post the pics. One of the issues often encountered with 3d printed armor is when people decrease their infill percentage or outline/ perimeter shells in order to lighten the print or make it go faster. For mine, I left the infill at 20% and kept the perimeter shells set at 2, but I've also increased outer shells to 3 for a few pieces. This makes the armor a little thicker than typical, and basically gives the outer shells more surface to "cook" together. While these are fairly common settings, I'm laying down the plastic a lot hotter that typical. This really helps with layer bonding since I'm still running the .4mm nozzle with a .2 layer height. In my first post I talked about the different settings/ combinations I've tried. By far, the worst prints came from the 1mm nozzle, but I'm probably going to step up to a .6 for my Mando chest piece, it just comes down to trying different settings until I find the one that works best. Also, I'm starting to find that filament brands all act differently. With the Inland brand, I haven't had any issues unless I lower the temp, or go too big with the nozzle. Temp swings of even 5 degrees have screwed up my prints, and make the parts susceptible to the issues you mentioned. Ultimately, I'll watch the non-fiberglassed parts and adjust as needed. Thanks again!1 point
-
My first build: TFA FOTK. So I'm doing this thing. Kit arrived March 2020. Then, as everyone is painfully aware, things happened. Also, looming fear of messing something up, but I'm just going to DO THE THING. I apologize in advance that I may not be posting regularly. I have a short stay-cation in August before I'm working full time and simultaneously helping my 3rd grader get through online schooling (NBD, right?). I am leaning heavily on the supply list from this post: I will update this post with additional supplies and links as I go. Supply list (updated as I go) --------------------------------------------------------------------- ABS Armor kit: https://850armorworks.com/First-Order-c36176027 Dremel 1-1/4 in. Rotary Tool Carbide Cutting wheel for plastics: https://www.homedepot.com/p/Dremel-1-1-4-in-Rotary-Tool-Carbide-Cutting-Shaping-Wheel-for-Use-on-Woods-Fiberglass-Plastics-and-Laminates-543/202315728 3M sanding sheets - Pro Grade Precision 400, 100, 60 Grit: https://www.homedepot.com/p/3M-Pro-Grade-Precision-9-in-x-11-in-400-Grit-X-Fine-Advanced-Sanding-Sheets-4-Pack-26400PGP-4/205415931 The old N95 masks I had in storage because 2020 is the worst I'm starting with the helmet. I will make it a goal to do some video, but cutting and sanding ABS is not kind to cameras or cell phones. Ok, a little afraid again but DOING THE THING!!1 point
-
Dont be afraid! I was hesitant about my first cuts too, big ol expensive kit with a lot of parts is intimidating I know. Just take it slow and steady, theres no rush. Theres lots of experienced troopers here to help you out and lots of resources here to check your work on I'm new too and I'm starting the beginnings of my FOTK as well. If you're not sure about cutting something, do research or ask. I just remember this rule: It's easy to fix something if you dont trim enough, its a lot harder to fix once you trim too much. So take your time, you got this!1 point
-
Jeff, Thanks again for the feedback. It just dawned on me that you made the 11B3OB4's ROTK Build thread. I think I've referenced that thread more than any other; thanks for the awesome resource. I'll talk about the shoulder straps in a minute. The third pic you referenced is indeed the trapezoids that go on top of those boxes. The designer sent it to me as a separate file to see what I thought. Here's a pic of the two sliced together. For the chest and back, when I inserted this pic, I noted that the "shoulder strap slots" automatically gets separated. So, I printed them separate from the chest and back. These are the trapezoids you talked about, I just didn't know what to call them. I keep going back and forth on whether I should have printed them on the chest and back instead, but I feel that I made the right decision because this eliminates the possibility of a misprint on the smaller detail parts, especially since there's a cavity underneath. When I attach them I'll probably regret it, but I'll be crossing that bridge this weekend. You can see it attached in this Meshmixer pic. Here's the golden trapezoids and shoulder straps after wet-sanding. When I started sanding last night, I realized that the paint wasn't 100% cured, so I decided to hold off for another day. However, after wet sanding the slightly "soft" paint, these got real smooth. I really don't want any more paint issues, the helmet broke my heart. So, here's an idea I had after I saw the silicone shoulder straps on Jeff's 11B3OB4's ROTK Build thread, "can I make flexible shoulder straps with my 3D Printer? I've heard about how good flexible filament is for armor prints, but I've been nervous about printing with it because you really need to get the slicer dialed in. Plus TPU comes in various forms, so it's kind of important to test different products to see what works best for your application. Initially, I picked up some Inland TPU from Microcenter, because I wanted to make the rear portion of my ab armor with it, but after running a test print, I laughed pretty good at what came out. https://imgur.com/H9FwHaT I chose the Hovi Mic Tip as my test because it was the smallest piece I had and was only a 45 minute print. They look innocent enough But they're very flexible. I could never make armor with this brand. The Zyltec filament Nikko Industries uses is pretty good for these applications because it's somewhat rigid. With mine, I may try to make some shoulder straps, but that'll be more of a test than anything else. I guess TPU that's this flexible needs to be dyed rather than painted, so I'm really not confident that they'll match the rest of the armor. I'm very interested in the silicone straps.1 point
-
Belt Boxes: Finished the mold for the pouch cover and cast with resin. After painting to match the armor, will use velcro to attach to the pouch I acquired from Trooperbay.1 point
-
Congrats Trooper! Welcome to the front line!1 point
-
Congratulations Trooper Sent from my SM-G981B using Tapatalk1 point
-
Hi there, Some quick background: I'm Steve, I live outside of Philadelphia Pennsylvania. I'm new to the Star Wars side of costumes but am a self proclaimed cosplay veteran. My mainstay is Beetlejuice but I have an assorted variety of costumes (Mad Max, Colonial Marine from Aliens, Pennywise the Clown to name a few, with a ton more that I have but rarely use). My girlfriend and I usually do a couple cosplay (She does Lydia, Furiosa, Ripley, etc). She is currently working on a Cara Dune costume and bears an eerie resemblance to Gina Carano. I've pointed her towards the correct forums for that costume. I'm a die hard Star Wars fan and have always wanted to do a SW Costume. I'm leaning towards basic Stormtrooper but I'm also looking at a Deathtrooper from Rogue One. The jury is still out on what I want to do. I need to do a bit more research on the Deathtrooper. I poked around the forums here and can obviously tell it's a huge wealth of knowledge. I wish forums like this existed for all costumes!!! My long term goal is to join the local Garrison where I live when life starts to normalize again. I'm not sure if it's permitted but my IG is lydiaandbeetlejuice (All amateur, we strictly do it for fun). If it's not okay I'll edit right away. Thanks for having me! Steve1 point
-
Welcome to the FISD Kevin Sent from my SM-G981B using Tapatalk1 point
-
Wow, nice work Avery, thank you for sharing.1 point
-
Looks really good, Avery! You took a less expensive Ebay bucket kit and made it look amazing! Kudos!1 point
-
This is a great thread Jeff, I have pinned it so we don't lose it.1 point
-
And BBB day was yesterday, probably ten days from order to delivery. Very communicative.1 point
-
Yeah flexseal spray. Didn't go off well.....I will have to address at some point. Eager to work on my armor so it will wait.1 point
-
Very nice work.1 point
-
Still plugging away as I get time. Made a reinforcing brass connection to put the scope back together.1 point
-
Loved the fresh leather smell upon opening the package! They're slightly big, but nothing an insole won't take care of. Thanks Mark!1 point
-
Hi Christin, great to see you have made a start1 point
-
Definitely use an online image host, I also use Imgur. Personally I wouldn't worry about air holes, the FOTK helmets have a large neck opening so you get plenty of air, you can also add a fan or two to help blow across your face and screen to keep it clear1 point
-
Ironically, It arrived today and, since I was in builder withdrawal, I only took photos of the helmet as soon as I had finished spraying after working for 2 hours straight XD Here it is as it stands drying in my garage shop And here it is next to the real deal again It's not perfect but considering this is my first go at a helmet using a poorly made recast kit, I'm happy with it More to come in the next few days or at least after the off gloss white enamel paint dries...1 point
-
Man we are close. We are like 99% of the way there...almost.1 point
-
13 spots remaining . Last approved EIB #987 Paxton "Paxjor91" TK367701 point
-
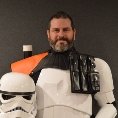
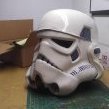
Ok. So I think I've got all the 3D print and slicer info out of the way. I can actually start treating this like a typical build thread, except without the BBB. For the time being, I'll stick with the helmet, because it's the furthest along. It was complete two days ago, but that's when I decided to get stupid. More about that later. The cool thing about the helmet is that even if I were to go in a totally different direction later down the road, I'll always have this helmet on display in my Star Wars Cave. Here's the one thing I wish I would have done different. I really should have either asked the file creator to provide a helmet without a vocoder, or sliced it out before printing. I think I could have either modeled a good one that is "tubular in nature with a visible gap between the outermost section and the helmet," or found another to print or buy. After sanding, primer and paint, I'm proud of how it looks, but not having the gap is starting to drive me crazy. I almost pulled the Dremel out a few nights ago, but my wife spoke some sense into me. Worst case scenario is I print another helmet and take care of this later. Here's the other reason why I'm going to print the helmet as one piece next time. Even though i sliced the helmet perfectly under the brow, the layer that adheres to the bed is typically rough, similar to the chin shot I posted earlier. This makes for a lot of sanding and smoothing just to get everything sitting flush. Overall, I am still happy with how it turned out, but this was the result of almost a week of sanding, filling, and priming. Bondo Glazing and Spot Putty is my friend. I don't think the vacuum formed armor builds require this level of fun, but please correct me if I'm wrong. Fortunately, this stuff is easy to sand, but of course finding cartridges for my respirator is impossible right now. I've been using a cloth dust mask and keeping the fans blowing, but if there's anything that would dissuade someone from trying one of these builds, it's this step. After I got the Bondo somewhat smooth, I went for the filler primer. Again, this step gets repeated several times; putty, sand, primer, repeat. Putty, sand primer, repeat. Eventually, you end up getting a pretty cool urban camouflage effect going: This is also the point where I started cutting out the teeth, tubes, traps and tears. The tears on the back of the helmet is something I refuse to do again. This part almost lead me to throw away the helmet, but I kept trying until I got something reasonable. This picture is bad, but now that the helmet is done, the results are much more presentable, and it definitely passes the "ten foot rule." I finally got the "camouflage" helmet sanded down to around 800 and sprayed one last coat of Filler & Sandable Rustoleum. After a quick sanding, I blasted it with some white primer and got this: Yes, I printed a Darksaber and Baby Yoda. Also, I was not happy with the Hovi Mics in this pic, so I found KamikazePigeon's file on Thingiverse, which I've seen several people on the FISD forums use. The file is found here https://www.thingiverse.com/thing:3510123. These Hovi Tips allow you to add the wire mesh and look great when finished. This next trick is something the paint shop used to do at the luxury motor coach manufacturer I used to work for. I was reminded of it when I watched Bryson Michael RC's 3D Printed Stormtrooper Helmet DIY Build video on YouTube. https://youtu.be/erxzsImux2Q If you can make it through the music he plays throughout the video, right at the 4:35 mark, a gold helmet appears out of nowhere. For the next 2+ minutes he discusses and shows the benefits of using a gold metallic undercoat. At the coach factory, we used to do this under a pearl coat and I was always blown away by the results. Even in a rattle can, the gold flake just seems to flow into any scratches and lines, and seems to work just as well as any filler primer I've tried. Additionally, you can really lay the gold paint thick, and wet-sand it down to 2000 and beyond for a smooth-as-glass finish. I've found that when I do this, the white seems to flow onto the surface, and just looks brilliant. Here's some closeups of my runs: And then the finished gold helmet: I love it. It's almost like a Rogue One version of Captain Pyre. After the gold, like I said, the white just seems to flow. I know that's the second time I've said that, but it's the only word I can think of to describe it. I've got a bad habit of not leaving good enough alone. After a full day of taking pictures such as the one above, posting them to social media, and admiring what no longer resembled a 3D print, I decided that if the first coat looked as good as it did, surely another wouldn't hurt... I was wrong. This isn't the disaster I've been alluding to, but as you can see in the pic, gone is the glistening white, and gone is the "flow" I've been so proud of. The helmet still looks good enough, but if you look closely, the paint has a texture to it, and would require additional wet sanding and polishing to get it back to where it was. I think the issue was that the paint was not fully cured and introducing another layer of wet paint caused a reaction. This also happened during the hot/ humid spell we had in Virginia last month. Since I was letting the paint cure in my garage, I think the humidity became a factor. Since then, I've let pieces dry in the garage for a day, and then after any noxious fumes are gone, I move into my basement to finish curing in a cooler, dryer climate. This seems to have made all the difference, also, I decided that I would add a layer of clear coat to bring back the luster. My next step was to mask up and spray on the Rustoleum Gloss Protective Enamel Smoke Gray for the teeth, traps, and tears. Additionally, I picked up some 16th inch pin-striping tape and began preparing for a very simple layer of Plasti Dip on the brow, vocoder, and neck trim. I didn't even take a picture of the Plasti Dip; I peeled it off just as fast as I sprayed it on. Rather, I went with the Rustoleum Satin Black which actually turned out pretty nice. After I added the Hovi-mic Tips, lens, and outlined the gray with an Extra Fine Point Sharpie Oil Based Paint Pen I was ready for my first Zoom conference. In this pic, I still have blue painter's tape in the tubes. Can anyone tell me if it's OK to touch up the inside of the tube cut-outs with some Testors Model Master French Blue paint? I bought a bottle for my ab armor, but was thinking about brushing a little on the inside of the cut-outs to accentuate the tubes. Here's this pic again. It's where I should have stopped. But again, I can't leave good enough alone. Remember I said something about adding clear coat. And, remember my Bold, Italicized, 16 Point, Red lettering up above? They don't mix... I didn't take a picture, but it looked something like this: So, It's Sunday, 9 August 2020, and I'm back at this: I got the flow back. I also know how to wet-sand, when to clear-coat, and the best way to do the gray and black. But, that stupid Sharpie. Can someone tell me how to draw those outlines straight? I'm done for tonight, but here's what I'm working on now: Good Night!1 point
-
Sure! That came from @The5thHorseman F-11D 3D print build PDF. He is a stickler for accuracy. Trust Germain, you must!1 point
-
It's official. 501st Legion TK31564 reporting for duty. Dune Sea Garrison1 point