Leaderboard


Popular Content
Showing content with the highest reputation on 04/25/2019 in Posts
-
As were yours (just wanted to clarify for him)2 points
-
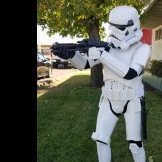
You'll sweat off 2lbs on your first troop2 points
-
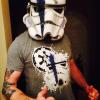
Almost done with this thing2 points
-
I use a small set of hand files for a lot of the sharp corners/details. They're easier to control than a rotary tool. Something like these: https://www.amazon.ca/Titanium-Coated-Diamond-Needle-Metal/dp/B014A17M8C/ref=sr_1_5?crid=3BAI1SKT9QFY1&keywords=micro+file+set&qid=1556202828&s=gateway&sprefix=micro+file%2Caps%2C170&sr=8-52 points
-
Approved: 1) TK - ANH Stunt / L2 2) TK - ANH Hero / L3 3) TK - ESB / L3 4) TK - TFU Commander / L3 5) TK - BF Shocktrooper 6) TD - Sandtrooper 7) TI - Reserve Pilot 8) IC - ANH Bridge Crew Working on: 1) TS - Snowtrooper / 60% 2) TX - Inferno Squad Del Meeko / 55% 3) TI - Rogue One TIE Pilot / 60% 4) TI - 181th TIE Pilot / 20% 5) TI - 181th TIE Pilot Baron Fel / 20% Planing / on paper: 1) CC - Clone Commando (2021 project) Not looking for approval: 1) Rogue Squadron Pilot Baron Fel / 40%2 points
-
I'll back up what Dan's said, keep away if you can. Have a read of that linked thread and go from there. If you have any further questions after that then feel free to ask.2 points
-
OK I'll join in, are you ready lol ANH Stunt TK......................... but.... Am sculpting and working on3D modeling and molds for TB full armour molds 80% complete TK full armour molds 30% complete Tusken mask (complete) combination of vac formed and resin cast parts Fett Helmet mold complete roto cast we make these fully assembled and painted and donate them to the garrison for raffle prizes at con's TFA F-11D resin kits 3D parts printed and preparation under way to make resin casts E-11 resin cast (still compiling original sterling parts) ANH Tie full armour molds under construction AT-AT driver helmet and armour molds under construction so you see, I have no money for making a costume for myself, but there is a team of us working on these and more projects.2 points
-
UPDATE Replacement ATA armor added and approved Sandtrooper added and approved 501st I have with appropriate level clearances. TK - ANH Stunt L3 TK - ANH Hero L3 TK - ESB L3 TK - Heavy Weapons Trooper TK - First Order ID - Officer ANH L3, Lt Tanbris L2, Lt Jir L2, Lt Childsen L2, 2nd Lieutenant L2, Lt Cmdre Praji L2, Lt Treidum L2 ID - Warrant ANH L2, ROTJ L3, Major Hewex L2, TC Joff L2, Col Dyer L2 ID - Line Officer ANH Chief Bast L2, Cmdre Cass L2, Capt Khurgee L2, Adm Motti L2, Gen Tagge L2 DZ - Jawa ANH DZ - Tusken ANH TB - Biker Scout Lancer L2 IC - Crewman ANH L3, ESB L3, ROTJ L3 IC - Mechanical Crew L3 TI - Reserve Pilot IG - Gunner TR - Guard ROTJ IN - Navy Trooper ANH L3, ESB L3, ROTJ L3 IN - Navy Dress Uniform ESB L2, ROTJ L2, Sgt Bean L2 ID - Line Officer - Olive CT - Clone Trooper (Ret) ID - Grand Moff Tarkin ID - Officer Social (Olive) ID - Officer Social (Black) ID - Science Officer TK - Replacement Stormtrooper armor approved TD - Sandtrooper approved2 points
-
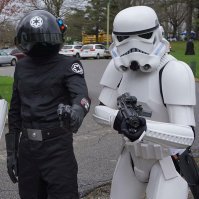
Keeping our beaches safe2 points
-
And now, the big reveal Hot Toys 1/6 scale figure or 501st approved costume? I am so happy with how this turned out. So much work has gone into this, and I still have a few things to change before I can go out trooping in it.2 points
-
My TK adventure started out with with an RS kit on Craigslist (build thread Here) last fall, but it had no helmet. I was totally enamored with the Black Series’ clean lines, and let’s face it - the price. The helmet arrived before the armor, and I got started right away. Many thanks to Parquett and his thread. I have an armor kit on order (pre-order?) from 850 Armorworks. The helmet is more or less finished (is any project ever really finished?). I have wanted to build a *fully* functional bucket for *years*, maybe decades. So I decided to go all out, and arguably ended up with more of a piece of art (albeit functional) than something troopable. I’m not prone to claustrophobia, so who knows, maybe it’ll be just fine. Some things I learned and would do differently next time (why not a next time?): 1. Trim ALL the plastic from the inside. I tried to preserve much of perimeter where the snap connectors attach, but once assembled, the helmet didn’t really fit *perfectly*, and to get perfect results it would have been better to just glue it. Starting with an empty shell would have given quite a bit more room (but my head is small so didn’t matter much). 2. As this was my very beginning, I didn’t have a reserve of scraps to make ABS paste. So I hoarded every little bit, and my batch got contaminated by a tiny speck of black rubber from the vocoder. It turned a lovely shade of primer grey, and then made a lot more work for me filling in the rear speaker hole. (Insert something something power of the Dark Side...) 3. Do the speaker hole first, when everything is disassembled, especially the face. If you need to paint it, you can paint the whole bucket if your paint doesn’t match. I ended up mixing my own acrylic to match the shade, then coating the rear piece with Krylon clear-coat gloss. That added just a *touch* of yellow to the result, but it still matches more or less. I was too stubborn to take the face apart and paint the whole thing. 4. If you want to keep the hideous lenses, remove them while working on your bucket. They scratch super easily. And no, they cannot be heat polished. Or polished at all, as far as I can tell. A headlight restoration kit had no effect. Plexus had no effect. Filling in with wax had no effect. Swearing at it didn’t even make me feel better. And Hasbro, for some reason, does not have replacement lenses. And if you’re going to replace them with different material (recommend), it’s easier to make a template before the last-ditch attempt and heat polishing. 5. I wanted to give the tears/traps a more 3D look by running a groove around the perimeter and filling in with black paint. I think it might be best to leave them as is. I abandoned the attempt on the traps. Here are some pics of the end result (build to follow): Tube stripe and tear detail (and couldn’t find much visual reference for the snout/faceplate gap, so I winged it). Trap detail. Be careful with your Dremel! I also left one vent hole because the back side was a boss for a screw. If you follow advice #1, you should be able to trim all of them: Eye detail, with replacement lens I made. *I have 3 available to anyone BTW!* The first one I cut out was the worst, but looks fine from the outside. I used a bandsaw at work to cut them out on a 12x12” piece of standard TAP Plastics transparent green. After the disaster with the original lens, I wanted to hedge my bets. Turns out the new acrylic is made of normal matter that plays nice. It requires a higher temp to bend, though, and I used two radii to bend - one large (like cookie jar) and one smaller (a jar of jam or something) for the center piece. Vocoder / Hovi tips: Wut: The specs are - Two 12V fans on the rear traps, two 5v fans on the tears and two buried as a sealed outlet to the exhaust stripes (blue tubes) from the respirator. Respirator? Yeah, I kinda geeked out there. But hey, in theory it will protect from a lot of environmental hasards! The filters are easily removable and the default setting will probably be no filters. It should avoid fogging up the lenses too. Mic installed in the respirator, connected to an aviation style portable intercom, which is then connected to the original speaker. The speaker was relocated behind the vocoder (and the rear was filled in with a Tyvek-type material). My roommate says it’s “not unloud”. No special effects at this point. The speaker is only 1/4 watt near as I can tell, and I don’t know if a more powerful speaker would help. The intercom is only supposed to drive headset speakers (though aviation specs are a bit different, at 300/600ohm). Hearing augmentation - two mics installed in each ear bar (if you look closely, the black is drilled out and covered in cloth), going to a mixer, which goes to a cheap pair of noise reduction headphones (with phone mic). If you unplug them from the mixer and plug into your phone (Android anyway), you can have a nice conversation while being acoustically isolated from the outside world. My roommate said he could understand me just fine with the dangling headphone mic. The next thing I want to try, but am limited by funds, would be a visual augmentation system. The Vufine display is the only one I could find that acts as a straight display, is small and affordable. AR would be nice, but I think a workable system would start at $2k. Hook that up to a Raspberry Pi, with a camera designed for the Pi. They make IR passive cameras too. I figure since you can’t really see out of the bucket anyway, covering up one eye wouldn’t matter *too* much, especially if it has a much better wide-field view of the world.1 point
-
Starting a new build for my son's costume. We built his armor from my custom molds and unfortunately he will not have a blaster for Halloween, but with a little luck we will have one completed by Christmas. The Blaster Rifle file is available here: http://www.thingiverse.com/thing:957801/#files. There are 8 print groups and it's a well done model. I did make my own modifications to the files. For example I added the knurling onto the handle as part of the mesh. I'm not sure how this will turn out yet. But I'll let you know when I get to that print group. I am modifying other parts as I go. I am printing with Black ABS with a .4mm tip. 245 C degree Hot End temp and a 75 C degree table temp. As with all 3D printed files, each part needs to be cleaned, smoothed and probably painted to look authentic. Here is his mostly complete costume. Here's my new TEVO Black Widow Large Format Printer which I built. First round of small parts - Print Group A. I had to make some modifications to the sight in order to get it to print. It needs a raft and support structure and although the printer handles the support structure well, the raft I custom built into the file. These have been cleaned up a little and sanded. They still need a little more work, but I will worry about that before I start assembly. For now I am concentrating on Printing. This first round took 18 hours to print. Printed at 100% fill and a fine setting. Group B looks a little rough, but it will clean up well. Printed without support structure 100% fill. I will get it sanded and smoothed just before assembly. And now on to Print Group C. The print head on my printer needs an upgrade to the replaced manufacturer's hot end. So I am going to take this time to refit the machine prior to finishing the next Group. Stay Tuned.1 point
-
For EIB you would need to shim the sides as the gap between the ab and kidney can’t be bigger than 1/2inch and if memory serves you’re already aware of that but other than that there’s nothing more you need to do on the torso for EIB and as i said, for Basic you are good to go1 point
-
Dan and everyone, Thank you for clarifying. When I went to bed last night, I was really feeling encouraged that the end was getting close. I think that suggestions you made above are worth pursuing at some point. I have been following the EIB guidelines as I have been building the whole way through. So, I plan to go for EIB after initial approval. I realize if I don't make some of these corrections suggested now that it might mean some added work and tearup when I do. However, I am really pushing to cross completing my armor and joining your ranks off my to-do / bucket list. I was already heading down the path of the reshaping the neckline, but I did not consider the butt plate. Thank you for the pictures and cut line reference. In the pic, I can see that the FX butt looks a little long compared to picture. I did compare it to ANOVOS kit before separating it from the kidney plate to make sure it was proportional. Do you think that the shoulder tabs on back plate need to be more rounded? If so, that would also pull up the back plate.1 point
-
The big thing to remember is that in general, all of the comments are offered in the spirit of legitimately helping you to have the best armor that you can. We all want you to be one of us, and we are working with you as part of your team to get you across that line.1 point
-
Michael, I have just found your build thread (due to the activity here today) after providing some comments for you on Facebook. You are doing just fine. I feel like your May 17th goal is really quite easily attainable. Just don't get discouraged with it. Anything that slows you down is just a learning experience that will pay off in comfortable skill usage somewhere down the line, so you'll make up the time elsewhere due to what you learn. Be sure to take a look at some Centurion Approval submission threads. The reason that I suggest that is because you will be able to see good examples of what each piece should look like before you begin reshaping or altering your kit. Stay the course, you're doing great.1 point
-
Spot on advise, Daniel. :-) Michael, just to clarify, my suggestions were relating to your comments of the oversize and the alignment. They’re not required changes. :-)1 point
-
There are some good suggestions made but just so it’s clear, FX armor is clear for basic as it is, unless it’s clearly not fitting right on the person (as with any other armor make). For basic approval you don’t need to do any of the suggestions Dan made BUT your kit will definetly look alot more like the movie Troopers if you do, if that’s your thing. I know it’s mine But again, for basic you don’t need to.1 point
-
Hi Michael, Firstly, you’re documenting this well so keep up the good work. I can see that responses are a little thin on the ground at the moment and, to be honest, I would imagine that it’s because many of us are not overly familiar with the FX armour these days. I would put myself in this category so please don’t go cutting your armour just based on the below. To my eye, it looks like you could possibly lose approx an inch from the bottom of the butt plate. This would allow it to come down by that inch, allowing more room for the kidney. The back plate, as you mentioned, is quite oversized. Again, perhaps an inch could be lost from the bottom of it. From the front, I wonder if you could potentially lose and inch or so from the neck and shoulder tabs? This would allow the chest to lift up by an inch and give a little more room over the ab. Otherwise, leaving as it might be okay. Perhaps check with your Garrison’s GML regarding basic approval. :-)1 point
-
Don’t know what you been told but back plate overlap is approvable, what you have there is good to go If it’s a matter of the back plate ”stickning out” at the bottom and your GML calls you on it just use some strapping to the kidney or run straps back to chest, just make sure it goes high enough not to be seen agains the ab/kidney1 point
-
1 point
-
The right screw looks good to me. The left screw looks like it could be counter sunk a little deeper into the ear so that the head of the screw is completely flush against the plastic. I'd say just give it an extra twist or two to secure it a little more, and you should be good to go! Once again, fantastic work on your kit, Fabio! Congrats on the well-deserved EIB, and we'll see you at Centurion!1 point
-
Ok. So going back through my earlier posts here, I see that some of the photos are breaking. The error being "URL signature expired". So I'm going to consider Facebook to not be a good place to host pictures. So I've taken the time to create a google photos album of all the pictures I've already uploaded. I'm going to go through and update all the pictures in previous posts so that they won't expire again (hopefully). So far, I've replaced all the images in the first post. I'll wait a little while to see if it lasts (or if pictures start majorly breaking - not too difficult to update now that I've got the pictures uploaded to another source location), then I'll update the other posts. In other news: As it turns out, sportsball game stadiums don't like it when you wear masks to their events... even when they're Star Wars themed..... so the pressure is off for getting it done before then. I was side-tracked a bit by realizing that my older pictures were starting to break. But I still plan to get the helmet (I should be saying bucket, shouldn't I?) completed next in line. My current pause point is trying to find the size of drill needed for the rivet holes, haha. I've already set the brow trim to length, but I'll make a separate update for that. Cheers!1 point
-
The torso armor straps are comprised of some elastic webbing with two, 1.5" square hook-side (I think Industrial) velcro. The tabs are sewn on. The loop side is adhesive backed and mounts directly to the armor. Hope that helps!1 point
-
I've watched those Dan. A bit painful on the quality, but you look good doing it Dan. LOL! Sent from my 5054N using Tapatalk1 point
-
The ROTJ CRL is due an update, the overlap is part of that as the original suits were all overlap so there was no coverstrip.1 point
-
We're coming into the season now so they should pop up more often. It will need to be an all day troop with one of the staff or events team there, if that's the case and it's not marked as an induction just ask if it can be made into one, they can't always but always worth asking.1 point
-
Personally, I’d say avoid. You can do a lot better for your money with some of the vetted sellers. https://www.whitearmor.net/forum/topic/11538-the-various-types-of-armor-and-where-to-find-them/1 point
-
1 point
-
The good news: A few months and Operation Slimfast was a success. I've lost 30 lbs and went from a 36 to about a 33 inch waist. Before: After: The bad news: While it fits better (and I feel better) I don't think it's enough. Nor is any further weight loss sustainable with my current, somewhat sedimentary, lifestyle. The truth is, it wasn't really that hard to lose the weight that I did but if I slouch off, I'd be hard pressed to fit into my suit. Additionally, the fit is currently pretty snug as in nearly skin tight and I'm pretty sure I should have some wiggle/movement room within as well as the ability to slip some fingers in there to snap in on one side as I'm suiting up. These are all assumptions on my part since this is my first armor but please 'weigh' in (ahem) and correct me if you think I'm off. Conclusion: I've conceded that I think I need to add shims (approx 1/2-3/4 inch) on either side between the kidney and cod joints. I'm fine with doing that and have read up on numerous build threads for how to accomplish this but I do have some questions that I need guidance on. Should I add a shims to the cod or to the kidney? Or does it matter? I'm guessing Kidney but that will extend the bottom notch (the little right angle notch) horizontally about 1/2 inch on either side and is that acceptable or will that make it look strange or out of spec so to speak?1 point
-
Some great threads on adding shims so they are seamless https://www.whitearmor.net/forum/topic/30226-side-shims-on-abkidney-help/ https://www.whitearmor.net/forum/topic/29077-adding-the-kidney-shim-not-bad-but/ https://www.whitearmor.net/forum/topic/30226-side-shims-on-abkidney-help/1 point
-
No cover strips on ROTJ.1 point
-
Sorry for the delay, brother... here you are!! http://www.whitearmor.net/eib/certificates/32568-centurion.png1 point
-
I like it! The plague doctor was my first “real” costume. Most, but not quite all was scratch built....thrift store leather pants, boots and some weird shirt with ruffled sleeves. Not the visible parts. Your steam punk dude is a bit classier. So... I removed and cut the kidney. I won’t know how I feel about that until tomorrow, when the glue is dry. Hmmm...maybe I can use the piece I cut off as a form to make a new return edge... Note to self: NOPE DO NOT PROCEED ABORT ABORT No damage done! *NOT* a good idea, though I know! I’ll just use the piece I cut off as a new return edge. Filled in the holes - ABS/fiberglass backing, ABS goo pressed into the front. Will definitely need to sand and polish. And this is how it matches up with the ab.1 point
-
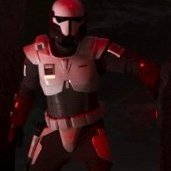
As an approved The Force Unleashed Incinerator trooper, I must do this version as well! I can not wait to figure out all the details for this kit!!!
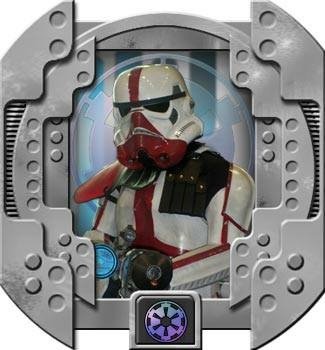 1 point
 -
And quite a few 501st and Merc members1 point
-
Yeah, it seems that Anovos went from one extreme to the other on the frown paint. They used to carry it all the way into the gum line, and now it's too short! I would grab some Humbrol # 5 or Testors # 1138 gray paint at a hobby shop and re-do them all. Hint: Use a quality, soft bristle brush with a fine tip for painting, especially in the small V on the sides.1 point
-
Hi Rob, welcome to FISD! Yeah the frown looks like it could use some more paint. Not a biggie! Enjoy the build!! We'll be here.1 point
-
Good luck on your build. Awesome to hear you are aiming for Centurion! Keep the pics coming.1 point
-
Sorry for the delay, but I am still waiting on Christine's name to be added to the program that produces these. Thanks for your patience!1 point
-
I’m with Neb on the order. However, whatever works best for you, really. Here’s my method. The video is pretty old (before my first troop), but you get the idea. :-)1 point
-
I've got a few helmet kits ready to go. I'm hoping to get the sale thread up this weekend.1 point
-
Any chance of an E-10 body tube, sight bar, and endcap that will accept a milspec buffer tube (for those of us with a "real-steel" stock)??1 point
-
Here’s a thread worth checking out - and welcome back1 point
-
Had another great test fit, I learned a lot. I'll be making some changes as I found some problems. For one the butt plate is too low. Also the shoulder bells need to be higher more flush with the sholder straps. I'm still not happy with the shins. I think my mods helped but I'm looking into some alternative. I really don't want to rebuild them1 point
-
Final version. Considering it's a 3D print, it's fairly sturdy. I've added some weathering and it definitely helps and adds depth to the model.1 point
-
So after a main board replacement and some more troubleshooting it turns out that the printer had a bad wire in the chain that had worn through. The hot end would stop heating every time the printer axis pulled the chain far enough to separate the wire. So....now to make up some time. I've skipped ahead. The sight rail was redesigned to be solid. There is no way a flimsy plastic piece is going to hold up the site. So now I have redesigned it. It mounted well. I also created a trigger shroud that was missing from the model. The only issue I have right now is the rear tube where the spring resides. It's a little thinner than I would like, and if I had to go back I would make it a thicker piece. The solid rail I created adds some strength to it but that's my only issue so far. Two more parts to print and I'm done. It still needs some paint of course. This is just black ABS. So after some flat black paint and a little silver streaking to make it look like worn metal we will be in business.1 point
-
New progress. There are some issues with the model. The Counter module group has major issues. The blaster core front component, not the counter module is not a contiguous piece. As it makes it's way to the letters at the logo the model splits somewhere even though it doesnt show up in the preview. I am going to modify this component and make it work. As far as assembly I have the barrel completed. It still needs some clean up and paint, however what I do have is solid.1 point
-
The knurling turned out great. Needs a little smoothing, but the handle looks lugit. I will probably engrave the letters around the connector hole. Or I may revise the model further to include the letters. The issue being the smoothing. It's hard to work around little letters when smoothing a 3D print.1 point
-
Doing some finish work today. I sanded and smoothed a portion of the barrel and a few other pieces. Print Group D is also complete. This is the handle with the revised Knurled handle grip. I'll take pictures soon. 4 more print groups to go.1 point