

wreakHavoc309
-
Posts
35 -
Joined
-
Last visited
About wreakHavoc309

-
 wreakHavoc309 changed their profile photo
 -
The torso armor straps are comprised of some elastic webbing with two, 1.5" square hook-side (I think Industrial) velcro. The tabs are sewn on. The loop side is adhesive backed and mounts directly to the armor. Hope that helps!
-
Hey yeah the Velcro has held up just fine over the past few years. No issues whatsoever. No need to upgrade at all. A surprise to be sure, but a welcome one. And I was approved with it like that. I’d go with the Velcro if you have it. If you want to upgrade later, you can, but the Velcro is great because of its adjustability. I don’t plan on making any alterations to my suit. And now looking back it seams I never finished this thread... well, let’s see. I got approved, I fixed all the plates, I used a slot and tab system on the shin armor which has held up great... and in the past few years I got a TIE Pilot, Imperial Crewman and a Clone approved... Here are just a few highlights from some past troops: (Look Sir, they put my school in the painting!) Guess I gotta finish up this thread. More later. Sent from my iPad using Tapatalk
-
Okay, so, TEE Leave (term end exams) is a thing and I managed to get about 36 hours leave to go back home. Now home, I have access to my family's workshop. Got back at 2345, so there wasn't too much I could do last night, other than change out the screws on the thermal detonator canister. Found the right sized pan headed screws, painted black, let the paint dry overnight, and then screwed them to the detonator in the morning. I know it's a small thing, but it looks much better now: Alright, so that takes care of that. Belt is now up to EIB standard. Next up, the shins. Is the stuff I'm doing necessary for EIB, no. Honestly, this is just a personal thing, as I did my research and I assembled the shins wrong and so not being able to get a new pair, I've decided I'm redoing these. My perfectionist side is getting the best of me, so this was the next obstacle. First off, I wouldn't recommend doing this. Just do it right the first time. Do research, then when you think you've done enough, you haven't, so do some more. That's what I'm kicking myself about. Anyway, I have to crack these apart. Slight issue is that I didn't use just a cover strip to fasten the parts together- I used strips on both sides and then on the inside I filled in the seam completely with ABS sludge... Pretty much an unbreakable seam... To break this seam, I used a dremel and sanded down the inside seam, digging through the inner strip and the sludge. This was a pain and damaged the inner edges of the shin halves. Then I worked at breaking the outer cover strip off. I worked at this with a flat head screw driver. Since I used MEK to put the strip on, taking it off ruined the finish of the outside of the shin... Oops. I can see why E6000 is preferred as the one seam I did do with E6000 came clean off... It isn't as strong of a bond, but if you mess up, it's an easier and more forgiving fix... So after an hour of work, I got both halves apart. Putting them together hasn't been easy, so I'm doing it in phases. I'm filling the inner seam with ABS sludge in the canal that the dremel dug. Once I get all of the inside, I'll glue the edges of the outside cover strip. Then I'll hit the sniper knee guard and the rear cover strip. Here's how it looks right now: Now it's just waiting for the seam to firm up and then I'll get to the rest of assembling them. There's also the issue of the rear seam... I had to remove the Velcro strips, and the adhesive came off with them... So no more Velcro. I'm considering the elastic and hook method, but I'm also looking at a slot and tab system like what I have on my ab and kidney plates. If anyone has any recommended methods, comment and let me know. And in the meantime I played around with some of the handguards and the elastic and Velcro that were included in the ANOVOS kit... I think I now have an idea for my next suit of armor... Here's a teaser: Sent from my iPad using Tapatalk
-
Awesome stuff kman! Thanks for sharing this info. This is going to make things a whole lot easier. Much appreciated! And Jason, I haven't seen any of the nomex gloves at the PX actually... They just have these cheap Chinese shooting gloves from what I've seen. Way too short and too expensive. Though I do know the nomex gloves are popular among the Sandhurst teams in the brigade. Either way, I got them now. Next question for the gloves is how to attach the armor. I'm not sure how many people keep the elastic strap around the hand to hold the plate on, but I was wondering if it might be just as effective to sew Velcro directly to the glove and cut out the elastic for the hand plates altogether. Anyone done this before? Sent from my iPad using Tapatalk
-
Thanks for all the comments and support guys!! I really appreciate all the helpful advice and tips that you all have given me on my journey to approval! Now that I'm approved, the next step for me is EIB. Right now, I'm trying to set things up for when I finally go on summer leave so I can get to work on fixing some parts of the armor. I've been trying to get a new pair of shins but I haven't heard from any of the guys I contacted, so I'm probably going to have to cut mine apart and rebuild them. They look good on the outside as they are, but I assembled them incorrectly, right inner with left inner and right outer with left outer... So that's on the list of things to do. Otherwise, from what I've been told, I just need to change out the screws on the detonator for EIB. So I'll need to get the right screws for that. I also plan on fixing the hovi mic tips, probably going to make new mesh pieces for that myself, as well as paint the interior white as I don't think ANOVOS did that... In other news though, so I have something to actually show as an update, I picked up a pair of nomex flight gloves. To anyone out there who has an ANOVOS kit, I'd strongly recommend getting some nomex gloves to troop with instead of the gloves the kit comes with. The included gloves are accurate, but once they fill with sweat (which they do very easily) they're really no fun. Get a nomex pair. I got mine off eBay for $9 shipped and everything. They're very comfortable, here's how they look: So, if you need good gloves, get some of those. I'm actually going to get some to go with my Mandalorian merc too as it is. And also, if you have an extra pair of TK shins that you'd be willing to see, or know where to get some in general, I'd really appreciate it if you could let me know. I'm too afraid I'm going to mess up these if I have to redo them. Thanks. Sent from my iPad using Tapatalk
-
TK-15775 from the Empire City Garrison requesting access. Thanks! http://www.501st.com/members/displaymemberdetails.php?userID=21314
-
Yeah, the MPs kinda told me a little about the story, apparently the guy refused to show his ID and didn't take his helmet off... MPs may get a bad rap around the army sometimes, but they're really not that bad. Just do what they say because they're looking out for the safety of the post. And besides, one of them leaned out of a different guard shack and shouted "May the Fourth be with You" before I even had a chance to greet him. Anyway, on another subject, does anyone know where I can get another set of shins? I think I assembled mine incorrectly and I'd like to get a fresh set and start over. Anyone know a good maker who would be able to make some for me, or does anyone have a spare set of shins they'd be willing to sell? Sent from my iPad using Tapatalk
-
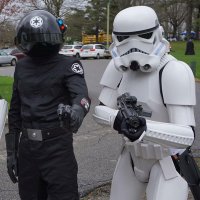
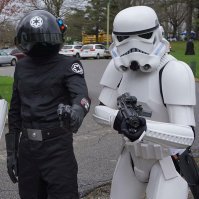
Agreed, hospital corners are no fun- I've never slept below the sheets because of them... Anyway, in other notes, May the Fourth be with You!! My armor was approved as TK-15775, and I've since joined the Hudson Valley Squad of the Empire City Garrison. Got to go on my first troop with them last weekend: And today, in celebration of May the Fourth, I made the West Point Yik Yak again: Funny story actually, the MPs in the pictures were from the same company that arrested the Fort Drum Stormtrooper. As long as I had the proper ID and I took off the helmet in front of them to prove it, I was alright. Not necessarily saying you should do this though, I'm just glad they knew how to have some fun too. This place can be dismal, so when there's a chance to do something fun and harmless, by all means, do it. Even if that means you rack up a dozen or so walking hours... (Or sometimes you get away with it because it's national Star Wars day). May the Fourth be with you all! Sent from my iPad using Tapatalk
-
Finally got some pictures taken of the fixed armor. Check it out. Everything previously mentioned has been tweaked, so let me know if there's anything more that needs to be done: Check those out and tell me what you think. Also, I picked up some imperial cog patches that I plan to sew to the under suit where the shoulder bells would be. That way, when I'm not wearing the armor, it still looks like an official imperial uniform, kinda like what I imagine an off duty Stormtrooper would look like. I dunno, seem like an interesting concept? How's it look (I know it's not an official costume, just an idea I'm toying with)? Sent from my iPad using Tapatalk
-
Okay!! Final stretch!! So, now that the shoulder situation should be fixed, I tackled the belt. Unfortunately, impatient me didn't take many in progress pictures of the belt work... Hopefully my narrative can clear anything up that the pictures can't. I started by removing the old rivets from the old ANOVOS belt. Not having a drill readily available, this was extremely difficult. I pretty much had to remove the plastic caps and then dig away at the rivets with my multitool. Using everything from the knife blade, to pliers, to screwdrivers on my multitool, I chipped away at the metal rivets until after a few hours, I was able to pull them loose. This was a real pain, and if you have a drill or a dremel to do this kind of job, use that. Anyway, rivets removed, the next step was to move this pink adhesive that was used to fasten the plastic rivet caps to the plastic belt. I got rid of most of the stuff by using my multitool and hammer as a hammer and chisel kind of deal. The pink stuff was pretty brittle, so it chipped away decently. Still would've went better if I had a dremel, so I recommend that. After a fair amount of damage was inflicted on the plastic belt and rivet caps, I had to sort out a way to fix the holes the rivets had torn in the plastic. Fortunately, I had made some snap plates (without the snaps installed) over spring break, so I just cut those to size and glued them over the holes, thus filling the gap and providing a point where I could insert new rivets, or in my case, Chicago screws. The plastic belt pretty much repaired, I then focused on the canvas belt. I measured and marked my holes for the three rivets that would hold on the main plastic belt, and then the two holes for the snaps that connect the belt to the ab armor. Creating the holes then became an issue. My method for this was to use fire. I took a paper clip, bent it into roughly a circle the width of a Chicago screw and then heated the metal circle with one of my shoe shining lighters until it was red hot. Taking the red hot paper clip, I then burned holes right through the belt. While kinda caveman, this technique worked decently: Holes bored through the canvas, I attached the belt on the sides with the two extra Chicago screws taken from my holster. Not entirely a fan of this method, but they were all I had on hand, so hopefully they don't undo themselves while trooping... The center was secured with one of the two extra split rivets I had, just because I didn't have another Chicago screw... THEN I SCREWED UP... I had put the plastic part of the belt on the wrong side of the canvas belt... So, remove the Chicago screws, the split rivet and the snaps and redo it all. Fast forward a frustrating hour of self hatred and now it's fixed... Put on the drop boxes before fastening the Chicago screws (important, as I forgot the first time). Then measure the holes for the holster, burn through the belt, attach holster. Done, done and done. Here's the result: So, now, only two Chicago screws hold the holster on. Should be good to go for approval now I think. Didn't bother to remove the excess leather though, figured it might work as some padding to keep the belt rubbing too hard against the armor. Also figured I'd leave it in case I make a ANH Hero someday... It's harder to add more material later once it's removed, y'know? So, that should be about it, right? Anything more I need to fix? Otherwise, I think I'll try and get some pictures of me wearing the improved armor and post them here. I think I'm just about ready for approval. I'm getting really excited! Feel free to comment your thoughts, opinions, etc. I'd love to hear your input! Sent from my iPad using Tapatalk
-
Did a little bit of work last night, namely I found some plastic scraps and was able to make some bicep hooks. Didn't have a lot of plastic to work with, nothing longer than 5cm, but I made it work. Both are glued in underneath the interior padding with hot glue. They're holding pretty well. Sent from my iPad using Tapatalk
-
Update: Got my belt from TKittell. Very pleased with it, as far as belts go. Fast turnaround, good quality and decent price. I'd highly recommend his belts to anyone with an ANOVOS kit that needs to fix their belt. So now I've gone to work disassembling the ANOVOS belt... Holster came off nice and easy, so that should be just about set (I contemplated trimming the leather belt attachment tabs, but opted not to because if at times I want to put this holster on another belt, for example, my Mandalorian, I'd like options for attaching). The harder part has been removing the plastic front boxes. They used a really strong adhesive on the buttons that covered the rivets and so removing those has been no easy feat. I only have two off right now and I'm waiting on the third, seeing as I stabbed through my hand when I slipped with a knife trying to remove the second... So just waiting for my hand to heal up. Anyway, the rivets are presenting another challenge, with only one fully removed now. The other is tearing up the plastic and won't seem to budge. Not sure how to remove it, but this thing has to go before it tears another hole in the plastic... I can't afford to have to replace that piece. Finally, once I get the belt fully disassembled, what should I used to reattach the stuff? For the plastic belt, what should I use? I assume some kind of rivets, but if anyone knows specifics, let me know so I can order some parts for em. Otherwise I might just use up they would split rivets I have left, or use snaps. Sent from my iPad using Tapatalk
-
So, a small update. Not too much has happened, seeing as most of the work needs to happen on the belt. As for the bicep hooks, I'm currently out of the plastic I need for them (2mm thick ABS strips, essentially excess cover strip pieces). I was originally planning on picking them up on pass on the weekend of the 16th, but seeing as there is now training scheduled for that weekend, I can't leave to get some. So this may set me back until the end of May, but I am looking into options. So, as for the belt, I took y'alls advice and ordered one from TKittell (less expensive than Trooperbays, no offense to either maker- I'm just on a tight budget). Hoping that comes in soon so I can remount the holster and plastic belt assembly. Currently working on getting tools for that. What do you recommend for reattaching the plastic part of the belt? (Just so I can order the materials ahead of time). Lastly, just for fun, I played around with my painted Hasbro E11. Found a silver sharpie and went to town. Perhaps a little heavy on the weathering, but at this point, this is mainly to create a cool looking shelf piece. I wanted it to look like it had been salvaged by some rebel from a crashed Star Destroyer, so that's why the damage is so heavy. Might end up using it with my Merc anyway: And the lights still work too, same as the sound! Let me know what you all think! Sent from my iPad using Tapatalk
-
Thanks! This is brilliant... I wish I had thought of this. Definitely going to do it now. Sent from my iPad using Tapatalk
-
Brian, thanks for the advice. I didn't actually know that about the shoulder straps- being forward of center that is. Very good to know, and I'll make sure that is adjusted next time I'm wearing the armor. As for the return edges, they have been removed at the ankles. The edge curves in a bit, but what would be the return edge is cut down so it's flush with the inner surface. As for the wrists, I'm leaving on the edge right now, simply because I don't currently have access to the equipment I usually use for trimming and sanding edges (yes, I could do it with a knife and some sandpaper, but I prefer to use a dremel because it's less work and comes out nicer usually). I think that's only a Centurion requirement too, right? If that's the case then it should be fine for now. It will be gone eventually though. The belt rivets definitely need to go. I was thinking of getting one of Trooperbays belts on the recommendation of another cadet. If not, I might just see if I can have my family back home sew one for me. Also, the ANOVOS suit appears a little baggy on the arms and chest because I was kinda rushed to take this picture. Underneath the forearms, the sleeve is bunched way up, but if I had actually taken the time to pull on the shirt properly, it would've looked better I think. Good to know though. I'll make sure I fix that in future images. And on the butt plate- it definitely is a bit too wide for me, that said, I've been hesitant to heat it and bend it because of some previous bad experiences with heating ABS. Although, when I look at some of the screen caps from ANH, it appears that a lot of troopers have this issue... I do want to correct it at some point if I can, so if anyone has any recommended methods, tutorials, etc, I would love to see them. Thanks for the input! Sent from my iPad using Tapatalk
