Leaderboard


Popular Content
Showing content with the highest reputation on 08/24/2018 in Posts
-
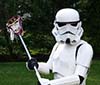
I have always dreamed of being a Stormtrooper since seeing Luke and Han infiltrate the Death Star in Episode IV. Now that dream has come true. It was quite a journey of sending emails, reading all kinds of information online, and eventually finding this forum. I consider myself a lucky TK, as I was able to acquire an Anovos Stormtrooper kit when they were first announced at Star Wars Celebration in Anaheim. I purchased it for a price of $350, a special price point they had it set at during that weekend. It came the week my first child was born so it had to sit for a bit while a adjusted to life with a newborn. I was invited to an Armor building party, a few months later and the fun began. Im going to keep this short because you may have already read many of the tips from the great folks on this forum. I would like to thank all those guys and gals that take so much time and effort to detail their builds, answer an email, or text, or in one case, have a nice conversation on the phone! I could not have gotten to the point I have without all the wonderful input from you! I look forward to helping out in whatever ways I can, like those of you helped me. Thanks for letting me be part of this wonderful family, and I look forward to serving the Empire for many years to come. Mark TK-421343 points
-
So this is where I will be logging my T-21 build for my Rogue One Kit. Not a lot of stuff at this time but I am sure I will be filling this thread in the coming weeks. So first let me say that I will be using Spool86's kit. NOTE: Version 2 of the RO T-21 is on page 2 of this build. For anyone interested, my ROTK build is here: And my RO Crystal Patrol Pack Build is here: There are a few difference with the RO variant of this BFG. 1. There is a scout tactical light on the right side like a lot of the RO weapons. 2. I have found reference pictures with a black sling and pictures with no sling. 3. From all the pictures I have found, the stock looks black but this could be the lighting. Here is a pic with the black sling I will add more pics tomorrow but I wanted to get this thread started. I welcome input from everyone. Thanks for the interest.2 points
-
Practice brings perfectation! Your build will be just as awesome2 points
-
Thanks! Yeah, on the biceps I used a pen and steel ruler to get my cut line. Wound up using lexans though because score and snap wasn’t working and I couldn’t get my scoring straight reliably. Felt safer this way and I got the lines pretty darn straight even with scissors. Sent from my iPhone using Tapatalk1 point
-
Yup keep it up.1 point
-
Think I managed earlier. Wait and see what happens Sent from my iPhone using Tapatalk1 point
-
Congratulations trooper and welcome to the ranks1 point
-
Congratulations on making your dream a reality! Have Fun out there Mark!1 point
-
Welcome mark ! Godspeed trooper !!!1 point
-
I'll look at so high res stills when I get home but so far those you mentioned are what I see also.1 point
-
1 point
-
I second this comment - not only does this bit grind away resin from side to side, there's teeth on the top of it so you can grind away resin by pushing it away. Also, getting it on to a flexible shaft gives you ultra control for detail work. Sent from my SM-G390W using Tapatalk1 point
-
TBH, I’m being semi partial, but I think NOTHING beats ANH-Stunt ...lol Sent from my iPhone using Tapatalk1 point
-
I just wish there was an email option “Don’t try and sell me anything new till you deliver what I already paid for”1 point
-
Heya, haven't had too much to update on, just been trimming 1-2 pieces a day or so. All I have left to trim is the chest, back, kidney, butt and the rest of the thighs Sent from my LGLS992 using Tapatalk1 point
-
The plan was to get you towards ESB! Just kidding- I just happen to partial to ESB. Originally I was between ESB or ROTJ- I ditched ROTJ because I didn't want to paint my boot soles white and have to keep them that way. To my knowledge since most kits are ANH derived, there's fewer ready options for ROTJ's one piece kidney and butt plate- I know there's at least one maker than offers that, but I'm not sure as to others. A two piece could be modded to become one, it would just take an extra step. ANH is by far the most popular option, so there's no shortage of help, parts, decals or paint options, etc. Thankfully, ANH-S/ANH-H/ESB are so similar in base that you aren't locked in to only build threads of your model- you can really look at any of them for most of it, especially the base armor. Good luck! Keep asking questions, keep checking these forums, and research, research, research! You'll join the white armor ranks in no time!1 point
-
Perfect! Definitely leaning towards ANH hero for sure. Now you settle on a kit. I'm 5'10, 200lbs. 34" waist. Definitely going abs, nice n bright white!1 point
-
That's why were here THT. If one person cant answer another will. Dont hesitate to ask. Once dry E6000 excess is relatively easy to clean up but I advise letting dry for a couple days making it even easier.1 point
-
Thanks. I feel like I’m bombarding everyone with so many questions, but this forum has some of the nicest most helpful people I’ve come across in a forum. Most forums can be harsh. It’s a scary prospect cutting in to expensive plastic Today I am definitely starting the gluing process. I need to trim about a half inch off the biceps and I should be ready to glue on cover strips. From what I’ve seen, it’s no issue is the E6000 looks sloppy or seeps as it is easy to clean up after it dries. Is this correct? Sent from my iPhone using Tapatalk1 point
-
Hi Nick, I used a regular drill bit for the bottom of the grip, then the below Dremel attachment for the muzzle bolts: This was, by far, my favourite and most used attachment for this build. :-)1 point
-
On mine I used a drill to remove the bulk and then cleaned up with a small cylinder diamond bit.1 point
-
For my blaster I mounted the scope and counter to the rail/bracket with some low profile hex bolts/screws . The original M38 mounting screws were cheesehead screws . I didn’t have anything like that at the time so I went with the hex bolts as the bolt heads allowed enough clearance between the rail and main tube.1 point
-
It does seem eerily similar doesn't it? I've got a bad feeling about this... And that last paragraph about his goal to keep "each and every one of his customers" up to date is precisely what he said months ago to us - and if that's his goal - he is failing miserably!1 point
-
Congratulations!! Welcome to the ranks !!! Godspeed trooper !!1 point
-
Another garrison-mate watching with anticipation. Love this thread so far! You may be way beyond snap plates at this point, but jic it makes a difference, I used nylon, Tandy 24, and my kit is RS. No issues 2 years into my trooping career. Keep on rocking, Lorelei!1 point
-
Isn’t this just about the same words he wrote about the FO kit as well ? About couple months ago ? Sent from my iPhone using Tapatalk1 point
-
Interested to see what they cook up as an excuse for FOTK kit this round. Some guy in our Garrison ordered a w/o helmet kit, I think it’s best if he bails out while still can.1 point
-
And we are back.... Ok so here is what happens when the site is down for a week. Well Crap! Bad timing on my part. The site has been down since I began this build to I am typing it all up and will post everything I have done once the site is back up. In the words of that Supreme Sith Lord Jar Jar Binks, “Hello Boyos, Mesa Back”. I have decided to do this in a separate thread from my ROTK and keep this thread here on FISD rather than on MEPD for a few reasons. To avoid and confusion and/or misconceptions here are the reasons: #1. I believe, and have always believed that the (as it is now being called) Crystal Patrol Pack is NOT a sandtrooper. The Crystal Patrol Pack is clearly noted in literature from Rogue One that it is a “duty patrol” not a classification. Further, I have read that the “bottom line” is that MEPD gets the “dirty” Stormtroopers. Well, there are numerous pictures of the Crystal Patrol Pack “trooper” that are clean, clean, clean white armor troopers (ex. Celebration Europe pictures). So not all the crystal patrol packs troopers are dirty and to be quite honest, I have a dog in this fight. I do not want to “dirty” my $1,800.00 investment in the ONLY ROTK to be both EIB and Centurion approved. Regardless, this Horse has been beaten to death and it is clear that at least some of the parties who made the decision to give this pack to MEPD are not willing to change their minds at this point. Further, it really does not matter what I and numerous others think, what is done is done. So that is reason #1 why this thread is here first and will eventually be cross posted on MEPD. Please do not respond to this reason by arguing for the “why” the Crystal Patrol Pack is now an MEPD asset, it is not the reason for this thread and I do not wish to get into a “Johnson” measuring contest. #2. All of the research for the ROTK CRLs and the Crystal Patrol Pack were done here on FISD by you guys. Sure many of you are MEPD as well but this discussion was started here and since you all did the heavy lifting, the credit should stay with you here. #3. I do not know the people on MEPD as well as I have come to know you guys. All of you have been instrumental in me accomplishing my TK build and attaining EIB and Centurion. I value your input and suggestions. I do not have any issues with MEPD or the people on that forum but I started out my 501st adventure here on FISD and I just feel more at home here. Like I said, I will cross post this build on MEPD in the future. Anyway here is the link to my ROTK build if you want it. https://www.whitearmor.net/forum/topic/44463-11b30b4’s-rotk-build/ So here is my Crystal Patrol Pack Build… When I ordered all the stuff for my ROTK, I also started to collect all the parts needed for the Crystal Patrol Pack. In a very short time I had everything I needed and just required the time to build this thing. For anyone looking to build this pack or has questions about building this pack there are several build threads here on FISD in the RO section, on MEPD in the RO section, and on the FB page for the pack build. I will link everything relevant here: FISD https://www.whitearmor.net/forum/topic/39073-celebration-europe-2016-rogue-one-stormtrooper-back-pack-build/ https://www.whitearmor.net/forum/topic/38162-rogue-one-stormtrooper-back-pack-part-found/ MEPD http://forum.mepd.net/index.php?/forum/66-crystal-patrol-field-pack/ Face Book https://www.facebook.com/rogueonetkbackpack/ The Build… I am hoping to achieve a very close approximation of the Celebration Europe examples of the packs. It will not be perfect but very close to what we have seen and know about the pack. Ok so for my build the thing that I expect to take the longest is the dyeing of the Alice pack and shoulder straps so I started this first. This is my Large LC-2 Alice Pack and LC-2 Shoulder Straps. Most people who build this pack use the woodland camouflage LC-2 Shoulder Straps but I located the Shoulder Straps in OD so these are what I am using. I posted a link on where to get the OD straps on the Celebration Europe thread on FISD if you are looking for them. The LC-2 Alice Pack comes in three sizes and the pack used for this build is the Large Pack. Most military surplus stores have them and there is information on the previously mentioned Celebration Europe thread to be able to distinguish the differences between the sizes. The Dye I am using is the Rit Black powder dye and the Rit Black DyeMore liquid dye. So I mostly followed the recommendations of the Celebration Europe thread and soaked the pack in1 gallon of boiling water then mixed the powder dye and 1 cup of white vinegar with another gallon of boiling water. I then added the dye water to the pack bucket and stirred everything about every 20 minutes for the first hour then made sure everything was submerged and left it for another 2 hours. Then I pulled everything out and hung it to air dry overnight. While the pack was dying, I knocked out the six 1”x22” bed roll straps. The Celebration Europe thread says to use tan cotton webbing but I used 1” tan polypropylene webbing I had on hand. The weave was the same as the cotton straps used so I figured I can make this work. The key was to paint the webbing but leave the ends tan. For the paint, I used a can of Rust-Oleum Camouflage OD spray paint I had on hand. I did a test and it worked great. I needed the ends to remain tan so I used a Q-tip and some petroleum jelly to mask the ends of the straps about ¼” on both sides, then I tacked the straps to some card board. I spray painted the straps with a very heavy coat and let them dry, then flipped them and did the same on the other side. Next, I took the cam-loc buckles I ordered and spray painted them with the OD paint as well. When the straps were dry I used a paper towel to remove the petroleum jelly and then cleaned the tips again with some rubbing alcohol and a paper towel. Exactly the look I wanting. Next, I stitched the straps to the buckles. The Celebration Europe thread says to do this by hand but I have an industrial sewing machine and some tan thread so I did it with the machine. And that finished the bedroll straps. Next I worked on the Grande box. Following the Celebration Europe thread I disassembled the box. Then I marked and drilled the twelve 5mm back mounting holes. Then I marked and did the twelve 1+” wide hole cut-outs. And that was Day one in a nut shell. Day two… I started by taking the dry Alice Pack and Shoulder Straps upstairs and threw them in the washing machine with no soap for a rinse and spin cycle. Once they were done, I again submerged them in 1 gallon of boiling water. I then Mixed the Rit DyeMore in another gallon of boiling water and added it to the bucket with the pack. Again I stirred the pack every 20 minutes for the first hour then l let everything sit submerged for another two hours. Took everything out and hung it to air dry. While the pack was dying, I started working on the antenna. The Celebration Europe thread had identified the fishing pole used for the antenna was the Avanti Precision X 12ft 3-piece Float Rod; however, that rod is no longer in production. A very close alternative is the NGT Float Master which is rumored to be made in the same factory. I managed to find several for sale for $24.95. I posted the link on the Celebration Europe thread and on MEPD. The only significant difference it that the threads at each eye are silver on the NGT vs red on the Avanti. I will fix that later but for now I wanted to get the antenna mostly done. In this picture you can see the silver threads (yellow circle) and also notice the rod wrapping (green circle) which are exactly the same as the Avanti. For the antenna you only need the top part of the 3 piece rod which is about 50 inches. The very top end of the rod is cut off removing the top eye. The cut should be about 50mm from the top of the second eye. Using my dremel cut off wheel, I chopped off the top. Next I removed all the plastic inner rings in each eye with needle nose plyers and an x-Acto knife. For the tip I got an assortment of vacuum caps from AutoZone and used the smallest one (5/32”) cap but it was still a little big for the rod end. So I added two layers of heat shrink to the end of the rod then added the snug fitting cap. Next I threaded the ¼” rubber surgical tubing I got off amazon through the top three eyes and wrapped is for the area between the third and fourth eyes (counting from the top) then continued the threading for the reminder of the eyes. The Celebration Europe thread calls for a 4mm ID black silicone tubing but I figure my tubing is close enough. The one issue I had was that when wrapped in the spiral, the tubing compressed and looks flat. To fix this, I inserted some black para cord inside the tubing for the area that gets wrapped and this made a big difference. So this finished the antenna with the exception of coloring the threads to red from silver. Next, I made the bed roll. So on the Celebration Europe thread there is no consensus on what was actually used for the bed roll. It looks to me like they used a USGI shelter half which would be consistent with most US military stuff so I snagged a shelter half from a surplus store and cut it in half. One of my concerns with this pack was the weight and how it has the potential to damage my TK armor so I want the weight to be a light as possible. Next I took the half and filled it with some poly fill and rolled it. Presto, bed roll. And that wraps day two… Day three… I started off with taking the now dry pack and shoulder straps and running them through another rinse and spin cycle in the washing machine and then a quick tumble dry in the dryer. While that was happening I painted the threads of the antenna red. For this I used Tamiya clear red (X-27) acrylic paint. I simply applied it with a small brush on the threads and presto red threads that are a damn near perfect match for the Avanti rod. After the pack and shoulder straps were dry, I took the shoulder strap that is worn on the left side and masked it off. I should note that this is actually the right shoulder strap. For some reason they are reversed on the pack but this is the way its done so this is the shoulder strap I used. After masking, I spray painted the shoulder strap with Rust-Oleum OSHA Orange spray paint. This took numerous thick wet coats because the nylon would absorb the paint. The guys on the Celebration thread used a plastic-dip type of paint that avoided the nylon soaking up the paint but I had the Osha Orange on hand so I used it. Eventually the paint began to settle on the top. Once it was sort of dry in the thin areas, I removed the masking. Since I was spraying the paint so thick, it did bleed under the masking tape a little. Once the masking was removed I cleaned up the bleeding a little with a Q-Tip and some acetone. I did leave it somewhat messy though since it needs to have the “used” look. I also smeared some of the wet paint in the two masked off areas inside the rectangle to give the impression that they had once been orange. All this will get more weathering later on but for now, it looks good to me. Next, with a seam ripper, I removed all the straps and back pad that are required to be removed as indicated in the Celebration thread. Next, I took some 1” black polypropylene and the correct brass buckles and made the four buckles that would be added to the pack. Once these were sewn, I sewed them to the pack in the correct spots. Next I stuffed the pack and 3 outer pockets with closed cell foam, then mounted it to the M75 frame. Next, I mounted the grenade box to the M-75 frame with black zip ties. I lined the inside of the grenade box with some black spandex material I had and then mounted the grenade cover. And that wraps day three… Day four (FISD site still not up)… So I only got a few things done today. First I mounted the shoulder straps and the lifeboat hook greeble. Next I mounted the bed roll and antenna. I am thinking I may have too much stuffing in the bed roll but I can fix that later. Overall, I like how the pack looks and all I need to do now is whether it and it will be done. And that is it for the update. Thanks for the interest. Day 5 update… First, I unstitched the end of the bed roll and removed some of the foam. I re-stitched the end and mounted it on the pack. I mounted the antenna and it looks better now. Next, I mixed up some craft paints using several browns, greys, greens, and black to develop about 4 colors of mud for weathering. I applied each color with a small 1” brush using several methods (splatter, dry brush, wash, etc…). One of the colors I sued was a champagne pearl brown, this color added the effect of light glittering that one often sees with actual sand and mud (yellow circle). I am also in the process of adding some black felt to the inside of the frame to help protect my armor from wearing the pack. And that is it. The pack is mostly finished but I need to try it on with the armor and see if any additional protective padding will be needed. I am also curious if I will need to remove my Thermal Detonator to wear the pack. That’s the update so far. Thanks for the interest. Update… and this site outage really sucks since I am not getting any feedback from you guys about this build. Well I put on my kit with the pack and surprisingly everything seems to work well together. No issues with the shoulder straps, Thermal Detonator, or back plate. Walked around a bit in the back yard and I think we are a go for the DragonCon Parade. Here are some pics my wife took. Thanks for the interest.1 point
-
1 point
-
LOL thank you1 point
-
Man that's awesome!!!! I'm probably gonna print it. More and more I'm pushing away from ROTJ and Migrating towards ANH now!!! This forum rocks! Lots of great info!!!1 point
-
LOL not the master, just a humble servant. THT1 point
-
Definitely face the fans towards the lenses, be it diagonally across like CTID above or just up to the corresponding lens on either side- it will keep them from fogging up but also not dry out our eyes. Mounting them lower in the helmet can catch what little ventilation you get from the teeth, as well as from the opening of the helmet. You can play with the angle a bit to also get their airflow to catch a bit of your face/cheek area on its way to the lenses; it might be a placebo effect but it works for me.1 point
-
And on it goes, here some pics of the assembled bucket:1 point
-
Personally I have them blowing diagonally across the face onto the opposing lens Sent from my SM-G950F using Tapatalk1 point
-
Glueup Part II -- Strip club OK, I'm back. Got a lot done on my TK glueup and have plenty of photos. For this portion of the build I've pretty much ignored the "body" of the suit (plus I already did the Thermal Detonator and Helmet a while ago) and concentrated on the limbs, which is really where most of the gluing takes place -- all of which involves cover strips that join the components of each limb. In the previous section of my build I noted that I'd attended Garrison Carida's annual armor bash/BBQ, and got a lot of outstanding fitting help. Back home in my workshop and after a lot of cutting, taping, trying on, and more cutting and fine-tuning, I'm pretty confident I have the arms and legs sized just about as well as could be. Keep in mind that for this part of the build I did all the appendages -- two shins, two thighs, two forearms and two biceps. Although I started gluing the biceps first, the photos here don't follow any particular order. Rather, I took the shots that best illustrated each part of the glueup. The first thing I did was to finish cutting all of the cover strips, both outer and inner. A.M. armor comes with a generous amount of plain flat ABS for this. To prep the strips, I first gave the glue sides a light but brisk sanding to rough up the gluing surfaces. This was fast work by laying them out in groups glue-side up and going over them with my friend Mr. Sanding Block. I followed this up by beveling all the strip edges with a razor knife. Note that I'm beveling the corner edges on both the glue-side and outside of each strip. This is a good thing to do for two reasons. First, for the outside of the strips beveling removes all the sharp edges or any ridges created by the scoring and "softens" the sides of the cover strips. For the strips inside the armor, that's less sharp stuff near your under suit and body; on the outer cover strips, it means no sharp edges at all -- your hand can run smoothly over the armor. It will also eliminate unwanted snagging if you brush up against fabric (which you can do while wearing armor: curtains, tablecloths, the clothing of people with whom you interact, etc.). It also gives the overall appearance a nice finished look. Beveling the glue side of the strips slightly not only allows the strips to sit perfectly flush against the armor (remember, scoring can create a tiny raised ridge), but it creates a tiny area where glue can accumulate. It's very small, but having this little bevel there can help make minor squeeze-out much less visible. By the way, see those little "strings" you make when beveling? Collect them in a jar for ABS paste -- they're so thin and wispy that they dissolve almost instantly. The last bit of prep is to lightly sand the gluing surface of the armor itself, easily accomplished with a bit of folded sandpaper. By the way, for all this prep sanding I used medium to coarse grit paper. You don't have to go crazy here: The idea is to scuff sand the area where the glue goes so it makes a better bond. Although not quite as important for "dissolving" glues such as ABS cement, Duco or anything with acetone in it, a rougher surface really helps non-dissolving glues like E-6000 or the various super glues (cyanoacrylate). For the first inner strip, starting with the biceps, I used regular ABS cement. I don't particularly like this stuff, but the strips on the biceps are very short, meaning it doesn't take a long time to get it on, plus not as much time for the container to be open fuming up the shop. Still, with this stuff you gotta work fast. If you look closely at the photo above, you can see that I've penciled a line down the center of the glue side of the strip. You only want glue on half the strip, but more importantly having that line there acts as a guide for placing exactly half the strip on the component -- stick it on, and adjust as needed till the line is right on the edge of the component, and then clamp it up. At this point, I decided to switch over to the Duco cement and did the same process with each of the limb halves -- one inner strip on each edge of half of a limb, except the backs of the shins (which I'll do later). I liked the Duco WAYMO better than the ABS cement. It doesn't smell or outgas fumes nearly as much, the working time is longer, and the narrow nozzle on the tube makes applying the glue much easier than using a brush. The real beauty of Duco is that it sets in only five minutes, although I left pieces clamped up for at least 30 minutes for a really solid bond, meaning that once you get rolling the glueup process can go pretty quickly. (By the way, the cure time for Duco as listed on the packaging is setting time five minutes, handling time one hour, full cure in 16 hours.) I worked through all the limbs in turn until I had a pile of half-limbs all with inner strips in place on the halves. Gluing and clamping strips on half-pieces is easy, as nothing impedes the clamps as you can see in the previous photo. Joining the halves, however, means clamps are only useful on the ends. Fortunately, my woodworking arsenal includes some fairly lengthy spring and ratchet clamps. In the case of the biceps, I easily joined the halves for those with just clamps: All the other limb pieces are longer, and while I could still use three clamps of increasing lengths on the ends, the center of the joint was where magnets did their magical thing. For the even longer thighs and shins, it required a few more magnets. Also, because getting the slightly curved fronts of the shins and thighs to close properly, I also relied on tape. The tape worked in concert with the magnets -- the tape pulled the joint together, while the magnets squeezed it closed till the Duco set. As before, at this point it was just a matter of working my way through all the pieces, gluing the halves together in turn. Occasionally, though, as you work on armor you're likely to bump into the same issue I had. You'll probably find that gluing the first side of a two-part piece like an arm or leg is pretty easy -- everything glues up nice and flat. Trouble is, those joints aren't really flat because you're working on a round object. Add to that the fact that during the trimming process you probably removed (or added via shims) a certain amount of material. As a result, when it comes time to gluing the second side of a two-part piece, that joint may not close properly. In fact, it may be way off. The least troublesome way this typically occurs is that the piece is "sprung" open, with the mating edges some distance apart, like the forearms here: That's usually not too bad to work with if the gap is small. However, you may also find that the gluing faces of the mating edges are nowhere near parallel, as they'll need to be when joined. For example, not only did my forearms have a pretty sizable open gap as you can see in the photo above, but the mating surfaces here are at a severe angle to one another: To apply glue and get this clamped up properly, I'd have to really force this closed with a lot of pressure, and the odds of getting it closed and clamped properly are slim -- in fact, while clamps might handle this OK magnets may not be strong enough to hold this closed. Plus, with joining faces this far off even if I could get it glued and closed with clamps, the stresses involved on the plastic would continuously try to pull that joint apart. (Even, to some extent, long after the glue has cured.) So before proceeding, I headed up to the kitchen and set a pot of water to boiling. I'll water-bath all the parts at the end to do some final shaping of course, but this issue needs some reshaping now. I dipped the forearm into the water and when sufficiently softened reformed the mating edges so that it not only eliminated that sprung-open gap, but also made the mating surface more parallel, as you can see here: It still wasn't quite perfect, but with that open gap gone and the surfaces a lot more parallel, it took only a light pressure to close the joint. Now I could far more easily apply the glue, clamps and magnets. By the way, the two forearms where the only places I had this issue. The shins, thighs and biceps were fine in this regard. Now, I just worked my way through the rest of the joints, plus I glued the 25mm closing strips to the backs of the shins. With that, the main glueup of all the limbs is complete. Let me give you a tip on how I work with glue, by the way. This is something I also do with my woodworking, and that's to "isolate" the glue as much as possible. I like to use some kind of dish or shallow tray, and always keep the glue in it. In the image above, I'm using a plastic coffee lid as my Tray of Isolation. I put my glue in it before I start, take out the glue to use it, then immediately put it back in The Tray of Isolation. Glue is easy to spill, drips on a glue bottle or tube can get on your work (or on you, which you then get on your work), and if you work like me and never set something down in the same place twice, glue is easy to lose on a crowded work table. This way, I always know right where it is and it's easy to slide it out of the way. It may take a while to get into the habit of always putting things back in The Tray, but it's worth it. Oh, wait... Did I just say the limbs were complete a bit earlier? You're probably thinking, What an idiot; those aren't complete without the outer cover strips. You're only partially right. But before I do that completing-up part, I have to do a personal completing-up part and eliminate every gap and open seam that would be visible on the armor. This isn't a requirement for any level, but those gaps would drive me nuts if I didn't do something about them and give my armor a more finished appearance. I started by mixing up a small jar of ABS paste. Then, I brushed a bit of acetone into the gap, seam or crack I wanted to work (you can see the brush in a jar with a bit of acetone in the below image). Not a lot, but just a bit of acetone brushed into the seam first really helps for the ABS paste to adhere. Then I used a thin applicator stick or that same small paintbrush to dab ABS paste into every seam or gap I wanted to fix (except the bottoms of the thighs, more on which shortly). Here, I'm doing the biceps. I didn't bother with any seam or joint that would be covered by the outer strips later, so that meant only dabbing ABS paste on the very ends of the pieces that are visible past the ends of the strips, plus the edges themselves and a little bit on the inside. Do this quickly, as ABS starts drying the second you dip it out of the jar. Clean your applicator stick or paintbrush frequently with acetone (I do this between every dabbing) and continue working your way through all the gaps and seams you want to hide. Now, just let it dry. ABS paste dries to the touch in seconds, but it takes a few hours to fully harden. This is a great task to do before calling it quits for the night. Here's what the patching job on the bicep seam looked like next morning: Now, use sandpaper to level and shape the hardened ABS. For this, I like to start with a medium/fine grit, maybe 180-grit or so. Always use a sanding block when leveling, whether the surface is flat or convex. For concave surfaces, wrap the paper around a curved object. The reason for this is that the fleshy pads on your fingers and thumb are very soft, and the flexible sandpaper will simply ride over the bump of plastic you want to level out. It'll get smoother, but it'll take forever to level it. For finish sanding and polishing, no sanding block is really needed, but for leveling it's a must. In the photo above, I'm using what amounts to a tiny stick of scrap with the 180-grit sandpaper wrapped around it. I continued sanding with increasingly finer grits, progressing through 220, 400, 800, 1200 and then a final polis-sanding with 2000 grit without the sanding block. After the last sanding, the ABS was smooth, the seam has disappeared, and the ABS has even started to take on a bit of sheen. Novus polish brought all those gap-fillers to a nice glossy shine. Now, for the bottoms of the thighs. There's a square molded portion that runs around the entire lower opening of the thighs, and the tops of the shins. The outer cover strips go all the way to the top of the shins so there's no big gap there, but there is on the bottom of both thighs. Yeah, yeah those are mostly hidden -- by the sniper knee on one side, and the small ammo belt on the other -- but Mr. Perfectionist here didn't just want them hidden, he wanted them gone. To secure that gap, I first adhered a small piece of ABS inside the molded portion at the front of each thigh, using ABS paste as the glue. Then when that was hardened, I dabbed on a small amount of ABS paste on the other side to fill the gap there. When it was cured, I sanded and smoothed it out by progressing up through sanding grits as before, then hit it with Novus 3 and Novus 2. Now the gap looks much better. Wait... gap? What gap? With the fronts finished I backed up the corresponding spots on the inside/backs of the thighs, but didn't bother doing the outside portions of those rear gaps yet. I haven't done my strapping yet, and will probably need to make the half-moon relief cuts at the backs of the shins and thighs for movement anyway, so I'll wait to fill and polish anything in back after making those cuts. Likewise, since I haven't done the strapping and upper body yet, I may still need to shave a bit more off the tops of the thighs -- and the bottoms of the shins -- for final fitment, so I'm not applying the outer cover strips to the legs just yet. I'll do that last after I've done final fitting. (In the previous photo, I'm just holding that cover strip in place.) And since I'd just as soon do all the outer strips at the same time, even though I consider the forearms and biceps completely done, I'll do those outer cover strips at the same time. So there you go. The main glueup is complete, and I have a full set of Stormtrooper arms and legs! From here, it's on to the main body. Not a lot of gluing there, except snap plates, so it's strapping and fitting. Yikes, am I actually in the home stretch? A.J.1 point
-
And you are correct on this! (aah the humor)1 point
-
Thanks! And a good tip! I like doing things ahead of time to help facilitate quick fixes later. For now, it's a definite to-do item after I get my basic approval.1 point
-
As the solution with the epoxy resin is really strong and nice, i decided to do the other side of the folding stock as well. You never know what happens ;-). I am really looking forward to go on with building the blaster, finally. Repairing during the build is no fun at all :-(.1 point
-
Congrats!1 point
-
Awesome! Congratulations Trooper1 point
-
Thanks Joseph and Tony!!!! EIB baby!!!!! The feedback is also very much appreciated and I will get on those adjustments asap, I thirst for Centurion. Special shout out to Randy (Magni) for being a source beyond the source, least of which was answering my pedantic questions at hours not normally reserved for talking about plastic space men. See you on the front lines, Gentlemen!!!! Regards, TK-92577 EIB 847 *kshhht*1 point
-
Hi Brett, and thank you for your ANH-Stunt EI application. CRL and EIB Application Requirements: All required submission photos have been posted, and I am very pleased to announce your armor displays all the necessary elements to qualify for Expert Infantry. On behalf of Tony and myself, congratulations! Other-Armor Fit/Assembly: In this section we review observations made by your fellow troopers and ourselves. Some observations may lead to suggestions to improve the overall look of your armor. You have done an absolutely spectacular overall job with this ATA kit, and your attention to detail is to be commended. Just a few small issues, Brett. Nothing major, just a few items that can make this build look even more screen accurate. The 4 button ab plate could use a bit of trimming. I realize that the buttons on the ATA armor are a bit larger than those used onscreen, but a small gap around the plate would look even better. Reference image It looks as if your left shoulder bell could come up a bit to match the right one, evening out the appearance. Definitely an easy fix! Reference image I gotta say that I am glad to see that you trimmed all the return edge from the tops of your thighs, and it may just be the angle of the photo, but it appears that your cover strips could use a tiny bit of trimming at the tops to even them out. Reference image While you have your Dremel out, I would also suggest trimming of the excess part of the cover strips in these areas (below) as well. All should be even with the edge of the armor it is attached to. Another easy fix! In most of your full suited photos your posterior plate is riding over your kidney. This is a very common issue and may be resolved by adjusting the connections. Reference image Lastly, although your drop boxes line up in the photos, in your rear belt photo they do not. Perhaps it was an older image, (and you may have done this already) but you may want to move them to where they line up correctly add a dab of E-6000 on the rear strap to hold them in place. Reference image Centurion Suggestions: Because Centurion photos show much more detail than EIB, items pertaining to Centurion might be seen there and not here. We try to point out all we can from what is seen but the final accuracy is the responsibility of the trooper. Nothing to add here, sir. Again, an utterly fantastic job... now get out there and be a shining example for the NEG!1 point
-
Could I add a suggestion to your great info piece? When making magnet sachets, it's a really good idea to make sure that you've got polarity-correct pairs. An easy way to help identify magnet pairs is to assemble them using fabric with high-contrast colors. Kind of like this:1 point
-
Thank you all for your kind words. I am please to say that i now have been added to the "Vetted Makers" list. cheers Ross1 point