Leaderboard


Popular Content
Showing content with the highest reputation on 04/19/2018 in all areas
-
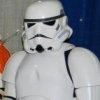
TK85421, been around for 6 years now, always wanted to be a Stormtrooper since 1977 when my farther had snuck me out of the house without my younger brother knowing, to see ANH at the drive in movies. I researched a costume about 15 years ago and at that time the price was way too much. Went through a marriage breakdown and a friend convinced me to go to a local convention to get me out of my hovel, of course there where Stormtroopers, once I asked a few questions especially about pricing I was hooked, signed up on the forums the next day and ordered armor a few days after that. NOW there's no turning back, you could say I was bitten by the building bug, so 21 approved costumes later, 6 of those centurion, a Lancer and 34 L2 officer variations yer you could say I'm addicted. Now with some medical issues this is what keeps me going, if it wasn't for Star Wars, my dear friend Liz and this community I don't think I would still be around. "Thank the maker" My first Supa Nova Convention, two of my favourite girls7 points
-
Hello again! I'm Sarah Bailey, TK-20466. I'm the attache for Connecticut and also the commanding officer of the Connecticut Garrison! I started in the legion with an Imperial Stormtrooper (ANH Stunt) build a year and a half ago. Ever since then I've been hooked on building costumes! I was terrified on my first go around, but if a novice like me can learn all this stuff anyone can! I eventually talked my husband into joining (He's TK-66402!) and we both made Heavy Weapon Stormtrooper variants too! Later that year I also made an ESB-Style stormtrooper, which I swear I'll get to Centurion one day with I do more than just Stormtroopers though... Over the last year I've completed an Imperial Line Officer costume, and my first face-character Admiral Daala (my signature picture). I'm working on some non-CRL variants for her from other depictions. I've also started two Bounty Hunter Builds, my Dengar Build (which is nearing completion) and a Jodo Kast build (about a year out from completion). Along the way I picked up many new skills and learned a love of molding. Now instead of buying and assembling props, I make my own props too. (some people even buy them!!) If I haven't gotten a chance to say hi to you yet feel free to drop me a PM. If you're ever in Connecticut and need help or just want to say hi, feel free to drop me a line Or stop into one of our Armour Parties! ~204665 points
-
Thank you, sir. I’d be honoured. :-)4 points
-
Great idea Dan and if you don't mind I'll be adding this to next months newsletter4 points
-
Definitely cut the cod - makes a world of difference. Cricket pasted it back together with ABS paste, but I just tucked it behind the ab and strapped it.3 points
-
You could always join the ranks of the HWTs, (hint hint, wink wink, nudge nudge).3 points
-
OK, future Troopers, many of you have asked about how to set snaps for your armor connections, so I thought I'd whip up a little tutorial. Please note that the example that I am making is based on using the "double snap" connection system (see last photo). I highly recommend this method, especially on the back/kidney, kidney/butt, and ab/kidney connections, as it provides an extra layer of confidence. Yes, it costs a bit more to do due to the extra snaps involved, but you can be sure that no matter what happens, you will NEVER have a piece come loose or fall off on a troop. Some builders may have used others, but after countless troops I have experienced no problems. So here we go.... Materials needed: 1. Hammer 2. Soldering (woodburning) iron. (Available at home improvement and craft stores. WELL worth the $10-$12.00 investment). NOTE: The tip of this thing gets CRAZY hot, so be very careful where you set it. Many come with multiple tips, but I suggest the pointed one. 3. Snap setting kit. (Available at all craft stores). Please note that I am showing both sides of the base... more on that later. Convex side Concave side 4. For this purpose, I am using 2 inch (5cm) wide black nylon and 1 inch (2cm) black nylon. The 1 inch strips will be attached directly to your armor. I suggest using E-6000 glue and clamps for this. 5. Snaps, of course! Don't "cheap-out" when buying these. The cheap ones come undone very easily and are garbage. For this tutorial, I am labeling the 4 parts as such: STEP ONE Cut the 2 inch strapping to about 4 inches long** (or as needed) for the particular connection. Cut the 1 inch nylon into 2 inch lengths as seen below. **NOTE: The actual length will depend on there you are using them, i.e. the kidney to posterior plate connections will be shorter. Just be sure there are no gaps, and that the 1 inch wide base pieces are in the correct position before attaching them. Example: The ends will be a bit ragged and will fray. Use the soldering tool to seal them. Again, using the soldering gun, make 4 holes in the 2 inch wide nylon as seen below. Be careful not to make them too large (just larger than the shaft of the snap base) or the snap may eventually pull out. Take one of the 1 inch wide nylon pieces and slide it up under one end of the 2 inch wide piece, even with the end. Once it is lined up, use the soldering iron to make holes in the 1 inch wide piece. This will assure that the holes for the snaps line up correctly. (VERY important)! You should end up with this: Repeat for other side, but be sure not to get the sides mixed up, as one set of holes may be farther apart. Insert one of the male bases into one of the holes in the 2 inch wide piece. Flip it over and place one of the male snaps on the post. Place the base in the concave side of the snap setting kit base. Place the striking rod in the center (straight up and down) and strike it several times firmly with the hammer. The inside shaft should be sufficiently widened to keep the top from coming off. There... your snap is set! NOTE: Do not attempt to do this step on a regular table. You need a hard surface, and a heavy duty workbench or concrete surface works best. Repeat this step for the remaining 3 holes. Now onto the 1 inch wide strips.. Insert one of the female bases into one of the holes, then (as above) place one of the female snaps on top. Place the female snap base into the convex side of the snap setting base. Again, using the striking rod, give it a few good whacks. (Getting the hang of this now)? This is what you should have at this point (only one end shown) CONGRATULATIONS, you have one strap completed! Now that you realize how easy this is and have it down to a science, repeat as necessary. NOTES 1. For added security, the double snap system can be applied to other areas as well, including shoulder bridge attachments and bicep to shoulder bridge, (example below) This is especially good for those who wear packs (HWT, Sandie, Spacetrooper). 2. Snaps set in elastic (as seen above) can pull out over time with repeated use. For added strength I recommend doubling the elastic over before attaching the snaps. 3. Be sure to use the female base on all the straps that will be glued to your armor. The reason being is that the bottoms are flat, insuring a tight seal. 4. Some folks set the female snaps in ABS instead of nylon when gluing them to the armor. There is absolutely nothing wrong with this, it's just a different way of accomplishing the same goal. The reason I use nylon is that I find it conforms to the curved parts of the armor better, and gives a larger surface area for the glue to adhere to. 5. Some use CA (super) glue to attach the 1 inch nylon to their armor. I have found that it can get brittle and break off or even cause warping on ABS due to the heat it puts off while drying. E-6000 needs to be clamped and takes more time, but trust me, it's worth the wait. 6. When gluing the 1 inch nylon to your armor, do NOT keep the 2 inch wide nylon attached with the snaps. Some of the glue may seep through the hole in the snap and glue the whole connection together. Not a good thing. If you should have any questions, just ask here or PM me, and best of luck on your build! Photo 1 (Double snap system.. note clamps). SHOUT OUTS: Gary jr. ( @flashpoint0214 ) The guy who introduced me to the double snap system! Jeremy (Copper) who supplied the nice clean photo of the double snap system.2 points
-
D ring now painted black [emoji4] Sent from my iPhone using Tapatalk2 points
-
Ohhhhhh I hadn't thought of strapping it! I'll probably e6000 it. How's my placement look? I think it also looks like I need to bend in the shoulder straps. Might as well get that out of the way while I have my pot of water on the stove! Sent from my iPhone using Tapatalk2 points
-
I would recommend lowering the chest to make the neck more comfortable. Try the adjustable strap technique I posted above to lower it. It will give you more flexibility.2 points
-
I cautiously move foreward, attaching a cover strip to the front of the left thigh, and an inner cover strip on the left forearm. I don’t think I’m going to hit my early May target for completion, but I’m not in a hurry... much rather get this done right.2 points
-
When I was younger my pack weighed less2 points
-
And now the brackets on the rear pieces are done, time to call it a night1 point
-
I kept the screws in my chest, so it looks screen accurate from the front, but used the straps/buckles on the inside. Best of both worlds.1 point
-
After some R&R (man-flu) I’m back at it again, not at a massive speed but picking away and enjoying the build rather than in a hurry to get it done, trimmed the torso and drilled a few holes and put some elastic in1 point
-
I'm a big fan of trimmed kits- having had a trimmed TK and untrimmed ANH Tie and Shadow Scout (latter two still in progress), the work saved with getting trimmed was immense, as was the saving of my hand and arm muscles from using the Lexan scissors and the dremel. Also trimmed kits are great for first timers, because you have less worry about learning how to trim and trimming off too much before you even really get started. Though you do get a significant trial by fire with an untrimmed kit, so food for thought. I second E6000- I love that stuff, discovered it when I built my TK, and I haven't looked back, I use it for all kinds of stuff. I recommend giving it a full 48 hour cure time- it takes more time, but the hold will last. And it still will come apart if you really need it to (carefully, that's how I put a crack in one of my shins). You're already putting a whole lot of time, effort, and money into this project, you might as well make it to really last. E6000 is also very forgiving for beginners- if you screw up you can pull it apart immediately and with some sticky clean up start over.1 point
-
From personal experience, you don't want the thighs to be too tight, but you also don't want them knocking around too loose. I like mine pulled up higher because it helps the bottoms not dig into the back of my knees. One of our guys stores his trading cards in one of his. As to your butt plate, mine likes to pop out like that too- I've also seen the same on another woman, so I think it might have something to do with the feminine shape. Giving it a little extra length in snap plates should help that, though- just a little bit so it gives it a little give and lets it not bump and overlap onto the kidney.1 point
-
As a Squad (and now me as Squad Leader) it was decreed that we generally don't do them, same with weddings, etc. There's a case-by-case basis, if one comes in for a kid that's in Make-a-Wish territory, or something to that effect, then we'll look at our schedule and consider it based on the request's specific circumstances. I'm not personally a fan of birthday parties, for reasons listed above, and captive audiences tend not to be the best for us anyway, plus the potential abuse, length (too short or too long), and all sorts of other little details. Our Squad is also crazy busy (40+ events a year), so we have plenty troops to attend and even more than we can handle at times as is, so adding private events to the mix would just be asking for headache and trouble. Now if a member has a family member or friend who they want to grace that family/friend's birthday party or wedding with their armored presence, I don't personally have any issue, so long as everyone knows it's strictly unofficial (we don't wear our colors, primarily). And if it's one of our own's birthday or wedding, we'll do it. (I suited up with a handful of others for a fellow Squad member's wedding and did a photo shoot and interacted with other wedding guests, it was great fun, because it was one of our own and I was a guest at the wedding already.) It also came up that we had offers of charity donations in lieu of payment, and my command team and I ultimately decided a private party charity donation for our appearance was still at its heart a private event, and we wanted to draw a line and stick to it to avoid confusion and muddying the waters, so we don't do that. I had a email run in with a disgruntled bridezilla with that decision.1 point
-
awesome tutorial! I believe at this point in time, I can give anyone a run for their money on bent, misaligned snaps......I probably bought an extra 2 bags of Tandy line 24 snaps because I've ruined so many female side snaps (the convexed ones). For those having trouble keeping the both sides of the snap mated straight, here is what I did: glued some rubber to the convex side of the base tool. This made sure that the it wouldn't slip/slide around during each whack started using a rubber ended mallet to initiate the deformation of the post (steel hammer bad....but can be effective with the male side snap as it is more forgiving) finish off the final blows with the plastic side mallet When I used a steel hammer on the female snaps, they tend to go helter-skelter and the post would flare out and seal way too quickly....usually in misalignment. Take your time with the blows from the rubber mallet; this will allow you to keep your snaps aligned as they are set into place. I'm OCD so I couldn't live with the misalignment. it was still functional, but looked pretty sketchy. Plus, I didn't want to throw down $200 for the vice tool at Tandy Leather1 point
-
Looks right to me!1 point
-
Chris is SPOT-ON, Drew. The kids are super excited to see you... for about the first 10 minutes. After all the parents have taken their photos, the kids will either ignore you completely or consider themselves youngling Jedi masters and make you the perfect practice target for their plastic light sabers, while the parents just stand there and say "Awwww, isn't that cute". Unless you have a handler, I personally would advise against it. What you do with your armor is up to you, but 99.9% of kid's birthday parties are not approvable for trooping unless they make a donation to charity.1 point
-
I'm not sure what the official legion line is, but our Garrison doesn't do them as a general rule. Outside of the legion what you choose to do is you business but I'd recommend against it. You'll be surrounded by dozens of children, hyped up on sugar and probably unable to listen to instructions. They will be super excited for 10-15 mins then you risk becoming a target. Also the children and even parents won't have any knowledge for the care and expense in the costume and my be surprised by the cost of any damage caused as "it's just some plastic".1 point
-
And it's looking like I'll need to cut the cod...... Your reminder that it will be hidden under the belt has made it less intimidating! Sent from my iPhone using Tapatalk1 point
-
Well done so far! I used the snap method but found it is too restrictive for movement. But this works for many trooeprs! I switched to a simple elastic that I glued directly on the armor. Good Luck on the rest of your build. You are moving right along.1 point
-
As well as clamps and magnets painters tape can be a great help. At least you have the right idea, it's better to take your time than rush through. No doubt you will get there soon, keep up the great work1 point
-
Jimmi also offers 2 sizes regular and tall.1 point
-
DLT-19s are not "normally" carried by TKs (except ANH Hero... think Luke and Han), but the CRLs state that they are an approved weapon for ANH Stunt, but.... it comes down to what makes ya' happy! I wouldn't suggest carrying anything larger like a T-21 or PTL missile launcher though unless you are a Heavy Weapons Trooper or a Sandie. That would look a little out of place, lol.1 point
-
Paul is right, there. I think very few Troopers holster their weapons anyway. The fact is, it can be almost impossible to do as it is danged near impossible to see it because of the limitations in visibility when wearing a helmet.1 point
-
Your chest can definitely overlap the ab more. Just make sure the button plates are still fully visible. If you need to shorten the ab even more, you can split the cod and remove some ABS and the belt will cover the seam.1 point
-
I have been taking things one step at a time and veeery slowly ever since my dremel died, so I'm trimming with patence, an Xacto qand Lexan Scissors. Now, I've got the chest, backplate and abdomen plate semi ready to go but my major concern here is the return edge. As the kit I ordered came untrimmed so I could fit it into my big chunky body, I still wanna look good. Here's a line I've traced of what I might go with - but still havent trimmed down. Ideally, is there a measurement I should follow, or how thick it should look? If it's good like this, should the same thickness be followed back to the kidney plate, both upper and lower areas and the butt plate? this is the ab an kidney held with masking, nothing has been cut, glued, etc. Pics: Butt plate which also concerns me, the lower area where our beautiful cheeks are tucked inside, does this area in particular has return edge? I notice some screen caps, they do have return edge but some don't or is it very minimal? As in not the same thickness that the Ab, kidney, upper butt, etc. (Taken from TK300 website) A general question, is the return edge all the same all around the armor? If so this could help and i'd just measure the return edge on the lower side of the chest plate and use that and cut and devour away like Tazmania1 point
-
Sugru works great for the frown mesh too. Thanks for the great walkthrough @justjoseph631 point
-
I got a price... pre order is $699 plus shipping otherwise its slate to be $780 plus shipping. pretty sure thats without a bucket... I want to see more of the BSP stuff but it looks great so far back to KB's stuff!!1 point
-
AP quoted me the average build and ship time to be 1 to 2 weeks. first week down. Probably because he is in Canada and I am in the US, it will be closer to the 2 week mark. Then it will be BBB day!! I will post photos here when I get it.1 point
-
Thanks for the advice Walt. And by the way , I just got approved for the 501st with one of your ANH TKs.1 point
-
Hi first. Take your time Go slow and really enjoy the ride your done when your done ( gino told me that ) anyway. You will need a tank for the pump. A pump alone won’t work all that well unless your CFM is way higher And as you probably Know now. The higher the CFM the higher the cost on the pump So with a tank added you will take care of that problem I don’t use wood molds just because where I live. Way to much moisture and the the heat from the plastic just splits them but what I did. Is instarted with plaster It’s cheap and you can form a few pulls off it before it brakes. But enough to get your sized up correctly You can add and sand down form that and try it till it fits. Then go in for your details And best advice I got from troooer master is go for accuracy Right off the bat Or you will find your self later on just redoing it to make it right most of all ..... don’t give up. It’s a lot harder to do then most people think oh. Also make sure your venting that area real good I run 2 to 3 fans to move fresh air in let me know now if you have any other questions along your way Walt1 point
-
Feel better soon, Daniel. Oh - and if I'm still up for it, I think this is my next build: Or a first order snowy. Make it hard on myself.1 point
-
on steel,,,, the alum is a diff story1 point
-
If I may, ‘clearable’ and looking realistic are two different things. People have managed to get cleared for 501st use with this armour, but that doesn’t automatically mean that it is good armour. Clearance is more about how it fits the wearer and whether the construction methods are correct - not whether the mouldings are screen accurate. My personal opinion is that the helmet and chest plate look very different from those seen on screen. That would be my reason to look else where. With buy one get one free, they’re dirt cheap and a low budget way into costuming. At normal price, you can get more accurate for less money. Just depends if you want cheap or more accurate. Just my opinion. :-) Sent from my iPhone using Tapatalk1 point
-
rear sight knurl1 point
-
rear sight knurl1 point
-
First off, he didn't have to show his moulds to anyone, however if he does use his own molds to form his armour and he were to show them it would stop people accusing him of recasting someone else's work. Which brings me to another point you made "Is he hurting you" the answer is no he is not hurting me personally but if, and I repeat IF he is recasting the work of others he is "hurting" someone. Last point, TK's do not cost $3000! Mine is from a vetted member and cost £800 all in. And as I always like to end on a high, you look the business in the armour, nice build Trooper.1 point
-
'Our helmet is the only 3-part kit on the market'...my AM 2.0 kit strongly disagrees. Come on, at least do a touch of research...1 point
-
Man.......the TK pics on the front page of that website look horrible. Maybe I'm just going by 501st standards and not the typical person in the public, but even before discovering the 501st, I would think that anyone looking at the TK's on that website would think something was off! The construction of the buckets look absolutely horrendous!1 point


.thumb.jpg.8eadc48331a3df147c8d5e71dd9b8a00.jpg)