Leaderboard


Popular Content
Showing content with the highest reputation on 01/25/2018 in all areas
-
Side 256 flat heads on the Hengstler front2 points
-
Now that the butt plate has a spiffy new return, the next big part of sizing down my TK armor is tackling the kidney. I'm only focusing on reducing the height of the kidney at this stage, not the width. I had some time to think about how I had sized my previous TK, and I really did not enjoy trying to get the kidney to fit properly. It was a whole lot of trial and error to get to a wearable stage. I always felt like I was winging it blindly, and it took loads of time to do. Looking at my WTF kit, I thought that there might be a better way to alter the kidney. First, I looked at the shortened cod/ab plate and the kidney. (Remember that I did not remove anything off the top of the ab plate, but rather removed extra material only at the cod.) Before alterations, the cod/ab plate top meets up nicely with top and the bottom of the kidney. That's how I figured it should line up after alteration as well. So my goal is to reduce size of kidney so that it meets both top and bottom of ab as it did before size alteration. Something I learned from my first build is that the front halves and back halves of the TK clamshell should be fairly lined up when closing. So when reducing armor in the front, you've got to reduce armor in the back in approximately the same amounts to help keep things lined up as you shrink the armor down. I misplaced the original measurements for the kidney (sorry!), so I don't have that to share. My ab plate edge measurement from top of the plate to the hip (after cod reduction) is 6.5”. In order for the ab and kidney to line up at the tops and bottoms, I need to remove plastic from the bottom of the kidney, making the overall height at the edges approximately 6.5". I also need to keep enough plastic on the bottom to provide material to create a new return. The kidney notch will be removed, but a new one will be recreated. In theory, this method should allow for a good smaller-sized fit and still maintain the original proportions of the kit. Here you can see the kidney before cutting the bottom off. Using my compass tool, I made a line across the bottom that matched the original lines of the bottom of the kidney. I'm giving myself a 1/2" allowance at the bottom for rebuilding a new return. I know that the bottoms of the kidney do not have to line up with the ab, but since I'm trying to keep things in proportion to what I removed in the front, this is my path. I begin by cutting about 1/2" of plastic off. After careful cutting, here's what I have to work with. Next, using my compass tool to follow the new cut line, I made a mark about 1/2" in from the edge. This will be my guide as I make my new return. Using my heat gun on LOW, I heat up the plastic, beginning at the middle of the kidney. I use a long piece of wood to shield the main part of the kidney just above the pencil line to help prevent any unwanted softening of surrounding areas. I hold the wood at an angle just above the plastic (not flat on the plastic!), but I couldn't get a good shot of it! The plastic on this piece seemed to take forever to soften up with the heat gun. I really had to be patient with it. Using a smaller piece of wood, I gently pushed the softened plastic to meet the jig behind it. This is what it looks like when starting out after a few passes. My first 'crimp' in the kidney was just a little short of my guide line. I had to reheat it and push inwards to get it exactly where I wanted it to be. Again, patience is critical for this kind of work! I kept working the heat gun to the right on the kidney, overlapping the previously heated and crimped areas to ensure that the entire return ended up uniform and smooth. Some wavy action on the inside of the return is to be expected. No need to panic about this. It can easily be flattened out after you're happy with your new return. Continuing to the right... And after about an 45 minutes of careful heating and shaping, the right side was done. You can see how smooth the return is after making sure the plastic was flattened out on the jig. I will be removing some of this return for comfort after installing my brackets. Another 30 minutes or so, and the rest was done. Behold, a kidney with a new bottom return! Here you can see the before and after. I wish I had the butt plate attached in the 'before' pic for a better comparison shot. Ah well. You can still get a good idea of how the cod and butt plate are more aligned with each other after the kidney trim. Remember, I am adjusting for my height right now, not my girth. Once I'm happy with how the torso armor hangs on my frame, I'll begin work on trimming at the sides.2 points
-
Ok, I've FINALLY made some descent progress on the counter. First up I used some cut up cigar box nails (really small) to fashion pins to hold the counter reset button in place. This is to give it some added strength in case it gets bumped. Hopefully it won't break off so easily. Then I added the screws from T-Jay's kit as well as one of my own to the counter. Replacing the poorly cast resin ones by grinding them out with a dremel. I also glued on the top plate and window that I made (correctly positioned this time) and filled the edges with "green stuff" to hide the seams (again). I should mention, I really didn't like working with "green stuff" at first. It's REALLY sticky. It kept sticking to my fingers and to any sculpting tools I tried to use to smooth it down and shape it. I got so fed up that I went to a local hobby store and picked up some modelling putty. It was Squadron Products fast drying, white putty, hobby filler. But you know what, I didn't like that either. It's a cream that goes on easily, but it's kind of "sandy" in texture and, worst of all, it wants to keep that sandy texture when it gets painted. Almost like wood the way it absorbs paint instead of paint sitting on the surface. Anyway, I went back to "green stuff" because it takes paint like plastic. Super smooth. And I learned to keep a bowl of water handy when I'm working with it. I keep my fingers and tools wet and the "green stuff" behaves better. I was getting really anxious to see what the counter would look like painted. So I took a break and built a little spray booth using 1" PVC plumbing pipe and some plastic "drop cloth" painter sheets. It's about 3 1/2 feet square. It's kinda cold this time of year and it's gonna rain for months so I can't paint outside. This way I can paint in the garage where it's at least a bit warmer. I also did something a little different with the counter window. Instead of trying to mask it off with tape, which would have been really difficult, I painted it with liquid latex. I dressed up as a zombie for Halloween last year and I still had some liquid latex left over. I gave the clear window about 4-5 coats, letting each one dry for several minutes before I started the next coat. This formed a barrier to keep the paint off but still something I could peel off easily. In this case I think it worked better than tape. Ok, big reveal.... Here's the counter with the liquid latex barrier still on... And with the latex peeled off... From the side: And a before/after: I'm pretty happy with the way it turned out. Makes me feel good about my first build. I'm not going to do any weathering yet. I'll save all that until the end. I think the power cylinders will be next... Mark2 points
-
Ab Box Trimming and Shaping To trim the Ab boxes to the desired shape I used a contour tool. I didn't know this even existed until earlier this week. It made this task a breeze! I shaped the tops and bottoms of each box, making sure to keep the tools orientation correct (gotta be cautious of that or else you'll get the exact opposite contour that you desire!) I then taped the boxes to the Ab to get a rough fit. Overall not too shabby! Box D has a bit of a gap up top from over trimming the curve but I can fill that in later upon assembly.2 points
-
Looking good, as you say just some fitting issues, hope to see you in the pre approval area soon, good luck.2 points
-
The Oracle is mysterious, and while I can perform the ritual and attend the sacrifices, it's beyond the ken of men to know when they will choose to intercede.2 points
-
Name: Daniel Melin TK ID: 99665 Garrison: Nordic Garrison Forum name: TheSwede Armor maker: TM (troopermaster) Helmet maker: TM (troopermaster) Blaster: E11 Imperial Warfighters Hight: 5'10 Weight: 202lbs Thank you for your consideration /TK 996651 point
-
Nothing better than a BBB, do your research before you trim, measure twice and cut once and don't be afraid to ask questions, there are no silly questions, just silly mistakes from not asking them. Good luck.1 point
-
Explanations of each screw are described in my "Supply List..." thread, as well as detailed photos if anyone needs to reference them.1 point
-
Centurion #2 is in1 point
-
I mount mine pretty much as Dave as said but without the gap, I hold in place with a few dabs of hot glue then use the corking/silicon which dries overnight.1 point
-
you can always google what that means. I feel if you are going centurion, you are asking other TKs what is what. So you should arrive with the correct conclusion1 point
-
Just bought one, Amazon $9. Thanks for the tip AJ1 point
-
More Hengstler build getting closer still need and few more tiny screws1 point
-
After looking at both, I'm leaning a little towards Troopermaster. I've sent him a message on facebook. Trying to figure out how to determine pricing, waiting list, etc.1 point
-
Thanks Daniel and Tony for the feedback. The 2 inch strap was already glued to bicep so I just had to tape the strap into forearm. Here are the revised arms with before and after comparison of reduced size biceps and forearms. Before... After... Before... After... Thanks for all the help so far everyone! Sent from my iPhone using Tapatalk1 point
-
I mount mine with a slight gap. I use cork glued to the helmet and then I am able to crew the lenses into the cork so I can always change them easily is needed. The gap I have you cant even notice. Its probably less then a 1/16 of an inch.1 point
-
Seconding all the cautions to be very careful when working with a heat gun- it's all true, and definitely practice on a scrap piece. I have a cheapie from Harbor Freight, it has high and low. I couldn't begin to tell you the actual temps, but both are pretty hot (ie don't stick your hand directly in front of it). The biggest trick is to KEEP MOVING. Don't let the gun sit steady and hover over any given spot of armor- yes, this is tempting because it makes the process go faster, but it also ruins things that much faster. Move it back and forth like a pendulum swing. Also don't get too close to the armor in question- same temptations and reasons as above. I'd recommend no less than six inches from your armor piece, preferably eight to ten inches. I use mine in combination with a clamp to get my forearms to a more circular shape when they want to go oval on me (so far a once a year thing for me). I tried the hot water trick, which works if you only need a little bend; I needed significantly more and the hot water trick just didn't hold. What armor piece are you trying to work with? That also makes a different. There are also heat irons, but I personally didn't have any luck with one and prefer the gun. It's all personal preference. Also, if inexperienced, the heat iron is used directly on the armor, while the gun is not. Food for thought there.1 point
-
I still don’t know what half the stuff means but congrats! Sent from my iPhone using Tapatalk1 point
-
Congrats on your BBB!! I have AP armor as well and I'm very happy with it. Yeah, this site is very helpful and there are many,very knowledgeable people who are more than willing to help you with your build... but the acronyms do take a while to sort out.1 point
-
Congrats on the big day! Don’t worry, I had to do the same thing with BBB[emoji23] Sent from my iPhone using Tapatalk1 point
-
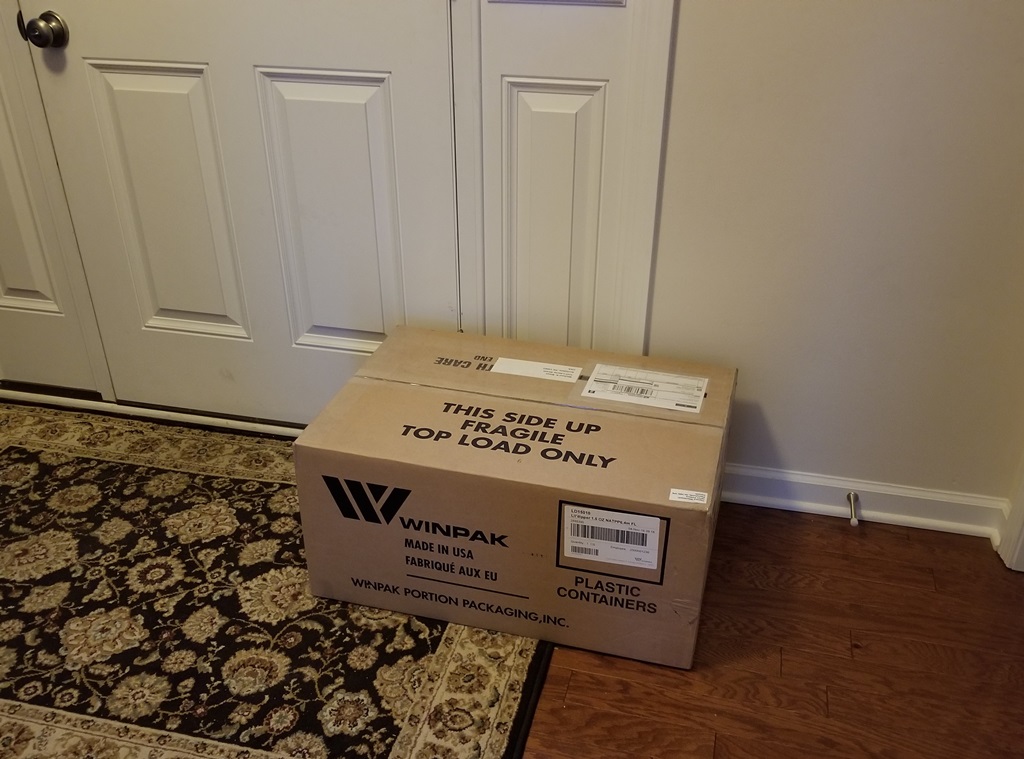
I have read so many posts talking about BBB day, but it has finally happened to me! My AP kit from Mark arrived yesterday. I'm ashamed to admit that once I decided to do a build and started to research, I had to do a search and find out what "BBB" meant. I know now! Very excited to get started.
 1 point
 -
From the looks of it you can trim more, mobility is not great but it`s a good thing to be able to put on/remove the helmet on your own and as for the black showing, most of the time you carry a blaster so with the elbows beeing bent hardly any black is showing. (RS suit for reference). Just to be sure not to trim more than you have to it`s a good thing to have the torso on with the shoulder bell and arms temporary connected (tape on inside works great) and then se how much mobility you have. Things tend to be different when strapt together compaired to just bits and pieces1 point
-
Thanks for the clarification! That's what is amazing in here; everyone is just so kind and helpful! I hope I'll be able to contribute to that someday!1 point
-
First of many my friend - Happy for you! Do add to the trooper log [emoji6] Sent from my iPhone using Tapatalk1 point
-
Pack is D O N E1 point
-
I will second Q. As for achieving higher levels, when you start from scratch, it's not more work, maybe a couple of holes for the spit rivets, but, that's it.1 point
-
Just a few strapping issues to resolve and I think I’ll be ready for Pre-Approval! The chest and ab seems to come apart too easily and the thighs need a better belt solution — they tend to slide inward and throw off the vertical alignment. Bugger. Sent from my iPhone using Tapatalk1 point
-
The first but no doubt many more to come1 point
-
Congratulations. Now time for EIB.1 point
-
Congratulations trooper and welcome to the ranks1 point
-
With the cover strips most try to keep the fronts at a standard size and if needing to size up do so on the back side as the public doesn't see that side as much. If you really have to size up and the backs are going to look huge I would make the fronts slightly larger.1 point
-
My first legion patch arrived today, and it’s a beaut!! Thank you to those involved in making and distributing these! :-) Sent from my iPhone using Tapatalk1 point
-
Congratulations Matt, it’s a fantastic feeling when you get your armour cleared. Well done mate Sent from my iPhone using Tapatalk1 point
-
Sent from my iPhone using Tapatalk1 point
-
Is this the one you mean? http://www.tridon.com.au/products/Toledo/19/327664/containers-and-funnels/409947/oil-drain-pans/428369/305090 you would have to do some adjustments, like remove the center tuba at the top, but the dimensions look about right. This link may help as well for other dimensions: https://www.whitearmor.net/forum/topic/40081-tip-note-on-hwt-pack-specs/ Note that all sizes are approximate, as there are no "canon" references. As long as the finished product is close in appearance to the one in the bottom part of the HWT CRL, allowances can be made. Best of luck on your HWT journey, and feel free to PM me if I can help.1 point
-
So did the test fit on the thighs real quick yesterday. Knowing the bottom should be mid knee was a relief to hear. Glad I won't need to trim them for height. I also realized they are almost a perfect fit at the top, pre-trimming the 20mm cover strips. Sent from my VK815 using Tapatalk1 point
-
Thigh ammo pack. I hot bathed this piece earlier just to make fitting easier. Just held the ammo pack up to the thigh and figured out the distance from the back return edge. I measured 6mm from the top edge. Drill hole and install split rivet with #6 washer Wrap ammo pack around to other side and marked hole. 6mm from top Install second rivet and I will add a couple drops of glue to hold ammo pack up to cover seam. Add some tape to hold and let dry. Much easier than that f&@$ing sniper knee. Oh sniper knee, I shalt maketh thee my bit... . Sent from my iPhone using Tapatalk1 point
-
Congrats Matt1 point
-
1 point
-
Congrats Matt. The belt issue has become quite a heated discussion on our Garrison's facebook page. To date, GML's and CO have elected not to comment.1 point
-
Congratulations and welcome to the ranks trooper1 point
-
Excellent news Matthew. Welcome to the 501st family.1 point
-
Unable to see it in my country? the United States is BANNED! I am sure it is awesome1 point
-
Sent from my iPhone using Tapatalk1 point
-
Looking Good Matthew. Do you need some padding in your thighs? Your left leg thigh looks like it moves around in your pic.1 point
-
My Rogue One E-11 blaster1 point