Leaderboard


Popular Content
Showing content with the highest reputation on 01/06/2021 in all areas
-
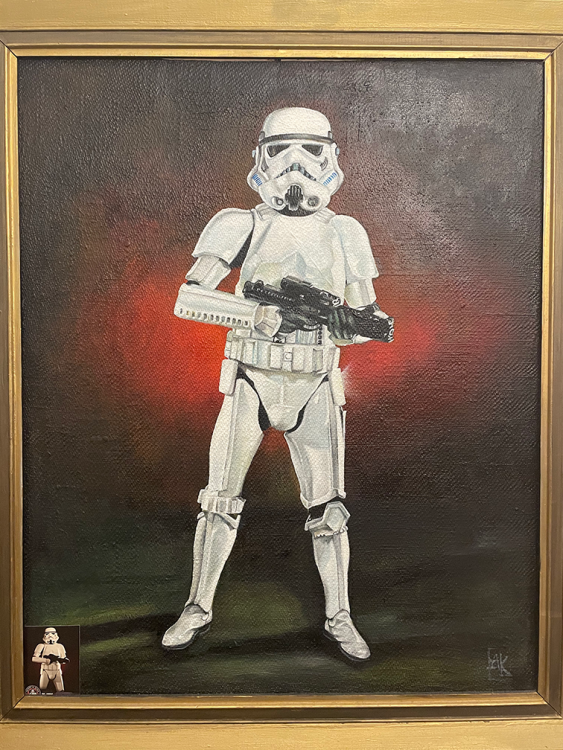
the last supper Oath of the Horatii3 points
-
Nice work. I went the route of commissioning an actual painting instead.
 3 points
 -
Christine (Cricket) also shared this tip with me several months ago, after she accidentally discovered the occurrence with one of her props. I am considering using the technique myself to remove my TD control panel.2 points
-
To add, Praetorian blasters (I own a few) are very high in detail, I mean I still try and flip the safety lever every time I grab it because it looks so realistic (i'm a real firearm owner btw so it comes natural). Anyway, I've dropped it onto concrete from over 6' without and single detail failure. On the other hand I've dropped 3d printed blasters 3' to carpet and watch them shatter into pieces. Lastly are the metal, naturally they look and feel like the movie prop but weigh 5+ lbs. No thanks. Whatever you decide to go with make sure it's durable, accurate and most importantly you'd be happy with it.2 points
-
Hi gang ! So my good pal @stevechewbacca finaly pushed me over the edge and I am starting to get things in order to make a mando episode 8 incinerator trooper. I am not the crafty type, so I will need a lot of help. EDIT : I have added a bit of formating and color coding so that it may be of some help for others (also helps me keep track of stuff). On to the parts : Imperial boots - boots : ordered 09 january 2021 (154.90 USD / 130.69€) + 43€ for customs Added to production backlog by IB on January 10th Received January 20th / wrong boots, got regular TK instead of R1 TK Sent a contact form inquiry through IB website. (Not sure if worked) 20/01 Sent an actual email to IB for inquiry with picture of the wrong boots on 21/01 22/01 : IB replied that the issue would be resolved next week Received February 3rd thanks IB for promptly fixing my little issue Endors finders - gloves : ordered 10 january 2021 (72 USD / 61.52€) Shipped 13th january Received January 20th Darkside closet - underwear : Pauldron : Found my grey pauldron, wife is confident it can be painted red Now the hard part : the armor and helmet. Steve mentioned jimmyroquai and 850armorworks but more advice would be appreciated. In particular I would like to have a helmet that match the armor. I don't mind painting the red strips, but going full automotive paint on the whole armor to have a matching white is a path I rather not go. 24/04/2021 : I went with Jimmyroquai in then end, couldn't be happier. The armor is super crisp, the details are amazing. Still needs painting, but it's pretty well finished already, I am less concerned. I am still looking for a pro to do the painting, because hey it's a 1000 euros worth of armor, better have it done right if possible (depending on the cost obviously). Armor from jimmyroquai 40% Downpayment sent on january 21th - 293.29 euros Rest of the payment sent on 07th April + shipping : 629.14 euros Scheduled drop on Tuesday 20/04/2021 : 107 euros for customs Dropped on thursday 22/04/2021 total cost : 1029.43 euros Zippo from Marko Makaj STL Files Delivered in minutes ! (30 USD / 25,88 EUR) 3D Printer : Artillery Sidewinder X1 Ordered on April 12th (357.45 EUR) Received on April 16th Thank you gals and guys for the help, looking forward to flaming away1 point
-
Hello all from NE Ohio! I am 5’11” and medium build. I will be ordering and building an RWA TX kit shortly, and look forward to making some incredible memories and joining the ranks of the 501st! I will be experimenting with integrating various electronics into the suit once I complete my build and have it approved in order to create an immersive experience. I am excited to start this journey, as I have spent weeks lurking on this forum and compiling useful knowledge for my upcoming build.1 point
-
Happy New Year to all! I've been reading about armor for months and have started gathering resources and guides on armor. First I want to say, this is a pretty amazing site with an incredible amount of knowledge on it. From costuming to 3D printing to just general questions on trooping, it's amazing to see so many helpful people. I'm based near Fredericksburg VA and have two kids (3 and 5) that have recently become obsessed with Star Wars. My daughter told me yesterday that she wants to be a bad guy instead of a good guy. My reply was "Excellent!! <evil laugh>". I'm currently making lightsabers for both of them out of Arduino Nano's and 3D print custom parts. As far as costume, I'm probably going to go for the ROTK. I absolutely love the Stormtrooper look and have always wanted a blaster. I'm currently printing the last few parts to my blaster and will be filling it out with an Arduino Nano..........and also making it so I can play laser tag with my kids. :-) I've engineered the lenses for that and will be making guns for them as well. Initially, I was planning on 3D print armor but from reading several other incredible threads (mainly Jason's from Stafford) about 3D printing, I decided I probably don't have that kind of time or patience. I mean.....I probably do, but printing something, spending all that time on it, and then having it crack is just not something I want to deal with so I'll likely buy most of my armor. I may print parts of it here and there, but for the most part I will piece it out from listed sources from this site. Except the helmet. I really want to print my helmet and really spend some time getting that right. I know I could just buy one, but I've read a great deal on finishing helmets and applying resins and hardeners, so I'm pretty sure I could do a good job with it. Anyway, I'm excited to be here and I hope that 2021 will see some events that I can attend in our area (though I'm a little doubtful). Catch you all on the flip-flop! Jason G1 point
-
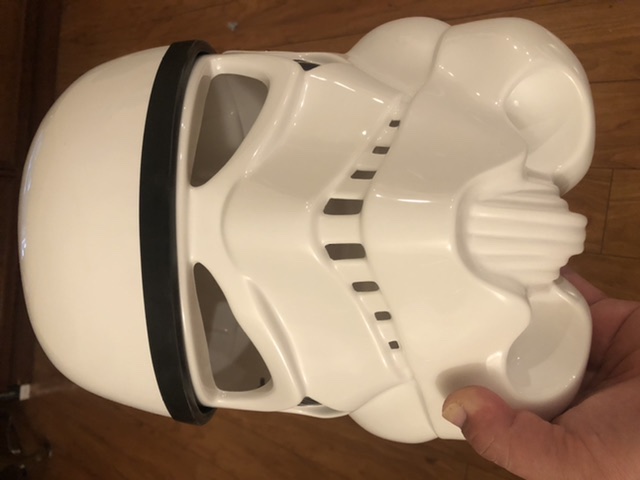
Update on the helmet, I’ve been working on cutting the teeth. Unfortunately I haven’t been able to find the correct paints so I may have to order those as well.
 1 point
 -
Good luck with the build, looking forward to seeing the progress1 point
-
Romain, I really like your plan. I've been thinking about repainting my old ROTK armor into something from The Mandalorian, possibly a Remnant Stormtrooper, the Incinerator, or even the newer Mortar Trooper. I think these new variations are outstanding. Let me throw up two screen shots: The Mandalorian Incinerator is entirely a Rogue One/ Anthology/ New Generation Stormtrooper. For that reason, I think your choices are spot on; either the 850 Armor Works or Jimmiroquai armor should work. Please check out @Nicker's WIP here: https://www.whitearmor.net/forum/topic/49446-remnant-incinerator-trooper-wip/ He's got an awesome build using the 850 Armor Works set, and has provided links to the flamethrower/ pack 3D files. Additionally, your soft parts selections are all great choices (they're actually the same ones I have.) For the Pauldron, I really like Katarra8's offerings on Etsy: https://www.etsy.com/listing/150178963/classic-star-wars-stormtrooper-shoulder?ref=shop_home_feat_3. So, when you begin your build, pay careful attention to the ROTK CRL and reach out with any questions, there's tons of people who will be excited to help. Now, lets get that CRL created.1 point
-
Cool. Just be careful not to get the WD40 on any areas you want to glue. You would have to completely remove any residue the E6000 wont cure.1 point
-
Good tip. I'll try in a current build.1 point
-
Awesome !!1 point
-
Congrats Mark well done!! Sent from my iPhone using Tapatalk1 point
-
I ended up using questdesigncanada on Etsy, I’ve seen lots of guys with his blasters and the communication between him and I have been fantastic. It’s taken a bit longer than originally expected but he’s kept me in the loop and I know exactly where it is currently. 10/10 would recommend1 point
-
There are advantages and disadvantages to different types of blasters, for instance: Rubber- (Hyperfirm-Praetorian) Pros- Basically unbreakable. Perfect for trooping, and you can let folks who ask "Can I hold your gun" pose with you for photos without fear of them dropping it. Cons- Not as detailed/screen accurate. Can be expensive. Resin-(Doopydoos)- Pros-Comes as a kit, but can be modified with one of Tino's finishing kits to replicate a screen used weapon. Cons- Hard to get ds to be on the brittle side. Not recommended to loan to a fan. Difficult to get. 3D printed- (Various makers) Pros- Accuracy can vary between "Wow" and total garbage. Cons- Depending on how it is printed, there may be a LOT of filling/sanding involved. (Required for Centurion level). Tend to be very brittle, Not recommended to be loaned to a fan. There are other makers that tend to be on the accurate side but require some alterations, especially for the higher levels of approval. When in doubt, always feel free to ask and we will lead you in the right direction!1 point
-
Excellent point, brother. Sorry that happened to you, but I have added a link to this post in #1 of the original post. THANKS! 1. ..... They also can (and will) shatter if allowed to connect from a distance, and flying chips can cause eye injuries. In a word, be careful. I highly suggest wearing eye protection. That is up to you, but please read this post from Glen located below.1 point
-
Looks like you have quite a bit of seepage there, but this is actually easily removed. Just use a razor knife and carefully trim along the cover strip.... just deep enough to cut through the glue. After that, it should rub off using your thumb or a sharpened popsicle stick.1 point
-
Small update to get the new year started! Currently in the process of taping off and getting ready to paint the brow, teeth, and neck rim. After that it's the 501st marking and tube stripes. Also the past 2 months I've gotten 2 new blasters for my collection: A DC-15s for my Clone build, and a E-11 (which does have lights for blaster and stun settings) for my StormClone! In reality the in-game model uses the ANH version, which I did own at one point... till it broke at a con and I always liked the RotJ version the most, so for now that's my stand-in. Hopefully next post will be an almost finished painted helmet1 point
-
Nice work, you may want to move the cut ends of the plastic ties behind the cabling or you may find you could catch on them from time to time putting the helmet on or off1 point
-
I think Doopydoos has left the stage on producing E-11's, sad to say. I LOVE their kits and have built a few of them, but I have been on the waiting list for almost 5 months with no reply. I have emailed them several times as well to no avail.1 point
-
As far as I know, Hyperfirm (HFx Productions) is no longer around, but Praetorian Blasters is a former business partner and sells foam E-11s. Another vendor to consider if you want a "soft" blaster is Hellhounds Props, they make rubber E-11s. https://www.facebook.com/BlasterMaker https://www.facebook.com/hellhounds.props I personally prefer to build the blaster from a kit, either doopy's or 3d-printed. Especially the doopydoo kits come at a very low price and are highly accurate, as they are molded off a real sterling. They are out of stock at the moment, but they are usually back very quickly. https://www.doopydoos.com/ekmps/shops/filmfreaks/stormtrooper-e-11-complete-anh-e-11-blaster-kit-offer-2685-p.asp1 point
-
1 point
-
Happy New Year, hope it's a much better year than the last for a lot of us1 point
-
Well done, Mark. Great job. :-)1 point
-
Congratulations Trooper! You look, and sound ;), great!1 point
-
Congratulations trooper, Welcome to the ranks.1 point
-
Well done KC, congratulations and welcome to Expert Infantry Hope to see you at L31 point
-
Ah that makes sense I appreciate that, and I’ll take a look thank you very much!1 point
-
Today I trimmed the edges of the forearm as by Josephs advice. Came out pretty nice I think. Then I took away the pesky returning edge by the wrists I think the left forearm is finally finished cutting! I have started with the other arm, that overlap is a PAIN to take off. (Thanks, by the way Dave with giving me instructions.) That will have to do it today, I have a free day tomorrow so I will hopefully make some more progress!1 point
-
Hey folks, I've posted this over on the UKG forum too *** Edit - Has now been removed from UKG forum *** I think this little list of required changes to the standard factory SDS battle spec outfit may be useful to anyone hoping for 501st basic approval, especially if they're in the UK, where some 'extra' detailing is required over and above the published CRL. For ease of use, I'd suggest following the level 2 requirements on the CRL if you wish to gain UKG approval. If nothing else, it may save time, both from a builder's AND armourer's perspective if SDS owners know exactly what is required of them from the start I will say for starters, that if I were to start this process again (with SDS stuff), I'd remove ALL internal strapping and velcro, and use snap and plate system with elastic connections. . I'll update the list as and when I remember stuff i've done or when I carry out a new change. . Modifications required for basic 501st (UK) clearance: SDS Battle Spec ANH Stormtrooper . Glue shoulder straps to upper tabs on chest plate. (Ensure 4 narrow ribs are on chest plate) Glue closed Biceps. Glue closed forearms. Glue closed thighs. Keep your ABS belt for the following: Glue cover strips to rear of thighs. Glue cover strips to rear of shins (ensure coverstrips are glued to extreme edges, or outside of shin overlap) Glue cover strips to front and rear of biceps. Glue cover strips to front and rear of forearms. Remove bottom 1" of left thigh coverstrip, to finish before knee ridge. Trim sniper plate to required standard. Remove both bolts from sniper plate and fill holes. Glue sniper plate in correct position on knee ridge. Remove both bolts from knee ammo plate. Replace bolts with suitable 6mm flat rivets, painted white. Reshape knee ammo plate to give 90 degree angles on upper corners and rounded on bottom corners. Reattach knee ammo plate, repairing any holes left. Remove plastic thermal detonator clip and replace with required metal clips. Repair holes left by plastic clip removal. Reduce length of thermal detonator to required size. (I had to cut slices out of grey pipe, as the caps were ABS welded on). Replace supplied ABS belt for a canvas belt of suitable dimensions. Reattach waist ammo pack and drop boxes to canvas belt. Attach suitable holster to left side of canvas belt with two silver coloured rivets or chicago screws. Ensure correct forward positioning of holster. Additional changes i've made, which weren't required, but are little bits of detailing: Reshape the bottom left and right points of chestplate. Make 50mm white elastic / snaps shoulder bridge connectors. Remove the SDS-supplied over the shoulder strapping. Install brass rivet on cod. Install 2x snaps on underside of butt. Things I still intend on doing: Install 6x white painted brass rivets on L/H body - 3 on kidney, 3 on abdomen. (Done) Make a belt / garter system for thighs. (Done) Install single snap on R/H abdomen. (Done) Complete all interior strapping with no velcro - only elastic and snaps. Cut notches in both sides of kidney, depending on how it'll look with the SDS armour. Install an in-helmet fan.1 point
-
So i've made some alterations to my SDS armour, still a couple of things to go.<br><br> I've:<br> Changed TD clip from plastic to aluminium clips.<br> Changed plastic belt for canvas one.<br> Made holster and affixed on l/h side with two rivets.<br> Got my Chelsea boots painted.<br><br> I need to:<br> Fix the shoulder straps to chest plate.<br><br> But the question is about the "Fully closed" wording, especially the biceps and forearm.<br> All limb parts on the SDS armour are velcro-closing. Is this acceptable? Does "Fully closed" just mean that there are no gaps? EDIT: An ongoing list containing steps required for (UKG) 501st basic approval here: http://www.whitearmor.net/forum/topic/36274-sds-shepperton-design-studios-snagging-list-ukg-501st/1 point