Leaderboard


Popular Content
Showing content with the highest reputation on 03/06/2020 in Posts
-
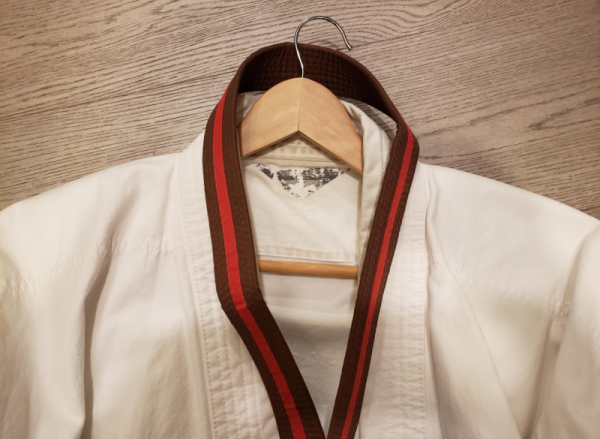
2.5 year ago I got tired of watching my kids do karate and stepped out on the dojo floor for the first time. I had just lost my step-father to heart disease and realized how short life could be. Last night my wife and I achieved the rank of ichi qu - meaning one degree below black belt and the highest belt rank we can achieve before that milestone. I am 52 years old. Making the jump from 3rd degree brown belt to black belt is a very big step. We are now expected to practice daily at home for the next 4 months in addition to class time, and that's just to be able to interview for the prep course (10% of people who do not take prep course earn their black belt, 80% of people who do, earn it). The prep course is a 2 hour weekly class from 7am-9am where you don't learn anything new, but they critique you to polish what you know to black belt level, and is 10 weeks long. We will have to refresh and perfect 4 katas we learned along the way and master one new kata (seems easy, right. Ha!). Plus we have to master 8 standard bunkai, develop our own 4 new bunkai, plus 26 partner techniques both as attacker and defender, for 52 total partner items. All of this has to be able to be performed perfectly, on demand, from memory. Students thus put in usually 4 hours a week of class time minimum, plus usually another hour a day especially as things get closer to test time. I have no idea if my wife & I will be able to achieve this level of performance in 6 months, or 12 months, or even 2 years. But one thing is for sure I will keep plugging away until I get there! I say this to help encourage those who tell themselves "I'm too old" or "I'm too out of shape" that these don't have to be excuses, or stories we tell ourselves that just aren't true. Never give up on a dream, not ever, and don't let negative self-talk get in the way. There are many days I really don't want to go to the dojo and would rather stay at home in front of the TV with a beer. It is also true that I never once regretted getting my ass out to the dojo and taking a class. Does anyone else have a story like this? It would be great if we could share them and help motivate each other.
 4 points
 -
Former LMO, SpecOps DL, Garrison Titan member, holder of the most FISD EIB Awards and all-around nice guy Todd Maxfield-Matsumoto & other R2 builders in my garrison & the Pacific Northwest made it to the cover of the SeattleTimes today. https://www.seattletimes.com/entertainment/movies/how-building-r2-d2-and-star-wars-droids-creates-joy-and-wonder/ Talk about dreaming a dream and a lesson that persistence pays off - way to go!3 points
-
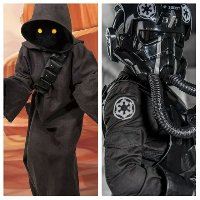
Hi guys. It's been a while since my last thread here. Been busy by others projects, personnal life, etc... you know what I mean. Props missed me so I decided to get back to an old project. By the past, I made some screen printed decals for some stormtroopers and TIE pilot helmets in the accurate way. But it was a very very long process and a little bit painfull. I improved the way to create those decals. Still not perfect (but the screen used decals weren't ^^) but I guess better. As you can see on the pics below, ESB style (which appears on ESB stunt, MKII and ROTJ V1) is different from ROTJ style (which appears on ROTJ V2, stunt and "Hero"). Shape and color. For the ESB style, I used reference pictures and close up of screen used helmet and corrected the shape since it's curved on the helmet and that I needed the shape flat. For ROTJ style, I used a resin cast of a screen used ROTJ helmet (those call Hero ROTJ) which was casted with its original decals. The blue stripes are the same for both (I used the ROTJ shape).2 points
-
Looking to hand paint your ANH Stunt helmet? Here’s my preferred process including tips and tricks. :-) See parts 7-11 https://www.youtube.com/watch?v=Saqc67Fkvnk&t=12s Any questions, don’t hesitate to ask. :-)2 points
-
Great work so far mate. Lookin good. To answer your question, my understanding is that the cover strips don't necessarily have to track down the middle but the strips on the thighs need to line up with the coverstrips on the shins. The reference photo on the CRL on the website shows the thighs slightly off center, but perfectly lined up with the shins. Keep up the good work!2 points
-
Great mate!! My ABC of building an Armor is usually : 1- Trimming and sanding all pieces 2- Taping Biceps, forearms , thighs and shins with painters tape to adjust size. (trimming again where necessary) 3- Cutting and gluing cover strips 4- Snaps 5 -Straps, pre assembly 6- 1st try with inner black clothes 7- Final Adjustment I would suggest to check out the ATA building threads to take and idea of what to expect and see what questions have been answered already and the following return edges post that can be so useful. Here is an ATA building thread that you can check. Good luck and looking forward for your advances. Cheers2 points
-
Painting time! I have started with colouring all black things: Ears and TD screws Cheeks: Right head: Left head: I also extended the vocoder a bit, will go back with toothpick later: How does it look?2 points
-
As mentioned, a hot water bath works well. Boil a large pot of water, place plastic in water for about one minute, take out and bend to shape, while holding the desired shape run cold water over the plastic. Done. Don't burn yourself.2 points
-
I will send today from Hong Kong.2 points
-
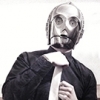
When I was a kid my uncle would tease me and tell me that my mother, despite not being a terribly religious woman had seriously considered naming me Hesikaya. After many years I asked her about it. Turned out he was right!? Fast forward to the day of the internet and i'm trying to create a cool screen name to use. Every dang one I picked was already taken. So for a good laugh I said to myself I'll bet this one isn't and plugged it in. Lo and behold it wasn't. I've been using it ever since. And most of the time it's available.2 points
-
Are you new to the FISD and wondering what the heck all those abbreviations and strange sounding terms mean? To help you along, I have compliled a list of the most commonly used ones that will give you some insight. If you have ANY questions about a particular term that is not listed or suggestions for new ones please ask! TK Glossary located at bottom of post Entries marked with blue asterisks ** are our "vetted" (tried and true) armorers. More information on them can be found here Acronyms A ABS- Acrylo Butadiene Styrene is a highly durable lightweight thermoplastic used by most makers of Stormtrooper armor. More info. here AM- Armor Master- U.S. based maker of ANH Stunt/Hero style armor ** (See DDD below) ANH- A New Hope (Star Wars episode IV) 1977 AOC- Attack of the Clones (Star Wars Episode II) 2002 AP- Authenticprops Canadian based maker of ANH Stunt style armor ** ATA- Affordable Trooper Armor U.S. based maker of ANH Stunt style armor ** (Sadly, no longer available) B BFG- Big Freakin' Gun Larger style weapons (T-21, DLT-19 etc.) used by HWTs, Sandtroopers and certain other TKs. C CFO- Cast From Original- UK based maker of ROTJ armor** CO- Commanding Officer CRL- Costume Reference Library List of all 501st costumes with a detailed description of each. Link here. CS- Command Staff D DO- Deployment Officer Responsible for approving troopers at higher levels (EI and Centurion) DD- Doopydoos UK manufacturer of various SW props, including resin weapon kits. UPDATE- No longer selling resin E-11 kits DDD- Dave's Darkside Depot Maker of AM armor (see AM above) DCA- Detachment Costume Advisor Offers advice to GMLs for approving various 501st costumes DCOG- Detachment Captain of the Guard Responsible for interpreting/enforcing rules, mediation and disputes. Also oversees disciplinary hearings and moderates FISD elections DF- Detachment Founder Paul (Daetrin) DL- Detachment Leader Elected head of a Detachment DMBO- Detachment Merchandise Branding Officer Responsible for all items pertaining to FISD logos and branding DPRO- Detachment Public Relations Officer Social Media, Newsletter, Publications, Photo Editing, Diplomat, Trading Cards, Content Editor etc. DWM- Detachment Web Master Systems Administrator/website gurus DXO- Detachment Executive Officer (XO is commonly used) Second in Command of the Detachment E EI- Expert Infantry Optional second level awarded for a more advanced screen accurate TK build. More info. here EIB - Expert Infantry Badge Official FISD logo used for the above rank. ESB - The Empire Strikes Back (Star Wars Episode V) 1980 EU- Expanded Universe Older term use for non-canon items/characters not seen in the existing SW films (books/novels/comics etc.) Currently referred to as Legends F FISD- 1st Imperial Stormtrooper Detachment FO- First Order FOBG- First Order Battle Group. Area of the FISD dedicated to all things FO related. Link here. FOTK - First Order Stormtrooper FX- Older brand of TK armor. Armor is acceptable for approval up to EI with modifications. Helmet is not accepted for approval at any level. G GML- Garrison Membership Liaison Responsible for approving costumes at Basic level GCO- Garrison Commanding Officer Elected head of a Garrison GXO- Garrison Executive Officer Second in command of a Garrison H HDPE- High Density Poly Ethylene A petroleum based thermoplastic polymer used to make the 50 original Stunt helmets for A New Hope. HIPS- High Impact Polystyrene Used by some makers of Stormtrooper armor. More info. here HWT- Heavy Weapons Trooper As seen in the Battlefront video game series. More info here I IA- Imperial Attache FISD Extended Staff Officer. More info here IAA- Imperial Attache Ambassador- Staff Officer in charge of the IA program ILM- Industrial Lights and Magic Special effects company founded by George Lucas in 1975 for SW IPM- Imperial Propaganda Machine Pertaining to the monthly FISD newsletter/Facebook/Twitter/Discord accounts L L1- Level one Basic 501st costume approval L2- Level two Refers to Expert Infantry status. Please see EI L3- Level three Refers to Centurion status. Award for the highest level of screen accuracy for a TK build. LCO- Legion Commanding Officer Description here LCOG- Legion Captain of the Guard Description here LFL- Lucasfilm Limited Film/television production company started in 1971 by George Lucas. Now owned by Disney. LMBO- Legion Merchandise Branding Officer Description here LMO- Legion Membership Officer Description here LPRO- Legion Public Relations Officer Description here LXO- Legion Executive Officer Second in command of the 501st Legion M MEPD- Mos Eisley Police Department Detachment for Sandtroopers. Link here N NL- News Letter Refers to the monthly FISD online publication O OT- Original Trilogy (A New Hope / The Empire Strikes Back / Return of the Jedi) P PER- Personnel Officer In charge of various FISD administrative duties PM- Private Message PRO- Public Relations Officer Serves as the FISD's main voice on Social Media R R1- Rogue one: A Star Wars Story 2016 RL - Rebel Legion Info here ROTJ - Return of the Jedi (Star Wars Episode VI) 1983 RPF - Replica Props Forum is a non-501st forum for prop replication information sharing. RS- RS Propmasters UK based maker of ANH Stunt style armor** RT-MOD - Canadian based maker of ANH style armor ** RWA- UK based maker of ANH style armor** S SDS- Shepperton Design Studios UK based maker of ANH style armor T TB- Trooperbay Seller of various TK accessories. Link here TBA- To Be Announced TBD- To Be Determined TD- Thermal Detonator TD - 501st Costume designation for Sandtroopers TFA- The Force Awakens (Star Wars Episode VII) 2015 TPM- The Phantom Menace (Star Wars Episode I) 1999 TK - 501st Costume designation for Stormtrooper style armor TLJ- The Last Jedi (Star Wars Episode VIII) 2017 TM - Troopermaster UK based maker of ANH Stunt, ESB and ROTJ style armor ** T/MC- U.S. based maker of ANH Stunt style armor ** TROS- The Rise of Skywalker (Star Wars Episode IX) 2019 W WIP- Work in Progress WTF- Walt's Trooper Factory- U.S. based maker of ANH style armor ** Glossary of common TK terms A ABS Paste- Slurry made from ABS scraps and acetone used to fill gaps/seams. More info here Armor bite- Points where the armor (usually return edges) are too tight and rub against your skin or cut into you causing chafing/bruising Aurebesh- Writing system/alphabet used to represent spoken Galactic Basic (the most commonly seen form of written language in the SW franchise). B Brow Trim- Black rubber gasket with a U shaped profile located above the eyes that extends back to the center of the ears on a TK helmet Bucket- Alternate name for a TK helmet Butt join- As used in ANH and ESB armor where the seams on the biceps, forearms, thighs and calves are hidden with a cover strip C Cap- Rear section of a TK helmet Canon- For our purposes, as seen on screen or deemed a standard part of the accepted/sanctioned Star Wars universe Centurion- Highest level of FISD approval for screen accurate TK style armor Info. here Cheeks- Elongated semi-tubular areas located below the tears on a TK helmet Chicago screw- Fastener that has a barrel-shaped flange and is internally threaded. Commonly used for attaching the holster to the canvas belt. Classic (strapping system)- As used in OT armor, the torso parts are held together with metal brackets/straps in lieu of snaps/straps Cod- Lower tab of the abdomen plate that covers the crotch area Cover strip- Plastic strip used to cover the bicep, forearm, thigh and calf seams on ANH and ESB armor D Detachment- One of 16 specific factions within the 501st dedicated to researching, constructing and promoting a distinct group of costumes Double Cap rivet- Hollow bodied 2 part fastener with a dome on both ends used for attaching ammo thigh pack. Not screen accurate. (See Single Cap Rivet below). Double snap- The use of two snaps instead of one on the ends of a connecting strap, providing a more reliable/stronger connection Drop Boxes- Rectangular boxes located below the ends/tabs of the ABS belt on most TKs E Ear bar- The raised area in the center of the top (round) part of the ear on a TK helmet Ear bump(s)- The 4 raised ridges on top of the ear bar. Hero ear bars have 3 bumps Expert Infantry- Optional second level of FISD approval for screen accurate armor, given only after Basic 501st approval Info. here F Face plate- Front section of a TK helmet Fire Team- Although not officially recognized by the Legion or FISD, these groups form a common identity and spirit of camaraderie among approved stormtroopers in the same geographic area/Garrison that troop together. More info here. Frown- The upside down V shaped opening (tooth area) located above the vocoder/Hovi tips on a TK helmet G Garrison- The largest type of 501st unit within a geographical region containing at least 25 members. Currently 76 world-wide Gaskets- Black ribbed rubber or shiny black coverings used to cover the shoulders, elbows and knees of FOTKs. Greeblie- A small part (usually plastic or resin) used to accessorize a prop weapon or armor H Hovi (mic) tips- Short round black plastic parts attached in the recessed areas on either side of the vocoder on a TK helmet. Note that the ones used in the original ROTJ helmets were metal. Hero- TK armor style as worn by Han and Luke in ANH. Differs slightly from Stunt. More info. here Hyperfirm- Maker of high quality rubber-type TK weapons/props. No longer in business. K Knee plates- Separate knee coverings worn by FOTKs which cover the front area between the thigh and shin L Legends- Please see EU in the acronyms area M Merch- Term often used when referring to FISD/501st branded merchandise Mobility cut- Arc shaped sections removed from the top rear of the calf and bottom rear of the thigh for comfort purposes N Neck Seal- Black ribbed collar used to conceal the entire neck and openings above the back/chest plate. Examples here O Outpost- The smallest 501st Legion unit containing at least 1 member, usually outside the borders of an existing Garrison/Squad. Currently 30 world-wide Overlap (construction)- As used on ROTJ armor, this is where one side of the bicep, forearm, thigh and calf connecting seams overlap the opposite seam, eliminating the need for a cover strip P Pauldron- Soft part used by Sandtroopers, HWTs and certain other TKs that cover the right shoulder Pull- Term used in vaccu-forming. Often used with "bad" or "rough" when the ABS loses it's intended shape in the heat molding process. R Rare Earth Magnets- Incredibly strong neodymium magnets commonly used for holding armor parts together during gluing. Info. here and here. Recast(er)- Person who steals someone else's original design in order to manufacture and sell copies, normally at a discounted price. Info here Return Edges- Angles on the edges of many parts of TK armor used for strength or to give them a thicker appearance. Info here S S-Trim- Black rubber gasket with an S shaped profile installed around the opening of a TK helmet Shim- ABS pieces normally used to extend the sides of the kidney plate, but can be used in other areas as needed. Single Cap Rivet- Hollow bodied fastener with a dome on one end used to connect the thigh ammo pack. Screen accurate, but split rivets may be substituted. Head diameter should be 5/16" (8mm) Sniper Knee Plate- Hexagon shaped piece attached to the top front of the left calf Shoulder bridge- Ribbed armor piece that connects the chest and back plate Spats- Circular pieces which wrap around the lower ankles of FOTK armor. Split Rivet- Round head metal fasteners with a split (bifurcated) shank attached on the left side of the kidney/abdominal plate. Head diameter should be 5/16" (8mm). Can also be used to mount the thigh ammo pack Squad- Subdivision of a 501st Garrison in a distinct region containing at least 10 members. Currently 78 world-wide Stunt- Armor style as worn by most TKs in ANH. Differs slightly from Hero. More info. here Swag- Alternate name for merchandise (coins, patches) etc. See also Merch. T Thermal Detonator- Elongated canister clipped to the rear of TK belts. Examples here Thigh ammo pack- Semi-round armor flexible piece with rectangular boxes, attached to the bottom front/sides of the right thigh Tears- Irregular triangle indentations located below the the eye openings on TK helmets. Pronounced "teer" Traps- The trapezoidal shaped indentations located above the rear of the brow trim on each side and on the rear of a TK helmet Troop- An event sanctioned by a local Garrison, Squad or Outpost. More info here Tube Stripes- Blue curved lines located on the upper section of the cheeks on TK helmets U Under Suit- Black (normally compression) garment(s) worn under TK armor to conceal all exposed skin Y Yoke- Extended tabs that are attached to the back plate and extend over the shoulder/under the armpits on FOTK armor. V Vocoder- The 7 raised black ribs located in the recessed area between the Hovi-tips1 point
-
1. Name - William Stuart 2. Future Garrison/Squad/Outpost or local area - Central California Garrison 3. Armor maker - Authentic Props 4. Helmet maker - Authentic Props 5. Cloth belt maker - Authentic Props 6. Neck seal maker - DarmansProps 7. Boot maker - Imperial Boots 9. Blaster maker - Praetorian Blasters 10. Height - 6' 1" 11. Weight - 160 lbs 12. TK type - ANH Stunt 13. Name(s) of any Trooper(s) who significantly helped with your build - justjoseph63 Hi everyone! I was not sure if I needed to put this in a build thread first, but I believe my armor is pretty much done! Yes, I do know I need to still bend my shoulder straps down, but I was hoping to get feedback on everything else first. Thank you and ALL the feedback is welcomed! :) Also, I am still not sure why my shoulder, particularly my right shoulder bell is off. I have a couple close pictures to see any anyone can give tips on that too! haha1 point
-
Maybe that's what I should do to mine also. But mine fit pretty snug at the top of my leg. But it is a little bit too long. So just the inner part of my thigh needs to be trimmed up a little bit. So I may just trim some off and not have a return Edge1 point
-
Awesome news, ATA armor is a lot thicker than most, I found I had to use a Dremel to trim (actually I use 3 of them as I hate swapping tips) cutting disc, drum sander and a cutting bit, makes life a lot easier. Once you've trimmed your first piece you'll realise how easy the rest of the process will be. Make sure you check the "Gallery Section" for references when trimming. Good luck1 point
-
Perfect! Thanks Glen1 point
-
For adding photos most of us use an online photo hosting site such as Imgur, then once uploaded copy and paste the links to images into your posts, you can edit any posts you have made. You can't delete a topic replica someone on staff will have to do it for you, I noticed you reported it1 point
-
Good start to the painting, Trooper. :-)1 point
-
I've heated the straps while attached, it's easy enough to do. In this case, yes, remove from the heat... just in case. Just be careful to apply a nice curve and not a fold. Take it slow and you'll be fine.1 point
-
Heat it to boiling and then remove from the heat. (I would just put them in for 30 seconds and see if that's sufficient, then increase the time you heat them up for if needed). Yes, wear gloves as the straps will get quite hot. They can stay attached, it just might get a little awkward. I would submerge the whole strap minus the part attached to the chest, though admittedly I have never done that myself and would heat bend them before attaching.1 point
-
Instead of a "build" thread, a "refurbishment" thread! Awesome idea Lionel, and looking forward to seeing your progress!1 point
-
You can also give the shoulder bridges a boiling water bath. Just be careful not to burn yourself. Sent from my iPhone using Tapatalk1 point
-
OP (MV) Post #13: BBB DAY ARRIVED YESTERDAY! Unboxing and obligatory laid out photos incoming. Yes, I'm wearing rebel scum "It's a trap" socks. Note that, as is the case with all my photos posted on FISD, they may appear a bit fuzzy embedded in posts due to poor web and forum compression. Clicking on each image will open them in a high resolution format for maximum clarity. Initial thoughts. These pieces are larger and more firm than I was expecting. Of course that will change a bit once I trim them and remove many of the return edges. Now where to start. I'm not sure I want to tackle the helmet first since that's such a prominent piece with tiny details. Perhaps I will go with taking off the return edges on the wrist side of the forearms, since that will be a requirement for level three. Are there any other suggestions for starting points? Perhaps the chest, back, or ab pieces? I tried to lay the pieces out in the fashion I expect them to be upon assembly, but the shins were the only ones labeled, so I may have gotten some of it wrong. Am I correct in understanding that the biceps (both with thumbprints) and forearms are interchangeable? If I recall correctly, the shoulder bells are to have the swoosh facing forward, correct? I believe the left side thighs are also intended to be a little shorter than the right, to accommodate the sniper plate, but please correct me if that's not the case. That's all for now. The journey is finally getting real!1 point
-
once you put elastic they will stay in place, just warm up and slowly bend keep the bended while they cool off, they dont need to be fully curved they will hold in place once you put the elastic, I prefer to add some velcro to keep them in place. Mark (AP)1 point
-
Congrats Robert! You'll be at Centurion in no time!1 point
-
Congratulations Paul. I remember taking the same journey with my daughter, it was fathers day and she had a take your Dad to class and 6 years later I was day 2 into my exam trying to figure out exactly how I got here. Two dans and a teachers exam later and I still remember my Master instructor saying that a black belt is just a white belt that didn't give up. Enjoy the journey however long it takes you.1 point
-
3rd degree brown belt. In some martial arts in particular karate, each belt is one color, e.g. green, purple, etc. For brown belt because it is a big jump to black belt, so they tend to break it in to multiple levels. ichu kyu translates in to one rank below black belt.1 point
-
my bad completely misread that part1 point
-
That´s it then, it can be low but is should still be straight and not "droopy"1 point
-
The exclamation points were to show approval, not disapproval. In the response that accompanied the photo I stated "the alignment of the kidney/ab gaps are absolutely PERFECT! '1 point
-
1. You should cut these down a bit, especially to get rid of the 90 degree angle at the front. Anovos is famous for the return edge on the neck splitting/cracking (red arrows). If you want to keep that return edge, be sure to add a thin (1/4 inch) shim** behind it. I would suggest losing it altogether. ** One solid curved piece... don't use short ones. You can trim the tops down as much as needed, just follow the existing curves. BUT, do this before final fitting (gluing the backs together). VERY important! The bottoms of the thighs can be kept like they are, just sand down those rough edges. Keep up the great work, and keep those questions (and photos) coming!1 point
-
Congratulations!1 point
-
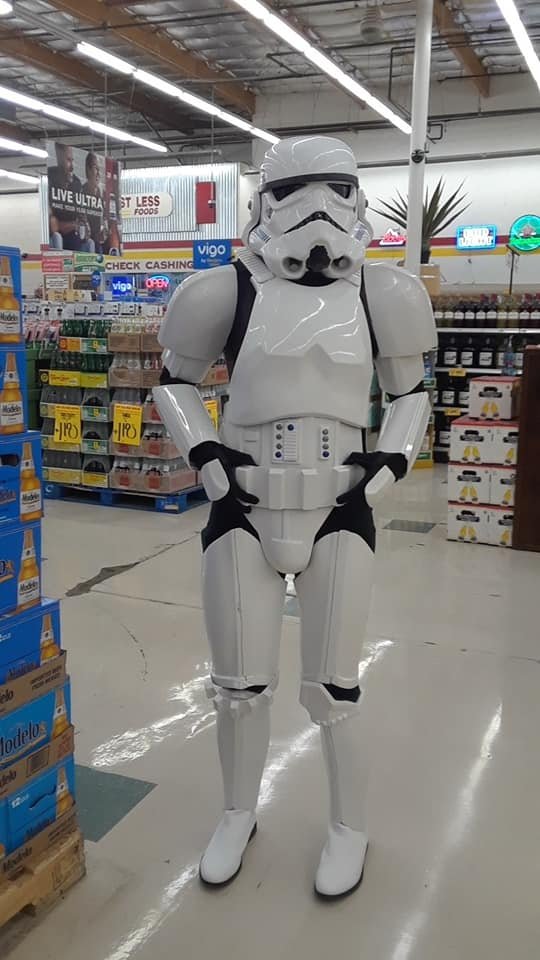
SOO mega update I got it wearable for 2019 Halloween but I am making changes to go for Centurion (i place full blame on @sharkbait for telling me about the pretty things) and i have a PICTURE finally found one that would work but here it is 2 months of slaving away in 2019 paid off well i also won my work place costume contest not that i cared i just felt so cool!!!! also lots of ppl loved it and did several pictures and double takes on the armor both young and old enjoyed it! Edit i added the second pic with the Helmet on
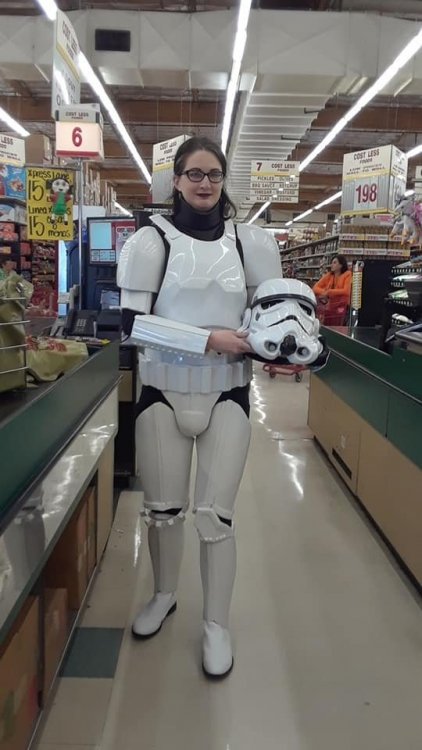
 1 point
 -
Thanks everyone for all your help! Now on to helping my son build his TK. I hope to see you out there! TK 12953 Closing this build thread! Next up for me will hopefully be a Sandy.1 point
-
In the late 1980's I was hanging out at a place named "B&H Motorcycles", I restored vintage bikes although back then it was more like "fixing up affordable bikes". We also rode as the B&H-MC, it was a combination of a bunch of clubs all coming together. Next door was a place known as "Billy Bob's Burgers and Beer" who boasted this "Belly Buster" thing which looked more like a tractor tire than a burger, but if you could eat it????? it was free! We all loved this Billy Bob's place because the bartender Linda would only charge us one time per day for a pitcher of beer, she would refill it as many times as it came back to her empty.....FREE! They had a jukebox and two billiard tables. There was a jug of pickled peppers on the bar always, and one burger would feed four grown men! Ha ha! Hung out in Billy Bob's most evenings until Harold (the "H" in B&H) would send the mechanic over to tell us to get our bikes out front because he was locking up shop (pretty much at lunch time we headed next door and left our motorcycles in or behind the shop). One of the guys I rode with gave me a flask for Christmas of 89, it had the name Scootch engraved in it, he said because I like Scotch and my name is Scott and I ride "Scoots" that was my new name. It pretty much stuck. They all called me Scootch after that, even my wife. I haven't seen Harold since the 1990's, last bike I restored was a 1968 BSA Lightning which I sold to a collector in 1999. I still ride em now and again when someone brings one by for a look. Funny thing though, all those guys I rode with....... they'd always bring bikes over and have me swap stuff around for new aftermarket stuff..... I ended up with box after box of Harley Davidson parts.... Finally a friend of mine opened a shop "D-Custom", and I saw my big chance to get loose from all that stuff. D-Custom is still around but my friend Donnie is in Huntington Beach or something like that now with a Taco joint named "Sancho's". The rest of my pals? Working for a Solar Energy Company, and me..... well I slowed down just a little bit.1 point


-Copy.thumb.jpeg.8715a83cb32a3e6745f879885b26e712.jpeg)