Leaderboard


Popular Content
Showing content with the highest reputation on 01/05/2019 in all areas
-
I think we have our list thanks everyone. As Joseph mentioned we still haven't completed the ROTJ from last year. One step at a time. Unless there's something so important it can't wait this thread has run its course for now.3 points
-
Ok so listen the big bad COG is stepping in now. This thread has be derailed a few times and has gone around and around to it being almost impossible to follow. Here is what I’m going to ask. Can everyone take a break for a minute from commenting. Dan @CableGuy can you please make a summary post if everything discussed so we can make some sense of everything? Thanks.3 points
-
Alright got the mic tips adjusted. Put a little triangle of padding behind the top of the back and it points slightly down instead of up now. Going to double over the shoulder elastic next, it pulls out with only one layer. Sent from my SM-G955U1 using Tapatalk2 points
-
Fair point, Steve. As my only suggestion was to discuss the brow height for ANH Stunt, I'll Kindly invite [mention=22112]justjoseph63[/mention] to help and edit this post to reflect the suggested ANH changes for L3; Level 3 - 1. Ideally, the ears shall be tilted back at an angle to where the screws align closely with the rear angle of the trap located above the rear of the brow. 2. Tube stripes are positioned no more than approximately 7/16ths (1 cm) from the cheek, (a standard pencil width). 3. Top section of posterior armor shall be in line with the bottom portion of the kidney plate. 4. Posterior snaps/cod rivet shall not be painted. 5. Ideally, a minimal (or no) gap is permitted between the top of the shoulder bell and the shoulder bridge. 6. All abdomen buttons are integrated onto the ab-button panels/plates. directly on the armor No separate/added buttons are permitted. 7. D-ring on end cap shall be of a similar shape/size to the original Sterling type. 8. 3D printed weapons must be free of noticeable print lines. I would also invite [mention=22112]justjoseph63[/mention] to summarise the below; I would invite [mention=16782]gmrhodes13[/mention] to edit and refine the below; ***Regarding ANH Stunt Brow height, to start, I would simply ask that anyone reading this look at the photos and explanation on post #1 of this thread; (https://www.whitearmor.net/forum/topic/46285-early-2019-crl-update-change-requests/ If we agree that the majority of ANH Stunt Troopers seen on screen display a gap between the eye sockets and the brow (much like the majority have tube stripes, the majority have a holster, the majority have 8 teeth drilled, etc.), then I put forward that ANH Stunt was "intended", based purely on the many screen shots and footage from ANH, to have a gap between the eyes and the brow. If the majority agree on this, then perhaps we could discuss if we, as a community, think that this should be a suggestion to new troopers. As the majority of seen on screen ANH Stunt troopers display this gap, I personally feel that this is a defining feature of the stunt. As such, I cannot see any reason why this could not be "suggested" from day one (basic), and perhaps requested at the higher levels. For example, "A gap is present between the eyes and the brow, as per the CRL photo." (NO EXACT MEASUREMENTS!!!)2 points
-
Sorry to derail further but it just popped in my head: do we have the mandate to change the basic CRL for the entire Legion? Also...and this might sting a little: if we are concerned about what people persive of us (as we should) then perhaps it’s a good Idea to remove a thread that is dedicated for making fun of peoples costume.2 points
-
Sorry I missed those, brother. So many to keep up with, lol! Now back to our regularly scheduled program: I hope it isn't coming across that I want to make it more difficult ("elitist") for anyone to reach higher levels. Many (if not most) of the fine folks I troop with are happy as clams to stay at basic approval, and I am totally fine with that! As I mentioned before, it's all about having fun, camaraderie and doing some good at the same time! Every one of the items I suggested (as changed in the updated list) pertain only to level 3, and not unrealistic to achieve (with the exception of the "ideal" ears and shoulder bridges/bells in some cases). We have seen people do amazing things when they are suggested! They are not requirements, and of course not everyone will, but those that do set their sights for the higher levels will have a more defined picture of what to aim for. When John/Jane Futuretrooper are looking at the basic CRL requirements they may just see the L2 and 3 ones and think "Hmmmm... I can do that"! Even if they don't apply, they will have a better looking set of armor. In theory, we could spend the next 6 months discussing them, but imho at some point we will need to 'decide to make some decisions" and set some of these issues in stone, so to speak. My suggestions were only that... suggestions, and I am comfortable with any changes that may or not be made.2 points
-
Gaps don’t bother me as much as ears that are too thick. Plenty of film helmets with some ear gap.2 points
-
This right here is what I’m fearing from some of the conversation here. I would hate for this detachment to start going down this very slippery slope.2 points
-
It's completely doable however. this is an Anovos kit I built for someone who's 6'2". Those that have built Anovos or RS know there's not much room to spare. I could have dropped his biceps another 1/2" and moved his hand plate back slightly giving him a more uniform look. I swear the guy has a wingspan that of a 747 lol. Anyway, we decided comfort and practicality took a front seat to accuracy. And yes he's a Centurion
 2 points
 -
Hi Patrick, So sorry - I completely forgot to reply. The T-track work was freehand with the dremel. A little risky, however it did earn me “surgeon” status from @Dracotrooper! Lol. That little dremel disc (approx 1mm thick) came in really handy!! The trigger guard ended up being a combination of a vice, pliers and a hammer. Most of it could be manipulated with the vice and pliers, or two pairs of pliers. It wasn’t overly hard to bend so a little trial and error, and a reference photo from Jesse (dracotrooper) helped make it possible. Let me know if you’d like a copy of the guard reference. Hope that hat helps a little. Looking forward to the next update. :-)2 points
-
Wow!! Great work on those tracks - that's right, Dan trail-blazed that mod. I have always refrained from applying a disc, now that you've shared your method, will give this mod a go in due time, thanks for sharing! Sent from my SM-G390W using Tapatalk2 points
-
Small update today (less time available now that the holidays are over...) Separating the T-tracks Spent this evening carving the sides of the T-tracks to create the illusion that these are separate parts, which I believe was first done by Dan. I hesitated to use a Dremel cutting disc on this delicate part of the tube, so I decided to use my engraving tool, a small file and 2 wax carving tools (in that order) instead: 20190105_000836 Fortunately I managed to avoid collateral damage and I’m quite pleased with the result: 20190105_001510 20190105_001609 20190105_003745 The more build threads I read, the more ideas I get for my own build. Thanks Tino for convincing me to start my own build thread; I really appreciate the feedback from experienced blaster builders! I also realized that I’m lucky that my electronics kit hasn’t arrived yet. Otherwise I may have rushed to the “pew pew” part, while now I’m taking my time with all the details that really make a difference. Unfortunately that was all that I had time for tonight... Cheers!2 points
-
"ideally no elbow gap is preferred" seems logical to me which still allows those with gaps to apply, I really would hate to see people being denied for higher level approval because of arm and shoulder gaps, not everyone has the perfect shape, I know I don't. I already hear us being called "elitist" don't think we want "discriminatory" added as well.2 points
-
Not talking centurion level Tony, but as I said above. Basic is VERY basic at the moment. There are troopers out there who will build to basic, and then be discouraged due to the extra work involved. I guess what I'm saying is that EIB standard should now be basic. Too many 501st garrisons out there clear on a basic level. Then you see other troopers copying their builds, which repeats a substandard build. I honestly believe that if basic was removed, then future builders would engage more with how closer they could get their kits than at the moment. Just my humble opinion, but think we are focussing on the wrong area atm Sent from my SM-G950F using Tapatalk2 points
-
After being asked a gazillion times about how I built my magnetic shin closures, I've finally compiled everything from my TK build and put it all in one post! Let me begin by stating that I followed the tutorial here for the most part when building these magnetic shins. However, I deviated from it in order to make the closures super strong by using a magnet-to-magnet closure rather than the magnet-to-steel method outlined in the tutorial. I have worn the magnetic shins I made for my RS Props TK out on over a dozen troops, and I have never had them come apart on me. I've only had to reglue magnets twice on these shins over a two-year period: a single magnet came off after being handled a lot (opened and closed dozens and dozens of times at an armor party by those who were trying to figure out how they work), and regluing a single magnet after trooping underwater for a few hours (well, not exactly underwater, but it was a parade where it rained for HOURS and I had to walk in the rain the entire time- for hours I tell you! My boots took days to dry out!). The small amount of maintenance I've had to do on these over 2 years of trooping is quite minimal. Once you get this mod on your kit, I swear you'll never go back to anything less than a magnetic closure on your shins. STEP 1: There are many steps necessary to build magnetic shins, so I begin with making a critical component for them: ABS buttons. The buttons are necessary to hold one half of the magnet assembly in place on the inside of the shin. I'm using 12mm x 3mm n50 magnets. You'll need a total of 20 magnets for the shins (10 on each shin). I strongly suggest buying more than 20, though. I've found that they can easily break, and you'll want backups on hand! You can find them in bulk- and cheap!- on eBay. First, I begin by making a template with a hole in it that is slightly larger than the magnets I will be using. I trace the magnet on a sheet of ABS. Here's what it looks like when done. Yeah, I know my hole isn't perfectly round. It's not terribly important for it to be perfect. I used two magnets to make each button. One on top to help me see where my hole template needed to go, and one underneath to form the button shape. Heat up one section of the ABS sheet using a heat gun on LOW until it gets slightly warpy. You can even leave the magnets attached to the ABS while you heat it up. Once the plastic is soft, quickly press it onto a flat surface, pressing the hole template around the exposed magnet. This is what it looks like on the top and underneath when you're done. And here's how it looks from the side so you can see how the magnets attach to the plastic. See how the bottom magnet sits flush in the new ABS button? I spent about forty minutes repeating the process until I ended up with 10 buttons. I will cut down and shape the buttons to fit each shin later. There will be five buttons installed on each shin. Still lots of work to do, but it's a pretty good start! STEP 2: Another step necessary for how I make my magnetic shin closures is to make sure that the backs of the shins meet up as perfectly as possible. This is to avoid any unnecessary strain on the magnets. This was acheived by some gentle shaping via a hot water bath. Before putting the shins in the water, since I don't have any cover strips installed on the outsides, I reinforce the closure with blue tape. The e6000 gets really soft when subjected to boiling water, and I don't want to weaken the join in the front. Blue tape holds up nicely for this application! Here's a before and after of my shins so you can see how the backs line up a bit better. I will be doing some further fine tuning on the lengths at the bottom later as I move along in my fitting. STEP 3: This stage involves making and securing the "holes" part of the closures for the magnets. I begin by cutting out two 3/4" x 12" strips of ABS. You should have this when you're done. Next make a lengthwise mark in the center of each strip to help keep your holes lined up in the middle. Then mark 3/4" in from each end. That will be the center point for the magnets on the end. I like using magnets with holes in the middle for this, so I can easily find the 'crosshairs'. Trace the magnet. I like to use extra magnets underneath to help keep it secure while I trace. Next, find and mark the center of the strip. It should be at the 6" point. From there, measure 2 5/8" from the center mark on either side. Mark and trace your magnets. When you're done, your plastic strips should look something like this: Next, I used my drill press and a step bit to drill out the holes. It went really quickly! When you're done, you should have two strips with holes in them that can easily fit the magnets. The next part is where people tend to get confused, so I took this photo to show what goes where. The "hole" strip will be glued to the inside half of the shin on the inside. It sounds kind of confusing, but it's not all that bad. Remember that the "hole" strip will be hidden! I begin with my left shin. I mark the center of each hole to assist when I line up the edge of the shin. Next, I test fit the strip on the shin to verify placement, clamping on both ends. Then I apply e6000 to the area of the strip that will be in contact with the shin, clamp and add magnets. This is what it looks like when glued together: Here's the right shin after gluing, but before I added the magnets. Here are both shins as the e6000 cures. I'll be allowing a few days for this to cure, which will give me ample time to get my ABS buttons ready for installation. STEP 4: Once the glue had cured on the hole strips inside the shins, I removed the magnets and clamps. With a light behind the shins, you can see how the hole strips are mounted, hidden inside. Using that light as my guide, I traced the approximate location of the holes with a pencil. This helps me to get a good idea of where my holes are going to be drilled. Yep. I'm going to make some Swiss cheese of my shins. Using a small Dremel sanding band, I carefully cut a notch out, just large enough for a magnet to fit through. Here's what it looks like at this stage when the shins are closed. I'm just focusing on drilling out the holes on the inside edge, following the holes of the hole strip that was glued in. I'm not ready to drill the outer half of the shins yet. Next to clean up my buttons that will hold my magnets. I rough trimmed them all to start. Then cleaned up the corners with a Dremel. I don't want anything poking at my legs! *Important!* If you want to make sure your magnets stay stuck on your shins, you must use e6000! CA glue will not keep the magnets stuck to the buttons; they will fail. I have heard this from several troopers when I have been contacted about their magnets not holding up. I repeat, use e6000 for this next step! I applied a liberal amount of e6000 to the inside of each button, then put the magnet inside to get all cozy. Make sure that you've got the polarity of all the magnets in the same orientation before gluing! Wipe away any excess glue from the top. To make sure that the magnets are firmly mounted in the buttons, I use the magnet intended on going on the opposite side of the shin to clamp it. In the pic below, you can see how I've got all the matched magnet buttons and magnets together as they cure. Back to the shins now. I like this ridge (where the pencil is pointing) to line up at the tops. For me, it makes the closure in the back look much cleaner if this is lined up. I tape it off there to make sure that the opposite side doesn't shift while I'm making my marks for completing the holes. I have an OttLite that fits nicely inside the shin to provide a clear light so I can make outlines for where I'm going to drill out the rest of the holes. Holes were already present on the left side in the photo below. I made sure that I drilled out the holes very conservatively as I went. I used an extra magnet to make sure that the hole was just the correct size for it to fit through. Now time to attach the outer cover strip! I use a 25mm cover strip on my shins for this. I taped off the edge of the inside half to keep any glue from transferring over. Then making sure that the cover strip was straight, I clamped the heck out of it. Praying to the TK gods that it doesn't shift!!!! Now time to wait for everything to cure really, really well. I am going to give these 3-4 days to fully cure just to be on the safe side! STEP 5: One shin is complete, with the outer rear 25mm cover strip glued into place. Woo! Here's a look from the inside, before magnets are installed. Be sure to clean up all excess glue from the inside edges in order to have a clean closure when you're done. If there's extra glue in there, it may not close correctly. I've tucked the outside cover strip to the inside so you can see how the magnets on the "cover strip" half are glued on. No magnets yet. I add a dab of e6000 to the magnet (be sure to check the polarization of the magnet before gluing!!!), and set it so that it fits inside the semi circle and on the outer cover strip. Like this: I wiped away the excess glue from the magnets and then positioned the inner "hole strip" over the magnets to ensure everything is lined up correctly as it dries. I tape the tops and bottoms of the shin to ensure it doesn't shift around during this stage. I'm not completely happy with how the inside cover strip is cooperating here. It sits flat on the top and bottom, but it pulls away in the middle a bit off to the right. I will have to heat bend this before installing the magnets onto the "hole strip". :/ Ideally, the inside cover strip should be sitting completely against the outside part of the shin, and it doesn't want to do that right now. This additional stress could cause the magnets to fail. It's annoying, but I'll need to address this before proceeding any further. Gah! Using the magnet buttons I created earlier, I clamp the magnets into place while the glue cures. Once the glue has fully cured, I'll reshape that inner strip to prepare it for the final magnet button installation. STEP 6: Now that the e6000 has had lots and lots of time to cure, it's time to attach the other halves of the magnets. Make sure that the halves are super clean and free of extra dried glue. It will prevent the shins from closing well. You can do this by touch. Rub all of it off where you feel it. Once everything is cleaned off, close the "hole" half over the "magnet" half. Your shin should be closing correctly at this point. The "holes" should lock around the magnets and prevent the shin from opening at all, even without the additional magnets at this point. If the "hole" strip is not fully engaged over the magnets, you won't have a very strong bond between the magnets to keep the shin locked. Easy part next! Apply e6000 around the prepared ABS button. No need to go crazy with the stuff. You don't want it oozing all around in there. And stick it on! This part goes really quickly. For additional strength, I add some extra magnets on top. Check those clean closures! Left shin. Right shin. I will open these up in a few hours just to make sure that there isn't any extra e6000 that has spilled out and might lock those shins closed where I don't want them locked. Now to allow several days to dry, and these shins will be good to go! Here's a short video so you can see them in action. Have you tried this on your own shins? Loved it? Hated it? Made a few mods of your own to improve this method? Comment below and let me know! Cheers- Cricket TK-104011 point
-
First print from the new 3D printer, got to trim the strands under the chin tho1 point
-
Agreed. That’s a great way to do it. Top job!! :-)1 point
-
Wow!! Sheer genius approach! Looks really spot on. Like how you gauge by putting source material side by side, keep up the great work! Sent from my SM-G390W using Tapatalk1 point
-
ha! Yes there are. There is a thread for that.1 point
-
i have made the adjustments to the biceps ..the thighs were not supported during the fotos but will be for future photos1 point
-
Use industrial acetone wipe on your leather part before painting white.1 point
-
Well there is someone we can call in if everyone wants me to? Paul?? FISD to @troopermaster1 point
-
Thank you, kind sir. I’m sure you’ll achieve your Trooper dream, just stay positive and ask away with any questions. We were all new to this at some stage. :-)1 point
-
Hi Frank, It's not ramble, ramble, Frank - it's your valid opinion. I understand what you're saying, and that is the beauty of basic. Nobody is forced to submit their armour for approval from their peers. Nobody is forced to aim for, or submit for, EIB and Centurion. And, from what I have seen across the forum builds, nobody is pressured or bullied into going beyond their skill set. Joining the FISD is totally optional. And for those that share your view that they don't see the need for higher levels, this really shouldn't affect them in any way. The Attache team and other experienced builders give constructive suggestions and advice when required. The majority of our regular helpers on FISD have a good manner with new and old members and any untoward responses or attitudes are reported. If a new builder starts a WIP and their first comment is "I'm starting my build and aiming for Centurion", as many of them do these days, I can't see any issue with helping them achieve that from day one. It is much easier to aim for Centurion from day one, with the help of the years of build experience on the forum, than it is to aim for basic, then have to make retrospective changes down the line if they choose to move to EIB and Centurion. "Yea centurion may be super easy for some people as it is but not for others. And why does it have to be difficult?" I don't believe it's super easy for anyone, well, especially not on their first armour build. It requires research, time and effort, and in some cases a few extra £/$ on certain bits of hardware. However, it is made available to those that DO want to aim higher. Basic allows a more straight forward path to trooping, and nobody has a problem with that. "There is a huge emphasis on getting a higher level. I don’t see why, again that’s me. I joined to troop and meet some like minded people." Surely the reason that many people start a WIP thread is to get feedback or support from the community. I know I certainly did. I did my research but also valued the constructive feedback from more experienced troopers. If they don't want to take the advice, that's okay. I also joined to troop, make money for charity, make people smile, and to live out my life-long dream of building and BEING a Stormtrooper. I could have achieved these goals with basic clearance, but choose to take my armour I high as I could. This doesn't make me any better at raising money, bringing smiles or living out my dream, it was just something that I wanted to do and worked hard to achieve. Basic clearance is not really being challenged here. Bringing awareness of what CAN be achieved, if a member wants to achieve it, is at the heart of these suggestions. Best wishes, Dan1 point
-
I think if you want to change it for L3 it’s fine I just think you should stay away from exact measurements on anything and take into consideration body types when establishing “gaps” Sent from my iPhone using Tapatalk1 point
-
Quick make a spreadsheet or something! Sent from my iPhone using Tapatalk1 point
-
We could always just change the title to Early 2020 CRL update change requests.... We’ve already got more pages then days in the year we’ve been through. Just imagine the great ideas we’ll have by 2020 Sent from my iPhone using Tapatalk1 point
-
No worries - here we are; Credit to the original source for this diagram. From memory, it wasn’t that difficult. Just do little bits at a time and keep checking the shape against the reference. :-) Sent from my iPhone using Tapatalk1 point
-
I get what you’re saying, however, basic is still very achievable. This should easily cater for those that ‘just’ want to get into costuming. I think this also ensures that we’re not elitist. It’s clear from the passion and skill across the community that this is more than costuming to some - this is a hobby. Building a top notch suit of armour with all the bells whistles deserves recognition for those that want to go the extra mile. However, we also do not look down upon those that simply want to pass basic and troop. As with many things in life, we all have personal goals. Many of the ideas above have been listed as “suggested” changes. We’re not going to bully people into them - we can use this as recommendations for those that want to build in more detail. I feel that if some of these were listed as “ideally” this and “suggested” that, we are simply adding to the knowledge bank available to new members.1 point
-
OK... Don't hate me, but since we are on the subject there are other dogs in this race. I know this is going to cause a clusterfudge, but what about these previous discussions? ROTJ https://www.whitearmor.net/forum/topic/45204-july-2018-request-for-crl-updates-thread/ 1) Shoulder cover pop rivets. L2 2) Thigh ammo belt secured with 3 pop rivets L2 3) Sniper knee secured with pop rivets? 4) Overlap construction L2 5) Forearm with return edge? 6) Removal of the need for elastic strap around rear of shoulder bridge? TKC https://www.whitearmor.net/forum/topic/45523-tkc-request-for-crl-updates-thread/?page=3&tab=comments#comment-634403 From The thigh ammo belt shall be positioned on top of the lower ridge as seen in official references and is not rounded off like ANH. To The thigh ammo belt may be positioned on or above the lower ridge as seen in official references and is not rounded off like ANH. Lastly, I think it might be wise to do some updating on the CRL photos themselves. I realize that many may have been used just to have an example, but some need serious updating to reflect up to date changes, and some just look plain awful and are riddled with issues. There are a lot of incredible L3s now who's armor better reflects a more ideal look. Example: giskard8 (Arthur) from the HKG attains the very definition of a CRL model in all his builds. I know a while back that we changed the policy where weapons were no longer permitted to be shown with models (which I thought at first was strange but now I understand it completely) as they can cover up certain key areas, etc. (as in the present ANH-S pic) and are not a requirement for L1. These are the some that could use the updates, and if this is decided to be something we should pursue I am willing to spearhead the project. ANH-S, ANH-H, ESB, R-1, TKC, ROTJ. Thoughts?1 point
-
Now you are going down a rabbit hole that will just piss more and more people off I advise caution.1 point
-
2016 04 011 point
-
Thank you for the answers. As said, it´s a lot to take in at the start and a lot of acronyms i think the word is, so thankful for all the useful help =)1 point
-
There is a whole other detachment for "dirty" stormtroopers (sandtroopers, Mimban trooper, etc). That is MEPD. We do have some slightly weathered costumes here, like the HWT (heavy weapons trooper). A few have added very slight weathering to their TK, as this is seen on screen - but only a few scratches and smudges here and there. If you want to get dirty, like the Mimban trooper in your picture, then MEPD will be of interest to you.1 point
-
1 point
-
Ok I’ll take a stab at this one. Stormtroopers were mostly clean white with the Sandy being the exception so that’s why we stick mostly the clean look. The CRL stats on some builds that armor will be “weathered” the TK CRL does not. As for question two. I have AM armor it’s thick there would be no need to reinforce most of it. With that being said I recommend to everyone to reinforce your chest. I’ve had issue with cracking due to basic movement. It’s no fault of the maker I love their armor it’s just me not being used to having a armor on. I’ve danced in this armor at various points and sometimes forget I don’t get the same range of movement that I normally do. Hope some of that helps. Sent from my iPhone using Tapatalk1 point
-
Or anything else in life, for that matter... A.J.1 point
-
You're welcome, glad that I can also give something back to the community that has provided me with such a wealth of useful information!1 point
-
I think there is more to it than just upping base requirements, though. For one, getting people over to the detachment and getting them informed. I can only speak for myself and my Garrison mates, but when I first decided to build a TK, I was lucky enough to have found FISD and realized that if you're starting a BBB it's minimal effort over basic approval (and just a couple hundred dollars more in parts) to go for Centurion from the start. My friend who joined at the same time didn't join FISD, build to the base CRL, and later, when I became an attache I tried to get him to go EI. He didn't. Why? Because he ignored L2 and L3 when building (because he didn't care at the time) and now if he wants to get his EIB badge (we aren't even talking Centurion) he'd have to rebuy quite a bit of his kit. As for base requirements, maybe it is finally time to move many of the ANH/RoTJ split EI requirements (such as cover strips and rivets vs none) to base requirements?1 point
-
With imgur you can right click on images and select copy, then you can post directly into threads1 point
-
I have an issue with GMLs expecting Centurion level requirements at basic. I know other garrisons that have that problem and it's a bit disturbing. I believe it's unrealistic and takes away from those who just want to do charity work or have fun. There needs to be a balance, what that is is debatable.1 point
-
Tbh, I think you have a point with highlighting basic approval. Surely this should be the focus, I mean, decal tube stripes, plastic hand guards etc. Let's start new members off on the right track, rather than asking for corrections down the line. This would bring clearance levels across garrisons closer together. No? Sent from my SM-G950F using Tapatalk1 point
-
Try using tapatalk or imgur - or whatever online image hosting site you want. I use tapatalk because I can upload directly from my phone - and its free.1 point
-
Mark from AP is sending me another set of the stripes, $5 inc shipping. I'll redo them with fresh decals so they're as close to perfect as I can get them.1 point
-
Looking good Drew. If I were a GLM looking to give you 501st approval I would suggest reducing the gap between the shoulder bells an shoulder plates. Also you need to pull up your thighs. Can you do this of will it require some armor alterations? Just a couple suggestions to start. BTW I'm gong to move this post to the "Pre approval" section.1 point
-
The consensus is yes to some changes that don’t change things unless you want to change those things and then your free to change what you think needs to be changed cause everything changes and change is good..... But let’s not forget a no to changing those things that don’t need changing cause they’re ok not to change and change would be bad for those things.... Sent from my iPhone using Tapatalk1 point
-
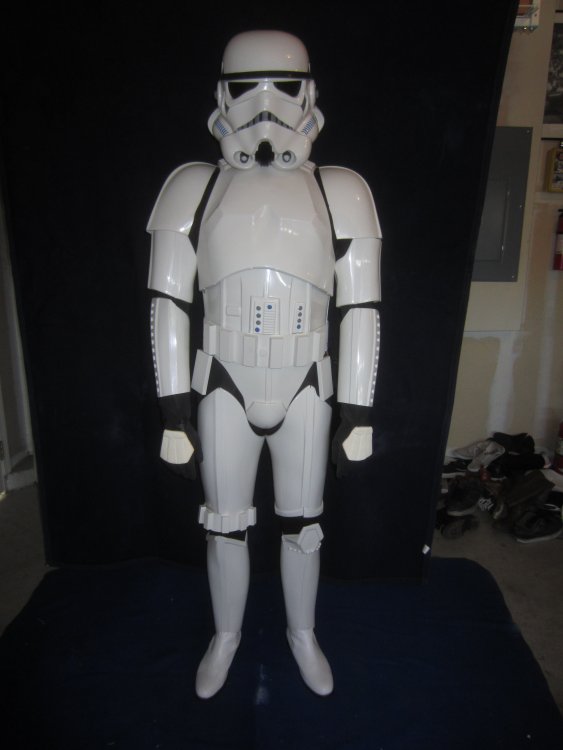
Really like the armor. Great job and looks sweet. Almost feels like one actually might succeed doing it oneself ^^1 point
-
Nice work, just to really make you look the part you may want to change your shoulder elastic to a stronger one or try doubling over, you can see your elastic being pulled sideways, almost touching the shoulder bells. I would also suggesting trying to bring your mic tips down, they look to be pointing upwards. This can be achieved by adding some rubber tube, if you cut one side straight and the other on an angle (like a wedge), you can then add to the base of the mic tip and rotate to get them to point a little better. Good luck with approval1 point
-
Has anyone Finished their Cardinal? Mine will be done this afternoon. To include Cape with Grey stripe on Right Shoulder, Red F-11D Blaster, Red SC-44 Hip Mounted Side Arm and Full Red FOTK Armor. And I have an Accompanying Phasma1 point