Leaderboard


Popular Content
Showing content with the highest reputation on 10/05/2018 in all areas
-
Who cares about the armor...let’s talk about the car!! how fast have you gotten that bad boy? I was the first to get my old man’s C5 over 100MPH. I am never allowed to drive it again and its willed to my sister.[emoji38]3 points
-
So on the topic of the TD or thermal detonator is that the tube itself is just a container to hold several detonators. Henceforth why the term TD was applied to them. The idea of it being an O2 canister would lead one to believe there should be hoses attached like the tie pilots. So my two pennies. Now carry onward young trooper and looking good. Sent from my VK815 using Tapatalk3 points
-
Great feedback on the eyes - y'all rock my socks. My usual TK work day (Friday) ended up being more of a helmet electronics research day with a side of O2 canister (have I mentioned I've decided to refer to it as the O2 canister? I ran across a thread somewhere discussing it and it really does make so much sense that it's that and not a thermal detonator, I mean a td is an entirely different object that you throw and whatnot, AND a td is a sandy just in case we wanted to make the acronym even harder to work with, and with a realistic imagined (oxymoron, anyone?) function fully fleshed out I've come to the conclusion that it's an O2 canister and not a thermal detonator) -- I say, O2 canister clip building. I ordered a 4' piece of 1" x 1/16" aluminum from work, and armed with a couple rusty old files (my favorite kind), a vise, a hammer, some aviation snips, the leftover few inches of 2" PVC pipe out of the 1' section I bought for my canister, and pictures of screen used O2 canisters, I set to work. First: the only moral to this story is that the proper aluminum is easy enough to bend and you can make half decent things by just looking at reference pictures. Only one O2 canister clip tutorial is available any more (that I could find) and I preferred a more accurate hole spacing and different clip style (NOT screen accurate) so I branched out. I drilled a hole in the aluminum at a random end point and screwed it into my spare PVC then hand bent it around to touch about half the pipe. As you can see it springs back out a bit. A little hand bending (applying EVEN pressure) quickly got me to the desired curve. Tadaa Note that I am not worried about where the curve lands right now - I will trim it down later. This is all about the clip part for now. I set the aluminum in the vise as best I could, with a rusty old file in front of it to provide the actual edge I'd bend on. Pulled back on pipe and bent aluminum away from pipe like so But here's where things got annoying. Sure, I had a nice first angle there, but getting the second bend so close to the first required some pounding with a hammer and it still didn't get very far so I bent it over the file manually again. Worked ok. Not great. There's a clamp-aluminum-on-either-side-of-the-bend method that I'm sure would've worked better but I had neither the clamps nor the patience for it. Then I began actually caring about measurements and measured 3" (plus a bit for good measure) from the bend, to hold the belt. You read that right. Purists, avert your eyes/come back when there's a less offensive post below this. I'm making my clips bend back on themselves to wrap securely around the belt. WHY? I'm gonna ruin what I always considered a great Lorelei-trivia answer and tell y'all that I'm scared stiff of Jawas, and once I heard that they occasionally steal O2 canisters just to be "funny" I swore I would make my O2 canister absolutely Jawa-proof. It's a matter of safety. *serious face* *cracks up* *back to serious face* I plan to put these lower bracket pieces between the layers of my belt. They shouldn't be visible at all. Honest. And if they are I'll make new, accurate brackets in two shakes of a lamb's tail. To be continued!3 points
-
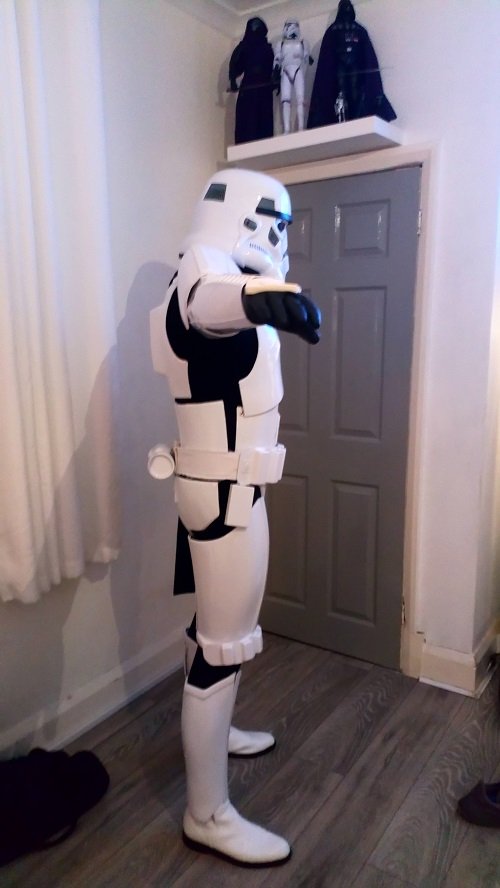
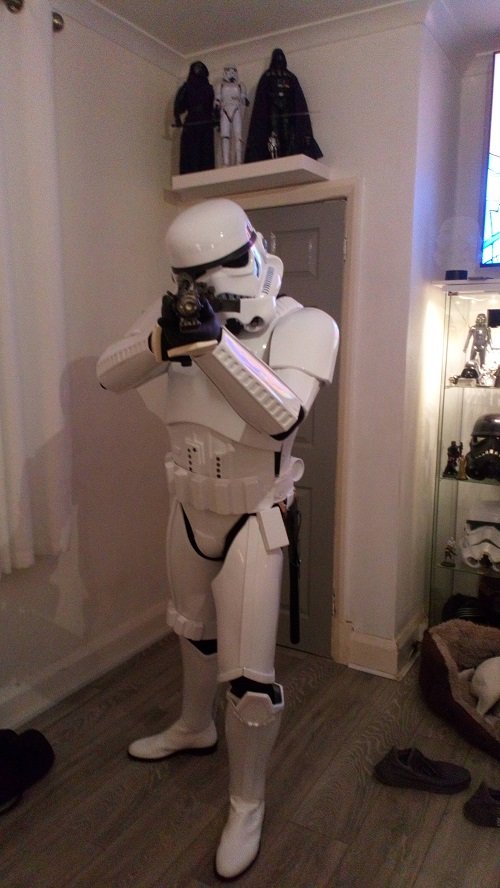
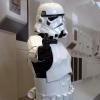
That moment when you have one cover strip left to apply to the front of one thigh in order to totally finish the suit, and you run out of glue. So I decided to get some attention over to the lid instead. Hero ears have been applied, and teeth have been filled (still need to finish sanding/polishing). Paint progress was made today, and I'm pretty happy with things so far. On the tears and traps, I've done some initial outlining, so it's still quite a mess. I'm going to allow a day or so to let the paint dry so I can safely apply the stripe templates later. The tube stripes were quickly (and neatly!) done with Trooperbay tube stripe templates and my favorite sponge paint technique. Thankfully, I have 4 tubes of e6000 arriving today (Amazon Prime all the things!), so I will be able to get that last cover strip stuck on before the end of the day. I can safely say that I've finished this kit (I'm not including the helmet) within my goal time of less than 4 weeks. Whew! I plan to get pics done for 501st submission next week, then it's off to apply for EIB. The reason why I had this (insane) goal in mind is because I needed to wrap things up well before Halloween. If I didn't get to finishing things right away, I would not have had any time to finish it until January... and I didn't want to wait! Those of you who've followed my other builds know that I am Master Builder of All Things Halloween in my home, and we do BIG HALLOWEEN here. (Shameless sharing of prior year's Halloween videos here and here...) I've got new lifesized props to build and refurbish! And a huge yard to decorate that takes all month to set up. After that, we have my son's birthday, followed by in-laws coming to visit for Thanksgiving, then decorating for Christmas, celebrating New Years, and then I'll be starting my next build sometime in January. That one will be a RS TK for my hubby. After that, I'll be finally converting my RS Stunt TK to a Sandy. I'll most likely do a few more updates when I get my pics done so you can see how my Hero finally turned out, as well as sharing my EIB and Centurion progress. Thanks for following the build!2 points
-
Red line (butt), red line (cod), blue line (back plate). Check the gallery (top of the page) for reference photos! Also Centurion applications are always useful in figuring that out.2 points
-
I still like the theory its for gummy bears Sent from my iPhone using Tapatalk2 points
-
You need to start getting other hobbies to spend money on. I hear good things about gambling, know anything about day trading? Sent from my iPhone using Tapatalk2 points
-
Thank you, hope so time will tell1 point
-
Looking great and like stated approval is a given For a cleaner look I would take a look at the cover strips on biceps, they seem a bit long and to take this build to higher levels then closing the gap between ab-kidney would be next1 point
-
A nice clean build, don't see any hold-ups for basic, good luck with approval1 point
-
Here's a nice reference, you can see some return edge is left on a lot of places. Always good to check the gallery for reference photos and also other ATA builds, here's a few: https://www.whitearmor.net/forum/topic/45654-jezzas-ata-stormtrooper-commision-build/ https://www.whitearmor.net/forum/topic/42738-reapers-anh-stunt-build-ata-hopefully-to-centurion-level/?page=1 https://www.whitearmor.net/forum/topic/41644-missingnos-first-kit-build-ata/?page=11 point
-
Thanks for the reminder that ATA doesn't have the notches. I forgot about that. Sent from my VK815 using Tapatalk1 point
-
E11 arrived yesterday. [emoji3] Will update with new pics and shots of the blaster this weekend. Sent from my SM-G955U1 using Tapatalk1 point
-
Match it up with the ab to ensure that's the correct orientation. Note that the notches are not required. If you don't have to cut them out, I wouldn't bother. Your call though!1 point
-
In a lot of armour, the top of the kidney will slope upwards where it meets the ab plate. Another thing to look at is seeing how the raised middle section meets up with the raised part of the butt plate. Hopefully that helps you sort if out.1 point
-
@Rat, thanks man! Any advice on the pics and trim lines I posted yesterday? Sent from my MSE-6 droid using Tapatalk1 point
-
Yes there is a right side up on the kidney, the side with the notches goes down. Though brackets are what was used onscreen it doesn't matter for approval at any level. Sent from my VK815 using Tapatalk1 point
-
LOL So, if I understand this right... you are offering to order and build these for me? That's great, Matt! That will give me time to start researching a landspeeder build. Thanks! Now if you will excuse me, the markets are about to open.1 point
-
Good call. Should be able to clip the end, grind them down or sand them... I’ll figure it out somehow. Slipped my mind. Sent from my iPhone using Tapatalk1 point
-
Hi all, Small update here. Primed more components of the blaster. Also carried through with Tinos suggestion for ensuring the 2mm was in place between the base of the rear sight and the end cap retainer. This would make sure the twisting of the end cap can be achieved when pushing the cap forward. End cap retainer needs to be put in place still. It looks like there will be less gaps than before which is great - a much cleaner look than before. More updates to come, thanks for reading! Sent from my SM-G390W using Tapatalk1 point
-
Nice work, Stuart. If you have any more pictures, post them up in your own thread in the pre-approval section and we’ll have a closer look. :-) Dan1 point
-
Just one of the theories I've come across. Sent from my VK815 using Tapatalk1 point
-
In Soviet Russia, Last Jedi hates you!1 point
-
Oh YEAH? That's neat! Hadn't heard that.1 point
-
You don’t need an entervention - I’m proud of you, Keep the builds coming1 point
-
It's a good idea just to round off the sharp edges on the inner strips too1 point
-
Looking smart, I don't think you will have any issues, good luck with approval1 point
-
That’s pretty much what my wife said. Minus the “lol”.1 point
-
If they are a little tight you could try stuffing them with wet newspaper, make sure it is tightly packed and leave until dry, this can stretch the leather a little1 point
-
I'm following that one, too!1 point
-
LOL! That was good funny, comrade!1 point
-
When will the madness end Sent from my iPhone using Tapatalk1 point
-
Uh oh. What have you gone and done??! Lol1 point
-
Correct a few kits are just like this. I used JB weld to glue the pieces together, it's very strong and is able to be sanded. Rough up the areas before hand, apply the glue and once dry use automotive filler/bondo and sand.1 point
-
There are a couple of pages on the main legion boards about Hyperfirm, apparently their replies to messages has been slow of late, some even have opened claims in paypal due to no response. Can't say personally if there are any issues there, I would suggest trying to contacting them in regards to your order and if you don't receive a response in an appropriate amount of time I would also consider getting a refund.1 point
-
The homestretch... Finally getting around to finishing my build. Discovered a vendor on etsy that makes some really nice parts for e-11. 100% cast from original and the plastic is very sturdy and feels solid. I've purchased new parts to replace the ones I had previously 3d printed from a fisd member and will add to this build. The first step was to insert the new sight dovetail block...1 point
-
This is coming along so well!! keep up the great work Christine1 point
-
Many of us short troopers cut the first notch (wrist side) off of the forearms. Totally approveable. And I believe you should cut at the other trim line on the inner forearm unless that makes them too small.1 point
-
@TheSwede has a newer KB kit and a great build thread: He made some interesting mods to the 2-part forearms so it should be a good reference.1 point
-
Just a tip don't go too small, make sure the sizing of your forearms matches the sizing of the rest of the armor or they could look out of place. My ATA kit has ridges so a there is a minimum size and I have a lot of room in there for my tiny Trex hands, even had to add a little foam inside so they don't roll around1 point
-
Bit of a status update: Removed the Anovos visor easily, but I'm having some difficulty getting the visor from VaderPaint to fit in the helmet. Seems a little oversized for the Anovos bucket. Looking into possibly having an optic shop cleaning the original visor to remove the warp effect. Would still prefer the VaderPaint one, as it is much easier to look through, but it's always good to have a backup. I'm also looking into a chin strap that loops through the spots where the hard hat liner was originally. Padding itself is quite easy, but I don't want to make any long term decisions until I can get the visor issue sorted.1 point
-
Ah, it's not the end of the world if you've already riveted things together. You can still spray it all in there, it just takes a little more work. A few posts ago, I promised some spongy tubes. This method works great if you want to paint your lid, but are too afraid to pick up a paint brush. Get your handy tube stripe template and stick it to the tubes of the helmet. The stripes need to be about a pencil's width away from the face. Apply the templates on little by little, starting at the ear, and smoothing each section on as you work toward the front. If you try to just slap it on, you'll end up with wrinkling and creases in the template- this is because the template is flat, the tube is not. Next, mask off the templates so you don't have to do a ton of cleanup. I cut a piece of cosmetic wedge down to a workable size as my sponge. This kind of sponge leaves a smooth finish. Apply paint to the sponge. You can either dab it on from a flat surface or apply it using a brush. Don't oversaturate the sponge or else you'll end up with bubbles in your paint. Less is more for this. Go gently and lightly along the template. Dab evenly all over the template. If your sponge starts to get 'sticky' or dry, just apply a little more paint to the sponge. Avoid going over the same area too much, because the paint will lift off onto the sponge, and the paint will be uneven on the tube. The pic below is after the first coat of paint. Don't expect uniform coverage on the first coat. I allowed about 10 minutes for the paint to dry between coats, applying three coats of sponged-on paint. After the third coat of sponged-on paint, remove the template. You want to remove the template while the paint is still fairly wet so that the paint doesn't pull up when you remove the template. Here's the result: There is just a little bit of cleanup necessary in the pic above, but it won't be much trouble at all. All you need is a fine brush, a little paint thinner, and an old rag to clean your brush on in order to erase any paint bleed. The same method works wonderfully for other stripe templates as well. Sponge on, troopers!1 point
-
Here's a helpful description of the removal process courtesy of FISD Member, Dakari .... The first thing I did was to spread my thumb and forefingers across the front of the lenses and alternate light pressure from one side to another. I was able to hear the CA glue giving way as I did this and the lenses felt noticeably looser. After loosening the outer edge tangs, loosen the lens from the center pin using finger pressure or if needed the small slotted screwdriver. There are 2 other pin locations on the upper lens, repeat for these if necessary. Mine was loose as a goose and no additional pressure was needed.. These were the primary glue points on my lens. Once they were free, the lens pivoted back, I released the lens cup, and the lenses rolled back and out.1 point