Leaderboard


Popular Content
Showing content with the highest reputation on 08/14/2018 in all areas
-
Well I was working on the Jedah Patrol pack and pulled out the laptop to get some reference pictures and noticed that I had a notification on FISD. Soooooooo it is official. I am not the first ever Rogue One TK to be approved for both EI and Centurion. I am very humbled and speechless. Just Wow!5 points
-
New thighs (this is also the thicker version - cause why not) and shins. My goal is to better align the backs of the thighs and get a straight cut on the shins.3 points
-
Sent from my iPhone using Tapatalk2 points
-
After some weeks without time and some troops i was able to go on with my blaster. The folding stock was the goal of the day, but it at the end it did not went as expected :-(, but have a look yourself . For seperating the different parts from each i used carving tools from the set you can see in my first post. It took quite a while to get to that resulot so don't get mad if it takes a while until you are satified with the result ;-). To work on the tiny holes, i used a tiny milling cutter from the Dremel. --- To get rid of the resin inside of the folding stock, to insert Tinos aluminium tube, i used normal sized milling cutter with the Dremel. --- After achiving this, i was very excited to get the folding stock attached to the riffle. Obviously i was not careful enough and the drill jammed and the folding stock broke in two pieces :-(. --- After having a talk to Tino, i glued it together with the glue of his pack :-), thanks again for the help. Hopefully it will last very long ;-).2 points
-
Yeah I’ve fixed it up for now with the advice given as well. It’s going to need a little more touch up, but for now I’ve got it to a point that it’s protected and painted. I will later need to sand some more and fill with spot putty, but at least for now it’s not noticeable unless up close.2 points
-
Again I am humbled and speechless. Thank you sooooo much. This will not be my last build and I hope to continue to represent FISD, the 501st, My Garrison and myself with such achievements. For the Empire!2 points
-
Installed ab left-side rivets into snaps (keep in mind the rivets here were trimmed down prior to installation) Installed the thigh ammo pack Glued thigh elastic (measured a bit much the first time as you can see here..) Current fitment of lower body Got the rest of the strapping done Velcro on bicep-forearm connection Nylon straps on left ab connection All that is left now is the helmet, ab-buttons, shoulder bridges, handguards, painting, and belt+TD assembly, but i'm still waiting for my order from Burkbench before that can be started. Also PS if you're taking pictures in a mirror... IT'S MIRRORED It was my left shin showing a gap, not the right one. Glued the upper elastic a little bit more and it solved the issue After test fitting a bit I am considering switching out the shoulder bridge elastic with white nylon. The elastic is not strong enough and the bells pull the elastic out a lot. Just moving slightly misaligns them.2 points
-
Zsherman, thank you for the support. Update, Well I got my ukswrath’s TK helmet audio system and figured out how to mount all the components. Since most people mount everything behind the chest plate I chose to do the same however, since I coated the inside of my armor with flex seal, Velcro will not stick to it. Since I had the suspenders attached to my abdomen I incorporated a chest rig that would connect to the suspenders. The first one I build was just to rough-out the design. Here is the second version in place. I modified this version but forgot to take pictures of the final design. So what you see here is two elastic strap pockets for the Icon and the Amplifier w/ rechargeable battery. The two strap that run vertical are secured along the top with a 1” square of Velcro. I later changed the top strap on the Amplifier w/ rechargeable battery and used some 1/8” shock cord. I also added two outside edge elastic wire routing loops. The back side of the whole chest rig is a pouch that can hold my money clip or even a cell phone since I have been at a loss for where to carry this stuff when I am in costume. The whole chest rig is held in place with two Velcro straps that wrap around each suspender straps and Velcro to the backside of the chest rig. Inside the helmet, I mounted the two Hovi speakers and routed the cabling with Velcro. I made two elastic loop that will slide along my left arm and hand to hold the PTT cable in place under the armor and secure the button inside my left hand. Sorry no picture, but you get the idea. Once all this was figured out I packed up the TK kit and my Mando kit for DragonCon. 16 days and a wake-up. This is the first time in 10 years that my DragonCon kits were done with time to spare for DragonCon. I hope I didn’t just jinx myself. Well that is everything so far and I am still waiting to hear back on the Centurion status. I hope to start on the Jedah Patrol Pack in the next few days. Thanks for the interest.2 points
-
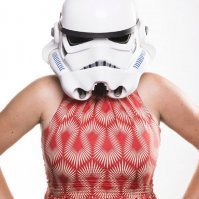
Steel City Con yesterday.. we made a trial run... a few pinch points need trimmed, but other than that... good to go! She got more requests for pics than this old trooper did haha Sent from my iPhone using Tapatalk1 point
-
Needs a little bit of cleanup but half way there.1 point
-
Sized, cut, ready to glue. This took a lot longer than i hoped for the thighs.1 point
-
1 point
-
It's been a while since the last update, but the the first one is finally done! Biggest setback was the metallic paint. I used gloss aluminium, which has a lovely shine to it like in the previous photos, but has 2 issues: first, it rubs off easily and dulls. Second, protecting it with clear coat dulls it too (gloss clear or even aryclic gloss clear). I've sampled the aluminium gloss enamel spray, however, while it doesn't rub off, it seems to be quite dull anyway, and I'm yet to test that with the clear coat. Interestingly, metallic brushed nickel doesn't rub off, and doesn't dull under a clear coat (only issue being the slight gold hue to it). Currently waiting for a metallic silver to test. All these are Plasti-Kote paints by the way In the end I stuck with the gloss alu and the clear coat as it was going to be weathered anyway. For weathering I've used a Tamiya weathering set for the scorched muzzle, and a mix of brown and black oil paint for the grubby oil effect Onto the next one! Sent from my SM-G925F using Tapatalk1 point
-
You were absolutely right my belt was too low. Added the lower snaps and here where it is now. I think it’s high enough according the the CRL which says at or just below. IMO this counts as just below. But correct me if I’m wrong. Sent from my iPhone using Tapatalk1 point
-
That is exactly my plan. Attach the fronts of thighs and shins, then line up and tape up and down to get close as possible. The fronts of my existing legs look good, just the back is the issue.1 point
-
Anytime THT1 point
-
This is so awesome to see! I can’t be more proud of one of our troopers!!! Sent from my iPhone using Tapatalk1 point
-
This is looking so awesome Rat!!!!! I love watching these builds. I’ve stated that before. Coming along so well. Sent from my iPhone using Tapatalk1 point
-
Best trick I can did was used a ruler after I got my thighs assembled, slid them on and put the shins on. Taped the shins down tight (helps if you have another person though) and line the ruler up with the thigh part and draw your line.1 point
-
Excellent, glad it helped.1 point
-
Woo hoo!! I did it! I practiced on a piece of scrap! Thank you!! Sent from my SM-G955U using Tapatalk1 point
-
Wear PPE (correct gloves) Bring a large pot of water to a boil. Remove heat or reduce to a simmer. Place object in water for 30-45 seconds. Remove, apply equal pressure by hand or using other object until desired shape is obtained. While maintaining shape place under cool water for 60 seconds Repeat as necessary.1 point
-
I make the Troopacoola fan systems. Here's a pic of where Iadvise placement of mine. Velcro the actual fans in place. Although this is one of my bespoke variable speed system, the actual placement of the fans I'm assuming can be transferred to Henry's. The fans are directed across the faceplate towards the opposing lenses. Sent from my SM-G950F using Tapatalk1 point
-
They are from Henry's fans. I bought them through trooperbay. I was surprised that it didn't come with instructions1 point
-
A huge congratulations!! Nice work, trooper!1 point
-
Congratulations! Big achievement for sure.1 point
-
I stopped yesterday evening since I wasn't 100% sure how far back they should be. Moving them inwards more is the easy part, getting them out would be the difficult part1 point
-
Congrats Jeff!1 point
-
Looking good Martijn, you might want to set the tip screen material back just a bit. Here's some reference photos.1 point
-
Way to go Jeff! As Tony mentioned, incredible job on that build sir, and definitely an accomplishment to be proud of!1 point
-
FISD forum with be moving to a faster and non shared server tomorrow. Starting around 1 AM EDT (0500 GMT) on Wednesday August 15 the forum will be inaccessible for about 24 hours. Thank you for your patience. FISD Web Team1 point
-
Welcome! Great to see another shorty. I'm 5' 3" and made it to Centurion so I'm sure you'll do great! Like everyone else said, take it slowly and remember that almost no mistake is unfixable. Besides trimming, us small troopers also have to do a lot of head bending to make the kits fit - most people use the hot water bath because it's much more forgiving, but I used a heat gun extensively and found it to be an indispensable tool, just one that you have to be very very careful with. I'll be following this thread.1 point
-
Great! One more to the ranks! Sent from my iPhone using Tapatalk1 point
-
Congrats and welcome aboard!!1 point
-
Congratulations once again from a fellow first achiever, looks good on you’re side profile too1 point
-
CO gratulations and welcome to centurion trooper1 point
-
Thanks didn't check there so I'll check it when I go again Sent from my Pixel 2 using Tapatalk1 point
-
Hey Jeff welcome back and thank you for your Centurion application. Let's do this. CRL and Centurion Application Requirements: All required submission photos are present. Outstanding job on your build trooper . At this time Joseph and I would like to welcome you to L3 Centurion. Congratulations! Other-Armor Fit/Assembly: Being honest here we looked really hard to see if there were any discrepancies worth mentioning for the sole purpose of enhancing the overall look of your armor, and.... couldn't find anything lol. A good number of people fly through builds just to be the first at something, but none compare to those that are built to the higher levels of accuracy. This is a very clean set of armor Jeff. Your attention to detail is noted and is something to be proud of . Now get out there and start representing the Empire as it's first ROTK.1 point
-
Congratulations and welcome to the ranks trooper1 point
-
Welcome to fisd !!1 point
-
Definitely! I’ll be submitting for EIB this weekend. I just need to make a few adjustments.1 point
-
And with the Tab’n slot you don’t have to worry about any shifting, my TK suits don’t have any space so everything stays pretty much put but the TD was another matter with pouches and back pack pushing and beeing a pain to keep things in place on the right side and the tab just works wonders1 point
-
No worries. It’s all doable. A friend of mine is pretty slim and he cleared his kit with UKG, then EIB here at FISD. Here’s a link to his EIB thread as an example. https://www.whitearmor.net/forum/topic/43754-tk-89135-requesting-anh-stunt-eib-status-rwa-792/ I’m not sure which strapping method you’re following, however, this is what I went with: Works really well. Also means you can kit up by yourself (with practice). Here it is in action: Best wishes Dan1 point
-
Thanks@lucnak Nothing has been glued on yet, so Im able to move the parts around, the caps arent fully attached to the pvc yet. Great to hear the screws are ok! Yay! Sent from my SM-G800F using Tapatalk1 point
-
I've used Rustoleum on a clone build and came out really shiny, perhaps you have an old batch of paint, normally their gloss is very shinny. After finding many of the cans of Rustoleum clog and not spray consistently I vowed never to use it again. Having sprayed a few cars in my time I prefer to use automotive paint, acrylic is very forgiving, dries quickly between coats and can be sanded and buffed/compounded to bring out a really deep shine. I used a standard auto acrylic paint for my FOTK, base coated and clear topcoats and very happy with how it turned out, didn't even need to buff it was shiny enough. I've heard others have had success with Krylon paint, quite similar to Rustoleum.1 point
-
Pics Darker lens and s-trim installed More ear trimming. Baby steps. Compare pics after and before distressing the MP40 pouches. I used 220 and 600 grit sandpaper and a wire brush. Distressing small Spanish pouches. After and before. I roughed up the pauldron but the effect does not really show very well in photos, so I won’t show that. Pauldron after some black and brown paint washes. Boots got brown and dark grey washes. Everything got a few light coats of a dark grey/ sandy colour. I have pouches for both versions of the docking bay capt and cantina capt. Sent from my iPhone using Tapatalk1 point
-
You should totally take whoever made that awesome backpack out for a nice dinner or something! Good luck1 point
-
Guys thank you.1 point
-
First test fit with the weathering and pauldron. Still need to make my thigh garter (temp setup being used) and proper shoulder straps. And yes, those are my dancing shoes (need to weather boots, pauldron, and pouches). I didn’t bother with the pouches but the wife snapped a few pics of the fitting so I tried some poses. Daniel, I was in a hurry and totally botched the pose. Next time And I need to finish the T-21. Sent from my iPhone using Tapatalk1 point
-
Boy, has this build stalled, or what? I still seem to be in the collecting phase. I have purchase a few upgrades for the build, Ukswraith's shoulder reinforcements and bucket sound system. Aluminum holster upgrade ... The list goes on. I just finished printing my F-11D and SE-44 (thanks 5th Horseman) and will be knocking those together to test out my paint. As to paint, I opted for a paint I have used in the past when doing bodywork on my old motorcycle. It had full plastic (ABS) bodywork, and this is a spray that is specifically designed for use on flexible body work. SEM paints. Here is a link to the white I am trying out: https://www.amazon.com/gp/product/B000PKZ2J4/ref=oh_aui_detailpage_o06_s00?ie=UTF8&psc=1 I will try and update this thread a little more often. I have a new build deadline (self imposed) of September 20th.1 point