Leaderboard


Popular Content
Showing content with the highest reputation on 05/10/2018 in all areas
-
Hey everyone! I have been away for a loooong time and I'm so sorry for not posting for a while. In fact, I've been pretty busy lately, having to work away from home for almost a month... So during that period, I had really little time to work on my build, unfortunately. However, since I came back not so long ago, I worked a lot on it and it progressed quite well I think... In fact, I have mostly finished all the huge work and now have to do some more adjustments and stuff like that but I think my armor should soon be completed - well, at least pretty wearable! I will post some new pictures soon. The reason I did not yet is because last weekend, the laptop on which I uploaded all the pictures I took to transfer them to imgur and then post them here completely exploded and is not working anymore - motherboard and CPU problems. I'll have to sort all of that and will probably be able to upload pics of all my new developments throughout the weekend! Sorry for having been away for so long, hope you guys will still follow my build... I have not stopped at all - in fact, I think (I hope!) I can say that I'll be done soon!4 points
-
Hi all, As a very proud member of the 501st UK Garrison, I just wanted to share this with the worldwide trooping community. Words from the UK Garrison Facebook page: “Remembering our founder, Graham Campbell, on the 14th anniversary of his passing on 9th May 2004. From the 10 troopers that Graham founded the 501st UK Garrison with on 23rd March 2000 to the 536 we have today, his legacy has continued to grow and flourish. Lids off troopers as a mark of respect for the sad loss of the man with the vision that started this journey for us. "You are the men of the Imperial Army, Let's go to work..."3 points
-
I agree with Preston that RT-Mod or AM will likely be a better fit for you. To make this fit you, you will need to lengthen the chest to back elastic strap and tighten the chest to ab. You will also need to reposition the shoulder bridges to ensure that they meet the back plate. They could also use some reshaping as well to curve more as they are very straight right now.2 points
-
Yeah we are here just like Luc said2 points
-
Progress of the day was to complete the thighs namely adding the ammobelt, elastic and sand it smooth also did a fit-check, pretty happy with the look and that I could manage stairs quite easily this time so that was good And I coulden`t resist taping it up for a full body - I have a good feeling about this2 points
-
We're all still here! Take the time you need and we look forward to seeing your photos! (Yes I just decided to represent everyone else just now hahah)2 points
-
Attaching the ammo pack to the Right thigh. The TD was used as a template for the curved corner. test fit fit then drill some holes Paint the split rivets. In hindsight, this could have waited, as the paint ended up requiring a redo anyway.2 points
-
There has been a lot of negativity surrounding FISD and our former DMBO lately and I thought I would inject some positivity instead of the mudslinging that the Legion boards seem to have (sadly) devolved to. I don't know Wyatt. I've talked with him via PM in my role as an attache a few times at most. Regardless of charges or what you think of him, he has poured everything into the Legion and this detachment for over a decade, from handling nearly every merch run on FISD to running Imperial Gaskets. I know I've only been a Legion member since November, but Wyatt... thanks for everything you have done for us here.1 point
-
Hi all. Rather than me posting on specific threads, I thought I’d make a post about the correct use of the “Dave M” style decals/templates for ANH Stunt lids. If it is deemed worthy, perhaps it could become a sticky. I will then try my best not to mention it on individual posts (as the last thing I want to do is upset anyone). As the name “Tube Stripe Police” was bestowed upon me, I feel it’s my duty to try and spread he work to keep up the high standards of TK screen accuracy. I hope I have not become a nuisance by flagging it. So, here are some shots of the Set for Stun, or “Dave M” helmet from ANH. These pictures are from the excellent website www.starwarshelmets.com My interpretation of these stripes are that they were intended to look like vents on a curved surface. When viewed from straight on they should naturally curve with the tube. Here are some shots that I put together (using my old SDS lid, hand painted stripes using Dave M style templates/stencils from Mike at Trooperbay). For obvious reasons, I won’t show pictures of those that have been applied the other way around as they are not mine to share and I don’t want to alienate anyone. Should anyone wish to share, please feel free. I hope that all makes sense. Any comments of suggestions to improve this thread, please let me know. Kind regards, Dan Sent from my iPhone using Tapatalk1 point
-
I'm not aware of anyone taking delivery of a kit yet1 point
-
removing return edge for centurion. Inner boxes inserted into outer boxes. Will need to sand even to 15mm Using this tool is quick and easy Done1 point
-
Drop boxes! There is a larger on and a smaller on. The smaller one makes up the back of the larger one. I trimmed these down to have a 15 mm edge and assembled. In an effort to make these functional I took some of my remaining nylon webbing and glued them in at the bottom to make a hinge. I'll have to take a few more pics to add in to document everything, but I drilled a hole in the back portion (the smaller box) and looped my elastic between the plastic belt and canvas belt and rivted the elastic to the drop box. I still need to get a setup to keep the boxes closed (i'll be using velcro just figuring out what will work best for me).1 point
-
Dragon_a, yes I filled it in and yes I know it's supposed to be there. I will be adding the hole on the left back in but at a slightly more left and lower location. If I move the two shoulder strap connectors then the hole would look all wrong. I am basically doing what Yosh did with his ROTK build. Regardless, thank you for point this out to me. When I was building my Mandalorian armor I though I was all squared away until someone pointed out that my knee armor and shoulder bells were inverted. Thankful that someone who knew what they were talking about decided to help me out but pissed that I had to repaint these parts due to the orientation of the graphics on them. So as you can see, I welcome all information and suggestions.1 point
-
Great work as always, Greg!1 point
-
Holy mother of a Star Destroyer Kman!! Are you sure that's enough?1 point
-
And I just realised, you are my last approval as a DO. It was a wonderful application to finish on so thank you Sir. Sent from my iPhone using Tapatalk1 point
-
There are 2 choices, Jim... You can pick up the supplies at a craft store or online (nylon, elastic, strapping, snaps) and do it yourself, or get in touch with Sara (screen name Alay), who I believe is selling the complete kits. If you do decide to go the DIY route, I have a snap setting tutorial here: https://www.whitearmor.net/forum/topic/44617-snap-setting-101/ Supplies can be found here: https://www.whitearmor.net/forum/topic/31404-supply-list-for-your-tk-build/ Another GREAT item to think about is one of Pencap's thigh garter systems. Makes life SO much easier! I can attach my thighs in about 5 seconds each, and they will never, ever slip. https://www.whitearmor.net/forum/topic/29991-thigh-garter-system/1 point
-
TK Talkie arrived! Quick update: TK Talkie arrived, and after a few minutes of playing with it I kinda got a Phasm-ish voice. I'll do more tweaking this weekend when I'm free from work, and when I get a better (cheaper) mic. Bonus: The Pyle Pro is on sale on Amazon Prime, with free 1-day shipping! Woo. Anyway, I pulled a recording of my current voice config. Waiting to hear back from the creator to see if he'd share his wisdom, as well as just infinitely tweaking settings until the voice is just right and not too bitcrushed (Phasma's voice is a lot more pure than other TKs). http://mypa.ws/i/FN2187Reconditioning.m4a <- there's an audio sample of what I got with only a little tweaking out of the box. Cape: The denim cape is almost done. I just need to sew on the pockets, which were held up by needing to sew some straps. The placement of the pockets is nonsensical and drove me mad. My best advice for people doing this in the future: Wear the cape, and position the pockets while you're wearing it, then adjust slightly on a flat surface. Hopefully that gets sewn on Friday, so Saturday I can apply the first coat of latex. I'm using Monster Makers liquid latex, mixed about 1pt water to 2 or 3 pt latex. Just enough to spread into the denim but not enough to soak through. Two coats seemed to be best on my test swatches. I tried coating the material first before sewing and, uh. The sewing machine really didn't like that.1 point
-
That is why this thread has been revised so that members can still be aware of the current situation, without the public disclosure of personal information here on the FISD.1 point
-
Hey thanks for the info! It is probably just going to sit at home though [emoji2] still have the smaller mag if it comes to that. Sent from my LG-V495 using Tapatalk1 point
-
I can't see properly on your pic but did you fill the round hole behind the right hand shoulder? That is supposed to be there.1 point
-
I just use my hand and friction. Rubs right off1 point
-
A piece of scrap cover strip works great. Once you get it started you should be able to peel the rest by hand.1 point
-
Everything went very well. Huge turn out at Third Eye Comics in Annapolis MD, free comic book day. I think we ended up with about a dozen representing the 501 st. We were definitely a hit.1 point
-
It's almost like you've done this before1 point
-
Congrats and welcome, trooper!1 point
-
Now seeing this approval! Congrats!1 point
-
Welcome in the ranks, trooper! For The Empire!1 point
-
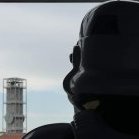
Hello guys, Well I have mounted the visor in the helmet and started on fabricating mounts for the fabric screens. You can see the two mounts on the forward most parts of the tube stripe screens. This is two pieces of HIPS that I glued together with an overhang and the screen end inserts into them. I think at the other end of the screen I will make a rotating spring metal clip that will hold the screen in place with tension. If this works, then this is what I will do for all the screens. It’s a very simple and low profile way to make the screens removable. Anyway, I wanted to get started on the rest of the armor because there will be a lot of gluing and filling that will require 24 hours of cure time so the soon I get started the better. Well I was told by someone who has built several TK armor sets from the OT that for sizing and fitting, you start from the center and work your way out. This being my first and only experience with TK armor, I started with the abdominal armor. I am a somewhat thick guys so there will be no cutting on this part but I need it to better conform to my body snugly so I have chosen to install three ¾” adjustable straps with slide release buckles along the back. I made them from black ¾” polypropylene webbing that I had in my shop. I cut three sections a 6.25 inches and folded them over the female end of the side release buckle, sewed them in place then installed them inside the abdominal armor with E6000. I used some rare earth magnets to hold them in place while they cured. Next I cut three sections of the webbing at 12.75 inches and glued them on the opposite side of the abdominal armor with E 6000 again using magnets. Once this is all cured I will add the male ends of the slide release buckles and test this method. I plan on putting the abdominal armor on backwards, connecting the buckles then rotating it 180 degrees then reaching behind to tighten it down. I may add an elastic section to each strap if needed after I test it. My hope is that this will ensure a snug fit and I can don the armor without assistance. Next I wanted to get started with the belt. Jim’s belt that comes with the kit is not aligning up cleanly with the abdomen. Either one side fits snugly or the other but not both and the gap between each “tooth” is not evenly spaced on each side of each tooth. So I think I will remake this part with some HIPS that is .125” thick. This is very close to Jim’s belt thickness and my only concern will be how well the teeth will hold up when I wear it or will the snap off? I may reinforce them with some fiberglass but I do not want to make the belt too thick. Each tooth is roughly 3/8” tall and I think I will attempt to cut everything out first then bend the belt. Hopefully it will all still align properly. Lastly, I went ahead and filled in the improper holes on the back plate with some bondo. I have marked where I plan on moving the shoulder connectors but until I test fit the back plate with the abdomen and chest plate, I do not want to cut anything. So that is the update so far. I do not want to make any predictions on a time frame for this build at this time. I learned from previous projects, I tend to be way too optimistic and then rush to meet a stated deadline. So for now I can only way that once all the armor is fitted and strapped. I will need to sand the hell out of everything then begin the painful process of priming and painting. Thanks for the interest.1 point
-
Here are some screen grabs from the movie. I think a little overhang on the knuckles will be fine. Hope these help.1 point
-
Don't get cocky, kid.1 point
-
Congratulazioni Alessandro cool italica;) Inviato dal mio iPhone utilizzando Tapatalk1 point
-
Congratulations trooper, well done1 point
-
Eric @Tolo has been with FISD a long time, including stints as DCOG and most recently as DXO. As things happen, Eric's personal life has changed for a positive for him, but for us it meant that he couldn't do what he needed and stay on as DXO. Eric - Thank You! for all you've done for FISD and we wish you the best. Fortunately on FISD, we believe in staff development, e.g. taking on new people to staff roles, and then grooming them for higher office, either here on FISD or elsewhere in the Legion. Many former FISD staff have gone on to be GCO/GXOs, SLs, and DLs. Continuing in that fine tradition, Andrew @Sly11 has graciously agreed to step up in to the XO role. Many of you know him from his solid work as a Deployment Officer, which he as rocked. Please join me in congratulating Andrew for a promotion well deserved. With unquestioned loyalty, TK-8020 "Daetrin"1 point
-
Nice progress. Just out of interest, are you planning to troop with this or is it a fun project? I only ask because if you’re thinking of trooping it, you may wish to check with your Garrison’s GML to see if they are likely to clear it with the extended mag. As you’re probably aware, screen used blasters had the mag cut down a significant amount. At a glance, it looks like your’s is roughly twice the length of a screen used mag. Dan :-) Sent from my iPhone using Tapatalk1 point
-
1 point
-
Nice job!1 point
-
Welcome aboard trooper!1 point
-
Congrats.1 point
-
Congratulations!1 point
-
Great news, welcome aboard trooper1 point
-
Congratulations Trooper.1 point
-
Congratulations, Trooper. :-) Sent from my iPhone using Tapatalk1 point
-
Thank you from the heart, you just gave me great joy, after work and great help from my colleagues from the spanish garrison I got the EIB, I will continue working on my armor to reach centurion and ........ Greetings and strong hug from Spain. Enviado desde mi MHA-L09 mediante Tapatalk1 point
-
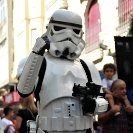
First troop in my TK today. Revenge of the fifth.
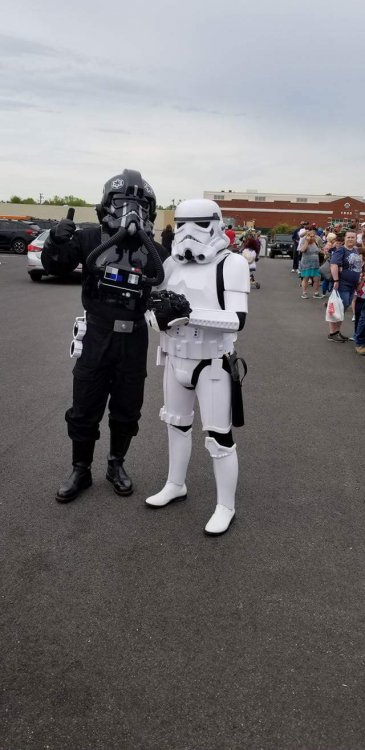 1 point
 -
I had a troop at a bookstore last night. No free movie but fun nonetheless. Thanks to Giles Woodward for the pics Sent from my iPhone using Tapatalk1 point
-
I hope so and thank you! After approval, I will definitely be submitting for EIB. I have to get a better blaster than my Rubies conversion, though. Hopefully getting a Hyperfirm DLT-19. Thank you very much! Thank you very much, and I actually noticed that after the pictures were already taken and submitted. I guess I see a lot of EIB and Centurion reviews get the critique that the thighs are too low and I overcompensated, lol.1 point
-
Guys looks like i,ve posted in the wrong section, i read it as Phasma/TFA/TLJ thinking it was all under one section can someone please move it to TFA Stormtrooper section please Apologies and Thanks1 point
-
A quick eulogy to my favorite childhood toy store and 501st-friendly retailer. Many Force Fridays and LEGO events were trooped on your soil. You shall be missed.1 point
-
I have 2 pairs of Imperial boots (1 dirty for HWT 1 clean for regular TK) and I gotta say that I couldn't be happier with them. Shipping was actually quite fast (2 weeks) and the customer service was great. One thing I would recommend, though, is that you order one size up from what you normally wear as they tend to run a bit small. As Daryl mentioned, they are close until March but you should be able to get in touch with them beforehand.1 point