Leaderboard


Popular Content
Showing content with the highest reputation on 02/17/2018 in all areas
-
try not to discard any of the cut plastic, especially the ABS filings and small pieces. You can make ABS paste with acetone as a method to fix mistakes. And the color of the paste should match your armor.2 points
-
Made a start on the scope this afternoon. Managed to fit both front and rear lenses but my drill died before I could hollow out the main body...typical! [emoji23]. Will see if I can get it finished tomorrow. Sent from my iPhone using Tapatalk2 points
-
All, Been a while and with RL haven't been on the forums as much as i should. That said I've been working on the armor and although I don't have an IP thread I do have a 90% solution (see photo). Essentially after using nearly all of the processes discussed earlier in the thread (T-cut was the one i could not get as it seems the white version was only available in England) with little improvement spoke to a couple of folks at my garrison and strangely enough Daetrim who attended one of our Garrison Titan monthly meet and greets. Finally decided to sand it. I started with 800 grit paper, but progress was slow. So i cheated a little and used my dremil's polishing attachment and accelerated the process. After i got the bulk of the dye out i went back to 1200 grit paper, then 1500. When it looked like i had gotten the main dye streak and the other 'shadow' streaks (in the original photo to the left and below the big streak) out i shifted to Novos 3, 2 and then 1. I definitely have some more polishing and buffing to do but it is much improved and should be ready for ECCC. Thanks for all the suggestions!
 2 points
 -
Hey Hollowbodies, I see one of your photos is showing a "gloss" black tin. I thought the vocoder was supposed to be "satin"? I'd like to get this straight because I'm probably just a few weeks away from starting my AP build. Thanks, Mark2 points
-
I'm sure most of you has seen the image below. These Billgrams have become a bedrock on which many TKs have been built. However this image, and 1 very similar, has a colour on it no longer deemed correct. Rather than carrying on explaining it I've made a new diagram, sorry no catchy name this time, with just the correct colours. The images show the Humbrol colours, but the Testors equivalents are shown too if that's easier to source. All this was built upon Billhags work, so it would be wrong for me not to thank him for it. He's also my GML so he has had a hand in me getting this far in more than just billgrams. I already owe him a pint, so Bill if you see this and the opportunity presents it's self, make that 2. ANH Stormtrooper Paint Colours by Christopher Pearson, on Flickr Click through to flickr to get access to a full resolution version, and feel free to share this if you find it helpful.1 point
-
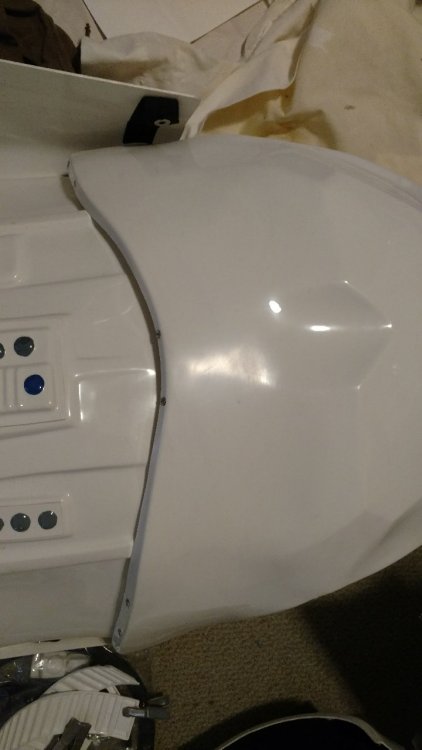
I first got my numbers in an ROTJ suit that came together in Frankenstein fashion over a couple of years but always wanted the look of a Bespin deployed TK. Finally got around to ordering some ATA armour and assembling it over the last couple of months. Love this kit, solid 2mm ABS, funky OT asymmetry and even the cream white finish of the plastic is tasty. I’m preaching probably to the converted here but for price versus accuracy versus sturdiness this kit is a pretty happy compromise [emoji106][emoji106][emoji106]1 point
-
(reposting here since this is where I should've put it in the first place) Summary - AP kit, first time builder, hoping to get this finished for May/June, also hoping not to cut off any of my fingers. Micro sized trooper so I'll be trimming lots. Plan is to only use E6000 so I have time to fix any mistakes. Trimmed forearms last night. Definitely not sure what lines are meant to be cut on, so I'm taking it slow until I can tape and size to my bod. - learned that you don't need to press and cut super hard/deep with that shop knife. Will make all future cuts so much easier and safer. Just picked up a pair of plastic cutting scissors. About to get out the Dremel and practice gentle sanding and shaping on some scrap pieces. (attempt #2 to embed my images with Imgur links below) https://imgur.com/Gc5xySs https://imgur.com/l8gqLU3 https://imgur.com/13hiis2 Thanks for the warm welcome1 point
-
First squire activity went well. Hooked up with two TKs near me which would have been super great 3 months ago but oh well. Had a good time though makes me want to get out in the armor soon. Fingers crossed. Sent from my iPhone using Tapatalk1 point
-
Compared to what? Facebook? That is even less monitored. There are indeed numerous email address and you are free to go to the 501st.com website and find them easily enough. For instance have you tried.... 1. Emailing your GML? 2. Emailing your GCO? 3. Emailing the detachment leader? 4. Emailing the LMO? All of these are listed on the website and are easy to find. Glen also gave a link that is also posted at the top of the forum as well in how to get detachment level access.1 point
-
Thanks Tom! Quite pleased with it so far...hope the rest of it goes smoothly! Now that my armour has arrived I’ve got a new found fervour to get the blaster finished and get on with it! Did u have a look at my power cylinders? Do they look ok? Sent from my iPhone using Tapatalk1 point
-
That's what I feel 95% of my posts are for my own peace of mind lol1 point
-
Ah, gotcha. I wouldn’t worry too much, though. I don’t think it’ll cause any clearance issues. Probably just a minor adjustment to line it up, just for your own piece of mind. :-) Sent from my iPhone using Tapatalk1 point
-
Looking at that picture, I think the angle of the photo might be deceiving. Based on the width of the floor tiles below the shins and those above the thighs, it looks like the photo is at quite an angle. RS kits are usually a thing of screen accurate goodness, so, I’m guessing it’ll look spot on when it arrives.1 point
-
Hi Jeff, Do you mean because the cover strips aren’t parallel? Do you have any pictures of them on with your undersuit? Symmetry and stormtroopers don’t usually go hand in hand. ;-) Here’s the elbow end of a screen used forearm from the FISD gallery. You’ll see that not all parts are symmetrical. Could you expand a little more on which part is bothering you?1 point
-
From the pictures (from the angles) they look a little short to me for being untrimmed. How do they fit on you just trying them now? If they work then go with them. On some commission I've done I've had to cut almost 3 inches off of the thigh sections to fit correctly so I wouldn't be worried without fitting them to you yet.1 point
-
Almost It should idealy be in the build section and...happy BBB-day1 point
-
I started on the other pack. I have most of the parts ordered1 point
-
So, bit more progress today. Power cylinders done, flash guard, ejection port guard and sights fitted. Also chopped up the scope ready to hollow out...just need to pick some spade bits up today so I can get that sorted this weekend hopefully. Should then only have the Hengstler to finish before I start chucking some paint at it [emoji23] Sent from my iPhone using Tapatalk1 point
-
Just sent a box full of left over luck your way! Congrats and have fun, and don’t cut yourself it’s not fun. As for forum posting I use tapatalk. Sent from my iPhone using Tapatalk1 point
-
Never fear - Gloss black is still good for the pinstripes - ie the bits around the traps and tears. Satin (Humbrol #85) is also good for the hovi tips if they need painting. :-)1 point
-
Oh damn, I bought the gloss black because I initially read it there : https://www.whitearmor.net/forum/index.php?/topic/31404-Supply-list-for-your-TK-build.... Thanks for the brushes suggestions, I'll look into all of that! Sent from my LG-M470 using Tapatalk1 point
-
Dominic, way to go, this is what FISD is all about, troopers helping troopers to achieve their goals and dreams. Looking forward to seeing the updated photos and to getting you approved. Great work my friend.1 point
-
Hi David, I bought a set of various brushes from Amazon. Of the ones in the set, I found that A and B useful for the frown and any finer detailing. C was great for the vocoder and D was good for filling the traps and tears with grey. Not sure if you’ve read this before but, for the traps and tears, some people recommend painting the black outlines before the grey. I found this much easier and gave a nicer end result. Here’s an example of what I mean: I tried the other method (grey then fine black pinstripe) and, for me personally, the former option gave a better result. Btw, +1 for satin black on the vocoder. I find it looks a little more “off the set”. And, if you’re going for the ‘hand painted’ Dave M style templates, just make sure they are applied as intended. They are specific for left tube and right tube. See reference pics of the Dave M helmet for confirmation. Sent from my iPhone using Tapatalk1 point
-
do not cut the joint strips yet, you have to measure the pieces of the armor and see how much space you need, I saw now that you are bigger than me, I used 15mm arms, 25mm legs in front and 30mm behind, but they can change according to different measures that we all have, since you are very tall I suggest you leave a lot of space in the pieces of armor, you will always have time to cut them later, after trying them on, the TM is spacious, but for those like us you have to stay at the cutting edge, there are pieces of my armor that have been assembled, cutting only the small folded edge of the vacoum form, be careful, measure three times, and cut one, if you have doubts ask, and post photos, so the question will be better understood[emoji1303] good luck Inviato dal mio iPhone utilizzando Tapatalk1 point
-
I do one heavy coat and work fast so the paint will self level and dry to a nice smooth finish with no brush marks, but for that the paint has to have a certain concistancy and not too liquidy, my vocoders people think its masked and airbrushed on its so smooth looking, I guess my many years of model building experience paid off lol! Mark (AP)1 point
-
I used a square flat brush, found it nice to use on the vocoder and for lines but I think like most things it's just how you use it.1 point
-
These were my go to brushes. The one on the left is awesome for lines ( it is longer and will hold more paint). The #6 round was recommended for the vocoder but I didn’t use it much myself. Sent from my iPhone using Tapatalk1 point
-
I use Imgur and not had any issues as yet BUT try to use the DIRECT LINK option to post into your thread and the image will show Ideally trimming pieces (depending on how they fit your shape) you want to trim from the raised ridge, just a tad bigger than the cover strip so: Forearms, biceps front and back 15mm (in that case you would trim @8 mm on each piece from the raised ridge (hope that makes sense) . Thighs front and back 20mm Shins front 20mm back 25mm Try and trim as straight as you can as these pieces need to align not only at the coverstrips but top and bottom too, the bottom of the thighs for instance isn't fully covered by coverstrips so they need to be somewhat spot on.1 point
-
Looks pretty good to me, you could try the lenses up to the eye sockets and see how the fit, I used a small block of wood and sandpaper to get the top and bottom of the eyes level so the lens sat better, but then some like to have a gap there.1 point
-
Sorry it’s a grueling wait Matt, the approval process can sometimes take up to 3 weeks. I’m itching to introduce you to the rest of the Garrison - and you’re not alone either, there’s one other trooper that has been waiting for his ID as well - ugh. I’m hoping they get back to us soon! Sent from my iPhone using Tapatalk Pro1 point
-
Hi Ian and welcome. To answer your questions - for the chest piece, I think you are looking at the screws used for the "bracket" strapping system. This is the screen accurate method of strapping. For the belt - those plastic covers are usually included with the kit (I don't have a RS props kit, but I think that is pretty standard).1 point
-
Darman's neck seals are great. I have one from Trooperbay.com, which I love- they go up to 19'' neck and will do custom orders if your size isn't listed. As to boots, I checked Imperialboots.com for you, but unfortunately theirs only go to US 12. Other than TK Boots (which I have) I'm not aware of any other white boot vendors... People have gone for the black Chelsea boot and painted it white with leather paint. It will require touch up, but if need be, it'd get you into some boots. TK Boots are custom made for them, last I heard at least, so you might want to reach out and see if they could make a larger pair. Worth a shot, at least. Good luck!1 point
-
Just moved from West Virginia to Pennsylvania this past year, and as a reward for all the hassle of moving I got this plate. Before that, I belonged to a different franchise.1 point
-
let's hope you stay GML for a while We got garrison license plate frames: (I got a different number, referring to when I bought my car.)1 point
-
Thanks again guys for all the kind words. Quick Update - End Cap Clip When I was checking out Suitcase Props on Shapeways, I saw they also produced an end cap clip which looked better than the Doopydoo's version. I picked up one of those at the same time. Here's a shot of the two along with the aluminum channel from T-Jay's Completion Kit... Using the same 1mm brass strip I purchased previously, I fabricated a strip to fit on the bottom of the clip. I gave it a bit of a curve to hold the clip up and simply attached it using E6000. We will see if it holds up over time... I also added some green stuff to add a knurling pattern to the top of the 3D printed clip... I cut the channel to the correct length and used a file to round off the edges of the channel. I gave them all a coat of primer to reduce the roughness of the 3D print and to help the paint adhere to the metal pieces. Then, finally, I installed a piece of a nail to pin the clip into the channel. Luckily, the hole I drilled in the channel was ever so slightly off, which means there is a bit of pressure pushing on the nail so it won't fall out by itself. That's it for today. :-) Mark1 point
-
But I don't need a trigger guard1 point
-
A few people have pointed out that the pauldron is inaccurate. I finally got around to fixing it. The conection pieces should be attached underneath and have white material on them.1 point
-
The reveal mask, now pretty much done. I just need to finish the greeblies on the neck seal, add the clasps to join the two, then complete the repainting of the rest of the mask (I decided it needed a new paint job). Sewing machine this week so that I can continue with the quilted leather suit and robes. Scratch built the vocoder unit and microphones with found parts and collecting bits from visits to the hardware store; and Lego! Any Lego enthusiasts might recognise some pieces. It's fun hunting around for parts to replicate this piece. It's inspired by the ROTS version, as it's more colourful than the ROTJ one. I ditched the pepakura neck seal and decided to build a better one with craft foam instead. Best find of all - that chin mesh, it's guttering grating, found at Bunnings. That stuff will also go on the mouth piece grill. Supanova (in April) awaits!!1 point
-
I used nylon webbing, Tandy Line 10 snaps and E6000- when I do any other builds with snaps I plan to use the same method. I also used my soldering iron with a pointed tip to make a nice clean hole to put the snap through. Also you'll need to burn the cut edges of the nylon with either a lighter or a soldering iron to prevent fraying. Here's my snapping system, I probably went a little overboard, but it works well for me: I also have a snap connection to each shoulder bell from the shoulder bridge connection, and a snap connection from the shoulder bell to bicep, and bicep to forearm. That way I pull on my entire arm armor in on go on each side- very convenient.1 point
-
Grip is waiting onthe trigger guard to be formed,,, not much longer1 point