Leaderboard


Popular Content
Showing content with the highest reputation on 12/10/2020 in all areas
-
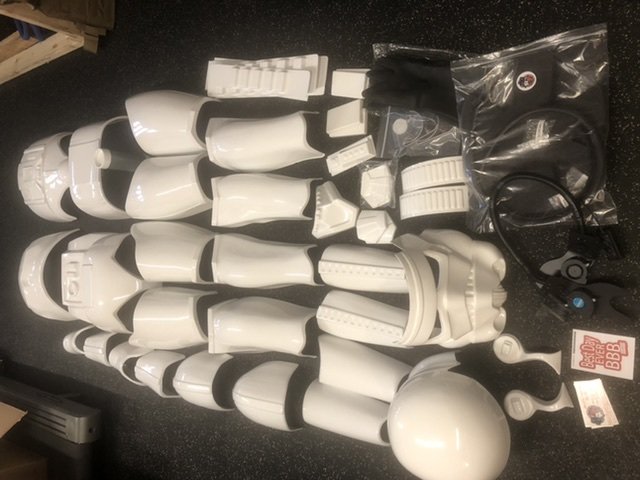
BBB day today. AM 4.5 armor. I will be building the ANH Stunt. Striving for centurion level. Sections: 1. Forearms: FINISHED 2. Biceps: FINISHED 3. Calves/Shins (lower leg): FINISHED 4. Ab: FINISHED 5. Posterior: FINISHED 6. Strapping: FINISHED 7. Thighs: FINISHED 8. Chest and Shoulders: FINISHED 9. Shoulder Bells: FINISHED 10. Thermal Detonator: FINISHED 11. Belt: FINISHED 12. Back Plate: FINISHED 13. Kidney: FINISHED 14. Hand Guards FINISHED 15. Helmet: FINISHED 16. Helmet Fans and electronics: FANS FINISHED 17. Fitment Alterations: FINISHED 18. Final Pics Basic Submit: APPROVED 19. EIB Submit: APPROVED 20. Centurion Submit: APPROVED #496

 4 points
 -
Nearly a week ago a special Command Staff member hit a noteworthy milestone of 10,000 posts here on FISD. On a daily basis he can be found expertly guiding new recruits on their journeys to the 501st or assisting veterans seeking the ranks of EI and Centurion. No doubt this Trooper's diligent contributions at the Detachment and Garrison levels have had a significant impact on a great many of us. Hitting 10,000 posts is no simple accomplishment, especially when they are as detailed and constructive as those by this member, and such a remarkable number is indicative of a consistent presence and immeasurable value to the community. Though he would never seek acclaim for his tireless commitment to the motto "Troopers Helping Troopers," his dedication to that cause is worthy of acknowledgement and thanks from us all. So, a big heartfelt THANK YOU to Joseph "@justjoseph63" Pedigo, TK-10963. You are a true asset to FISD and the 501st, and your abundant generosity and passion will continue to be inspiring to all of us! Here's to many more helpful tutorials, flexible hand guards, and removed return edges!3 points
-
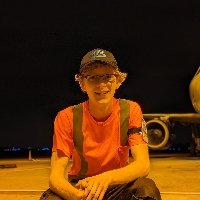
Now... the fun begins! Harder, (AKA TK-91918).. reporting for duty! Nearly 6 years ago, I learned about the 501st, simply via googling to buy a stormtrooper "costume". I admit, I used the excuse of a Madri Gras party to be the reason to pull the trigger and do it. But upon searching, and discovering the 501st, peaking my curiosity, later to see all the good they do... albeit was already a passion, became purpose. I have been a fan as many here clearly are, since childhood. LOVED Vader. What a bad A** mother right there! The Stormtroopers to me were the elite group and front line, the true power and force to be reckoned with. When my children were little, a friend of theirs was diagnosed with Childhood leukemia. He was one of 14 children in the cancer wing at the local cancer focused hospital. Through a 7 year battle, he was the only child within his ward to survive. I visited him often with the kids and this young man became a son to me as well. I cried when I left, but left him laughing and with hope. "See you tomorrow... stop faking it, its getting old... Love you." One day, I was there, when I witnessed the 501st, trooping through the hallways. At that time, I only thought how cool it was, and those are nice people. Come back to 6 years ago, discovering the 501st existence, and then tying it back to such strong emotional ties, plus fandom... Hence my passion grew. A few years back went through a hurtful divorce. I found myself needing to rediscover myself and re-establish purpose. I had access to money that I could use just for me. After the support of the new love in my life, and family, I purchased a fully commissioned set from RSP. As a plastics degreed mechanical engineer, I knew I could build it, but I wanted to get to trooping and help brighten anyone's day with this persona. After two months, it came!! But the legs were 3" sized too big every dimension. Initially I was heartbroken, but RSP followed true with their reputation. They immediately rushed to correct the mistake at no cost. While I was waiting for the 501st approval, I decided to dawn the armor and report in as an off duty storm trooper. I had so much fun with this, and sending some pictures to friends, I was overwhelmed with people asking for more. I love making the photos. So, I got my approval! "TK-91918.. I AM.. at my post!" I want to thank so many of you for helping me with questions and adjustments, snap strap fittings, where to procure, who to trust, all the plethora of information available... And while I can't possibly thank everyone, @MaskedVengeance @justjoseph63 @CableGuy @ukswrath @Sly11 @gmrhodes13 @Firedog @TKSpartan y'all, have been an incredible help and of the highest value to help me make this purpose and passion a reality. Thank you! Now... I'm gonna return that kindness and assist anyone else with a purpose and passion. Oh, and start my trooplog lol. Regards to all Troopers and aspiring.. Harder, AkA Craig Best2 points
-
Name: Mark Gambino / TK84212 Username: MightyAtom Knightfall Garrison Melbourne, Australia Armour: AP Helmet: AP Blaster: Premier Props (Etsy) EIB submission: https://www.whitearmor.net/forum/topic/50394-tk84212-requesting-anh-stunt-eib-status-ap-1013/ Height: 6' Weight: 178lbs Boots: Imperial Boots Canvas Belt: Imperial Issue (Kittle) Hand Plates: [mention=22112]justjoseph63[/mention] Electronics: [mention=35426]MissionTrooper[/mention]Arduino Nano Neck seal: Darman's Props (with Extreme Racing back-up neck seal) Holster: AP Note: Updated Hovi mix tips photo with revised vocoder2 points
-
Hey troopers, Brand new here but I’ve been a fan of y’all for ages now. Finally getting to a spot in my life where I can stop imagining this and start getting ready to don the helmet for the first time - exciting stuff. Although I’ve still got quite a bit of prep and familiarization ahead before I can start in earnest, I’m thrilled to join the forum and start learning. Fingers crossed we’ll have a 2021 that’s a biiit less insane and I’ll be able to see you folks around sometime soon. Cheers from Virginia - stay safe & sane out there! -Korhal (Dylan)2 points
-
Chatter links: To save - right click then "save audio as" http://play.starwars.com/starwars_soundboard/asset/audio/TRPR_stormtroopers/storm_01.mp3 http://play.starwars.com/starwars_soundboard/asset/audio/TRPR_stormtroopers/storm_02.mp3 http://play.starwars.com/starwars_soundboard/asset/audio/TRPR_stormtroopers/storm_03.mp3 http://play.starwars.com/starwars_soundboard/asset/audio/TRPR_stormtroopers/storm_04.mp3 http://play.starwars.com/starwars_soundboard/asset/audio/TRPR_stormtroopers/storm_05.mp3 http://play.starwars.com/starwars_soundboard/asset/audio/TRPR_stormtroopers/storm_06.mp3 http://play.starwars.com/starwars_soundboard/asset/audio/TRPR_stormtroopers/storm_07.mp3 http://play.starwars.com/starwars_soundboard/asset/audio/TRPR_stormtroopers/storm_08.mp3 http://play.starwars.com/starwars_soundboard/asset/audio/TRPR_stormtroopers/storm_09.mp3 http://play.starwars.com/starwars_soundboard/asset/audio/TRPR_stormtroopers/storm_10.mp3 http://play.starwars.com/starwars_soundboard/asset/audio/TRPR_stormtroopers/storm_11.mp3 http://play.starwars.com/starwars_soundboard/asset/audio/TRPR_stormtroopers/storm_12.mp3 http://play.starwars.com/starwars_soundboard/asset/audio/TRPR_stormtroopers/storm_13.mp3 http://play.starwars.com/starwars_soundboard/asset/audio/TRPR_stormtroopers/storm_14.mp3 http://play.starwars.com/starwars_soundboard/asset/audio/TRPR_stormtroopers/storm_15.mp3 http://play.starwars.com/starwars_soundboard/asset/audio/TRPR_stormtroopers/storm_16.mp3 http://play.starwars.com/starwars_soundboard/asset/audio/TRPR_stormtroopers/storm_17.mp3 http://play.starwars.com/starwars_soundboard/asset/audio/TRPR_stormtroopers/storm_18.mp3 http://play.starwars.com/starwars_soundboard/asset/audio/TRPR_stormtroopers/storm_19.mp3 http://play.starwars.com/starwars_soundboard/asset/audio/TRPR_stormtroopers/storm_20.mp32 points
-
Well, it's been a hot minute! It's been the better part of a year since I was able to get anything done on this armor. COVID of course didn't help but on top of that I was working full time and at school full time... that, and I finished getting my pilot's license! (woo) But now I'm taking a break on flying, and since school is winding down for the semester I've got a ton more time to work with! My partner and I are getting a membership at a local makerspace since we live in a complex that is rather DIY unfriendly. I feel bad for my poor armor--it's been sitting in a closet for all this time just collecting dust. I'm beyond ready to break it out and start making some progress on it! Starting with where we left off: biceps. It's great to be back. Can't wait for the next update!2 points
-
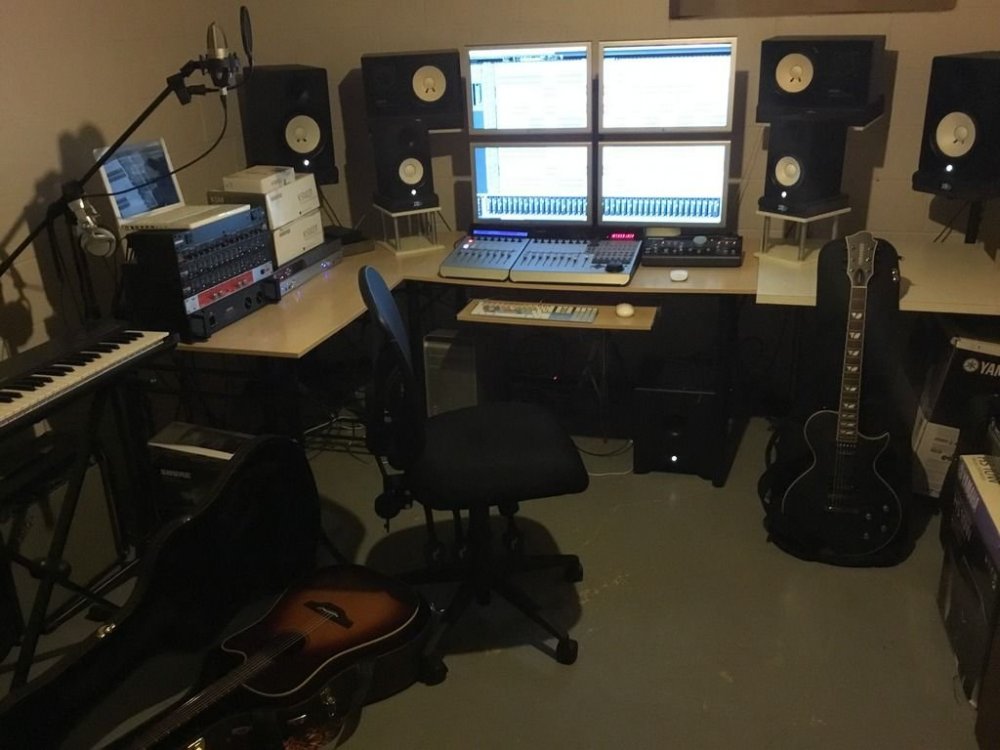
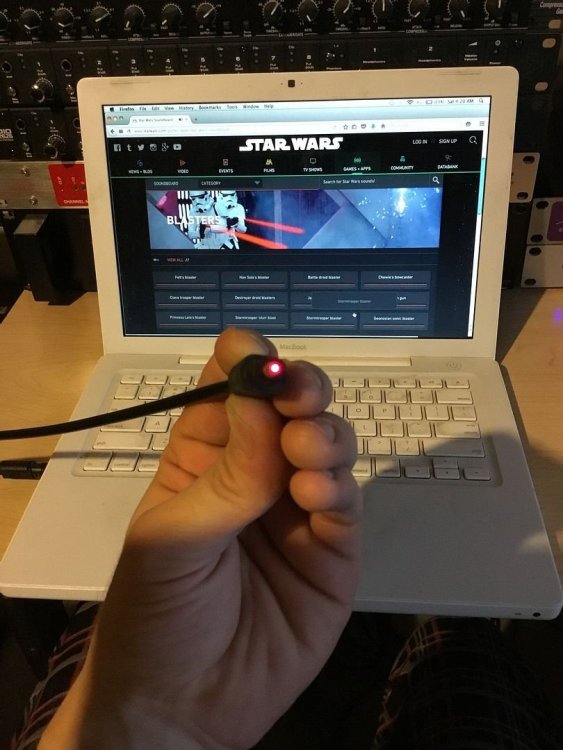
So I stumbled upon a flash based soundboard on StarWars.com the other day and I thought it was actually pretty cool. If you go to the "Films" category and click on "Stormtroopers" you can hear various clips of authentic trooper chatter from the films. ------------- These samples are directly from Ben Burtt himself, mixed at Skywalker Sound. The effects on the voices are exactly what was used in the films. Some people don't know this but some dialogue you hear in films is actually voice over dubbing done in a recording studio during post production, many scenes do not use not live voices from the actors during their performance. I believe some of these samples are actually original takes directly from the recording studio voice overs hence the complete silence of the studio environment in the background. Some of these samples are actually really clear and clean sounding with no background noises from other movie sound effects/voices that you would typically hear in sound clips sampled from a movie's final soundtrack. That would indicate these sounds are direct source material of the voice over recording sessions that were used for inserting into the movie's final soundtrack. You can really tell with the Darth Vader clips too as well as other characters. Some of them are so clear and don't have any other movie background noise or sound effects which would lead me to believe these sounds are direct source material from the voice over recording sessions. Very Cool!, and pretty rare to hear some of these lines outside of the final soundtrack. (Interesting note; I don't think Ian McDiamird/Darth Sidious did any studio voice overs! all his lines were recorded live during performace, he is a classical theater stage actor and he is very talented to the point he was able to offer George Lucas multiple versions of his lines to choose from later in editing) Anyways I thought these audio samples could be useful for those that are interested in having authentic trooper chatter from the films on their com system. Unfortunately Lucasfilm won't let us just download these sound effects and they are under copyright. Which means they can not be sold or distributed without the knowledge and permission of Lucasfilm Ltd. However just because there is no download option does not mean it's illegal for us to have a copy of the sounds on our hard drives nor does it prevent one from obtaining them. The fact that Lucasfilm has shared the sounds for free online streaming automatically means they are now in the public domain, omitting a download option discourages and helps prevent this but having a copy on your hard drive is not infringing any copyright laws and certainly not illegal. The sounds are not "Royalty Free" that's something totally different. The sounds themselves are still copy-written and possibly even trademarked, which means one cannot redistribute or sell them in any way without possible legal consequences. But it is definitely not illegal for you to simply record sound coming from your own computer, you just can't redistribute or sell that sound if it's copyright material you don't own the rights to. Anyways, as you can see I have a professional home recording studio in my basement. I was able to use digital optical audio to transfer a full high-definition 44.1kHz 24-bit quality data stream from my MacBook into my MacPro, essentially downloading the raw audio data directly from the website. Not an analog audio rip, but a digital data stream of the sounds. An exact digital copy of the audio waveform my sound card is playing from StarWars.com, Perfect! Here is a photo of the optical digital audio coming out of my MacBook, which I then plug into my MacPro. If anyone is interested in the samples PM me or post here, I am willing to share my recordings with friends in the community. Just remember you cannot redistribute or sell these sounds to the public without legal consequence as they are copyright of Lucasfilm Ltd. Also I recorded the official E-11 Blast and Stun sound effects from StarWars.com if anyone is interested in using them for their blaster build (thread here:http://www.whitearmor.net/forum/topic/34892-official-lfl-blaster-sound-effects/ ) 501st Legion Sounds can be found here https://www.501st.com/forum/viewtopic.php?f=29&t=28538 The owner moved most of his files to his personal site BUT the TK/TB chatter loop is too big so he's uploaded the audio to Youtube, to save this use a free online audio converter, just copy the Youtube link into the converter and let it go to work. NOTE: a lot of the online audio converters will open other pages when you click on boxes, just close these, your audio file should still download Youtube link: https://www.youtube.com/watch?v=5I_N94dX97U&t=257s Youtube audio convertor: https://ytmp3.cc/en25/ NOTE: some of the free online audio converters open other pages when you click in them, just close these as the file should still download. Separate TK Chatter links Chatter links: To save - right click then "save audio as" http://play.starwars.com/starwars_soundboard/asset/audio/TRPR_stormtroopers/storm_01.mp3 http://play.starwars.com/starwars_soundboard/asset/audio/TRPR_stormtroopers/storm_02.mp3 http://play.starwars.com/starwars_soundboard/asset/audio/TRPR_stormtroopers/storm_03.mp3 http://play.starwars.com/starwars_soundboard/asset/audio/TRPR_stormtroopers/storm_04.mp3 http://play.starwars.com/starwars_soundboard/asset/audio/TRPR_stormtroopers/storm_05.mp3 http://play.starwars.com/starwars_soundboard/asset/audio/TRPR_stormtroopers/storm_06.mp3 http://play.starwars.com/starwars_soundboard/asset/audio/TRPR_stormtroopers/storm_07.mp3 http://play.starwars.com/starwars_soundboard/asset/audio/TRPR_stormtroopers/storm_08.mp3 http://play.starwars.com/starwars_soundboard/asset/audio/TRPR_stormtroopers/storm_09.mp3 http://play.starwars.com/starwars_soundboard/asset/audio/TRPR_stormtroopers/storm_10.mp3 http://play.starwars.com/starwars_soundboard/asset/audio/TRPR_stormtroopers/storm_11.mp3 http://play.starwars.com/starwars_soundboard/asset/audio/TRPR_stormtroopers/storm_12.mp3 http://play.starwars.com/starwars_soundboard/asset/audio/TRPR_stormtroopers/storm_13.mp3 http://play.starwars.com/starwars_soundboard/asset/audio/TRPR_stormtroopers/storm_14.mp3 http://play.starwars.com/starwars_soundboard/asset/audio/TRPR_stormtroopers/storm_15.mp3 http://play.starwars.com/starwars_soundboard/asset/audio/TRPR_stormtroopers/storm_16.mp3 http://play.starwars.com/starwars_soundboard/asset/audio/TRPR_stormtroopers/storm_17.mp3 http://play.starwars.com/starwars_soundboard/asset/audio/TRPR_stormtroopers/storm_18.mp3 http://play.starwars.com/starwars_soundboard/asset/audio/TRPR_stormtroopers/storm_19.mp3 http://play.starwars.com/starwars_soundboard/asset/audio/TRPR_stormtroopers/storm_20.mp3
 1 point
 -
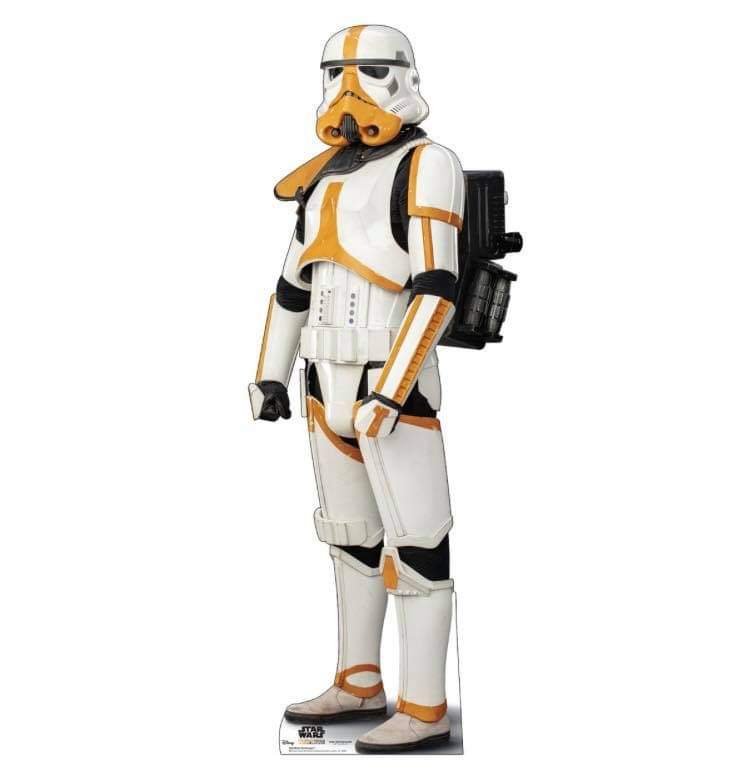
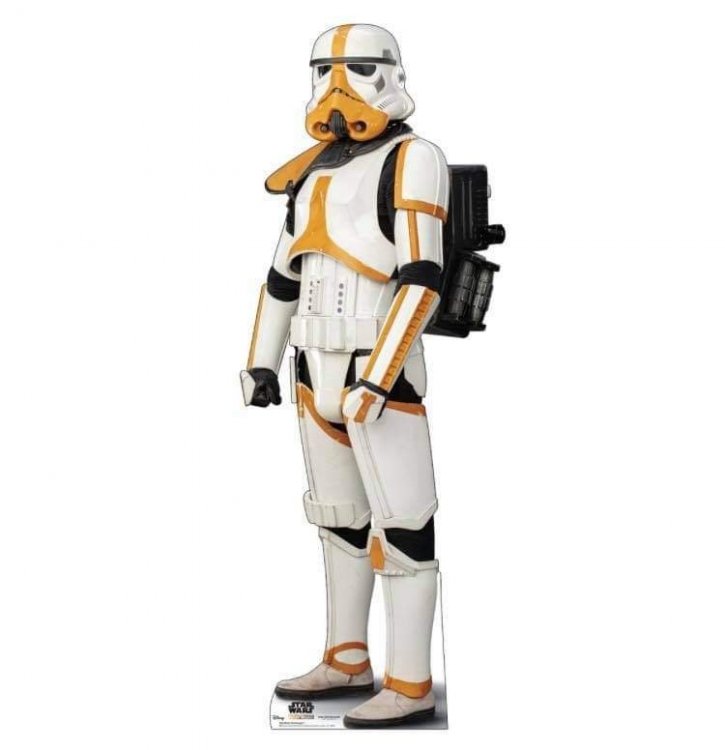
The Mortar Stormtrooper was a specialized variant of stormtrooper that specialized in mortar weaponry. The stormtrooper was equipped with stormtrooper armor, albeit with yellow markings, a yellow pauldron, and a military backpack. The style and position of the yellow markings on the Mortar Stormtrooper were identical to the red markings of the incinerator troopers deployed by the Imperial remnant led by Moff Gideon.
 1 point
 -
something like this.1 point
-
Block of wood behind rivet, then use a flat head screw driver, splay open the posts a little, lay side of screwdriver down on posts, hit with a hammer, post will open, then tap flat with hammer.1 point
-
Thank you!1 point
-
I use this free online audio merger https://clideo.com/merge-audio Drill.mp31 point
-
Awww shucks... I'm blushing now. Thanks for the kind words, Caleb. Much appreciated, brother. "Here's to many more........ removed return edges"! Am I that obvious? LOL.1 point
-
Fantastic work on the strapping system1 point
-
Heyhey! There aren't too many approved out there just yet, but with the cheap ABS kits hitting the market, I expect to see the numbers jump up. There's a ton of great reasons to go Rogue One/Anthology style - the more ergonomic (more FO than ANH) style design, the level of detail in the parts, the fact that that is likely the standard depiction of TKs we'll see moving forward in LFL productions... Oh yea, and pauldrons The suits are strictly Rogue One style (and veryvery likely production suits from that film being reused for Solo... and Mando...), with zero parts overlapping from the OT suits - save maybe a few scenes where Anovos ANH helmets were used with RO armor in Mando S1, but they take design cues from the OT and sort of updated them obviously. The construction of the suits was in flexible injection molded polyurethane, so the Jimmi fiberglass is likely the closest we'll get to the accurate material (not ABS, which you just can't pull the proper detail in, and ends up being a mixmash of ABS and resin parts). As you mentioned, the boots and gloves (but in black) carry over from the FO's, and the suits share a lot of elements with other Anthology costumes (like the Shoretrooper). It will absolutely be more difficult in general, since there are way fewer makers and fewer resources... but Jeff and I tried to document our builds and there are a few other great threads to get you started if you go that route. The actual assembly is pretty easy compared to OT, but stuff like paint and strapping are a unique challenge. Another update is coming soon, I swear! Figured some stuff out lately and am almost done implementing. And yea, I got to go play Star Wars for a couple days and saw some cool stuff1 point
-
Hello Dylan, and welcome to FISD! @TheRascalKing is almost finished with his ROTK Anthology suit, and he can also personally speak to seeing LFL's suits up close since he was a TK in Mando season 1. Below is a link to his build, as well as that of another prominent RO Trooper.1 point
-
All righty, power cylinder time. I have been working on plans for a couple a months now in Illustrator. The work Andy has done has been such a huge help. Go read his research here: E11 Stormtrooper Blaster Power Cylinders Resource: History & Analysis I wish that we could ID this part that seems to poke it's little head up everywhere in ANH yet we have no exact ID for it. Here are my drawings: And then I used Tinkercad to make the 3D models. This is most definitely not the best 3d model out there for power cylinders, but the point of this build is to source original parts or make them myself. Tinkercad worked pretty well, but it is very spartan. I would love a 3d modeling program that ran like Adobe Illustrator. Oh well, a free program is free, so I cannot complain much. I just found out that one of my cousin's recently bought a 3d printer so I'll try to print these files out to see if they actually turn out. I may also scratch-build the power cylinders too from items that I can find at the hardware store. Time will tell.1 point
-
With elastic it's always easier to make any straps longer than you need, then after you wear it a bit use safety pins (or even put knots in it) to shorten them. Then when you are highly confident they are the right length, make new ones of the perfect length. That's what I always did anyway. It's very easy to take length out of elastic, can't really put it back in during a troop LOL1 point
-
The good thing is that you can adjust the length of the elastic loops. If they are too loose you can make them longer or the reverse. The ones at the top of the chest/ab connection should have enough play in them to move around and not affect mobility (bending over).1 point
-
Looking good trooper1 point
-
Good luck mark, but i dont think you will need it. looking very sharp sir.1 point
-
Great work Mark, good luck on your Centurion application.1 point
-
Hey team! An update on my build. My submission to EIB was approved last week (thanks to the Emperor!) and want to say a big thanks to everyone who helped with advice along the way. Building in isolation (literally) was a little daunting to begin with, but a lot of research, advice and many questions from myself made it feel like I was in a crowded room with friends. Thanks! A mighty thanks also to the DOs, who have set many high bars with the EIB 1000 and Centurion 500. I'm also proud to announce I have submitted my TK for Centurion assessment. I've spent the last week(-ish) making mods and have to say I am much happier. FYI - I took a cm off either side of the kidney plate to bring in the sides (which included ABS pasting the holes and drilling new ones), replaced the Ab/kidney plate connections, gave the shoulder bridges a heat treatment, repositioned the velcro on my belt to get it to sit higher, and painted black the cocking lever on my E-11.1 point
-
Unfortunately I had run out of time this morning before Doctors. I had left it as there are quite a few links incorrect in that thread and the other "blaster" version thread, I've just updated them now, the old links went to a defunct page, here is the new one https://www.starwarsgamesonline.com/game/star-wars-soundboard https://www.whitearmor.net/forum/topic/34943-official-lfl-trooper-chatter-sound-effects/, restored by gmrhodes13 https://www.whitearmor.net/forum/topic/34892-official-lfl-blaster-sound-effects/ , restored by gmrhodes131 point
-
So I did alot of digging and combing for the appropriate length of elastics. I came up with 3 x 3" for chest, 6 x 2" elastics. I just need them sewn now for test fitting. Yea Glen I am concerned as the kidney plate connection to the butt. The corner fit looks challenging and it would appear and I'm hoping, that the elastic pulls the middle back towards the butt a bit more. Maybe I'll need some hot water to convince the kidney (or more trimming of the return edge) to convince it to form more with the butt. I've not tried any kind of method such as safety pins but I have plenty of elastic banding. I'm going to have my sis sew them with her machine and then reverse the loop inside out. This is s shot I took before I took a lighter to either side to remove any fraying.1 point
-
Great to hear you are aiming high from the start. A great thread full of info can be found here Also when in doubt check the "Gallery Sections" and also some of the Centurion applications Good luck with the research.1 point
-
Hey thanks everyone! Appreciate the warm welcome and looking forward to starting the adventure. The nice thing is that I’ve lurked CRLs and even WhiteArmor for quite a while - so I have some idea of what’s what. What I don’t have is a clue on the particulars or really where to begin. I’m pretty agnostic on build vs buy. What I do want to do is shoot very high from the very beginning - I’m happy to spend a lot more time and love to end up with a really nice suit. Any pros/cons that might not be obvious to a rookie? Might help me decide between scratch/kit/etc!1 point
-
Glen, as always, you are awesome! Buckets off to you! Some links I had found in forums were broken. I'm going to dig out my iPod and put some sound loops together over my XMas leave. See how they sound in the Icomm1 point
-
Thanks. Oh yah. I’m going to start by removing the return edges on the forearms. Always the first cut. I’ve built Fett’s, Tie Pilots and Shore Troopers. But still first cut.1 point
-
Happy dance continues, then the panic sets in "I've got to start cutting this". Research is the key, measure twice and cut once. Good luck with the build1 point
-
If you are on computer you can use Paint works well, if on mobile there are some apps available for photo resizing1 point
-
Congrats on your BBB day! Very VERY exciting! I saw that your have some mentors in the SoCal garrison, so I’m sure they have you covered. Justin is particularly awesome! You have probably already seen it, but A.J. Hamler’s AM build is an excellent one to follow, and I even created a PDF of his thread, linked towards the end and also in my All-In-One resource compilation thread. Looking forward to following along with your progress, especially since I’m mid-build myself! Sent via Imperial Tapatalk Comms1 point
-
So I've been working on it a little here and there. Here you can see I trimmed out the face and bucket leaving extra at the bottom. Then I spent a lot of time on the eyes, using the reference pics. Here are some pics of the end result. Any concerns here? Do I need to trim more? Next step will be the frown. Chris1 point
-
Okay guys, I've figured this mostly out, and I think I'm just a dumbass ha. I consulted some others and I think I'm just wearing them too high. I clasped them on over the boot this time and let them sit lower, and instantly felt much better. Now feeling confident, I went ahead and did the other shin as well. Yeah they're a little loose the back still and misaligned, but that'll fix when I put the cover strip on. On a side note, anyone have a good way of using imgur to shrink uploaded images? I've tried using their resizing setting while editing, and they look fine there, but whenever I post here they're still original sized gigantic.1 point
-
Would you guys hurry up!!!! I want more pins and patches!1 point
-
Also when it comes to painting do not paint the full button, you can see from the images that there is a small area paint free just around the base1 point
-
Took me a couple nights but I managed to get all the brackets installed. Now just need to find how long the elastics are supposed to be. Also got the cod elastic rivetted in place to connect to the butt plate.1 point
-
Went to Target. Stay on Target! I found some really cool pillows that match my bedspread designs. But now... I have to always remember how to arrange this.. ugh.1 point
-
OP (MV) Post #40: Additional Helmet Resources + Intro to the Ears & Brow + First Hand Painting I've had these ears in-hand for over half a year now, but never until now did I fully realize just how differently shaped the left and right are from each other. I knew everything was asymmetrical, and Alexey's photo captures it [im]perfectly, but wow this lid is wonky. The ear photos below really highlight the profile differences. Here is a supplemental list of resources for all things helmet-related which will guide my work in the next several posts. I will likely reference and link to individual techniques in my next several updates, but this is the entire collection. HELMET BUILDS pandatrooper's ATA Brow & Ear Section (Print entire thread PDF) Ales ATA Ear Section by Ales (Print entire thread PDF) ANH TE2 Helmet Build by TK-4510 A.J.'s Helmet Work kman's Lens Mounting Posts LTM Lens Mounting, and Helmet Work Cricket's Sponge Template Painting and Lid Work (several posts) zv288bot's Helmet Assembly, Scimitar's Excellent Helmet (Pages 1-3) wook1138 Helmet Progress Ensi's Helmet Work dereferenced's Photo-Heavy Posts plus Flickr album TheLorelei's Helmet Posts (across many pages) HELMET TUTORIALS Quick Reference Guide OT TKs by justjoseph63 (see particular posts) (Print PDF) Helmet Ear Tutorial by gazmosis (Print PDF) Draw No Gap Ear Line by bpoodoo (Print PDF) Choose Your Brow Height by CableGuy (Print PDF) Helmet Alignment by CableGuy (Print PDF) Template Painting 101 by justjoseph63 (Print PDF) HELMET VIDEOS Video of panda's finished ATA helmet Video tutorials by TK-4510: Helmet Assembly series, Hand-Painting TE2 series, How To Apply Decals CableGuy's TM Series & supplemental Stormtrooper Series RS Prop Masters RWA's Lid Build (2-part series), General Assembly Overview, and Hovi Tip Fitting Pandatrooper's series Armor Building with TK1636 Before proceeding with additional cap side trimming in preparation for ear fitting, I decided to try a few things which aren't completely conventional―the first being to paint the front traps before locking in the brow height and ear placement. My goal with this was to enable me to fine-tune the precise location and cut angle at the ends of the brow trim, which I wanted to line up perfectly (to the extent possible) with the rear edge of the traps paint. Here are some example of what I was aiming for. With that goal in mind, I began by first finishing the trimming of the helmet cap around the ear area. As suggested by Terry (Panda) and many other Troopers, I drilled holes in the corners where the cut lines would meet to avoid any possible tearing. I believe I used a smaller drill bit than most but I wanted to create a tighter gap in those corners to help keep the brow trim wedged in and less susceptible to drooping. With the holes in place I proceeded to trim the remaining ABS with curved lexan scissors. I also decided not to sand any of the brow bottom edge in order to maintain just that little bit of extra "bite" from the roughness, which might potentially hold the brow trim in place better. I then set out to tackle my first hand-painting of my build, and used an uncommon (to my knowledge) technique to accomplish it. Because I have absolutely no experience in miniature or hobby painting, I wanted to us a stencil, and the decal sheet I originally purchased from Trooperbay seemed to fit the bill. Using an xacto blade, I sliced off the excess adhesive layer and test fit it to my ATA helmet LEFT trap. Seeing that this makeshift stencil was slightly too wide for my trap recess, I sliced the sticker so I could overlap the two pieces and thus shorten the total width. I then marked the helmet with a pencil where I wanted the outside edge of the black paint to be (the photo below shows draft marks which I eventually widened) and set the stencil. In an attempt to combat paint bleed under the stencil I pressed it down repeatedly with my fingernails (@justjoseph63 recommends a pencil eraser), and then further expanded the masking area with blue tape. Having already wiped down the ABS surface with isopropyl alcohol prior to laying down the stencil, I then proceeded with a thin laler of Testors 1145 Gloss White (purchased at Michaels or Hobby Lobby) along the edge, to try to seal any gabs under the stencil and prevent the forthcoming black paint from bleeding. I then followed it up with the appropriate Testors 1139 Semi-Gloss Black, also from Hobby Lobby. I applied first a thin coat followed quickly by a thicker coat without any wait time, so essentially only one coat, and below are my results. Note that the white paint photo was from my second (right) trap inserted in this process photo to show my actually sequencing. On the first (left) trap I left a little curved portion at the bottom covered by the stencil, but didn't use any white paint in that area as a test to see if "sealing" with the white actually does anything. The answer―it didn't really provide any benefit in this particular instances, but it can't hurt, so I will continue to use the strategy in the future. I will fill in the black in that remaining white area at a later time, even though it will eventually be covered by the brown trim, because you know, OCD. A couple other notes regarding painting. First, I absent-mindedly hand-shook the small paint bottles, rather than stirring them, but I don't seem to have introduced air bubbles into my paint job. Or maybe I did, and my inexperienced eyes simply can't discern them. To be on the safe side, next time I will stir them, perhaps with a folded up paperclip to create a whisk of sorts. I also failed to remember that enamel paints dry far slower than latex home wall paint, and that I therefore should have let both the white paint and masking stencil sit longer prior to proceeding/removing. I only waiting maybe five minutes between the white and black paint, and pulled off the masking perhaps only five minutes painting. Luckily I don't think this impacted my results, and the end photo above is without any cleanup. I wonder if I should take my chances and replicate my exact same process again, or pivot to the apparently more tried and true methods. Perhaps some qualities of the TB decal cutout I used (adhesive on the bottom and smooth on bottom?) were beneficial? Apparently I pretty much ignored Joseph's painting guide―not intentionally of course, but from lack of memory and not having it right in front of me to reference. That's what I get for using my ancient iPad to review RS suit and reference JoeR images for trap sizing, my printed binders stuck in another room, and working in my baby daughter's nursery closet at 5:00am. Instead of using two thin layers I applied a single thick one. Luckily only a thin outline of the black will remain visible once I go over most of it with gray. But don't be like me. Be like Joseph (and other veterans), and use his Paint 101 thread, which I've now linked to five times in this post for emphasis. Haha. So with lessons learned, the following day I proceeded with the right-side trap. Even though I was successful with my technique from the first trap, I decided to employ at least some of the advice mentioned above. I stirred the paint with a toothpick and waited half an hour after applying the thin white edging before moving to the black. But of course I then fell back to my success from the previous day and only applied a single thick layer of black, and also removed the stencil after only 5-10 minutes of "drying" time. Basically the enamel paint was still very wet when I removed all the masking, but thankfully once again I was blessed with very good results, at least to my eyes. At this point I realized I had a little warp on the right-side of the brow near the trap and wished I had tried to smoothen it out a bit before applying the black paint. I read that enamel paint isn't as flexible as acrylic, and since I didn't want to risk cracking my fresh paint job, and had no prior armor and paint experience to inform me of whether or not it might actually occur, I proceeded with conservative caution. The arrows below show all the areas that I would have liked to apply some pressure to fix the curvature, but I decided to work on only the green areas in order to avoid bending the painted area. Not wanting to risk over-heating with a heat gun, I decided that boiling water was my only option, but I also didn't want to just dip my lid into a pot, or even pour boiling water on that entire area due to the paint in close proximity. Instead, I dipped a white cloth into the water, pressed it against both side of the plastic, and simultaneously applied pressure in the proper areas. I did this repeatedly with fresh rounds of boiling water (while wearing thick protective gloves), but in the end I'm not sure it made any difference. I suspect I simply wasn't raising the temperature of the ABS enough. But it was worth a shot, and I'll now simply rely on the brow trim to cover this odd curve. I'm sure this imperfection is more screen-accurate anyway. With the traps painted (black only; gray to follow later) and cured it was time to fit and slice the brow trim. I tackled one side first, using needle files to shift the trim back as far as needed to align with the traps (first set of photos below). Once I had that side flush and the trim cut at the appropriate angle I turned my attention to the other end, which I knew would be a bit more difficult to align properly due to my method. With the trim installed on the brow I eyeballed where I thought I'd need to cut and made a series of three conservative cuts to finally attain the proper length. Due to perspective challenges with the trim bent away from its final resting location, I actually got lucky with my final cut, thinking I'd have one more to make. Fortunately, I didn't overcut, and here were my results: I was extremely luckily with my third slice on the trim, which was still a cut of about 1cm, since I thought I had more material to work with. I had expected to need at least one or two more cuts getting down to 1-2mm, but the rounded ear section of the cap through off my estimates. In hindsight, perhaps a better way to cut the trim CLOSE to the final length would have been to remove the trim completely, tape it onto the front of the brow, and mark and cut accordingly. It could then be test-fitted and retrimmed as needed. The photo below shows both methods. Now on to a preview of my potential brow line and the current status of my cap and face plate alignment. I've always like a low brow, but I do also want to stay somewhat true to the common Stunt alignment, since that's what I'm building. Hopefully this isn't too Hero-like, though I know it's nowhere near Luke's level. Now that I think about it, I'm tempted to lower it further... And of course the seams/alignment under where the ears will be placed are all crazy. I trimmed back a little more plastic to get the pieces to fit well together. It looks like I could attain a better pairing of the two pieces by trimming more of the cap on the wearer's RIGHT side. Would you all agree? Should I also raise the rear of the face plate a bit more (but keep the front at its current height) to further reduce the gap along the tube bulge? This would result in the brow trim not being perfectly parallel with the tops of the eyes all the way around, but even screen references I see show the brow-eye gap narrowing on the sides near the ears. As I've often done, here is a review of the questions already asked throughout this post: It looks like I could attain a better pairing of the two [helmet] pieces by trimming more of the cap on the wearer's RIGHT side. Would you all agree? Should I also raise the rear of the face plate a bit more (but keep the front at its current height) to further reduce the gap along the tube bulge? This would result in the brow trim not being perfectly parallel with the tops of the eyes all the way around, but even screen references I see show the brow-eye gap narrowing on the sides near the ears. Finally, as you've likely noticed, I've updated my method of displaying photos in my posts. With less than 300 uploads left on my limited Flickr account, I am attempting to conserve capacity by combining images in collages. However, since many mobile collage apps downscale images, I'm using my 10-year-old Photoshop (and desktop computer for that matter) to manually compose the collages with each individual image segment retaining its original resolution (4,032 x 3,024). This means that my collages are quite dimensionally large (some over 12,000px wide) so they can still be zoomed in on for closer inspection. As is always the case, I try to display images in my posts at 800px (or 400px) in width so they don't visually weigh down the post and so viewers will lower-resolution monitors can hopefully see them entirely without lateral scrolling. Note: I want to continue to use Flickr, rather than imgur, in order to keep my image collection on a single platform, and since I like the organizational features of Flickr. I'm also starting to add some additional graphics to my posts, mainly for format and aesthetic purposes. Hopefully they are a positive addition to my documentation and don't detract in any way. That's all for this update. The time for ear trimming is soon approaching... Printable/downloadable PDF of my entire build thread to this point contained in [THIS SHARED FOLDER]. The PDF will be updated within a few hours of my own new posts and will note sequential version numbers and revision dates.1 point
-
I have added Velcro strips and it has made a big difference to the sagging in the middle and holds it in the position as shown in the top picture below. The bottom picture shows the Velcro strips on the abdomen armour and the belt.1 point
-
Yes Tino, correct. I am trying to make a master set to make copies from. That’s the plan for the resin ones at least. I tried using right angles ABS strips for the base plate. ABS is easier to drill for sure and would certainly be a better idea for the resin power cylinders as you suggested. The right angle parts are okay but I am not liking the sharp angle of the bend so maybe it’s better to have them laser cut on a flat piece and then just need some heat to bend them into shape. Thanks for your suggestions. I was originally thinking of all resin casted but the base plate is not so straight forward to mold and cast. Fragile as well I imagine.1 point
-
Hi all, I'm Paul, I have been a member here for a while, but this is the first time I think I have contributed. Firstly I would like to say that the intention of this build is not to make a hyper realistic E-11 blaster, and I am aware more can be done in terms of detailing than I have done here to make a more accurate representation of an E-11. My goal was to make a reasonably accurate looking ANH E-11 which had the added benefit of an electronic light and sound system. Here is a video of the completed build which I did to talk about the build and demonstrate the electronics. I will start with a list of all the parts I have used and where they can be purchased. Doopy Doos Resin E-11 kit https://www.doopydoos.com/stormtrooper-e-11-complete-anh-e-11-blaster-kit-offer-2685-p.asp BlastFX electronic effects board & Mini Scope Display from TRamp. https://www.facebook.com/trooperamp/ Hegstler Counter box, Trigger assembly, Charging port assembly, & barrel LED mount from Lee McCormack - Shadow Defense Systems on Shapeways. https://www.shapeways.com/shops/shadow-defense-systems Power Cylinders from CSB Props on Shapeways. https://www.shapeways.com/product/ERH6MCTSC/power-cell-assembly-7-with-2-resistors?optionId=59449027&li=marketplace Hollow 1943 M38 scope kit from Bulldog Props. https://www.facebook.com/BulldogPropsJapan/ Various parts from Tino’s E-11 finishing kit including the scope rail and counter bracket. USB charging board. https://www.ebay.co.uk/itm/TP4056-5V-1A-Micro-USB-18650-Lithium-Battery-Charging-Board-Quality-1-2-5-10pc/163005239011?ssPageName=STRK%3AMEBIDX%3AIT&_trksid=p2060353.m2749.l2649 1000mAh Lithium Polymer battery. https://www.ebay.co.uk/itm/Conrad-Energy-Lithium-Polymer-Battery-3-7V-1000mAh-10C-with-BEC-Connector/122527159108?ssPageName=STRK%3AMEBIDX%3AIT&_trksid=p2060353.m2749.l2649 Black PVC tube, clear acrylic tube, & rare earth magnets. All purchased fro eBay. The only glue used throughout the build is Zap-A-Gap CA+ which I purchase from Amazon and Miliput was used as filler which can also be bought from Amazon. Spray paints are from Halfords, Clear coat and detailing paints are all Tamiya acrylics and Revell Aqua color, and the weathering washes are from the Mig range of model making products. My starting point for this build was the scope and mini scope display. I built the scope kit as per the instructions which come with the kit. I then drilled a 3mm hole in the underside of the scope just behind the front leg. The power cables for the mini scope display were then threaded trough this hole and the electronics boards slid into the body of the scope. I then used clear tape to secure the display to the red lens of the display kit, ensuring that the tape extended up the sides of the lens and making sure the display was centred on the lens. This was slid into the rear of the scope where the retaining ring inside the scope then presses against the tape securing everything in place. The clear lens from the kit the goes in on top of this and the scope lens retaining ring is screwed in to secure the whole assembly in place, making sure that the display is oriented correctly to the scope. Next I prepared the parts of the resin blaster kit. The counter box, scope, trigger and power cylinders from the kit were discarded as the would be replaced with alternative parts. The rest had any casting flashing removed, generally cleaned up and washed in soapy water. next I cut a hole in the receiver tube behind were the mag well casting will eventually be fitted. I marked the position of the mag well on the receiver and then marked out an area inside of this which still allowed for the mag well to be glued in place. the corners of the smaller area were then drilled out, and a Dremel with a router bit was used to create the opening. The receiver is actually quite thick as it has a PVC strengthening tube inside of the resin casting. I moved on to the trigger assembly next. A hole was created in the resin trigger group casting by drilling and routing with a Dremel once again. This hole houses the 3D printed trigger assembly, and needs to be snug, but not so tight as to restrict the trigger movement in any way. The trigger assembly was built up incorporating the trigger switch from the BlastFX unit. I opted at this point to cut the wires for the trigger switch in order to feed them through a small hole in the receiver, rather than having to make a larger hole to fit the switch itself through, which may need filling after assembly. I also fitted a small coil spring ( a cut down ball point pen spring) between the back of the trigger itself and the resin trigger group. This spring returns the trigger after it has been depressed. A hole was routed out in the back of the trigger group above the pistol grip where the rumble generator was fitted. Similarly the wires for the rumble generator were cut to accommodate easier wiring later on. Two 3mm holes were drill in the receiver for the 2 sets of wires to pass through, and then the trigger group was glued and screwed into place using Zap-A-Gap and self tapping screws. I chose the method of fixing as I want a very strong bond between the trigger group and receiver. The scope assembly was then fitted to the rail and counter bracket. The holes in the rail and counter bracket needed drilling out to take the screws which come with the scope. I ended up gluing these screws in place as the resin the scope is made from is quite soft, and I did not feel that the screws would hold for any length of time just by screwing them in. This assembly was then attached to the receiver in order to ascertain where the counter bracket would sit in order to place a 6mm hole behind it which would allow wiring access between the counter and the receiver. The scope and bracket were then removed and the front half of the counter was fixed to the bracket with some self tapping screws. A further 6mm hole was drilled through the bracket and counter to give access to the counter. I then cut a piece of 22mm diameter 3mm walled clear acrylic tube to length and slid it into the receiver until it sat where the barrel would normally be. The 3D printed LED end cap was assembled and the unit was then placed through the hole at the mag well, and placed over the end of the acrylic tube. The wires for the LED were once again cut to allow them to be routed back to the counter box. A length of 20mm black PVC tube was cut to fit inside the receiver to cover the charging handle slot so that the wiring in the receiver cannot be seen. This needs cutouts at each end to allow space for the wiring hole behind the counter bracket, and the charging board which sits at the end of the receiver behind the end cap. The Charging board and on/off/charge switch were assembled, and leads soldered on to reach back to the mag well opening. The main BlastFX board, display panel, speaker and selector switch where then all fitted into the 2 halves of the counter box, with the trigger, rumble unit and flash unit wires all fed out through the previously drilled 6mm hole. This hegstler box 3D print is a godsend if you are using the BlastFX system because it has been designed specifically for the components to all fit in. It has a cut out for the screen, a grill and mounting pegs for the speaker, and an assembly which creates the working reset switch, brilliant!!! As it is made for the BlastFX system though, it does have a 'BlastFX' logo where the Hengstler Eagle logo should be, so if that is important for you you may need to find a work around or alternative part. The corresponding ends of the cut leads were fed through the receiver and out of the 6mm hole behind the counter bracket. The cable ends were then rejoined by soldering them and heat shrink was used to cover them. Next the power lead from the main board was fed out of the back of the counter, and along with the power lead from the scope fed through the 6mm hole in the receiver and along to the mag well opening, where they were soldered to the appropriate leads from the battery connector and the charger/on/off switch. At this point the battery was attached and correct function of all the components confirmed, before the charger/switch assembly was glued into the back end of the receiver and all remaining cabling were fitted back into the receiver. I then effectively had a functioning blaster, except that the speaker was not working for some reason at this point. This was resolved shortly afterwards. The rest of the resin detail parts were then added. I also replaced the 2 screws at the muzzle with real metal knurled hex bolts. I also replaced the hex bolt in the end of the pistol grip with a real bolt too. Several other hex screws were used to replace resin cast parts. The end cap was fitted, and a section of foam was added inside. This foam pushes agains the end of the receiver and provides enough tension to hold the end cap securely in place so that it does not rattle around. The mag well and mag were hollowed out to allow the battery to sit inside. The mag well was then glued in place, and rare earth magnets were recessed into both the mag well and mag to keep the two together when the mag was inserted. The blaster was now ready for masking prior to paint. All parts to remain free from paint including the holes in the receiver which the clear tube can be seen through were masked off using masking tape and Blu Tak. The battery was removed. The front end of the scope was also removed to protect the front lens and preserve the metal finish of the screws which hold it in place. The blaster received 2 coats of Halfords grey plastic primer, which was allowed to cure for 24hrs. Then 2 coats of Halfords satin black were applied as a base colour. Once the black paint was touch dry I also added various bits of detail paint in Tamiya XF-16 flat aluminium, and X-31 titan gold. I also touched in any light spots in the black paint with Tamiya X-18 semi gloss black. I used a white wax crayon to highlight the lettering on the back of the scope. I also replaced all the parts I removed for painting, and unmasked enough to check that all the functions still work as they should (and they did this time). Next the blaster was dry brushed with the silver and the scope dry brushed with gold. This is to simulate ware and tear in the paint and finish on the gun. It is done by loading a small amount of paint onto an old paint brush (I find old and worn out ones work the best the more rough looking the better). Then most of the paint is brushed off. I use a folded piece of kitchen towel and just rub the brush on it until almost all the paint is gone, and the brush looks dry, hence dry brushing. Then just brush over the blaster and this will leave what little paint is left on any raised edges, corners and high spots which is generally where ware and tear occurs. Once the dry brushing has had enough time to dry, a wash of Mig ‘dark brown for green vehicles’ enamel wash was applied over the top of the dry brush weathering. This gives the blaster a more dirty look, and blends and softens the dry brushing a bit. When dry, this was then all sealed with a coat of Tamiya TS-80 flat clear. The clear coat seals in the weathering and gives the blaster a uniform finish. The final stages were to remove all the masking, and then hand paint areas inside the vent holes in the receiver which had missed paint due to the masking. I painted these is Revel Aqua Colour 08 black matt. The front of the hengstler box was given a very light brush coat of Tamiya x-18 semi gloss black, and the rear of the box was dry brushed in the same colour to try and give the look of the plastics used in the counters covers. There was then some very light dry brushing of the silver and gold paints again on areas where high levels of ware may occur just to bring out some of the highlights that had been dulled back by the earlier wash. And that completed the build. I would like to say a massive thanks to Paul Whitrow over at TRamp for his advice and encouragement, to Lee McCormack at Shadow Defence Systems for his excellent 3D printed parts which are superbly designed to just work with BlastFX, To Brian at BullDog Props for hid brilliant M38 scope kit and the advice on getting the right one for my needs, and to Tino for his fantastic detailing parts kit and scope rail. You all made this build a lot easier to pull off Guys thank you. Thanks for taking the time to read through this long post, I hope you enjoyed it. Paul1 point
-
Looks like a million bucks,,, alot of hard work that paid off nicely.....1 point
-
Good trick Endoskull. Would have done the same way had you not gone before me. Here's the URL: http://play.starwars.com/starwars_soundboard/asset/audio/TRPR_stormtroopers/storm_01.mp3Just change the last number from storm_01.mp3 to storm_02.mp3 and so on, up to 20. If you're on linux or mac, just paste this in your terminal to download them all in one go. for i in $(seq -w 20); do wget "http://play.starwars.com/starwars_soundboard/asset/audio/TRPR_stormtroopers/storm_$i.mp3";done1 point