Leaderboard


Popular Content
Showing content with the highest reputation on 11/25/2020 in all areas
-
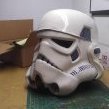
Here’s the hovi with proper screen. Should seen my wife’s face when I ran into the kitchen on the eve of Thanksgiving to grab the strainer out of the drawer. Told her was all for the Empire. The look I got...would have rather faced an angry Vader lol. Thank the force we had a newer one we just bought a few months ago.3 points
-
18 to go, congratulations to Scott, TK-41469 of the Dune Sea Garrison, Centurion #482!3 points
-
Now that I've finished my 4th OTTK Centurion approval... and my ROTK is nearing completion approved... if only I could find something... maybe a new build... to keep me busy during the holidays/continued lockdown... MORE TO COME SOON!2 points
-
Dennis M. Mueller TK-60446 Garrison Carida - Eastern PA https://www.501st.com/members/displaymember.php?userID=32825&costumeID=6 Armor = ATA Helmet = ATA Blaster = Hyperfirm E11 Height = 5’10” Weight = 178 lbs Boots = Imperial Boots Canvas Belt = Unknown Hand Plates = JustJoseph Electronics = iComm & Aker MR1506 Neck Seal = Unknown Holster = Unknown Note: All armor and accessories were built by and previously approved for Bill Blake TK-14791. Full Body Photos Full Body Front Full Body Back Full Body Right Full Body Left Right Side Detail Left Side Detail Armor Details Abdomen Details Action Shot Cod and Butt Plate Attachment Interior Strapping Helmet Detail Front (Updated 11/22 - paint removed from Gums; paint added to voice coder) Right Side Left Side Back Hovi Tip Detail (Updated 11/22 - with extended paint on voice coder) Lens Color (Updated 11/22 - for consistency in photos: paint removed from gum; paint extended on voice coder) S-Trim Blaster Details Blaster Left (Updated 11/22 - weathering on grip and cooling fins removed) Blaster Right (Updated 11/22 - weathering on grip and cooling fins removed) Accessory Photos Neck Seal TD Back TD Front Holster Attachment Additional Photos Gloves Boots Sniper Plate Front Sniper Plate Left Sniper Plate Right Thigh Ammo Rivets Han Snap  Bucket Off Thank you for your consideration and review. TK-60446 Edit: 11/22 - photos updated and additional photos requested posted.2 points
-
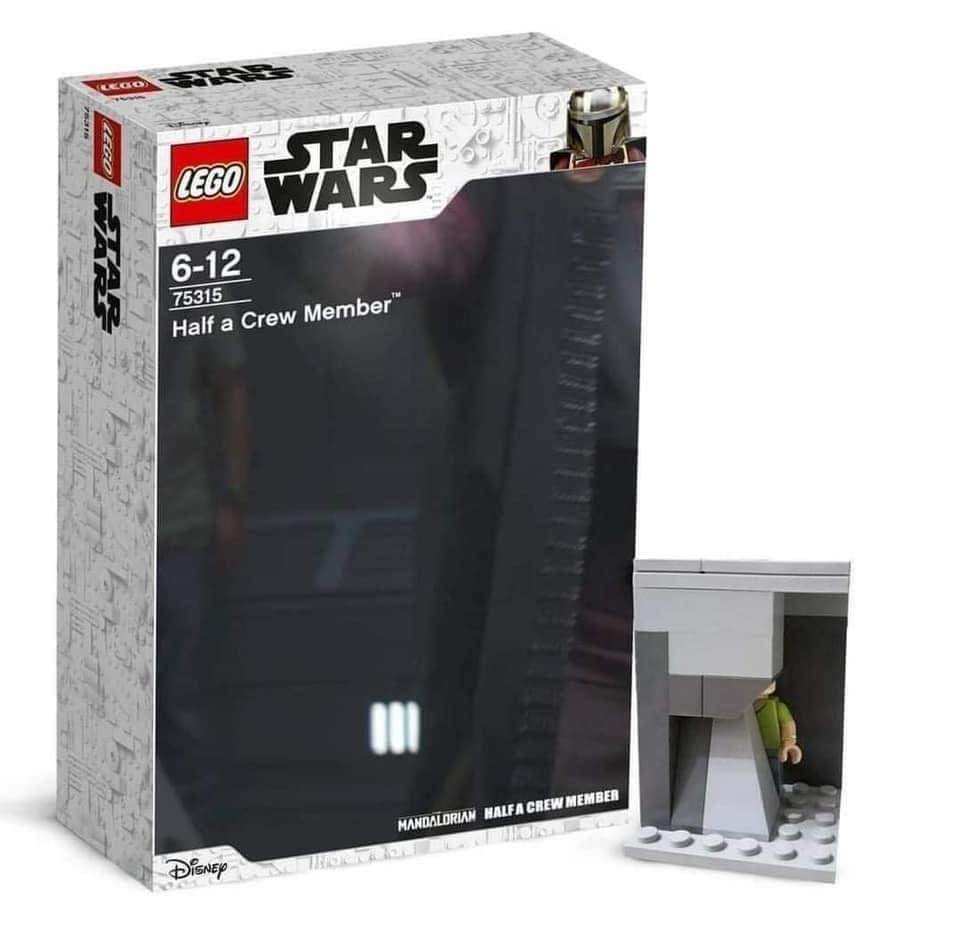
I can just see people dressed up holder a corridor wall walking around celebration2 points
-
Thanks Gentlemen. I’m on it.2 points
-
That's so exciting, I'm EIB#982 and Centurion#482 such an awesome coincidence. I'm so happy to have made it to Centurion. Of course, I didn't get here alone. Thanks must go to everyone who's offered advice along the way to get me here. You all make this community a spectacular place to learn and grow. Sent from my sorrosuub C1 comm link device using Tapatalk2 points
-
Body work: Another fix to get to Centurion was my back gap. As is an issue on many AM kits, those back corners need a little nudging to look right. I also needed to raise my belt, especially after trimming it, the snaps would need to be taken out and new ones added higher: I started by trimming a bit of the return off... and then realized I needed to trim more in order to get it to move. I then used a heat gun on low, and slowly caressed those corners up and in, as well as some of the lower return to be more flat so it would fit better. In addition, I created a few longer elastic internal straps that would allow it the slack it needed. I only ended up using them on the sides, the central one was fine at the original length. I will need to try this on, but it looks like it will fit more like the originals now. Snaps were drilled out by kissing the center with a 1/4" drill bit. After measuring, new ones were placed just under 1/2" higher, and now the belt sits where it just covers the lower edges of the blue buttons. Not shown, but I also moved my sewn-on shoulder bell snap mounts on the strap a bit which will get my shoulder bells even closer to the shoulder bridges. All that is left is re-attaching my belt boxes into place, and trying it all on, and getting new photos taken. I feel like I am getting really close to Centurion submission!2 points
-
they are black slotted.2 points
-
Here are the new pics....2 points
-
A helpful tip I recently received is to especially be conservative towards the bottom near the neck opening under where the ears will be. That way you can ensure both properly-aligned ears and a flush neck opening curve (which will also helpfully be covered by the neck trim). And speaking of neck trim, you may also pull back your cut line on the one mix tip side to match the other side, even though the plastic is a bit more rough there. Once again, it will be covered by the trim. Sent via Imperial Tapatalk Comms2 points
-
19 to go, congratulations to: David G TK-15028 Centurion 480 Lluis Quinquer TK-15711 Centurion 4812 points
-
Thanks, Sha Sha Here's the updated pictures: Picture of back and kidney showing no overlap. S-Trim put back in place.2 points
-
Hello all, My name is Danny, my TKID is TI-30180, and I'm a member of the Outer Rim Garrison who's been out of commission for about 2 years now. On top of the pandemic, I've been dealing with a number of personal, work, and mental health issues that have kept me from trooping and socializing with my garrison-mates. I would like to get back into trooping with a R1 TK and I figured this was the best place to start. I look forward to getting reacquainted with all of you folks and trooping as soon as it's safe enough to do so.1 point
-
Hey there everyone! So glad to finally be a member of this fantastic group. Looking at my armor on its stand still makes me giddy. I started this journey about three years ago, but the past two months is when things really kicked off. I binged the Clone Wars while waiting for my armor to arrive, which only fueled my excitement to be involved in the 501st. Like everyone else, I’ve had to make a few quality of life changes to the armor; shortening/lengthening strapping, wrangling those pesky shoulder bells, making the helmet into less of a plastic coffin and more of a trooper’s friend with some fans and speakers. If I had any advice for any aspiring members, it’s to come to terms with the fact that TK armor is not the most comfortable thing in the world, but you can definitely work to make it bearable! I still have a ways to go but I’m confident in my fellow troopers and their wisdom to guide me. Again, thank you for all your help and support and I hope to see you on the field! -Ian
 1 point
 -
yes I see that, I'll trim it some more1 point
-
"Half a Crew Member" now that's great!1 point
-
We've been joking about this in command, must be real, he has his own figure, and a Lego figure
 1 point
 -
Here it is. Hope this can be useful. Personally what I have done several times to fix this is as follows. A- Remove the mesh from tips . I have used knife, screwdriver and plier. B- look for a strainer with the proper mesh C- Use a permanent marker top and a rubber hammer to give the shape to the mesh. D- Paint the hovi tips inside and rim with white acrylic and cut the mesh with a minimal edge. E- Place the mesh into the tip carefully and reassemble to the helmet.1 point
-
Dennis, Harder...you’re cheerleader here... You got this man. Love these gents. Look at it this way (silver lining), once you change mesh, you have 100% bragging rights to say “...and I even changed the MESH!!” Who can say that? Honestly. That should be in your signature..1 point
-
Here you go Sir!1 point
-
Congratulations once again trooper, it was worth the extra work1 point
-
Could be the actual helmet but a couple of the teeth cut outs look a little curved when you do a comparison
 1 point
 -
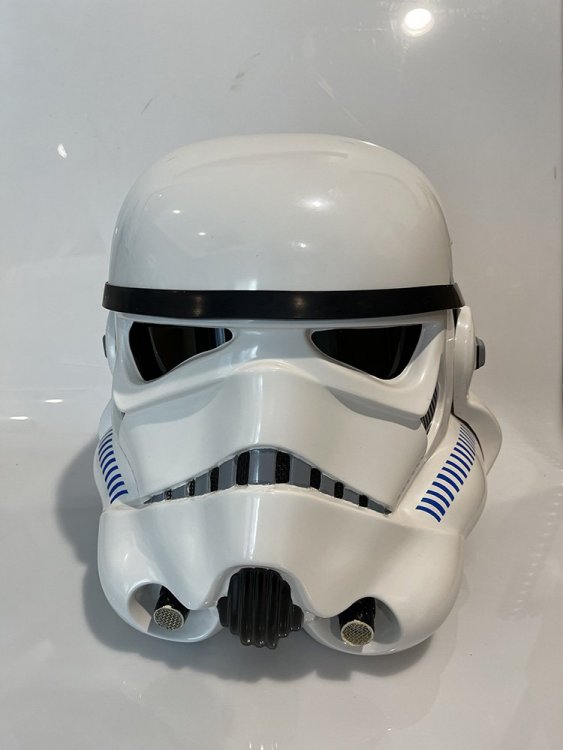
Well after spending a night in the sauna temperature furnace room, the helmet was 85% dry and so the ideal time to remove the masking. It will now cure for the next week or so as that's how long it takes this paint to fully harden. It is very important that the paint has fully hardened BEFORE applying more paint. I also took this time to cut away more of the frown to match the style of originals. This is how it stands now1 point
-
Forgot to update, Centurion approved #477!1 point
-
Thanks to you both for your feedback! Makes a lot of sense to leave extra and trim as necessary. Cali_Nole- I'm following your build thread, really great! More to come soon!1 point
-
Somehow I knew this was coming..., lol. Best of luck on your build, brother!!1 point
-
Looking forward to see the progress1 point
-
Yep starting with the helm. Screws and NUTS is the plan. Gotta see if I have some on hand before going looking for 4mm screws as tomorrow is Thanksgiving. Shame that my first try with rivets went so poorly.1 point
-
Hi everyone! Thanks for the feedback. I went ahead and worked on everything today and got suited up for a second round of pictures and updates (noted accordingly below). Rather than replace the entire first post, I’ll just put everything here again in one place in this followup post. Personal Information Name: Alex Cardenas Height: 5' 11" Weight: 185 lbs. FISD Name: Cardena5 Legion ID#: 55105 Profile Page: https://www.501st.com/members/displaymemberdetails.php?userID=31330 Garrison: Florida Garrison / Everglades Squad Build Information Armor Maker: AP (Authentic Props) Helmet Maker: AP (Authentic Props) Blaster Type: E-11 Hyperfirm Boots: TK Boots Canvas Belt: AP Hand Plates: Silicone plates from JustJoseph63 Electronics: Aker 50W Amp, TrooperTalk Neck Seal: Darman's Props Holster: AP EI Submission Centurion Submission Photos Armor Photos Full Body Front Updates from EI: Shortened shoulder bell straps to pull shoulders in closer to chest. Raised belt slightly higher to match screen references Full Body Back Full Right Full Left Right Side Detail Update from EI: 1. Corrected alignment of kidney and ab plates Left Side Detail Rivet Detail Abdomen Detail Update from EI: 1. Reduced size of ab button strip and made corners rigid instead of rounded. Interior Strapping Shoulder Straps Cod Piece Sniper Knee Thigh Ammo belt Ammo belt Update from Centurion Round 1: Made adjustments to further align the boxes with the edge of the belt. Thermal detonator Update from Centurion Round 1: 1. Originally, in lieu of disassembling my original TD to cut down the control panel and/or remove and reinstall the clips, I instead submitted for Centurion with a spare TD unit we had that was more in line with Centurion requirements regarding the control panel positioning. Unfortunately, the 1/2” gaps and the screws were not Centurion approvable on this spare TD. So I have switched back to my original TD after I was able to safely remove the control panel, trim it, and reinstall it so that the control panel was more visible as required. Gloves Neckseal Blaster left side Update from Centurion Round 1: Reduced weathering on handle/grip Blaster right side Blaster D Ring Helmet Detail Photos Front Sides Update from EI: Trimmed brow strip ends per recommendation Update from Centurion Round 1: 1. Rounded out Ear Detail edges Back Hovi tip detail Update from Centurion Round 1: 1. Narrowed bottom of Vocoder and added more white to Hovi tips Lens color (Backlit if necessary) S Trim Detail Action Shot1 point
-
Sorry for the late congrats Jonas. Welcome to L3. Great job1 point
-
I seriously can't keep up with your builds and approvals Justin , Fantastic work and congrats at L3 again1 point
-
Congratulations Lluis, beautiful job trooper. Welcome to Centurion1 point
-
Congratulations David, welcome to L3. Fantastic job on your build trooper1 point
-
For drilling rivets, grip at the back with pliers, use a sharp drill bit and drill slowly or heat will build up, you only need to go through the top cap of the rivet and the rest should pull out1 point
-
IT’S OFFICIAL! You know, by the time all this craziness is over you may even have had time to convert your ROTK to a Mimban, and then maybe this TFA TK to another variation as well. Sent via Imperial Tapatalk Comms1 point
-
I wet sand mine with wet and dry sandpaper, adding a little dish washing liquid to the water helps to keep the paper free of clogging. Start off with some 180 grit, then go up in stages, 240, 400, 600, 800, 1200, the finer the paper the less the easier it is to polish, use an automotive cutting compound polish to bring back the shine. Some references1 point
-
I've come to the conclusion a long, long time ago. Glen is a MACHINE! A real "Trooper helping Troopers" to the Max!1 point
-
If you can use the "direct link" option or just copy and paste Two things can be done to make the brow sit tighter, you can either pull the front downwards, this will change the angle of the faceplate and should close the gap (but will give you more gap under the brow trim) OR remove the rivets, slot the holes and bring the backplate further backwards. Many of us don't use the rivets, we use bolts and nuts, allows you to move the pieces around until you get them just right. Personally I would do the second option1 point
-
Your images aren't showing, you may want to try an online image host like Imgur, it's free and many of us use it. A couple of great threads which may be of help1 point
-
David Gdula 15028 Centurion Letter Mario http://www.whitearmor.net/eib/certificates/15028-centurion.png1 point
-
Today: Decided to work on my aiming skills with a little Nintendo Switch playing something called Fortnite:1 point
-
Congratulations and welcome to the centurion ranks trooper1 point
-
Mos Eisley Police Department home of Sandtroopers1 point
-
http://forum.mepd.net/index.php1 point
-
updated with additional paint removal and corners of frown added.
 1 point
 -
Forearms: Belt snaps were too tight to allow the belt to stay any higher so I removed and raised their position.1 point
-
1 point
-
I did it!! I gotta tell you, I'm also finishing up my master's degree right now. I just submitted the initial draft of my thesis to my advisors. BUT...receiving my approval to join the 501st through the Golden Gate Garrison from @RickyBoyBlue made me throw my arms up in triumph!! My wife rolled her eyes So proud to be joining this fine organization. Thanks for the support!! Just waiting on that TKID...1 point
-
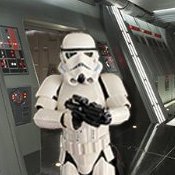
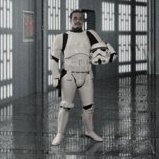
The top picture shows where the armour is rivited together on the left side of the body. The bottome picture shows the right side of the armour which opens for you to 'step' inside the armour and the single snap to hold the side closed in the clamshell style. The single snap on the right side of the body is facing inwards to the body with the snap holding it together on the inside.1 point