Leaderboard


Popular Content
Showing content with the highest reputation on 11/17/2020 in all areas
-
...and then there were these! https://www.homedepot.com/p/Plasticolor-Star-Wars-Stormtrooper-Heavy-Duty-2-Piece-27-in-x-18-in-Vinyl-Car-Mats-001482R01/207163461?2 points
-
Hello everyone, I am Chris from Cleveland, Ohio. I’ve been a Star Wars fan since I was a young kid when the first movie was released. Ever since then, I’ve always wanted to have a Stormtrooper outfit (I’ve looked for kits over the years). During these Covid times, I have a little more time on my hands to actually make it happen. Over the summer I 3D printed an ANH helmet and was pretty happy with the end result. That wasn’t enough. But it was enough to make me pull the trigger on an ATA TK kit which has been sitting for about a month in my basement. I’ve been reading a lot on this amazing forum, and honestly it’s a lot to take in. Every time I think about starting it, I feel like I haven’t researched enough. With that said, my goal is for Centurion level, else there will always be regret. I do hope to get started on it this week!2 points
-
ANH TK Stunt Name: Mark C Height: 182cm Weight: 105kg Future Garrison: Knightfall Garrison Armour Maker: AP Helmet Maker: AP Cloth Belt Maker: AP Neck Seal Maker: Darman's Props Boot Maker: Imperial Boots Holster: AP Hand plates: AP (until Joseph's arrive) Thanks in advance for any feedback! Special Thanks to: justjoseph63, gmrhodes13, TheSwede; ukswrath; sly11; Tarok; TkSpartan; husky68, + many others http://i.imgur.com/XDIeFPX.jpg http://i.imgur.com/8nLMgPq.jpg http://i.imgur.com/JQWdQws.jpg http://i.imgur.com/AtYgac0.jpg http://i.imgur.com/fKgSEre.jpg http://i.imgur.com/rHLEsCd.jpg http://i.imgur.com/xDukABy.jpg http://i.imgur.com/6EFp69i.jpg http://i.imgur.com/mh5QcTO.jpg http://i.imgur.com/ShKjlOs.jpg1 point
-
Personal info: Name: Scott Ruckert 501st ID: TX / TKC 69901 Garrison: Northern Darkness Armor info: Armor : RS PROPS Helmet : RS PROPS ( S neck trim ) Boots: RS PROPS Neck seal: RS PROPS Under-suit: RS PROPS Gloves / hand guards: RS PROPS ( rubber gloves / silicon hand guards ) Canvas belt: RS PROPS All seams: Over lap ( no cover strip )1 point
-
Hey everybody I am kenneth from the netherlands And i am very happy to be here and have been wanting to join for like 10 years but never haf the money to start a build. Now i recently bought a full kit and posted some pics in FB some very helpfull people pointed me in this direction so here i am. I will be starting a WIP soon after i finish writing here so ill be looking forward to meeting all of u. Edit: link to my armor1 point
-
Hello I’m TK11605... CharlieMcNeil Can’t wait for the weather to be nice again so I can troop on the Harley.
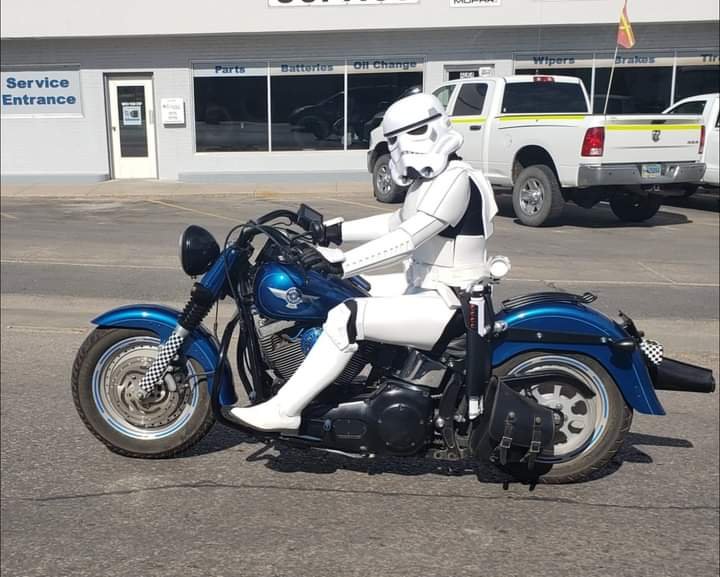 1 point
 -
Oh cool thank you!!1 point
-
I really appreciate you taking the time to help me, I really didn’t mean to come off as a jerk before, I was just confused with some of the things that were being asked for. You did a very good job clearing them up I do really appreciate your time. I don’t know if you saw but I fixed the closure in the back, that had bothered me for awhile but I never took the time to fix it. I’m home now till next February I’m having wrist surgery so I have plenty of time to start tweaking my armor and getting it where I want it to be. I just finished rewiring my fans and I added a wireless mic, I’m sure you saw the inside of my bucket lol. I’m a little obsessed with pimping the inside of my buckets lol1 point
-
Yea I was looking at that.1 point
-
They are only suggestions, DO's have the final say1 point
-
Hi Jonas, you can leave then as it, but if you want a more clean application it's not problem to remove the old ones and replace. cheers1 point
-
RS do a nice pre built helmet BUT one thing to be wary about is the color when mixing armor and helmets from different makers, RS is quite cream compared to ATA. There are some great build threads and info out there, take a look and you may see it's not so daunting1 point
-
Oh thank you for those photos that makes way more sense to me being able to see what you’re talking about ok! I am working on the readjustments now. Thank you again for all yours help!1 point
-
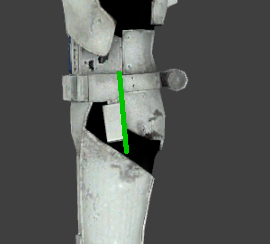
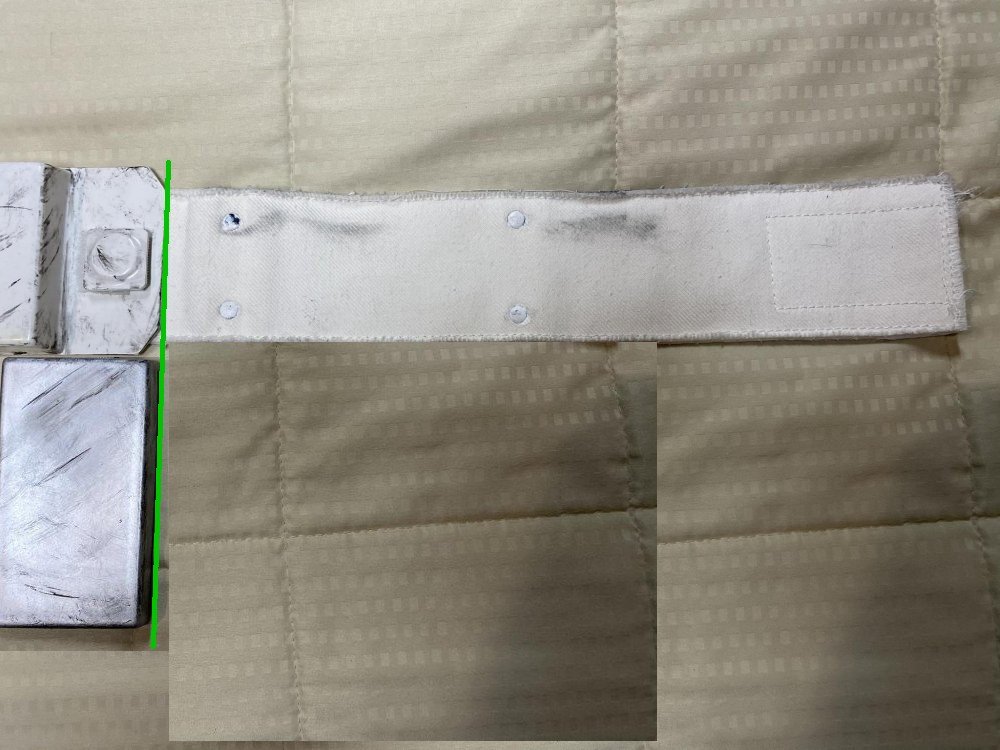
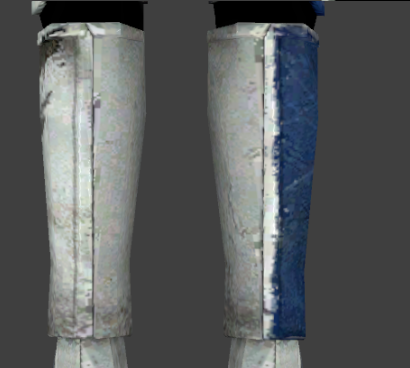
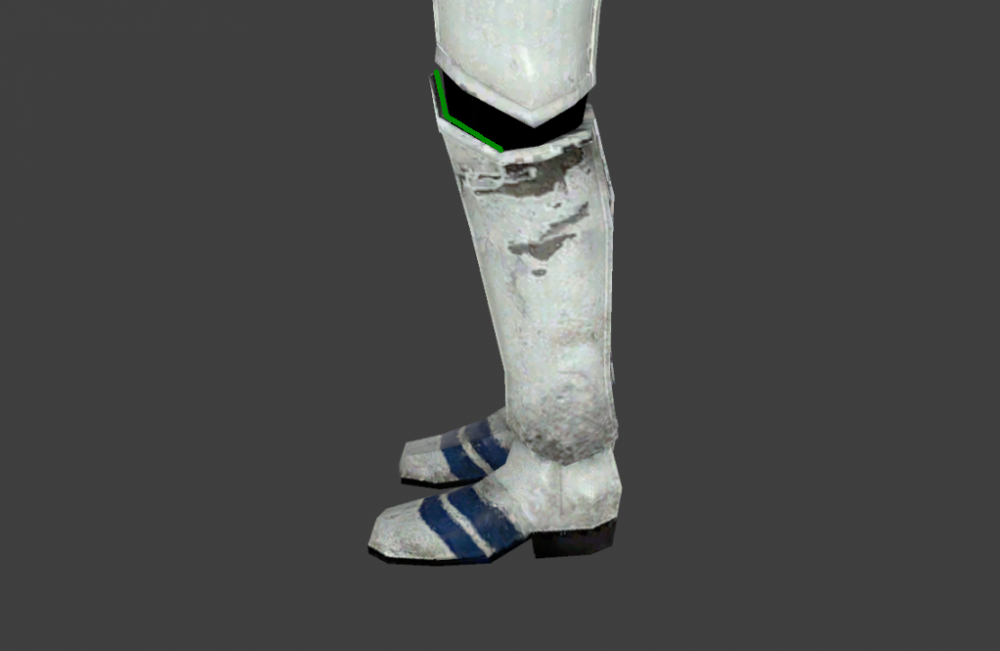
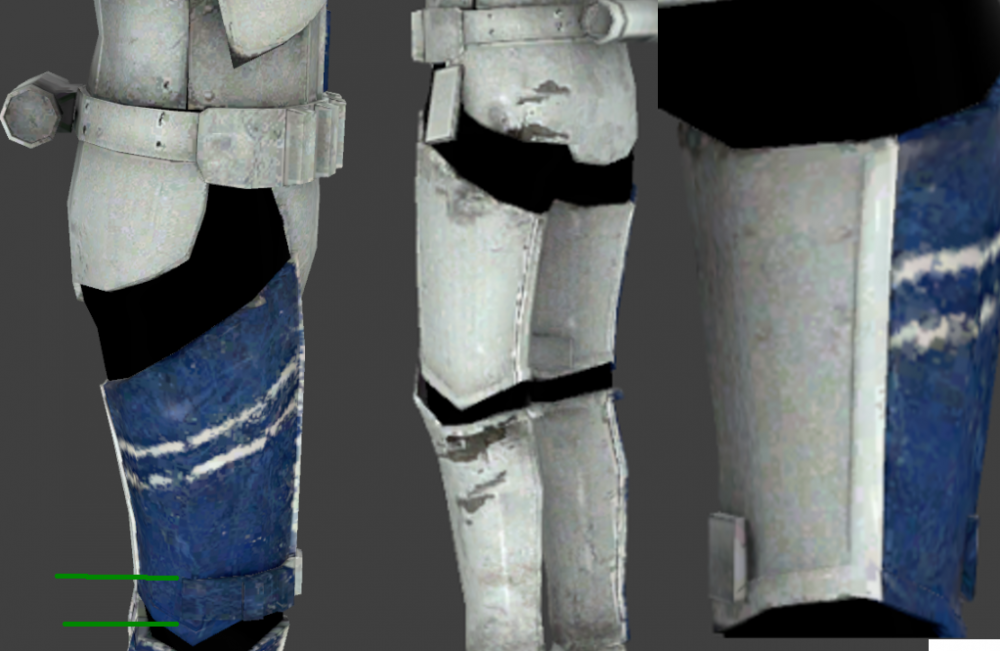
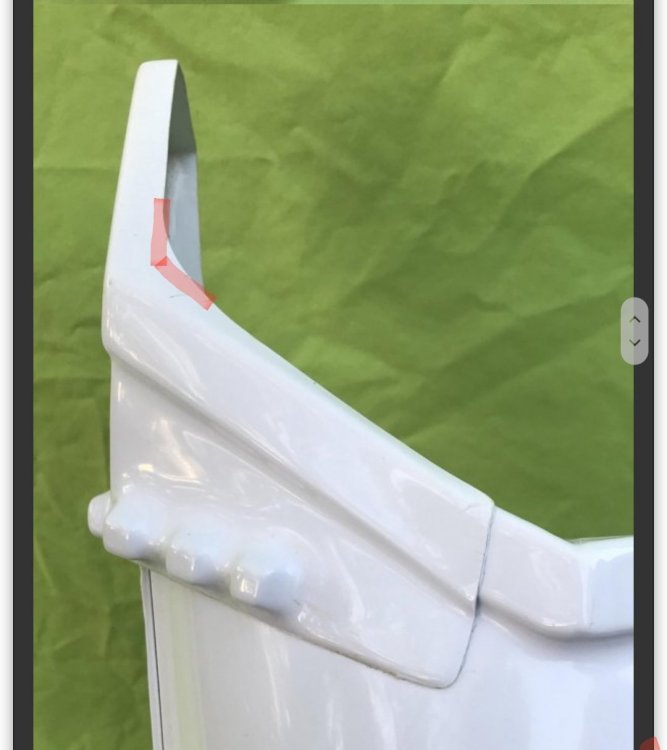
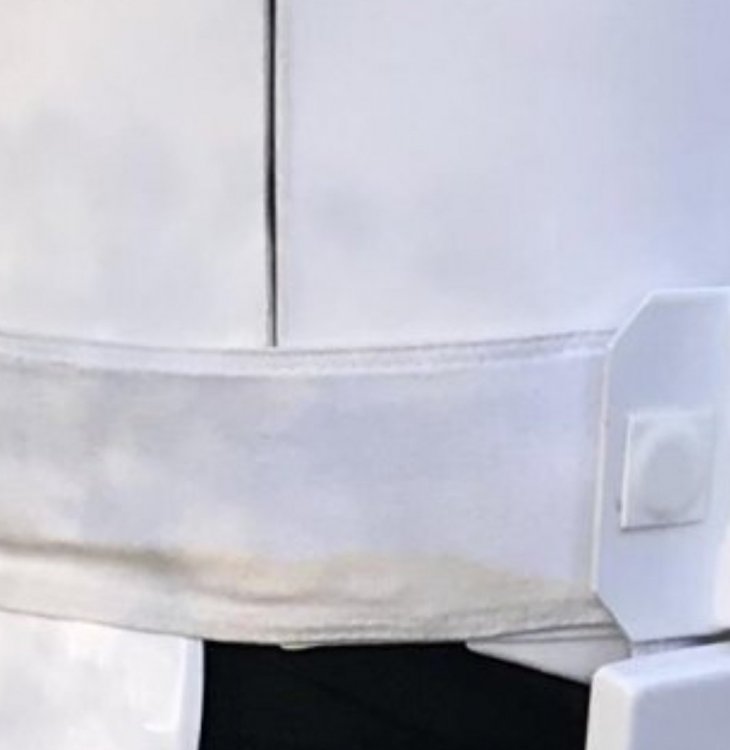
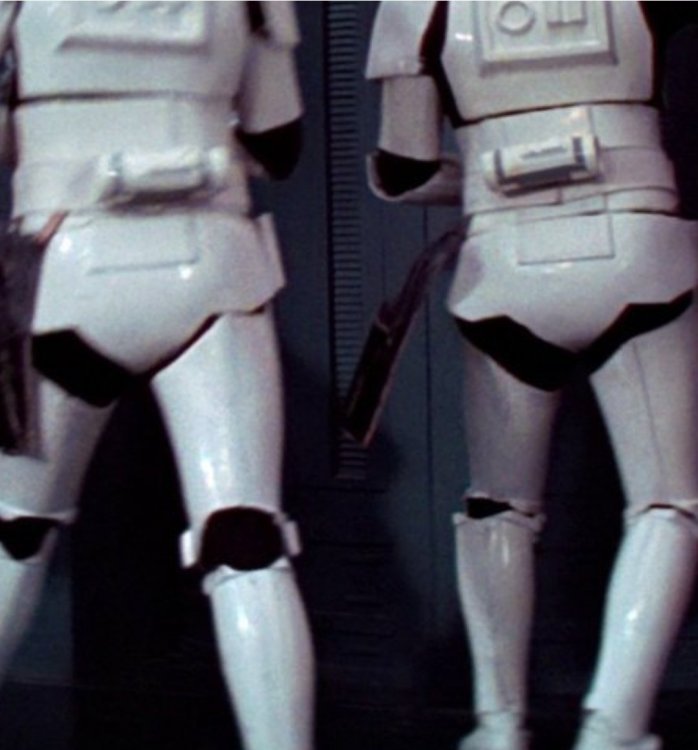
Correct gloves are pictured above with silicon hand guards. The pics taken outside were a test fitting with other gloves. I’ll add these here to show. Correct gloves should be worn in your approval photos Repositioned drop boxes moved the buttons further towards edge. Should align with the end of the plastic belt The drop box elastic is outside the plastic belt shown here Square buttons should be closer to the end of the belt square buttons positioned close to the end of the belt For the shins it does not state the closer needs to face inside, except if it’s AM armor then it reads “ the AM greaves (shins) shall be on the proper legs, with with a new cover strip. The cover strip edge shall be facing the inside of the leg. Note: There is a manufacturer defect with the AM greaves (shins) that may cause you to wear them improperly. Please see the tutorial titled : “AM armor shins: the proper way to assemble and wear”. on the whitearmor.net.” I checked and rechecked the wording, if you require the seams to face inside then it should be clearly written that ALL shin seams face inward, over lap seam, and cover strip seam. I understand it looks better and I am remaking my left shin to correct that as we speak but again it’s not written in the CRL that way. Not everything is worded in the CRL, there is still some research to be done when building This document is not intended to be a detailed how-to on costume construction; rather a visual guide to be used for 501st costume approval. Details on construction may be found on the respective costume detachment web forum. Closes outside over inside Detonator screws need to be black and should be closer to the end of the brackets You could trim the inner curve of the sniper plate, you also have a large gap under the middle Please understand I am in no way trying to come off like a jerk I want to fully understand what I need to fix but I’m the type of person that understands it better if I have photos to reference along with the written description. Some of the CRL the way it’s written is confusing. And the TKC is not the same as a TK so I had to do some digging to make sure I built it correctly. Mostly I followed the CRL pictures at least what I could see. Also I had a question on the Centurion level. On the ammo belt that goes on the right thigh it says the ammo belt is on the top of the lower ridge has square corners and glued in place no rivets. Do you have any reference photos that I could see? I want to make sure I understand what is being asked. Also the rivet positions on the kidney plate and ab plate. I’m a little confused as what it should look like, it’s asking for a total of 4 rivets 2 on each side. Is that on both the left and right side or just the right? And what are the positions. I know I sound ignorant asking these questions but like I said it makes more sense for me to see what’s being asked rather than just reading g about it. There is a whole gallery section for the TKC full of references you can find here https://www.whitearmor.net/forum/gallery/category/15-tk-commander-reference/ Thigh ammo strip for L3 Also need side rivet photo
.jpg.7d76975b7323bfa18ee16f1ca21af140.jpg)
.jpg.2b6dae21fbc5fedca04f042d6f304dc2.jpg)
.jpg.de00436d9200c69b8a968abfdc4b699d.jpg)
.png.82642eb42aa69d1d2b9dee3efbf669c4.png)
.jpg.ed9d43e047c027adc6cb69c036d4189b.jpg) 1 point
1 point -
Hi Scott, Glad to see another TK Commander aiming for high levels . I have added your app to the processing line, one of us will be with you shortly, meanwhile, you may want to check the following TK Commander Centurion App , (That we hope you go for the highest level too), to have and idea of common issues.1 point
-
1 point
-
Looks awesome, Mark. Well done, and good luck with your application. [emoji4]1 point
-
I was able to bend the sniper knee plate using a hot water bath. I bent the left side up and the right side down in a sort of twisting motion described in other builds. I then clamped the middle and let dry for a few days and glued the sides down. The middle separated a little bit so I had to re-clamp to get it more straight. It isn’t perfect but it turned out better than expected.1 point
-
The TD caps are on so tight I decided not to glue them. Hopefully that works out ok and I don’t lose one. The color is dark admiralty grey and is lighter in person.1 point
-
Hello, all. My name is Eddie, I’m a healthcare worker in Chicago. I’ve been a SW fan since ‘77, and remember drawing TKs for my friends in elementary school. Could never get that TK frown just right. Last Thursday, a big rectangular box and a much smaller cube-shaped box was delivered to my apartment with contents described as “Fancy Dress Costume.” This is my second full commission TK, my first from RS Propmasters, who have created an INCREDIBLE work of art, a vast improvement from my previous TK armor, a “full commission” store-bought Ben Cooper TK Halloween costume back in 1979. During the past few months, I’ve been browsing the forums for general costuming ideas and information on the 501st and what they do. I was impressed by the organization’s camaraderie and support, but mostly by their purpose of “bad guys doing good,” and it’s something that I would love to be a part of. I have some past experience with creating period clothing for Renaissance Faires, and I am aware of the impact a costume can have on the wearer as well as the individuals he/she encounters. No matter how young or old you are, there’s a certain magic in meeting a character from a different place or time, or in this case, a different galaxy far, far away. It encourages people to dream, escape the mundane and doldrums of everyday life, or simply puts a smile on someone’s face. I am looking forward to hearing your stories, sharing advice and experiences, and eventually joining you all in putting a smile on someone’s face, because we all know that the world could use a few more smiles right now!1 point
-
Hi all, at Saturday I painted the helmet. Firt I used the red primer. Then some houres later, I used the white primer.. I am not sure but some times the primer Looks like White and grey. Next Saturday I will paint the helmet with gloss White. Next Saturday I will paint the helmet with gloss White. Were the screws visible inside the helmet ( screen Version of the helmet )? I found some Pictures..... But I cant see the screws…. but the screws that were a part of the kit are good visible inside…. Maybe you can feel them on your face hahahahah. Regards Svante1 point
-
Thanks for the warm welcome, everyone. And Happy Life Day to all!1 point
-
Thank you very much!1 point
-
Thanks everyone! I'm really getting excited. Look for my build thread soon!1 point
-
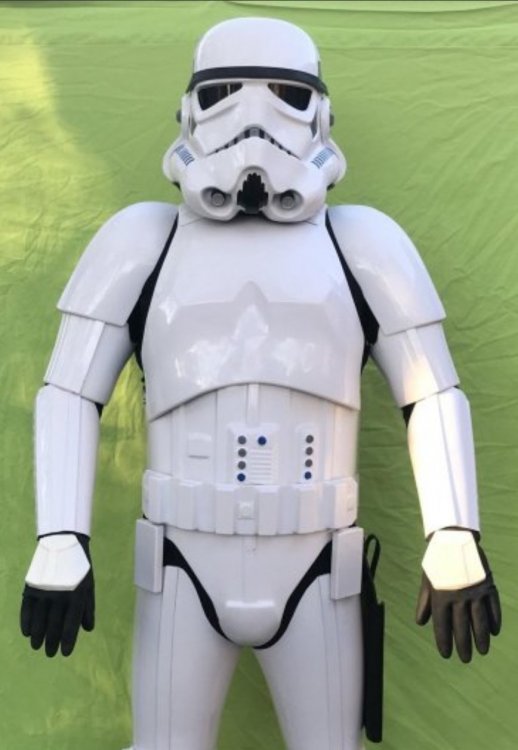
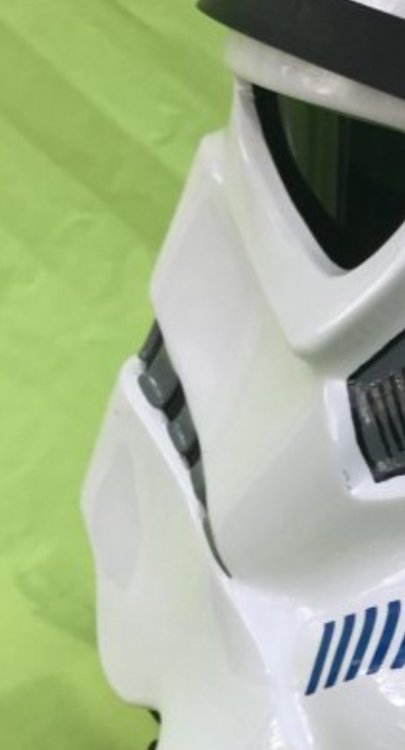
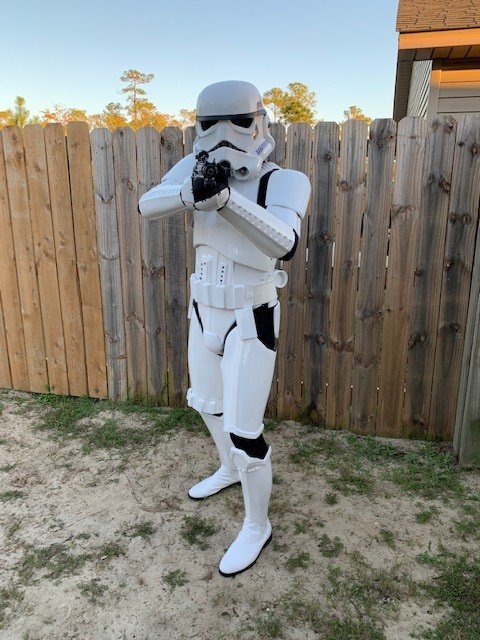
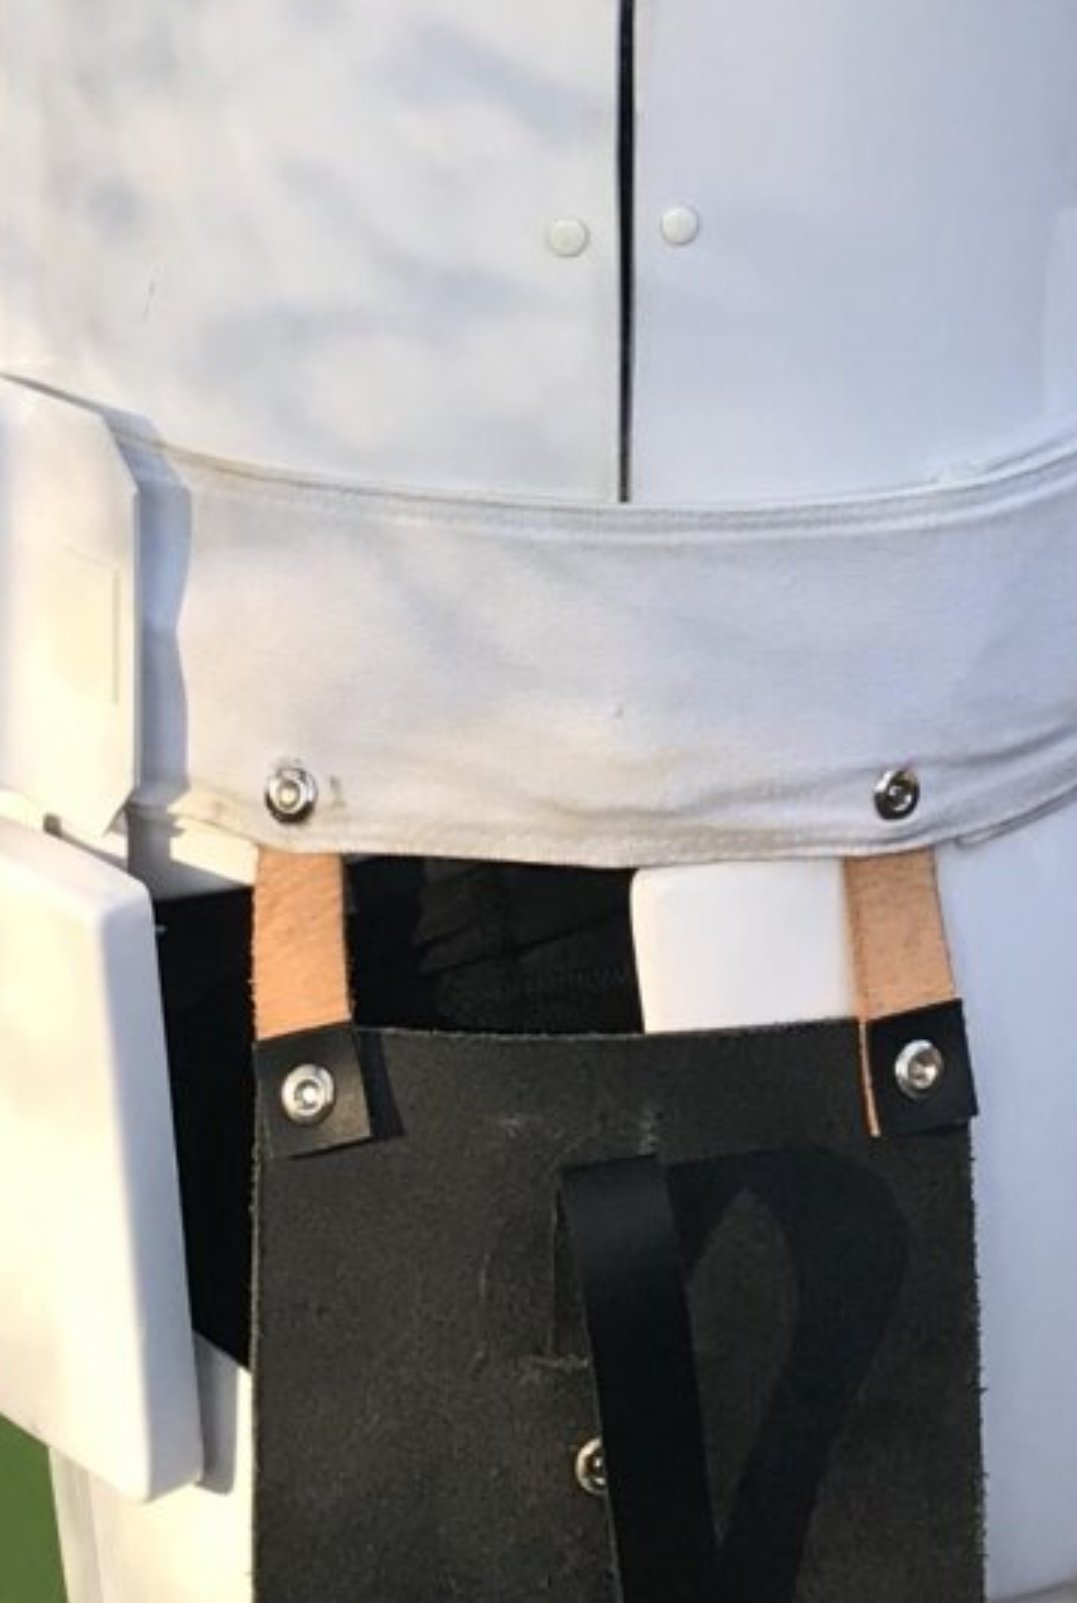
Nice work trooper a couple of things before the DO's get here: You could remove the curved area from you sniper plate Your TD gap between the end caps and panel are quite large Belt is quite wrinkled on the bottoms also appears stained You may want to adjust your biceps up a little you have no gap at the elbows and the pieces are overlapping You may have a little paint on the ower gum Frown is painted gray and does not leave the teeth area The counter on your blaster appears a little far back, normally some scope can be seen on the rear Could you also post the following images: Close of of your ab/kidney rivets Both side outer and inside of the thigh ammo strip connectors/rivets Good luck with approval


 1 point
 -
That is great to know. I did not know that. Thanks Glen1 point
-
Both ways are acceptable and screen accurate
 1 point
 -
Great looking kit Trooper. Congrats on the nice build and best of luck in your approval. You got this.1 point
-
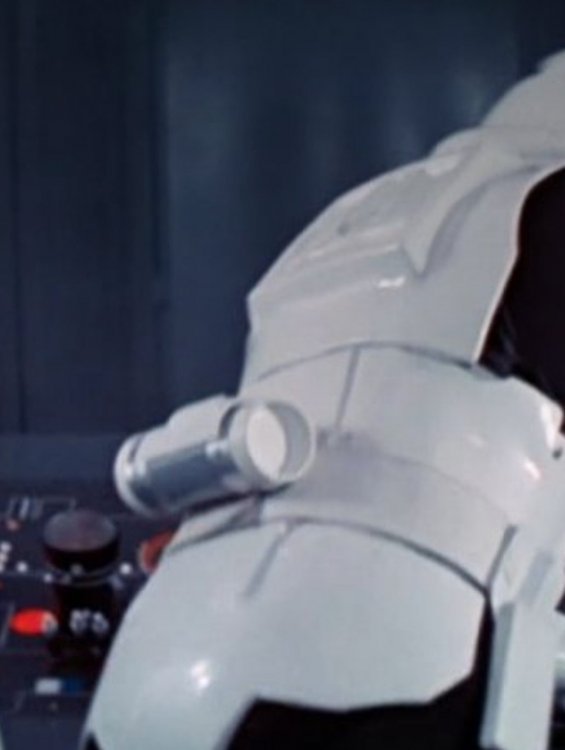
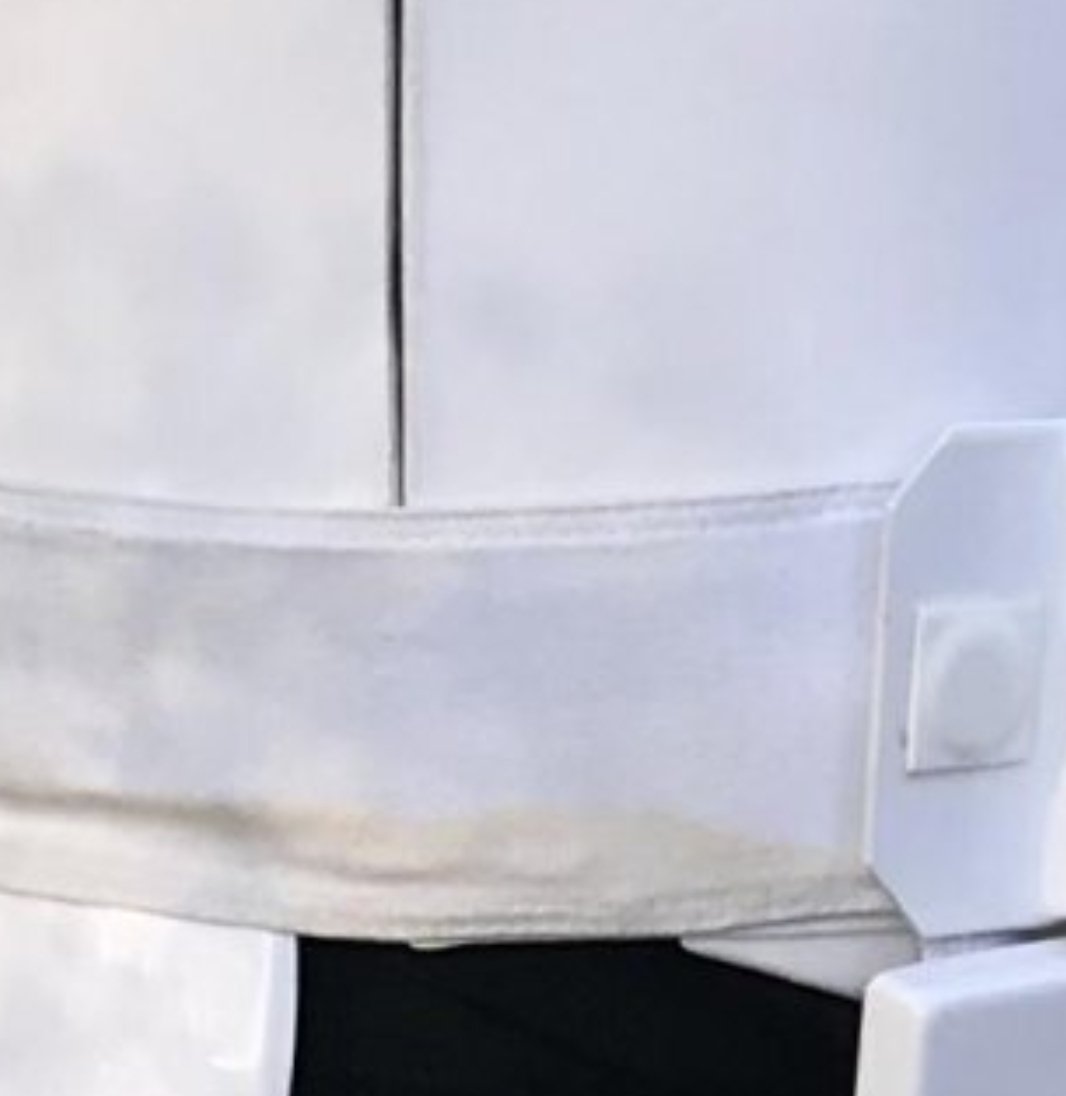
Hey Scott, Thanks for the ear screw fix, and apologies for the initial miscommunication. Could you please post close-ups of the wrist side of your forearm armor? The L3 CRL states No return edge on the inside of the front of the forearm is allowed. I can sort of see them in your arms raised photo, but a closeup would be helpful to confirm that there's noreturn edge. Next, this was listed as a suggestion in your EIB application but per the CRL should have been a Centurion requirement. The L3 CRL states: The top of the ABS ammo belt should sit at or just above the bottom of the central and vertical abdomen button panels. Yours is sitting a bit low: Reference Images: I had this same issue with my Centurion app and have added a couple small strips of velcro to the front of my ab armor to keep my belt from sagging. I really appreciate your patience in this review; I have been swamped at work and have been peeking at applications on short breaks so I'm definitely not operating at full capacity. You have a great build and you're almost there - we'll get you over the finish line soon. Thanks, Sha Sha1 point
-
I have corrected the photos as per your request. The issue was when I emailed the pictures and saved them it produced a copy adjacent to the original in my phone. I uploaded both pics of each, and went in to delete the smaller sizes, then was able to upload the photos to edit this post and hopefully it is righted for proper review. Thank you for your patience.1 point
-
Thanks for all the info guys. It is truly appreciated.1 point
-
Hi Josh . Glad to see your Centurion APP, before we can start you review, there's Just one detail: Could you please post the photos with a larger size? most of then are too short to see in detail. If you look at your EIB app, they have the correct size. Thanks in advance Trooper .1 point
-
Guess this answers my question! Sent from my SM-G930T1 using Tapatalk
 1 point
 -
I did it!! I gotta tell you, I'm also finishing up my master's degree right now. I just submitted the initial draft of my thesis to my advisors. BUT...receiving my approval to join the 501st through the Golden Gate Garrison from @RickyBoyBlue made me throw my arms up in triumph!! My wife rolled her eyes So proud to be joining this fine organization. Thanks for the support!! Just waiting on that TKID...1 point
-
Check your email, Dan...1 point
-
GREAT! Thanks! Sent from my SM-G930T1 using Tapatalk1 point
-
Dan has an nice documented RS build which may help There is a lot of tweaking with helmet builds, move one spot and it affects another spot, you will find most helmets will have a gap until pieces are pulled together, using magnets can help aligning things up1 point
-
Hey everyone! My name is Lucas. I am currently still serving in the USAF and a commander out at Eglin AFB in Florida. Obviously, I have a love for Star Wars especially the original trilogy (specifically ESB). On top of all that, my oldest brother had a disability from birth requiring many surgeries and extended overnight hospital stays in children's hospitals. When I was younger, I remember going to visit him and seeing the faces of the patients (including my brother) when people and characters took time to visit them. Seeing the mission of the FISD and my love for Star Wars there was no way I couldn't do what it takes to join and give my time to share hope and joy with others. My TK ID is the date my older passed away and his first and middle initial just happen to be TK... So it is a perfect way to honor him. Being in the military, we have been moving a lot and with deployments and demanding work days, I am finally at my last tour and look forward to settling down. I have contacted the local GML and have been approved and assigned a 501st TK ID#. See profile here: https://www.501st.com/members/displaymember.php?userID=33092&costumeID=126 Thanks for reading... Lucas
 1 point
 -
Looking great, should be easy basic for you. That helmet looks amazing with paint and ear angle. One fix for higher levels, try rotating the TD to show panel more horizontal. My TD needed to be rotated too, you can see in my build log. Sent from my iPhone using Tapatalk1 point
-
You can make the belt anyway you like as long as it match the CRL reference you are good to go, that thread was an example, I personally fold and iron the fabric 4 times, add support for the holster then sew.1 point
-
Nice work and great build thread, you listened to feedback and took it on board. Just an FYI you need a K on that Nightfall You could add some white to the rim of your hovis tips Also watch the rear belt and TD, slightly on an angle. Nothing I can see should hold you up for basic, submit away, good luck and hope you receive approval soon.
.jpeg.76bda5a86760a288c50f22b79f878af0.jpeg) 1 point
1 point -
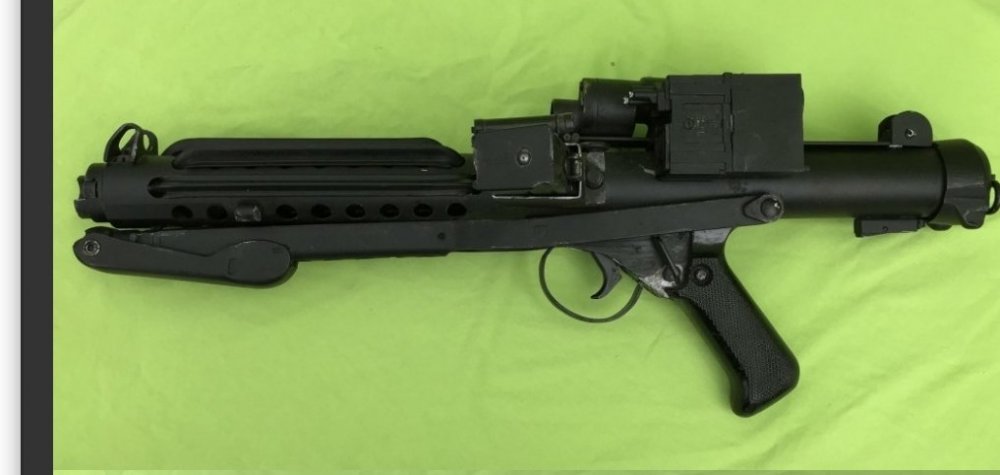
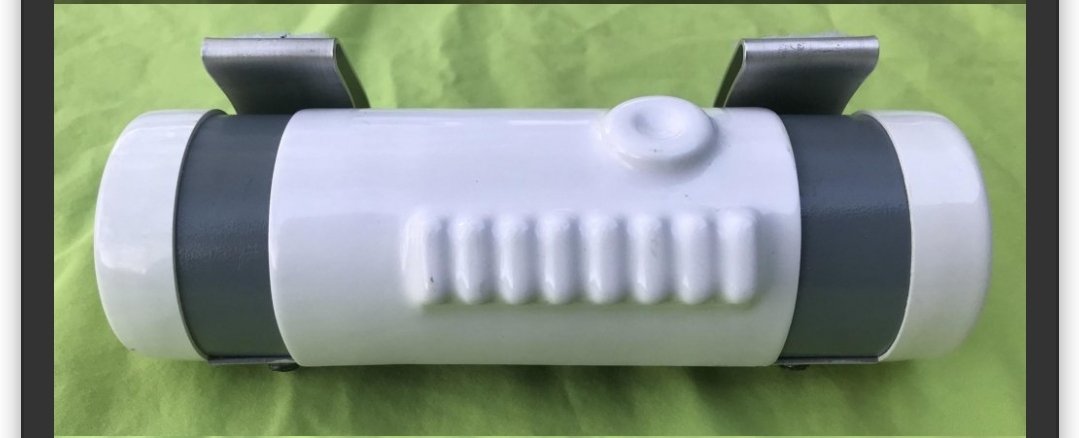
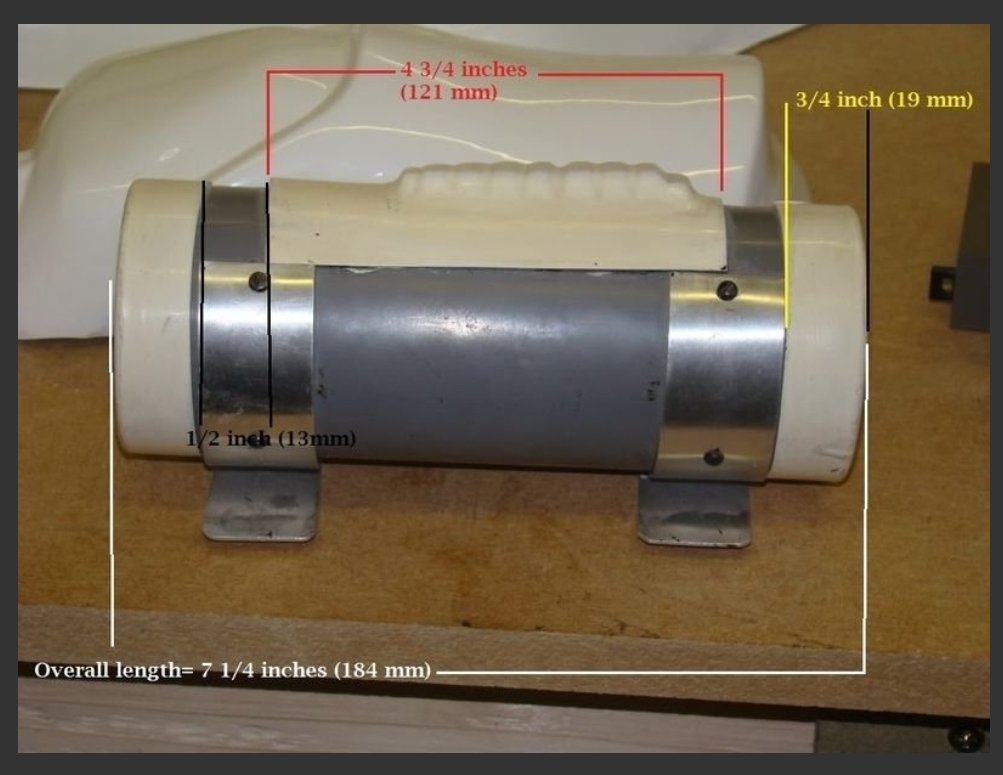
Here is a quick look at the 3 types of folding stocks I will be using for my blasters. The top stock is the original one from the DVH kit; one full casted piece, non-moving parts The middle stock is from Phoenix Props kit. I am not sure if this was modified to cast into 2 parts from the DVH kit stock. It still has the old sterling paint in some areas so I think that is what this is from. Then Dday went with newer parts to cast from. I might be wrong about this so please feel free correct me. The bottom stock is casted from the paint stripped parts I acquired from Dday. Side View Top View Parts For Part For the DVH and Phoenix Prop stocks I am working on removing the inner resin to fit in the folding arm tubing. The DVH stock is really interesting as it has all the paint texture and battle worn look & feel to it. Lots to clean up and patch but still fun to work on. Nice point about this stock is the hinge mount part is casted with the stock wishbone arms so its easy to glue onto the receiver tube & the outer hinge caps are casted into the piece. The Phoenix Prop stock was a huge improvement from the DVH and Doopy stocks as it added more depth and detail by molding the handle part separately. No Need to carve out areas to make it appear like 2 parts. The stock I casted will have all the parts included. I have only molded the large parts so far but hope to start on the smaller parts at some point. The stock will be fully movable, lightweight but with the parts being plastic and very thin, I don't think it will be very strong and will eventually break. Just fun to go from a static one piece stock assembly to a 1:1 part for part replica.1 point
-
There are some diagrams in a link I posted in your other thread There are no step by step instructions but having a look at others build threads is a great visual resource. Also check out the gallery sections, lots of reference material there.1 point
-
Great to hear how you ended up here Dave and a fantastic username if I must say. Nice choice! I had a similar experience with getting my kit assembled and can relate a lot about the mistakes and taking more time than expected to get it all finished. Job well done! Wishing you many happy troops.1 point
-
Welcome to the ranks Dave and thank you for sharing your story!1 point
-
Congratulations Trooper Sent from my SM-G981B using Tapatalk1 point
-
Such an AWESOME surprise on my birthday!!!! I’m giddy!1 point
-
congrants1 point
-
Congratulations Dave!!! Very good team(Vader and the troopers)1 point


.thumb.jpg.a22c59871126b71e159a4adfd3e00414.jpg)