Leaderboard


Popular Content
Showing content with the highest reputation on 09/03/2020 in all areas
-
Hello Troopers, First off, thanks to anyone checking out my build thread. I'll preface this by saying this will be a marathon, not a sprint. I'm not gonna give myself a timeframe, I'd rather take my time and see how it goes, but I do plan to build towards Centurion from the start. As it's my first build, I'll be sure to ask plenty of questions here when I get stuck, which I'm pretty sure will be often. I feel no matter how much research you do, it's still going to be an eye opener once you get your hands on the shiny, white armor for the first time! Here's a link to my new member intro in case anyone wants to take a look: So after a few weeks of research and due diligence, I decided to go with an ATA helmet + armor kit. Was added to the waiting list on 8/16 and got an email yesterday (coincidentally, my bday!) that my kit was next and would be finished in a few days time. Needless to say, I was PUMPED! So BBB day should be coming in the next week or two, I'll be sure to update when that day arrives. Since I don't have my kit quite yet, I spent August pouring over build threads, tutorials, etc. and stocking up on tools & supplies and some soft goods. I have already ordered an E-11 Blaster from Quest Design Canada on Etsy (thanks to @Firedog for feedback regarding his blaster) but that's still about 6 weeks out. I've also purchased my holster and neck seal from DarmansProps, still waiting on those as well. I believe a build thread can't have too many pictures, so below are a few I have so far. Imperial Boots 421's, received in early August: TD clips and Hovi Mix tips from @ukswrath's Etsy shop (thanks Tony! these are fantastic!) I'm unsure if I'm going to fully handpaint my helmet or use "handpainted" look decals, so I ordered a full set of Humbrol paints AND a set of Dave M helmet decals from Trooperbay. I figure I'll see how the helmet build goes and then decide when I get there, but both options will be available to me when the time comes. Of course if I use the decals, I'll need the paints for frown, ears, vocoder, ab buttons, screw tops and rivet tops anyway. Here's some miscellaneous tools/supplies (line 24 snaps, snap setter/anvil, some blind pop rivets that came with my hand riveter, lexan scissors, utility knife, etc.): And last weekend, decided to get my feet wet with snaps, since snap setting is entirely new to me. I referenced @justjoseph63 Snaps 101 thread (many thanks already to Joseph for all the SUPER helpful newbie threads and also a shout out to @MaskedVengeancefor his Index of Resources), but I also tried a method mentioned by @gmrhodes13 of using a phillips head screwdriver prior to the snap setter to kind of score the post. In the pic below, on the male snap plates you might be able to see I tried each method on a couple of the plates. Not sure which I prefer yet after only a few snaps, but where scoring the post first made a HUGE difference was the female snap post. I only attempted two, the first one without scoring the post is on the left and I completely butchered that one, post flattened out sideways. Used the screwdriver scoring on the the one on the right and it worked almost perfectly. I'll play around with more snaps this weekend and I'm sure I'll get the hang of it more with additional practice: And lastly, for this update, since I had to drag a barstool from the kitchen into the garage for snaps practice, I realized the "need" for a garage stool. And since I realized this "need" in the early stages of TK armor building, well then, why would I not get this one: Stay tuned for Episode II....BBB day, coming soon!!!4 points
-
Very happy about the release date for second season of the Mandalorian... ...but I got pinged 10 times by my coworkers within the first hour of work. Including by one of the SVP's and by the head of HR. Share stories of how you know you are THE Star Wars person at work! As for myself.... Colleagues give me SW themed Valentine's Day and Birthday cards. When I showed up to work on Halloween in full armor, my boss looked at me and was like "...I'm 95% sure that's Jessy in there." (My reaction was "who's the other 5%?!") New hires are told to find me from all the Star Wars toys on my cubicle. The day after the season finale of Clone Wars dropped, I got like 5 pings of people asking what my reaction was. When places started closing down due to the pandemic, someone stuck the meme of General Grevious on my desk.2 points
-
Thanks for all those suggestions! I just noticed you had seen the issue with the Hovi tips. Apologies for missing that on my first read. Sent from my iPhone using Tapatalk2 points
-
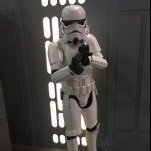
Haha but I never was really into biker scouts. I feel like if your gonna go stormtrooper gotta go full on stormtrooper! Thats my mentality lol I'll live and die by it. Unfortunately the undersuit I have doesnt fit, I've ordered a size up but it hasnt arrived yet. But I decided to take your advice so I put on something similar to the undersuit material and put on some gaskets and tried fitment again. Heres the results of that. And here I was thinking I was gonna have to whack off a whole lot of the shins, thank goodness that doesnt seem like the case. The thighs are definitely spot on to me though. Thats the height they have to be on me to not have any leg movement issues and leave space for the knee plate. Glad I did this before starting to really work on the shins. I feel a lot better about my leg fitment now, that was a big hurdle to jump. The Ab plate and chest are gonna be my other big hurdles... lol2 points
-
Thanks for catching that oversight! Here are the repainted Hovi Tips:2 points
-
Hi, David, just the top border as Joseph pointed will be ok. Good luck Sir.2 points
-
Thanks for the advice JR. I've already been reading up on build threads (mostly ATA builds), but I had not checked out AJ's yet. I will definitely do so, much appreciated. I've also already made a habit of viewing approval/pre-approval requests, trying to see if I can spot potential issues before seeing what the experts have to say. Still an amateur, but definitely learning a lot from it. Thanks again JR! I can totally relate to the OCD, Joseph! But I can see where that can potentially help with this hobby. I take all the advice I can get to heart, so questions and photos will be plentiful for sure. Yeah, I was pounding away pretty violently with the hammer. I was also using a 4x4 block of wood under the anvil, so with a combination of too much force and soft wood underneath, the anvil was sinking into the wood and not staying level. I've since picked up a steel bench block to place under my anvil and will be mindful of not "jackhammering". Much appreciated Shawn.2 points
-
Again thanks for your advice and input. I am looking for a screen accurate version (and will meet 501st admission criteria) so will go for the 1.5mm ABS.. Really looking forward to it. Thanks again.2 points
-
Hi Darren, Great choice! :-) Personally, I prefer 1.5mm ABS. It is closer the original material used, is nice and flexible for trooping, easier to cut when building the suit, and holds more detail than 2mm (as the thinner plastic forms better over the moulds). Again, my personal view is that acrylic capped is not as nice to look at. It’s very, very shiny, it’s also a different shade of white to non-capped so it’s quite easy to spot in a line of troopers. Also, as above, the details can be lost a little in acrylic capped. Here’s Ross from RWA showing off the different shades and thicknesses. Below is an example of the difference. From left to right, Standard ABS, acrylic capped ABS, Vader (lol), standard ABS (me) and a dirty boy. ;-) Hope that helps a little. :-)2 points
-
I hate acrylic capped. It’s not accurate and it’s really horrible to cut. You will go through blades like nobodies business. It’s shiny and very white. It can be brittle as it has a layer of acrylic on the plastic surface. You will get more flex and a more accurate look using standard 1.5mm white smooth ABS.2 points
-
Super clooooose!! Come oooon!!2 points
-
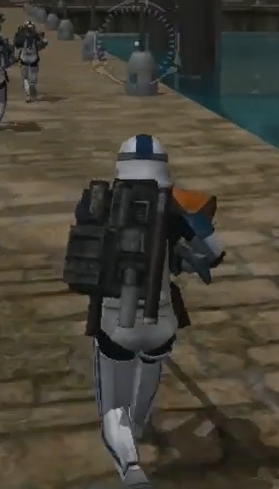
Day by day it becomes less of a mystery and closer to reality, I am as excited as everyone else for this, so here is another piece to the puzzle.
 2 points
 -
2 points
-
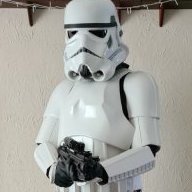
I suspect that one of our IT guys is likely labeled as our Star Wars guy, considering two of them also have SW figures all over their cubicles, but at least this was me on Ep. IX premiere day: I know, it’s only a Black Series bucket, but I was only one month into my build that day exactly, so it’s all I had. Sent from my iPhone using Tapatalk2 points
-
Hey y'all. Work continues for the leg portion of the armor. Both the left shin and the right thigh are what we're looking at this week. I went ahead and purchased a hardware set by Joseph Pedigo. Thanks for the heads-up Shawn! And thank you, Joseph! For the thigh ammo belt I'm gonna apply cap rivets for attachment. In the pic there's only two but I think three should be applied for secure fastening. Please correct me if I'm wrong. Both pieces have been painted over with three coats of white enamel paint. Speaking of the thigh ammo belt, is this the correct height and area of attachment on the right thigh piece? Note the circled-in holes. Is that the correct hole placement for the side rivets? Again, I believe there should be a third rivet punched through the right-middle area. I will supply an additional pic to confirm soon. On to the right thigh. After measuring for accuracy the cover strip was glued in. There is a noticeable gap along the bottom area where the side join. I have placed a small cover strip but I'm thinking I'll make some ABS paste and cover it up on the inside. What do you think? An additional cover strip was added on the inside for additional support. After measurements were confirmed, a heat gun was used to conform the sides inward. After the cover strip was measured, created and glued the awkward task of gluing and applying the velcro was completed. Here's a pic of that small strip piece I mentioned earlier on the front part of the thigh piece. Yeah, I think I'll see about pasting that up. On the rear portion of the right thigh you'll notice that gap there (again!). Looking at the CRL, I noticed some pics do show mobility cuts along the back of the knee. Is it recommended to reshape or cut out this area? Lastly, the sniper plate was worked on. As you can see I decided to further trim the bottom area to make it more flush against the shin armor. I will admit, I was so excited to attach this thing and got a little ahead of myself by actually gluing it onto the armor. Doh! For what it's worth, here are the shots with clamps aaaaand glued. If this doesn't work I'll take my lashes and reapply to ensure accuracy. That's all I have for now. Oh! And my homework for this weekend will be doing more research on Hero, Stunt, EI and Centurion differences as I STILL haven't fully decided the path I'm going to pursue. I know, I'm awful lol! Thanks in advance for your guidance and time-I really appreciate it!2 points
-
Just don't rush, rushing can lead to mistakes and remember it's not a race, If you can't make it to the first 1000 I'm sure you'll be in the march to 15002 points
-
While surfing one of my favorite movie info sites I found this little article. https://screenrant.com/star-wars-first-stormtrooper-tragic-tale/1 point
-
Thank you so much for the quick reply and info. I’ll get to further investigating! Cheers!1 point
-
@tarok they are. Every change has been added to the original file. If a person downloads the armor file, they get all these changes. You only have to dig through the files and find the ones that say V_2 or something of that nature. I think at this point, there's four different belts,1 point
-
Hej Joseph Yes sure: (The gab is less than 1/2 inch)1 point
-
You are definitely starting out on the right foot, Paul. And by that I mean being organized! (I'm kinda' OCD when it comes to that, lol). Great to see that you started a build thread, and the one main suggestion I can offer at this point is to ask questions if you have any doubts about a particular issue before cutting or gluing... and add photos. Lots of em'. No question is "too small" and there's no such thing as too many pics. Trust me.1 point
-
Super excited to see you start your build! Something I recommend doing is checking other people’s build threads. AJ’s thread is basically the go to at this point because of his very in-depth process of recording and describing things in great detail. https://www.whitearmor.net/forum/topic/40831-ajs-of-am-20-build/ I’m still working on my first set of armor, but something I’ve been doing as is looking at pre-approvals for all levels. That way I can more easily see where people go wrong and how to fix them.1 point
-
Dave Fredericks 18034 EIB A4 Mario (TKSpartan) Thanks http://www.whitearmor.net/eib/certificates/18034-eib.png1 point
-
Progress Report - 9/2/20 It seems like everyday 1 more expert infantry gets approved, I'm pretty sure I'm not gonna make it. But I wont let this deter me. Work moves on as I do the best I can to get through this build. May not get to #1000 but #1500 I can do! Dremeled the holes in the hand plates. This was the easy part for the day. Here is the CRL for the thighs. I said I would work on the thighs today. Apparently this is one of the hardest parts of the FOTK so I've heard. How bad could it be I thought....it was a pain. It literally took all night to get them to this point, and if I look hard they probably are not 100% symmetrical to each other, but I dont know how to make it any closer than this without going insane. I'm about 5'0 so because I'm so vertically challenged I literally had to chop off a bunch of the thighs to get them to this point. Pretty much annihilated any return edges wherever it had to be downsized. Trimmed a good 2 inches from the top and behind the knee I made a cut out that was nearly as tall as in the front of the thigh for the knee. But at least I can bend my legs now and it somehow still looks like the CRL despite how much I sawed off. I want to be able to sit, that was part of the reason I picked FOTK in the first place. I'm sure the shins are going to be the same situation. Right now they clash with the bottom of the thighs and they leave no room for spats...ugh. I'm gonna turn in a little earlier tonight, I'm tired. Gonna get my rest so I can deal with more short people problems tomorrow1 point
-
LOL. Hey Jonas!!!! Great to hear from you. Hope things are well. Quite a year to start your trooping. Along with this blaster I will soon be......drum roll please...... starting my application for Centurion!!! This would have happened sooner as I had lots of time during Covid, but I had to complete my military move right across Canada this summer. Big trip. I've finally settled in, set up the workshop again so I can restart my projects. I've picked up some starter paints to get the butt painted. Still lots more sanding on the other parts to go. This DLT-19 will also have a Blast FX system installed. Pew Pew muthers! I also had a friend who graciously 3D printed not one, but TWO E-11's for me!!!! I have a Blast FX system for one of those as well. Let the good times roll. I'll have to find a good forum page to put the builds on.1 point
-
I just submitted my request for EIB! TK-15028. Down to the wire now... Sent from my iPhone using Tapatalk1 point
-
That’s the piece of the puzzle I was looking for!!!! Actually, not really. I still can’t make out the whole picture. Such a tease!1 point
-
Sooooooo close!!!!!!!1 point
-
Hi Dave, and thank you for your EIB application! CRL and EIB Application Requirements: All required photos have been submitted, and on behalf of the entire D.O. staff we are pleased to welcome you to the rank of Expert Infantry. Congratulations! Other-Armor Fit/Assembly; In this area we review observations made by your fellow troopers and the DO team. Some observations may lead to suggestions to improve the overall look of your armour. *************************************************** Let's start by the Helmet: It seems like you have a bit of extra return edge around your eyes, especially up . To give it that menacing Stormtrooper sight you may want to trim it a bit. A few minutes of sanding or with a dremel should clean it up nicely. Reference Images This looks like a dressing issue , As you can see in the sections marked, Your sides are overlapping showing a noticeable gap , you may want to check the strapping adjustment to close it a get a better look. Reference Images Your belt is on an angle, also nearly covering the bottom ab button and it should be just "almost touching" , not a deal breaker but you can take note when dressing up. Reference Images Onto your canvas belt, some troopers prefer the weathered look which is fine, but we're suggesting you give your belt a bit of a haircut to trim off some of the extra threads. Reference Images We are suggesting to bring your thighs down a little so your shins can come down also and have a better fit by reducing the gap at your knees, also will let the to rest better over your boots. Reference Images *************************************************** Centurion Requirements; In this section we prepare you for Centurion. Because Centurion photos show more detail than EIB, items pertaining to Centurion might be seen there and not here and additional photos may be required. We try to point out all that we can from what we see, but the final accuracy is the responsibility of the trooper. CRL L3: Ab button paint shall not extend beyond the bottom of the actual raised button. The paint on your Ab plates sticks out a little from the raised edge of the buttons. CRL L3 :Abdominal and Kidney Plate align horizontally at top This is likely just a dressing issue, but your ab and kidney left side rivets are misaligned . You can also consider adding or adjusting strapping to keep them better aligned. Reference Images CRL L3: Canvas belt must be firm/sturdy in appearance. No creasing or sagging. The canvas belt looks as if it is fairly good as worn, but the wrinkles can not be present for L3. Mine is an RWA too and what I always do is to tighten it when dressing up for trooping. Reference images CRL L3: The blaster may have minor weathering or base metal exposure however, T-tracks and grips shall have the appearance of black plastic. Finally in this section, we have your blaster It appears that there are some silver showing on your blaster grip, there are a couple of areas under the T track on the other side and around it front handle, perhaps not enough paint coverage. Reference Images The scope rail is a little bent Reference Images And that's all . Congratulations for your great looking set of armor and looking forward for your Centurion application soon.1 point
-
yeah the boots were what i was thinking if it needed to be a Finn specific build. Also might have to go to the gym and bulk up a bit !! easier to stick with the clean trooper i think then.1 point
-
@gmrhodes13 thanks! That actually makes sense because as the designer and I have sent pics back and forth, they've frequently referred to the promo photos. I'm making some changes and should be set this weekend. Thanks again.1 point
-
Well it is specific to Finn as all the references are him but he wears different boots. There was a conversation about adding a Finn option to the CRL and someone did build one with those specific boots, but I can't remember why it went no further, post by our DL at the time (note: in 501st only section)1 point
-
I get the same funny clips off FB continuously from people, not as if I haven't seen them a thousand times before1 point
-
With all that's going on in the world, many of us are staying at home and wondering what to do to keep our sanity, lol. Here are a few suggestions that will help you get ahead so that when it's time to troop after all this you will be prepared. 1. Break out the armor bin- Since most of us only see our armor during a troop, maintenance issues can be forgotten, "I'll fix that later....". Well, it's later. Taking out each piece and examining it for cracks, loose straps, scratches, etc. will put you ahead of the game. 2. Line your armor bin- If you have access to a fabric store or even Walmart (many are still open) consider picking up some 1 inch thick foam sheets and spray glue to line the inside of your bin. This will help prevent it from jangling around during transport. 3. Clean your armor- On many troops, we sweat. Although the under suit absorbs most of it, the ABS can really start to reek over time, especially if not wiped down after an event. To help keep your bin and from smelling like a gym locker, grab some disinfecting wipes (or even plain old soap and water) and give the inside and outside a good cleaning. While your'e at it, air out your boots and gloves. 4. Organize- Once you get everything clean and ready, organize and pack everything away in preparation for your next troop. This way you will be ready to walk out the door knowing you haven't forgotten anything. Still bored? Spend some quality time here on the FISD- There are a lot of future (and existing) Troopers who need help and guidance. Remember back when you first started your white armor journey and pass your knowledge along to those who have questions. EI and Centurion- If you are already approved at Basic level, consider taking some time to bring your armor to the next levels of screen accuracy. Binge watch all the SW films- (It's OK if you fast forward through all the scenes with Jar-Jar Binks). Stay safe, and if anyone has any other ideas post em' up!1 point
-
https://www.whitearmor.net/forum/topic/19255-anh-e-11-blaster/ , restored by gmrhodes13 https://www.whitearmor.net/forum/topic/18938-34rds-magazine-cut/, restored by gmrhodes13 https://www.whitearmor.net/forum/topic/17044-guess-what-more-hasbro/, restored by gmrhodes13 https://www.whitearmor.net/forum/topic/16271-lets-finalize-this-counter-wires-where-do-they-attach/, restored by gmrhodes13 https://www.whitearmor.net/forum/topic/16272-dlt-19-build/, restored by gmrhodes13 https://www.whitearmor.net/forum/topic/19917-chookabooms-hasbro-e11-conversion-build/, restored by gmrhodes13 https://www.whitearmor.net/forum/topic/19397-anh-e-11-blaster-doopy-doos-and-hasbro/, restored by gmrhodes13 https://www.whitearmor.net/forum/topic/19993-what-scope-have-i-got/, restored by gmrhodes13 https://www.whitearmor.net/forum/topic/19966-m38-scope-base-removal/, restored by gmrhodes13 https://www.whitearmor.net/forum/topic/19942-wires-for-e-11/, restored by gmrhodes13 https://www.whitearmor.net/forum/topic/19932-jreeveos-great-procrastination-aka-build-wip/, restored by gmrhodes13 https://www.whitearmor.net/forum/topic/19926-e11-blaster-power-cell-placement/, restored by gmrhodes13 https://www.whitearmor.net/forum/topic/19842-resin-repair-question/, restored by gmrhodes13 https://www.whitearmor.net/forum/topic/18881-doopys-blaster-build/, restored by gmrhodes131 point
-
Well with that news, here is another piece piece
 1 point
 -
I just added this photo to show that I filled the seam. The ammo pack sits on top of the bottom rim against the cover strip. I just added this photo as well.1 point
-
I will be starting dialogue today with the Clone DL and LMO's There are a lot of elements to this design that are of clone nature compared to TK nature and we need to make sure it ends up in the right home with the right expertise etc etc. I'm going to follow the correct process for this so everyone is on board with the final decision I think you and those that have been waiting for a home deserve this to be resolved once and for all, especially if this has been going on since 2018.1 point
-
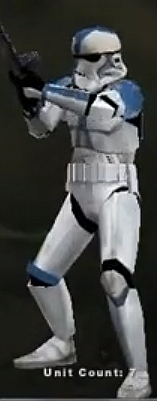
Also @Sly11 this was taken to the Clone Detachment when the helmet model was completed back in 2018. They told us it was too Stormtrooper esc and sent us here and to Spec Ops https://501stclonetroopers.com/forum/index.php?/topic/25296-force-unleashed-wii-stormclone-thread/1 point
-
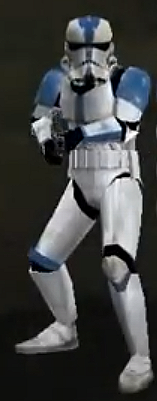
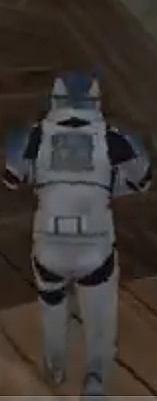
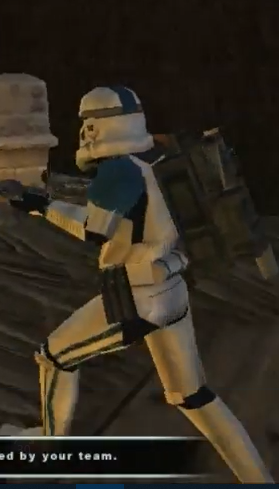
These references are from the in-game costume (which is slightly more detailed). These were taken from the PS2 version (Ps2/Wii/PSP share the game with slight differences, like the Wii version armor is alot more shiny) These were taken in-game:1 point
-
Funny thing is I have alot of these mods lol. Ill repost any references I have.1 point
-
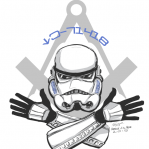
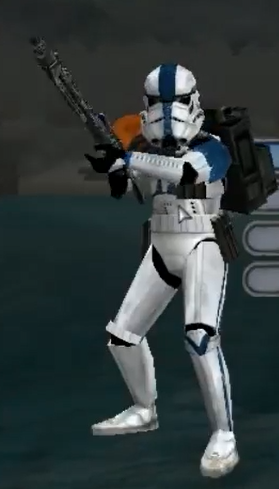
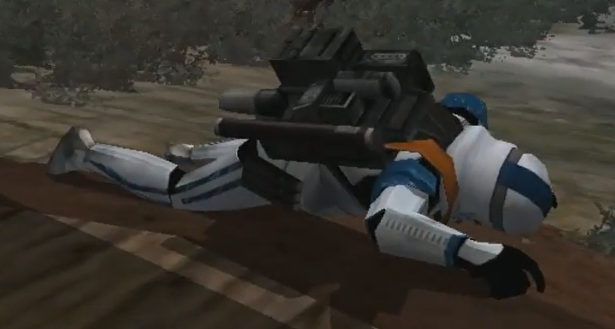
Combination of clone looking pistols and a SandTrooper back pack.1 point
-
A bit of reference material I've come across Photos in this thread updated

 1 point
 -
Interesting costume for sure Before anything can really happen with this I will need to have a discussion with the Clone Det DL and the LMO's. There are some very Clone elements to this costume, like the back plate and the elbow armour pieces and some very Stormtrooper element, like a hybrid as they transitioned from one to the other. It would be great if we could have a full front, rear, left and right side image so we can see the trooper clearly.1 point
-
Nice looking helmet. Just PM @Sly11 in regards to starting a CRL You will need clear full front, back and both side images for reference so if you can get that together that will be a great start.1 point
-
That model looks awesome!!!! ALSO just got the helmet in the mail today! It's not really skinny, it's just the photos that make it look like that. Since i have it in person now I compared it, and its size is very close to the Black Series ROTK helmet. Gonna start painting this in a few days Also about the modded model: It's probably possible to rip it once its released and be used, but it's his work, so if it was gonna be used outside his mod i'd at least get permission (unless it'll be for your own use, but still). But i gotta admit, these models are beautiful! Only difference to mine is the belt (using the clone belt instead of a TK one) Also a word on the models I had made: They were built upon the In-game model (a very polygonal mess ), but even after getting them made, there were some things I wish I could improve or change about them to make them maybe alittle more accurate. I do want files for the helmet to be released, but I want them accurate enough so if people who wish to go for approval with it can. So if it's possible, can we get the CRL team in here and discuss this build and see what we can do to get accuracy on the helmet and the rest of the suit as a whole? Even if I myself aren't going for approval (for now), I'd want other people to be able to at least have a stepping stone for that to happen (especially since my build is getting a lot of recognition on group post and a good amount of people have told me they want to do this build themselves too).1 point
-
I received my basic approval notification last night l and am awaiting my TK ID...the armor gods are making me sweat this one out.1 point
-
almost ready for launch !!!1 point
-
Mine is rather easy.... I spent almost 25 years as an Artilleryman in the Royal Canadian Artillery, hence Gunner. As we always say once a Gunner....always a Gunner! The 27 was one of the call signs I had as the Battery Seageant-Major. So Gunner27 My TKID is 71418, If you take the seventh, fouteenth and eighteenth letters of the alphabet you get GNR, which is the abbreviation for Gunner.1 point
-
The empire is very busy in my area. Even if there are some well known rebels in action, it doesn´t last long for our troops to react. Lord Vader shows up1 point