Leaderboard


Popular Content
Showing content with the highest reputation on 08/12/2020 in Posts
-
Yep, we are down to only 12 spots left to become a part of FISD history... to be one of the original 1000! Who knew lo these many years ago that we would have so many dedicated troopers who would take the time to bring their armor to the next level of screen accuracy! For those who have already been approved, and those about to step up and set themselves apart, I salute you!6 points
-
Hey there troopers, I was thrilled to receive a package yesterday, (a MBB: medium, brown box), generously sent to me by the team at RS Prop Masters. What an honour. :-) So, I did a little unboxing as it’s been a long time in the making. And, I was not disappointed. More updates and a full build thread to follow. [emoji1303] Sent from my iPhone using Tapatalk3 points
-
Attention all members and loyal citizens, Ask not what your detachment can do for you but what you can do for your detachment! Right, now I hopefully have your attention, we got a real easy way that any member can be part of the forum clean up crew, and help out making this place a tiny bit better by doing what many of you already do and that's simply peruse the forums. The task we have is monumental for any one person, but together, many hands make light work and you can feel confident that you played a part in the 2020 FISD term. Here's all you need to do. Find a post while surfing the forums with any of the following, please post a link to it in this thread. and that's it. Job done. What am I looking for? Photobuket water marks across images in a post. Watermarks in general that cover an Image that is advertising in nature. (Members are allowed to watermark photos and images they themselves have taken as long as they don't obstruct the image) Post where the images no longer work or just have info like 12034056.jpeg and nothing else. Broken links in a post that go no where, usually found in older post from years gone by. These generally don't help anyone so may be considered no use or obsolete. Please note we do not require links from anything already residing in the Archive or Trash compactor sections at the bottom of the forum. What happens once you have posted a link here to the thread with the issues. A member of the clean up crew ie. a staff member, will take a look at your link and see if we can rectify the situation by correcting the image, re-instate the broken link, or consider archive the post or thread. We are not in the practice of deleting but rather preserving our history. Once a staff member has attended to the links in question that hopefully will start populating this thread, they will respond to make all aware your post has been attended to. If you have any questions regarding the process, you can also ask those in this new thread. Happy forum surfing2 points
-
And we're off I've started painstakingly replicating the hand painted details, scrapes and drips in the paint to the best of my ability. It's a lot harder than it looks and I was not as successful as I know I could be, meaning that I'm certain I will do better on the next helmet. Hard work for sure but It is a lot of fun Here's a sneak peek before the final reveal2 points
-
Thanks Shawn! The feeling is mutual and the fact you're a fellow Nole...even better! I lived in Clermont, FL for about 5 years ('02-'07) and my daughter graduated from FSU in 2017 and still lives in Tally currently. Yes, the research needed to purchase and build a TK kit correctly is no joke. GO NOLES!! Hi Caleb. I've actually already read through your build thread (stay strong, trooper!) and am already well acquainted with the resource guide you put together. The amount of detail, passion, organization, etc. is top notch in my eyes and has already been very helpful to a newbie like myself. I tip my bucket to you, sir! Thank you, Mario! My new dancing shoes!2 points
-
2 points
-
Genious!2 points
-
Woo! Thanks all! I'll work towards that Centurion next, but I'm definitely taking a break for a bit lol. Thanks for all the help and suggestions!2 points
-
Ok. So I think I've got all the 3D print and slicer info out of the way. I can actually start treating this like a typical build thread, except without the BBB. For the time being, I'll stick with the helmet, because it's the furthest along. It was complete two days ago, but that's when I decided to get stupid. More about that later. The cool thing about the helmet is that even if I were to go in a totally different direction later down the road, I'll always have this helmet on display in my Star Wars Cave. Here's the one thing I wish I would have done different. I really should have either asked the file creator to provide a helmet without a vocoder, or sliced it out before printing. I think I could have either modeled a good one that is "tubular in nature with a visible gap between the outermost section and the helmet," or found another to print or buy. After sanding, primer and paint, I'm proud of how it looks, but not having the gap is starting to drive me crazy. I almost pulled the Dremel out a few nights ago, but my wife spoke some sense into me. Worst case scenario is I print another helmet and take care of this later. Here's the other reason why I'm going to print the helmet as one piece next time. Even though i sliced the helmet perfectly under the brow, the layer that adheres to the bed is typically rough, similar to the chin shot I posted earlier. This makes for a lot of sanding and smoothing just to get everything sitting flush. Overall, I am still happy with how it turned out, but this was the result of almost a week of sanding, filling, and priming. Bondo Glazing and Spot Putty is my friend. I don't think the vacuum formed armor builds require this level of fun, but please correct me if I'm wrong. Fortunately, this stuff is easy to sand, but of course finding cartridges for my respirator is impossible right now. I've been using a cloth dust mask and keeping the fans blowing, but if there's anything that would dissuade someone from trying one of these builds, it's this step. After I got the Bondo somewhat smooth, I went for the filler primer. Again, this step gets repeated several times; putty, sand, primer, repeat. Putty, sand primer, repeat. Eventually, you end up getting a pretty cool urban camouflage effect going: This is also the point where I started cutting out the teeth, tubes, traps and tears. The tears on the back of the helmet is something I refuse to do again. This part almost lead me to throw away the helmet, but I kept trying until I got something reasonable. This picture is bad, but now that the helmet is done, the results are much more presentable, and it definitely passes the "ten foot rule." I finally got the "camouflage" helmet sanded down to around 800 and sprayed one last coat of Filler & Sandable Rustoleum. After a quick sanding, I blasted it with some white primer and got this: Yes, I printed a Darksaber and Baby Yoda. Also, I was not happy with the Hovi Mics in this pic, so I found KamikazePigeon's file on Thingiverse, which I've seen several people on the FISD forums use. The file is found here https://www.thingiverse.com/thing:3510123. These Hovi Tips allow you to add the wire mesh and look great when finished. This next trick is something the paint shop used to do at the luxury motor coach manufacturer I used to work for. I was reminded of it when I watched Bryson Michael RC's 3D Printed Stormtrooper Helmet DIY Build video on YouTube. https://youtu.be/erxzsImux2Q If you can make it through the music he plays throughout the video, right at the 4:35 mark, a gold helmet appears out of nowhere. For the next 2+ minutes he discusses and shows the benefits of using a gold metallic undercoat. At the coach factory, we used to do this under a pearl coat and I was always blown away by the results. Even in a rattle can, the gold flake just seems to flow into any scratches and lines, and seems to work just as well as any filler primer I've tried. Additionally, you can really lay the gold paint thick, and wet-sand it down to 2000 and beyond for a smooth-as-glass finish. I've found that when I do this, the white seems to flow onto the surface, and just looks brilliant. Here's some closeups of my runs: And then the finished gold helmet: I love it. It's almost like a Rogue One version of Captain Pyre. After the gold, like I said, the white just seems to flow. I know that's the second time I've said that, but it's the only word I can think of to describe it. I've got a bad habit of not leaving good enough alone. After a full day of taking pictures such as the one above, posting them to social media, and admiring what no longer resembled a 3D print, I decided that if the first coat looked as good as it did, surely another wouldn't hurt... I was wrong. This isn't the disaster I've been alluding to, but as you can see in the pic, gone is the glistening white, and gone is the "flow" I've been so proud of. The helmet still looks good enough, but if you look closely, the paint has a texture to it, and would require additional wet sanding and polishing to get it back to where it was. I think the issue was that the paint was not fully cured and introducing another layer of wet paint caused a reaction. This also happened during the hot/ humid spell we had in Virginia last month. Since I was letting the paint cure in my garage, I think the humidity became a factor. Since then, I've let pieces dry in the garage for a day, and then after any noxious fumes are gone, I move into my basement to finish curing in a cooler, dryer climate. This seems to have made all the difference, also, I decided that I would add a layer of clear coat to bring back the luster. My next step was to mask up and spray on the Rustoleum Gloss Protective Enamel Smoke Gray for the teeth, traps, and tears. Additionally, I picked up some 16th inch pin-striping tape and began preparing for a very simple layer of Plasti Dip on the brow, vocoder, and neck trim. I didn't even take a picture of the Plasti Dip; I peeled it off just as fast as I sprayed it on. Rather, I went with the Rustoleum Satin Black which actually turned out pretty nice. After I added the Hovi-mic Tips, lens, and outlined the gray with an Extra Fine Point Sharpie Oil Based Paint Pen I was ready for my first Zoom conference. In this pic, I still have blue painter's tape in the tubes. Can anyone tell me if it's OK to touch up the inside of the tube cut-outs with some Testors Model Master French Blue paint? I bought a bottle for my ab armor, but was thinking about brushing a little on the inside of the cut-outs to accentuate the tubes. Here's this pic again. It's where I should have stopped. But again, I can't leave good enough alone. Remember I said something about adding clear coat. And, remember my Bold, Italicized, 16 Point, Red lettering up above? They don't mix... I didn't take a picture, but it looked something like this: So, It's Sunday, 9 August 2020, and I'm back at this: I got the flow back. I also know how to wet-sand, when to clear-coat, and the best way to do the gray and black. But, that stupid Sharpie. Can someone tell me how to draw those outlines straight? I'm done for tonight, but here's what I'm working on now: Good Night!2 points
-
After waiting for what felt like eternity with everything going on, I finally received my BBB, and with the help of my local garrison mates, I’ll be inducted into the legion in no time! (Hopefully)1 point
-
Thank you all so much for the congratulations and kind words! I appreciate it very much and hope to make the Legion and Detachment proud! To make sure I have it all down, I condensed your notes to a work list, @TKSpartan... let me know if I got it all correct! This same suit has made it through Centurion twice now, and I appreciate your attention to detail - there's always SOMETHING to fix or upgrade haha 1. Helmet ear alignment - Mandatory for L3 or a suggestion? 2. Clean up vocoder paint - Not surprised, common for Anovos helmets. It's not too bad, but I can clean it up a little more for you, no problem. 3. Arm gap issues - Oh yea, I knew this was coming and will adjust and minimize that spacing in my L3 photos. 4. Thermal detonator screw clip location - Mandatory for L3 or suggestion? I'd prefer not to if I can help it... 5. Left leg adjustment - Easy, will adjust for L3 6. Posterior plate adjustment - Trickier (#bigbootytroopers), but will adjust for L3 7. Shoulder bridge to bell gap - Will adjust and minimize for L3 8. Ab to kidney gap - Will adjust and minimize for L3 (I didn't think these last two looked tootoo bad, but I'll do my best for L3!) 9. Fix cocking handle on blaster - It just snapped off and was lost, will fix for L3 Let me know on #1 and #4 if they're considered mandatory, and I will definitely fix the remainder in my L3 photos... it was admittedly pretty hot and I hadn't installed fans in my new bucket yet, so I was a bit rushed. We'll make sure the Centurion photos are as proper as possible! My girl should be an honorary Centurion too, after all I've made her learn so she can help adjust me and take my photos hahaha Thank you again!1 point
-
Congrats! Well done! Sent from my iPhone using Tapatalk1 point
-
So my logic was to use the two medium boxes with the raised top ridge and work off those. I measured the center of the belt and made a mark, then placed the right box where it goes from the reference image, then measured that distance and duplicated it on the left side, which wasn't quite centered. Then I measured the width of the two smallest center boxes and subtracted that from the distance between the two medium boxes, then divided what was left by 3 to get my spacing. For the last two biggest boxes, I just replicated that spacing from the edge of the medium boxes out. Hopefully that all makes sense! MATH haha If I get a chance, I'll try to measure where mine landed, but it might vary slightly suit to suit.1 point
-
I actually used mustard XD1 point
-
Looks pretty good to me1 point
-
These are fab, thanks Glen!1 point
-
Tedious work but will be worth it in the end. Another way to do it is apply toothpaste to areas you want to remove before painting, works well1 point
-
Some great references here;1 point
-
Nice! I need to get on that RS mailing list! ;-) Have fun with it, Dan! Sent from my iPhone using Tapatalk1 point
-
Haha. Yes, about time! Can’t wait to get started on it. [emoji2956]1 point
-
For free? You lucky duck! and about time you got to build something like this (armor next then)1 point
-
Wow, 3rd EIB... Awesome Justin... Congratulations1 point
-
I figured that I would need to, but was concentrating on the join between the chest and back plates in these photos. Once I get this done the next job was to tighten the shoulder straps to bring the top of the chest plate in and down a little. Strapping a R1 kit is more complicated than my previous ANH kits. Sent from my iPhone using Tapatalk1 point
-
Congrats man! Only one more step! Sent from my iPhone using Tapatalk1 point
-
1 point
-
Congratulations! Sent from my iPhone using Tapatalk1 point
-
Congratulations trooper1 point
-
That's great news! Looking forward to seeing your progress my friend!1 point
-
All images recovered and complete.1 point
-
I have recently been testing and experimentting with making ABS paste on some scrape pieces of plastic. So far the results have been good and i'll be able to fill those gaps and deep scratch that have occured during the build process. As for the torso, I'm going to give that a break for now and focus on something else. It's best not to do too much of the sma ething and work on some other parts. When the shins and thights are roughtly cut, I'll tape everything up and do another test fit just to see if any more hot water bath adjusting is needed. Until then, I'm moving onto the silicon hand guards. I've looked into all the reference pictures provided by Justjoseph63 on the silicon hand guard positions and done several measurment checks. https://www.whitearmor.net/forum/topic/49105-attaching-flexible-hand-guards/?tab=comments#comment-686234 I found that the position would be 2.5cm (25mm) between the hand guard tip and the finger valley. But then I discovered, after several fist clenches, the hand guard moved too far forward. So this is whats happening:- I place my hand into the gloves with the guard positioned ontop, I would then clench my fist and the hand guard would be in perfect position. Then I would do this 4 more times but because of the size of the glove, it would move forward. So after that when I make a new fist the hand guards would overlap my knuckles by alot. Because the gloves are a large size and I am a medium, I found that the glove would move forward because of it. I have tried wearing cotton gloves underneath, but it still moves. I even purchased medium size black gloves but they look too small for the hand guards. Here is where my finger tips are in the glove. This is when I put the gloves on making the first fist clench. And this is after 5 fist clenches. I really don't want to go a buy another set of silicon hand guards. But would like to know:- Is there is a way round with what I have already or am I just worrying too much about nothing? Does the positioning look correct 2.5cm? When making a fist (in general), should the hand guard overlap be glued down, or does the guard need to be flush and straight? Going to use loctite glue (not E6000), do I glue right to the guard edges or leave a 1mm gap? Would appreciate all the help and feedback. Thanks1 point
-
Thanks for the advice! I’m definitely getting some other boots1 point
-
12 spots remaining . Last approved EIB #988 Anthony "TKStrider" TK166031 point
-
They would, as that tan strip above the sole looks way out of place. Something else to think about is the overall height of the upper, Lucas. If it's not tall enough, it can (and will) slip out from underneath the calf armor while walking. The taller the upper the better!1 point
-
Thanks Glen!! I’ll go for more accurate ones then, I was just checking because these ones were really cheap, but I prefer to spend a little more and get some good boots!1 point
-
You may need to bring your chest down a little, the shoulder straps are sticking up a bit. Nice work1 point
-
Depends on what your blaster is made from too, I see some very heavy blasters on belts that could really do with the plastic insert1 point
-
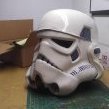
Ironically, It arrived today and, since I was in builder withdrawal, I only took photos of the helmet as soon as I had finished spraying after working for 2 hours straight XD Here it is as it stands drying in my garage shop And here it is next to the real deal again It's not perfect but considering this is my first go at a helmet using a poorly made recast kit, I'm happy with it More to come in the next few days or at least after the off gloss white enamel paint dries...1 point
-
This is a new photo showing the small square os ABS.1 point
-
Man we are close. We are like 99% of the way there...almost.1 point
-
13 spots remaining . Last approved EIB #987 Paxton "Paxjor91" TK367701 point
-
The empire is very busy in my area. Even if there are some well known rebels in action, it doesn´t last long for our troops to react. Lord Vader shows up1 point
-
I think you will find that thread had been archived once the First Order Battle Group section was created and superseded by1 point
-
Sorry, I got carried away and was too excited to post the pictures on here yet. I’m just using Tapatalk for my picture needs. Here are some pictures1 point
-
If it were me, I would reconsider using a 3D printed rail, JR. The reason being is that it will be pretty thin, and since you will have not only the scope, but the Hengstler counter as well mounted to it, if it gets bumped hard the rail could break. Ouch. I would seriously think about using steel or aluminum. You can pick up a 3/4 wide strip from Lowe's for a few bucks (in the hardware area), cut it to length and cut/bend then end. There is an EXCELLENT tutorial here that will help: https://www.whitearmor.net/forum/topic/32111-fisd-e-11-blaster-reference/?do=findComment&comment=414706 Although you can order the one piece metal ones (bracket attached to the rail as seen on your 3D printed one) online, I just bought an L shaped bracket (Lowe's), screwed it to the counter and then to the rail.1 point
-
Reposting the Power Cylinders Template by @PlayfulWolfCub as they seem to have gone missing. This isn't the original file and so it's all a bit JPEGd now, and you can't trust the "Print at 300dpi" bit. E11 Cylinders M38 M19 variants by Christopher Pearson, on Flickr Click through for the largest size I have.1 point