Leaderboard


Popular Content
Showing content with the highest reputation on 07/24/2020 in all areas
-
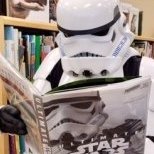
Finally, big update! The helmet kit has arrived from Dave's Darkside Depot! I'll be starting work on it over the weekend. I'll have to ever so gently reshape the left eye so that they match symmetrically.2 points
-
Th3DarKn1ght, keep up the good work. Anytime its seems overwhelming, just pick one part to work on till its done then move on to the next thing. I had a devil of a time working on my kit and about 1/2 way through, I rushed the end so I could get approved and included in a racing shirt run. Whatever work you can do, is fine as long as you keep working. I have seen a lot of people start kits then put them aside for whatever reason and never pick them back up. I have added you to the roster.2 points
-
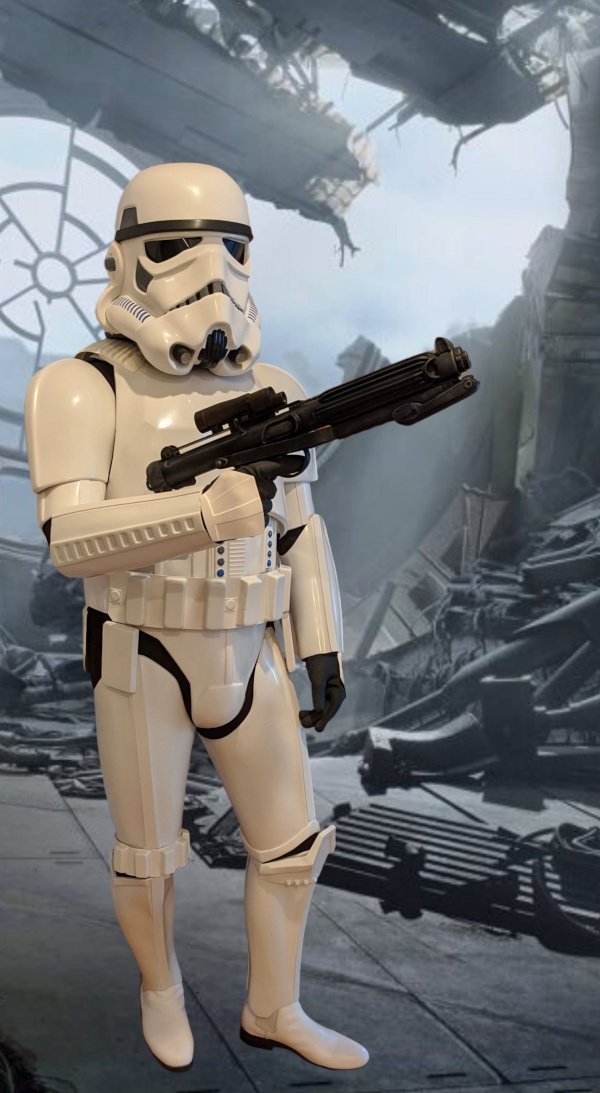
CENTURION PHOTO CHECKLIST (for all non-FO TK costumes) Mandatory Information: PHOTO GUIDELINES ___ Armor Maker Photo size- At least 800 X 600 (preferably 1280 X 960) ___ Helmet Maker Good lighting ___ Blaster Maker A neutral (solid) background color is suggested ___ Link to your EI Approval thread ___ Permission photos social media: Yes IMPORTANT!- Example photos can be seen below, but all photos MUST be 800 x 600 or larger to show details. You MUST include a link to your EI Approval Thread with your submission PDF Available for download/printing here:CENTURION PHOTO CHECKLIST-converted.pdf Optional information: ___ Full name ___ Height/weight ___ Boot maker ___ Canvas belt supplier ___ Hand guard supplier ___ Holster maker Please be aware that all photos listed below are required for approval Full Body 1. ___ Front (Arms flat by side, no weapon) 2. ___ Back (Arms flat by side) 3. ___ Left side (Arms raised) 4. ___ Right side (Arms raised) 5. ___ Left side detail (arms raised) 6. ___ Right side detail (arms raised) Armor Details 7. ___ Cod and posterior plate connections showing rivet/snaps (exterior) 8. ___ Shoulder bridges- Front/rear/sides 9. ___ Thigh ammo pack connections (interior and exterior, left and right sides) 10. ___ Sniper knee plate (left and right sides) 11. ___ Wrist openings 12. ___ Abdomen button plates (close-up) 13. ___ Posterior plate/kidney connection (back and/or front) Helmet Details 14. ___ Front 15. ___ Left side 16. ___ Right side 17. ___ Rear 18. ___ Close-up of Hovi tips 19. ___ S-trim (side view) 20. ___ Ear screws (close up, left, right and bottom). Accessories 21. ___ TD (Thermal Detonator) front and rear showing screw type 22. ___ Hand guards bent showing flexibility 23. ___ Holster attachment 24. ___ ABS/canvas belt (rear, showing drop boxes) 25. ___ Boots (tops and sides) BLASTER 26. ___ Left side 27. ___ Right side 28. ___ Rear (showing D-ring) Important! IF A PARTICULAR DETAIL IS NOT CLEARLY VISIBLE, THE APPLICANT MAY BE ASKED TO PROVIDE ADDITIONAL PHOTOS. Model: Philip Aitken (Ruffalo) TK 41808 Armor type: ANH Stunt FULL BODY 1. 2. 3. 4. 5. 6. ARMOR DETAILS 7. 8. (Front) 8. (Rear) 8. (Side) 9. (Left) 9. (Right) 10. (Left) 10. (Right) 11. 12. 13. HELMET DETAILS 14. 15. 16. 17. 18. 19. 20. ACCESSORIES 21. (Front/top) 21. (Rear) 22. 23. 24. 25. BLASTER 26. 27. 28. A big shout-out (and many thanks) to Andrew (Sly11) for doing the PDF for this!1 point
-
Greetings fellow troopers! I'm Andy from Westchester IL (just outside of Chicago) and now also a proud new TK member of the 501st - something I've wanted to become for many many years - as well as a member of the Midwest Garrison. I'm definitely looking forward to trooping and joining my fellow Legion and FISD members in the future. Cheers all!

 1 point
 -
Sorry, I got carried away and was too excited to post the pictures on here yet. I’m just using Tapatalk for my picture needs. Here are some pictures1 point
-
Nice work, looks like your cod is a little low, the ab appears to be coming out under your chest plate, I would try lifting the ab/cod higher, would give you more room at the top of the thighs Shoulder bells at the bottom are sitting outwards a little, you could try tightening the strapping to see if they will pull in a little more. You could probably cut the paint down a little on your ab buttons too, look a little large No major issues I think you will be fine1 point
-
Just don't rush the painting, sometimes it's better to leave a project to dry properly rather than rushing and having issue with paint reacting when not dry enough, I've ran into this a few times1 point
-
Interesting he made them that way but I guess because the fronts are glued they shouldn't appear open, they will however look like a cover strip is glued on, with the inside you could match the look of a cover strip glued on by perhaps running a fine pencil down the ridge so it appears like a shadow, (or even some acrylic wash and wipe away excess).1 point
-
This is definitely one of those things where it’s so what you can when you can, like you said. Trying to get as much done on the helmet before I go off back to school in like 2 weeks, bc I probably won’t get another chance until Thanksgiving. And this week has been taken up by my summer class, so yeah. I’ve started too many things and stopped them shortly after, but I will not do it with this, no matter how long it takes! Thanks for the encouragement1 point
-
Alright, large post time as I have spent the majority of the past few days just gluing and making final adjustments. First up, I installed the strapping system to the biceps and forearms. I decided to use Velcro in places that house the support systems to make it easier for both removal and adjustments. Industrial strength Velcro seems to hold up very well, so I'm not concerned thus far about any unintended falling off. Ammo box installed for the right thigh. Got the belt in yesterday and proceeded to make it today. I still need to glue the ammo boxes in place so they line up with the edges of the belt. Thigh support system made as well. Again, Velcro on the end, but then I sewed the belt portion on. Still easily removable if needed though. All that was left to do was to try it all on! Few things I can safely say so far with this build, and things I have to modify. 1. This thing is SUPER HOT to wear. Installing an AC system will be a must! 2. I'll need to create some sort of helmet mod to keep is strapped in, it rolls around just a bit too much. The button strap I installed so far isn't cutting it. 3. I'm going to have to install some support strips to the lower legs. I almost broke the thing off just trying to get the legs over my calves, so I'm not sure what to do besides support strips to keep that from happening. 4. The cod piece rubs up against the thigh pieces too much. I'll either have to trim the sides of the cod or the thighs (or both) a bit to account for this. Any thoughts here? 5. Is it supposed to be somewhat uncomfortable wearing this? Like I'm not in pain or anything, but I do notice it makes quite a bit of noise. Is this normal? Does anyone have any suggestions for me at this point? Besides what I mentioned above, I feel like I'm 95% done, and just need a few mods here and there to finish it off. Thanks everyone so far for all the help!1 point
-
If no one starts it by the time I get my armor, I’ll look into it. Sent from my iPhone using Tapatalk1 point
-
Thanks man! Oh sweet, I also grabbed the file on his initial offering, and I also have his Shoretrooper files! lol I just barely started printing those! I currently have Anovos ANH TK armor and would love to get a set of RO armor but it’s gonna have to wait until I can afford it unfortunately1 point
-
DarthBiscuit, your build is coming along nicely. Keep at it.1 point
-
Cool a new kit for the anthology TK. I have a HSP Generafett bucket, and i have seen Imperial Valour's build with his bucket. I look forward to you build. I added you to the roster. BTW, there is a thread on who sales waht for the ROTK but just so you know, Dark Side Closet on FaceBook makes the undersuit top and knee gaskets. Message them and they will give you price. I have the Jimmiroquai undersuit but I really like what DSC is doing and all his stuff it here in the USA and hand made.1 point
-
Here are the shots for those. It is amazing what a blown up high resolution image will show. I can see that I need to do a bit of work on the teeth for sure.1 point
-
Totally understand about the front outer cover strip. What you could first try is keeping the standard front outer strip, but use a wider INNER (touching your actual leg) cover strip. That way you could main some mm space by not having the two though piece edges actually touch each other. The purpose of having an inner cover strip in this situation would be to provide a proper surface for adhesion. Here’s a really rough illustration. Sent from my iPhone using Tapatalk1 point
-
Looking good!1 point
-
You need to upload them to a picture hoster (for example imgur, you use the direct link for pasting here) to embed the pictures1 point
-
A paint marker is a good choice too, or trust your pulse with a very fine brush.1 point
-
Hola Leonardo, Excelente Armadura !! Solo un par de detalles antes de que alguno de nosotros sea asignado a tu aplicación: 1- Si puedes agregar una foto de la conexión de la armadura del pecho con la de a espalda: 2- Foto cercana del Sniper Knee ambos lados 3- Corregir el cierre de las pantorrillas como indicó Glen arriba. Buena suerte . Trooper Hi Leonardo, Great Armor !! Mean while one of us in the D.O team is assigned to your application, Just a couple of details: 1- Could you please add a close photo of the Chest/Back connection 2- Close photo of the Sniper Knee both sides 3- Make the fix to the shins closing as Glen pointed before. Good Luck Trooper!1 point
-
We are quite a few away from 1000 for centurion BUT getting close to 500 and there may be something special in the works for those who have earned that level shhh1 point
-
Test fitting today!!! Test fittings are awesome, but also a challenge to get through. I love seeing everything together for the first time. But I am not a fan of all the fine tuning that is so necessary at this stage. I still need to add black paint to the ab boxes. Adjustments need to be sewn into the belt for the thighs and rotations adjusted. Suspenders also need adjustment. The big one is that while I thought I had the biceps rigged in well, they just weren't hanging correctly with the strap I had installed in them. I have velcro sewn into the ends of the vest sleeves, so I used that to temporarily secure the biceps on the arms. The biceps kept slipping down as Cameron moved around, and as a result the forearm ends were cutting into his wrists. I'll have to make this connection more robust for the next fitting so the biceps stay put. Oh, and I put the leg gaskets on in the wrong orientation, so I couldn't put on the knee caps (and we weren't up for taking off parts again). D'oh! Now for the pics! Short test fit video. Again, biceps were slipping and will be fixed. Cameron is always so animated until I get the camera on him, then he's Mr. Serious! His boots arrived right after we took pics- how's that for timing? And I'm still adding paint to finish the helmet, but that should be done soon. Very close to being finished!!! Time for me to take a well-deserved break before finishing the detail work. I always get a little sad at the end of a build, so I want to prolong things just a little to enjoy it without feeling exhausted. EDIT: and spats are currently in assembly mode!1 point
-
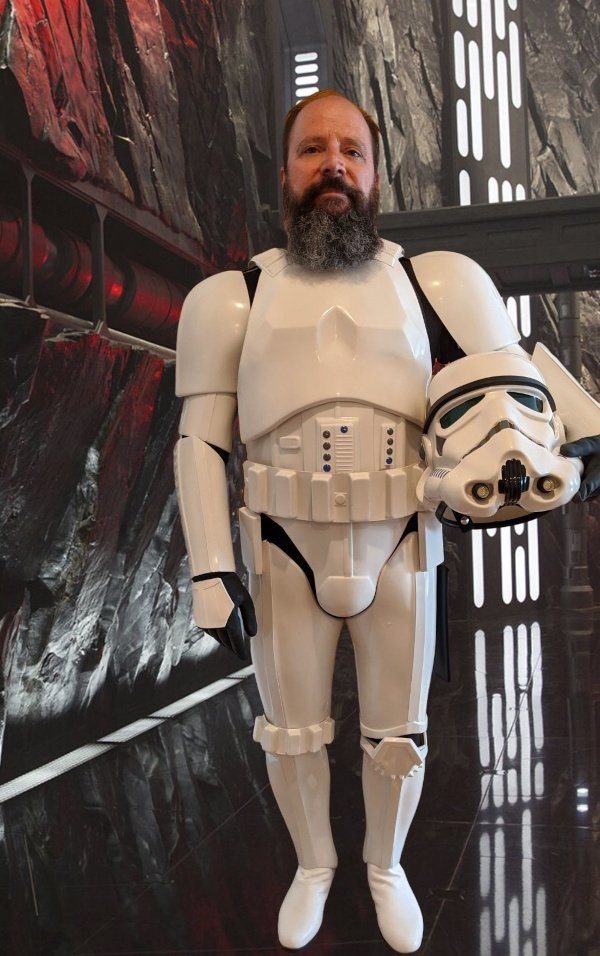
I wanted to send a special shout out to [mention=22112]justjoseph63[/mention] for going above and beyond. He PM'd me after my first post. Frankly I was feeling a bit intimidated and unsure I could build acceptable armor. His outreach and interaction made a huge difference. The difference between me just getting basic approval, and possibly trooping once in awhile and wanting to strive to build armor to the best of my ability! Higher level armor like EI and now I'll be shooting for Centurion. All this when I haven't even done a single troop (darn Covid). But I am sure that I will love trooping as much as I love working on the armor. So thanks Joseph (and others like him) and keep up the good work. You are truly a great ambassador for the 501st (and Vader[emoji6]). Awesome job mentoring and motivating newbies like myself to not only want to build better armor, but also want to be a part of the 501st.1 point
-
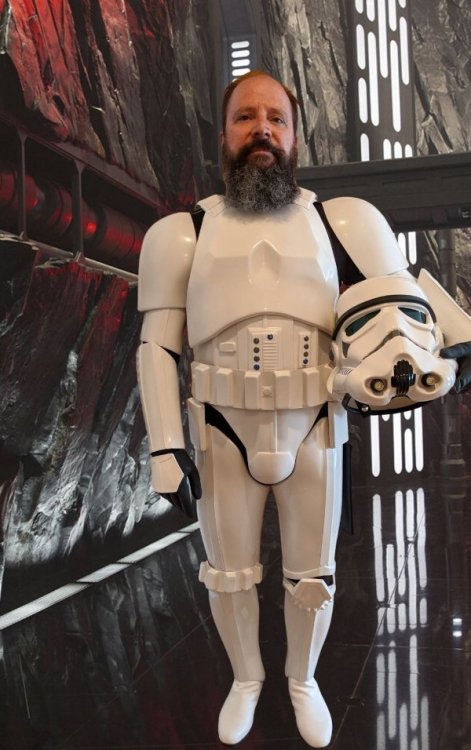
Thank you to everyone: Joseph, Tony, Q, Andrew and everyone for the input, guidance and support. TK-88667 reporting for duty1 point
-
Thanks, no I have had the kit for about a year. I keep checking Doopys because I want to get another but nothing yet. I have slowly been working on the kit and finally getting around to posting pictures. The stock is from War Machine Replicas, it is a great one off and fully functional.1 point
-
I have made the suggested adjustments to my brow trim. Let me know what you guys think? Thanks. Sent from my SM-G920F using Tapatalk1 point
-
Congratulations, Looks Great !!1 point
-
1 point
-
Some goodies came in the mail! Gloves by Endorfinders: ImperialBoots coming through with a big score: R1TK zipper boots (non-Chukka boot) with flat one-piece sole, and a thin balacava for trooping down here in sunny South Florida : Next thing coming in the mail is the E-11 R1 blaster kit printed by friend of mine, and the undershirt with gaskets from "The Darkside Closet". So many things happening!1 point
-
Jeff turned me on to some good making tape. I have decent frown paint now. Thanks Jeff1 point