Leaderboard


Popular Content
Showing content with the highest reputation on 03/22/2020 in all areas
-
Oh I did also get lights going in the dome.3 points
-
Hello everybody, I'm fan of star wars since 1977. I live the north of the france. I've somes lightsabers and blaster. take care of you and your family.2 points
-
Ok, so I boiled the knee plate and bent it as best as I could. It looks like it got a bit wonky in the front, but the knee plate seems to be aligned on both sides now?2 points
-
And after a very long Day 6 of quarantine.. I finally got the thighs finished. Can’t say I enjoyed working on these pieces, but I’m happy how they turned out. Just finished giving them a bath. Ready to shape my joint strips and glue them on. I’ll be doing a butt joint on the outer seam and will be using a joint strip on the inner seam to allow for the use of Velcro. I don’t need the Velcro, but it’ll create a better overlapped look. Also got my belt put together. It’s a Belts of the First Order and I’m very happy with the finished product. It looks much better on but I didn’t take any pictures with it yet. I’ll post some once I do my next test fit for the thighs. I basically followed the belt instructions and kept trying it on as I went along. My soldering iron came in handy poking all the holes as I was able to do so with the belt on. Done for now. I’ll be gluing the thighs next and will have another test fit either this evening or tomorrow afternoon. Until then! Sent from my iPhone using The Force2 points
-
Hi Jon, Thanks for your application and for the quick fix with your frown paint. You have a really nice build and it's clear you really did your research. CRL and EIB Application Requirements All required photos are now in and, after review, we are pleased to welcome you to Expert Infantry rank. On behalf of Joseph and myself, many congratulations! Other-Armor Fit/Assembly In this area we review observations made by your fellow troopers and the DO team. Some observations may lead to suggestions to improve the overall look of your armor. Note that we consider both text (CRL) and pictures (screen caps/reference images) when reviewing submissions Starting from the top, a small suggestion with your vocoder paint. Compared to screen used helmets, the shape of your vocoder is a little soft, so we're suggesting you spend a few minutes cleaning it up. Reference Images: Next, onto your forearms. While it is ideal to see a minimal amount of black showing through the armor, your forearms are overlapping your biceps and handguards a bit. It would improve the look as well as likely help your arm mobility to try to adjust the positioning. At a glance, it appears you may have some room to bring up your biceps, which should allow you to bring your forearms up a bit as well. For troopers who are very small (I'm 5' 3"/1.6m) it is completely approveable up through Centurion to actually trim off a notch on the forearms so that would be an option for you as well, but I highly doubt you'd need to. Reference Image: Next, in one of your photos, your kidney is overlapping your chest piece. A simple dressing issue, but worth pointing out. When you're out trooping, just be sure to have a handler give you a quick look to ensure nothing is out of place. Reference Image: Moving along, a lot of troopers prefer a weathered canvas belt which is totally fine, but in the 501st we tend to err a bit more on the side of an ideal look, so we're suggesting you give your canvas belt a bit of a haircut just so there aren't so many long hanging stray threads. Reference Image: As was already mentioned, if you're going for ultimate screen accuracy, the ends of your TD clips should be squared off, not rounded. A minor detail for sure but worth mentioning. If you do decide to make this change, note that the clips would need to be repositioned so the ends are still flush against the plastic panel. Reference Image Next, as was already pointed out, your drop boxes tend to get caught on your thigh pieces. I have the same issue with my right dropbox, and some of us are just unlucky enough that our dropboxes hit in exactly the wrong place. I've been considering using some sort of magnet system to keep them in the right place on my thighs, but haven't done anything about it yet. I'd consider this more of a dressing issue, but you can try adjusting strapping a bit to see if you can get them to fall in a slightly different place, or see if you can adjust your thighs to make it less likely to happen. When you're taking your Centurion photos, just make sure they're sitting in the proper place. Reference Image: Finally, a tiny nit. I see you've already backed the gap in the rear thigh ridge with ABS which is great, but you could also go the extra mile and fill it with ABS paste for a super clean look. Centurion Requirements In this section we prepare you for Centurion. More photos may be requested in the future that allow us to make better decisions on possible adjustments. If there are any areas of concern they will be discussed here. Because Centurion photos show much more detail than EIB, items to pertaining to Centurion might be seen there and not here. We try to point out all that we can from what is seen, but the final accuracy is the responsibility of the trooper. The L3 CRL states: There should be a minimal gap between the shoulder armor and the chest/back plates. From the front, your shoulder gap is textbook perfect, but the gap in the back is a little bigger than we'd like. We realize all troopers' bodies are different, but we'd like you to try to minimize the gap in the rear. We'd suggest ensuring the top strapping is short, trimming off all the lower return edge on the shoulder bells, and even being aware of how you're holding your body. Reference Image: . Finally, the L3 CRL states: The top of the ABS ammo belt should sit at or just above the bottom of the central and vertical abdomen button panels. Your belt is sitting just a touch too low. As you can see from the reference photos, you can even overlap the bottom button slightly. Reference Images: And that's it! I have no doubt in your ability to make these couple small adjustments, so I'm looking forward to seeing your Centurion application soon. Congratulations again!2 points
-
Looking good so far Jon, excited to see your build progress.2 points
-
Hi William! I'll be doing your review. You've done a really nice job with your build. Troopers who are on either end of the height spectrum have more work to do, and you've done a nice job fitting the armor to you. I will need you to make one correction before we can proceed with your application. The L2 CRL states: Sniper knee plate must be aligned with the ridges on the shin. You've done a nice job with the left ridge, but your right ridge is a ways off: Reference Image: It will take some careful clamping and gluing and it definitely doesn't have to be perfect, but in looking at previous AP approvals, you'll see that you should be able to get the alignment much closer. Reach out if you need any assistance or clarification. Thanks!2 points
-
Okay, so here are some more gasket photos. I have just done the knee gaskets, with some Velcro sewn onto it. Basically, I put some tape where the bottom of the thigh is and the top of the shin is and put it in the middle. For the arms, I stitched some Velcro onto the top and bottom so that they can stick right on to the armor. I have also begun on strapping the armor. Using snaps, I have attached the shoulder bell to the yoke, and it sits quite nice. I used Glen's method of shortening the front strap so that the bell is always forward as well. Thats pretty much it for now.1 point
-
I had to add some foam in my shins and thighs as I have the same thin frame, things had been wobbling about without it Hopefully your new pieces turn up soon.1 point
-
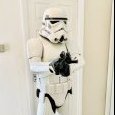
I was able to glue my thighs together this morning. And since I have a gigantic roll of Velcro strips, I decided to give it all a test fit. As I stated earlier, I’m still waiting on a new TD plate, a set of shins, and my chest/back pieces. So for now, this is what I have. Not sure when KB is shipping those out, so I’m focusing on getting all of what I have to a finishing point. My gaskets are next to be modified. They’re a bit big and bulge out of the arm and leg joints. The knee plates and shoulder bells are currently just held on with Velcro for the picture. I’ll be working on the proper knee plate supports once the gaskets are sewn up. I do want to put some foam pads in the shin/calf armor. Not being gifted with large legs, I find these are really the only parts that giggle around when I walk. For the most part, everything else is nice and snug and allows for a good range of motion. So here we are. Very motivating to see a near completed version of myself! Sent from my iPhone using The Force1 point
-
1 point
-
Holy smoke that was fast, Jonas! WOW! Awesome job on those issues, brother. Awesome job indeed!1 point
-
Jon Hannaby 14097 EIB A4 Sha Sha Done! http://www.whitearmor.net/eib/certificates/14097-eib.png 2761 point
-
I've been waiting for this day! All the hard work has really paid off, sir, and you did a fantastic job on this armor. If I could add my 2 credit's worth it would be: 1. It may be the photo, but are your shoulder straps sitting evenly on the top of the chest plate? If not, your GML may mention this. 2. Your left one is perfect, but the right rear calf closure is a bit askew. Should be just a simple dressing issue. 3. At some point you may want to bring the paint at the ends of the frown up and out a bit. Not a biggie, but something to consider. 1. 2. 3. Reference images Best of luck on your submission, and I'm looking forward to seeing that official TK# under your name soon!!1 point
-
Great job, Jon!! Excellent. :-)1 point
-
Congratulations trooper, Welcome to the ranks.1 point
-
Great Trooper !!! Welcome to EIB. !!1 point
-
Congratulations Trooper, Welcome to EIB ranks , just few adjustment and go for Centurion !!! You got this mate!!1 point
-
Bienvenido a EIB Chemi. Vamos por el siguiente paso Centurion!!! Welcome to EIB Chemi. Now, your next Step Centurion.!!1 point
-
Great work, Almost there trooper !!1 point
-
Looking good Chris1 point
-
Yep that would certainty work1 point
-
Congratulation Jon, excellent job on your build. Welcome to EIB1 point
-
1 point
-
Congratulations Jose, welcome to the rank1 point
-
Congratulations Tyrone great job. Welcome to EIB brother1 point
-
Congratulations Chemi fantastic job, welcome to EIB1 point
-
you want the extra size for gell soles :-)1 point
-
hey. i like paint templates. if you have a really steady hand and mix paint perfectly, maybe you won't need them. if you use them be careful about the placement, curves the right way, pencil thickness from the cheek. then put one on slowly and press it down as flat as you can. do the other. then paint white paint in the template and let it dry. paint a second coat of white. let it dry. the white pain fills all the gaps and imperfect spots. the blue will sit perfect now. paint: mix it. a lot. an awful lot. when you feel done, keep mixing. i uses a thin wooden stir stick from coffee shops. go nuts slowly mixing it. like for five minutes. then paint. if the blue goes on less than perfectly blue, this is the first coat. let it dry. repeat. same for any template really and the black edges around traps. brushes: the bigger the brush the bigger the mess. use a decent size round pointed one. L2 and L3 Build it to the red standards. red meets or exceeds blue in most cases since it (L3) is highest echelon. After basic approval at your garrison, make your EIB thread here with all the pics hosted somewhere else and just linked here. Once that award is in hand, repeat for Centurion. easy peasy.1 point
-
I already have Jospeh's stunt hand guards and hardware but a set of hero hand guards may be put to use at some time. Since I've been watching Clone Wars for the first time I'll get as best as I can to Fives - 555. My stalled Build Thread1 point
-
Thank you very much, this is great news. I look forward to submitting my centurion request through once I’ve sorted out the tweaks required. Thanks again. Sent from my iPhone using Tapatalk1 point
-
This is an awesome thread. Thank you for the time you’re putting in and the detail you are including. I’m learning while I continue waiting for Anoshow... One question about the bolts for the belt boxes and shins, etc. how do you get the placement of the bolts right when glueing them? Am I right in assuming that you temporarily hold or affix the boxes in place, with the bolts sticking through their holes? I know this might seem obvious - but it’s somethng I’ve been pondering in the virtual build inside my head.... thanks1 point
-
Congratulations trooper and welcome to the EI ranks1 point
-
Hello and welcome aboard1 point
-
My pre-approval thread is up!1 point
-
OP Post #4 Progress continues slowly, and since my last post has consisted primarily of the acquisition of components for my HWT build. BBB day came a couple weeks ago, and you can see my full post with armor unboxing photos on my ANH Stunt thread. Here is a preview! I also had a medium brown box day with the delivery of my orange pauldron from Trooper1 (Jay), and it is gorgeous! Seems a bit of a shame to have to dirty it up a bit for my heavy. Pics incoming. I also completed inking all the white threading on my MP40 pouches black with a Pilot G2 1.0-size black pen, which I already had at the house. It was very tedious, and for some reason I found it appropriate to have some WWII TV documentaries playing in the background. It was cool to see some MG-34s in action! The photos below don't do my thread paint job justice, as some of the lighting and texture differences with the leather make the threads still appear to be white. I also want on a paint binge and purchased many shades of black and gray to use on my T-21 and DLT-19 builds, when that time comes. Social distancing may make supply runs difficult, and potential shelter-in-place orders could even make it impossible. I've also acquired gloss white (for TK rivet heads), Model Master 1923 Gunship Gray, and some Rust-oluem gray primer and black. I'm not really sure why I got the Testors thinner, since I already have Gamblin Gamsol mineral spirits, but I suppose I could use it on non-ABS areas. At some point I suspect I will create dedicated threads for my T-21 and DLT-19 builds, but for now I'll leave that related content on this thread, since I haven't made much progress yet. I do have a couple questions for those of you with blaster build experience: Does the ACT cap (shown below) appear to be the correct proportion for the PVC bunting I purchased? I opted for the "smaller" sized bottle since I saw that mentioned on another thread, but it wasn't clear what the exact bottle oz size was, or the dimensions of the flash suppressor itself. Is there a way to coat a thick paper/cardboard tube to provide it with moisture protection? The tub itself is already very strong, but I would worry about it losing form if rained on. I'm asking because the outer diameter of the tube more closely matches the the size of the reduced T-21 barrel than standard 2.5" conduit or the vacuum tube extension wand. See the comparison below. Finally, just another T-21 component I acquired--the phone line cable. I still need to find some blue wire, so any suggestions for the proper gauge would be helpful. Thanks, Joseph, for your automotive windshield washer tubing suggestion in your post above. Hopefully I'll have more updates soon, especially if I'm kept home from work during these uncertain times. Stay safe, heavies.1 point
-
Nice! I should get a set from Amazon then. I am also considering painting the inside of the helmet black as well. Similar to how this one is done1 point
-
Received my pauldron from IG! As Devastator Squad Leader I feel like this is a necessary addition! I hope to make more progress on the armor this weekend!
.jpg.8afb2720fa17304defdd5b299b41f072.jpg) 1 point
1 point -
Hi there, thank you for the confirmation on the helmet and the TD, I’ll work on the helmet frown to bring in the edges to the requirement. Sent from my iPhone using Tapatalk1 point
-
At some point in your OT build you will be using rivets. It may just be for attaching the thigh ammo pack for Basic, the cod tab for EI or all those plus the ab/kidney ones for Centurion. It's honestly pretty easy to attach both kinds of these using basic tools you probably have on hand: A flat-head screwdriver (preferably large), a drill with the correct size bits and a hammer. Removing them will require a thin bladed flat head screwdriver, some heavy-duty pliers and perhaps a drill. Safety gloves and goggles are recommended. For this tutorial I will be using scrap ABS. Now, let's get to it! Split (bifurcated) Rivets Assuming you are (hopefully) aiming for Centurion, you will need 9 (with washers) 6 for the left ab/kidney connection 1 for the lower cod tab 2 for the thigh ammo pack (if not using cap rivets) Head diameter should be 5/16" (8mm). Shank should be 3/8" (9.25mm) long BEFORE YOU START: Make sure you have a very hard surface to hammer on, and I suggest laying down a piece of heavy cloth on top of it so you don't scratch your armor. 1. Carefully mark your hole placement(s). Using a 9/64" bit (about 4mm) drill out the hole 2. Insert rivet, dome side out. Hole will be snug 3. Turn over piece, insert washer onto rivet shank 4. Using the thin end of the screwdriver, insert it into the split and gently hammer it down 5. Continue moving the screwdriver farther up toward the thick part, hammering at each increment to open up the "legs" 6. Use the shaft of the screwdriver to get the widest opening possible. At this point you should be able to 7. use the hammer to flatten it out completely 1 2 3 4 = 5 6 7 = DONE! Single Cap Rivets Single cap (one domed end) rivets were used in the original films to attach the thigh ammo pack to the bottom of the right thigh. Although not a requirement at any level, many like to use them for screen accuracy You will need 2 sets (top and bottom), one for each side Head diameter should be 5/16" (8mm) Again, you will need a hard surface (like the edge of a workbench) to hammer on Reference photo for placement IMPORTANT! Make sure the back edges of the ammo pack tabs are equal distance from the corners of the rear of the ridges on each side! 1. Carefully mark your hole placements. Drill holes. 2. Insert bottom (facing inside). 3. Shank should be facing outward. 4. Place cap on shank. 5. Gently give a few good taps with a hammer until it is set. Cap will flatten out. 1 2 3 4 5 DONE! REMOVING RIVETS Spit type: 1. Using a thin bladed screwdriver, CAREFULLY pry up each side the "legs". POINT SCREWDRIVER AWAY FROM YOU WHEN DOING THIS!!! 2. Using a set of heavy duty pliers, pinch the legs together until they meet 3. Washer will now slide off and rivet can be easily removed 1 2 3 Cap Rivets These are a bit trickier than removing the split type, so take your time to avoid damaging your armor. Safety gloves and goggles are suggested. 1. Using a pair of pliers, grip the cap part (this avoids it spinning). 2. Using a drill bit at least as wide as the shaft of the rivet, CAREFULLY drill through the bottom (base) from the back 3. Once the drill has penetrated the entire rivet, it can be easily removed. 1 2 3 If you have any questions, comments or suggestions, post up here.1 point
-
ANKLE SPATS So, I've been wrapping my head around how to do this, as I have seen a few methods using snaps on the greeblies, or velcro. I've finally decided I will do it a little differently, and clasp the ankle using the seam instead. Let me explain. The seam has a higher surface area compared to the greeblie, and that allows me to use magnets to ensure that when closed, the ankle is "straight" and not at an angle. MY first step is to shave off the top and bottom of the inner seam so that the outer one will sit nicely flush over it. This is how it looks after. Next, I cut away the notch where the greeblie will be sitting, so that the greeblie can also sit flush between the 2 pieces. Glueing the 3 pieces together (Ankle, Flap and Greeblie), this is how it looks. The excess top and bottom will be shaved off later. This creates a higher surface area bond compared to just a snap on the greeblie. On the other end, this is how the seam will look like after I install 2 magnets (1 on top, 1 on the bottom) to make sure the alignment is always flush when worn. And this is the completed ankle spat with the flap glued, edges trimmed.1 point
-
BELT POUCHES So I decided to make my pouches functional, while keeping them in shape. I made 2 boxes out of acrylic, reinforced the insides with triangular angle supports. Here's the long one: And here's how it fits inside. With the flap closed. And with the armour piece test fitted on it. The other smaller box. Inside the pouch. And with the flap closed. Both pouches done. Now I can give out stickers while trooping (If my gloves can reach in to grab them....)1 point
-
Unless he made new molds you can' t make hero helmet with ATA kit without major rework which would involve sanding, resculpt, putty and full repaint, unless you have correct hero ears, hero smooth back/cap, correct 6 hole frown and grey bubble lenses, his helmet as lineage from stunt helmet but I assume you knew that, if you wanted a hero you should have gone the TM route. Mark (AP)1 point
-
Here's a list of things to work on to improve the armor. This was, after all, a speed build on a first time build, so there were a few hiccups. 1. Replace the belt it has broken on me several times, and I am actually not too happy with using the solid plastic that way. I recall @Navajo Bro's documented build they also swapped the belt out with a rubber matt they had cut and glued into a long strip. Also just considering buying something since I'm like totally out of energy now. 2. redo some of the strapping So it turns out I had accidentally used some of the straps included in the kit incorrectly. First is the thighs: there were two very long pieces of webbing that I got mixed up with some of the webbing I had, and ended up cutting them for other things. So they're actually meant to attach to the thighs and go on like suspenders. Instead, I had used the elastic straps meant to hold the biceps up as holds for the thighs. This is not working since the elastic is obviously already stretching. I'm not worried about the biceps, because they hold up pretty well, but I might switch it too 3. clean up forearms So I worked on the forearms when I had the flu, so they're pretty jank. Fine for costuming, but the perfectionist in me is twitchy. First is I need to remove the return edges on the wrist, they're where my main armor bite is. Also possibly trim down the whole thing , again armor bites at the elbow. Next is to possibly bondo or caulk the seams where the greeblie is attached to the forearm. I was a little overzealous when sanding it, so there's some slight gaps. Lastly, to clean up joint. I had the idea of using ABS past to join the pieces, not realizing that the abs paste had bubbles in it, and had slightly discolored. I kinda want to learn about bondo, but then I'd have to paint it. 4. Redo seams on the legs My thighs and shins were a lot smaller than the kit, so I ended up trimming a lot from it. The result was that they were a little less curved, and can tell the plastic is pulling hard on the E6000 glue. I might ABS paste this, since as messed up as my forearms look, they're super secure. The bottom of the shin might need some trimming, since I'm pretty short and it knocks into my boots 5. getting a different size shoe so Imperial Surplus had a boot that was sold with the kit, and I was advised to go down about half a size. Well I'm actually in between a 7.5 and a 8, so wearing a size 7 actually is not the most comfortable. Since I've worn it obviously can't return/exchange, so the question is whether to contact them to get the larger size, or to get a different one completely ALSO.. I ORDERED A BLACK FEM7 KIT. SO STAY TUNED FOR ANOTHER BUILD IN THE FUTURE... hopefully better documented and more carefully done ALSO. I DID ORDER THE LEGACY TK KIT. Guess I might actually try to join the 501st... but I'm really scared of all teh snap plates! I got away with velcro'ing everything in this one~!!1 point


-Copy.thumb.jpeg.8715a83cb32a3e6745f879885b26e712.jpeg)