Leaderboard


Popular Content
Showing content with the highest reputation on 07/03/2018 in all areas
-
https://www.ebay.com/itm/1232284265832 points
-
Welcome! A couple questions on your build, are you aiming for higher level approvals? what parts are going to need to be larger? forearms, abs, shins etc? A hot water bath will definitely help with fitting but some things may need to be trimmed larger or even shimmed. Post up some pictures and lots of detail on what is not fitting and we will get you where you want to be. I have a WTF kit myself and very pleased with the kit and also the customer service Walt provides.2 points
-
The back of thighs turned out great so far, some ABS paste and sanding on the lower ridge and you’re golden For the front I have a suggestion, have the coverstrips end just were the ridge comes to a point, screen suit for reference - and...good luck and keep up the great work2 points
-
Looking superb! Easy basic by the looks of it. Just two simple changes I’d suggest for a little more accuracy, neither of which will affect clearance (by the looks of the CRL). The smaller ab button appears to have all of its return edge. This could be cut away to leave a flat plate. The only other thing is totally optional, but you could extend the frown paint beyond the un-drilled 5th hope if you wanted to. Example below. You’ve made a great job of fitting the armour to your frame and you wear it really well. Great job. [emoji1303] Dan2 points
-
@Ensi The V5 kit is so nice. I can tell Jim has made adjustments to a number of areas. I think the helmet too is a little more correct in it's build than it used to be. I do like the added parts to the front of the yoke, that will allow me some good contact points for a magnetic style attachment system. I think he's had a lot of improvements in material as well. I didn't have any cracks or bad spots with my armor at all. This is something I know has been noted in previous build threads. I highly recommend this V5 kit.2 points
-
Thanks for the detailed info. Yeah I will be sizing things out before plastidip on mostly everything. I've got ukswrath fans so I just need to figure out where to place the velcro. Also thanks for the info on the inner thighs. I will have to adjust how those are shaped once I've got the cod piece attached to the ab plate and can actually measture and see how things fit. For the itch I've been sanding the interiors with a 100 grit sanding sponge, but will also sand most all part. I only intent to plastidip the chest and yoke and ab pieces just to help so they aren't scratching really nasty on each other as that's what I've read from many parties. The other option would be to line the sides that would be rubbing with some thin and smooth foam or fabric material.2 points
-
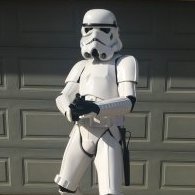
Hey everyone, Pleasure to meet you all. Just a bit of an introduction. I am living in Prince Edward Island, Canada and have been a long time Starwars fan since a young age. I was introduced to the 501st by a current member who lives close to me and could not be more excited to get things together. I have recently purchased my untrimmed TK armour from AP (Helmet Trimmed) which was delivered last week and am very pleased with it so far. I have since started to trim everything and am having alot of fun doing so. Here it is unpacked.1 point
-
My first kit. Trimming pieces down. I'm noticing my body is a bit bigger than what I thought. Is a hot bath the best way to loosen up the plastic or are there other techniques that have been used?1 point
-
That's the way to go mate, good job! So fun isn't it once you're started! The ab buttons lool good... Did you check them where they're supposed to go on the ab to see how they fit? Keep up the good work! Sent from my LG-M470 using Tapatalk1 point
-
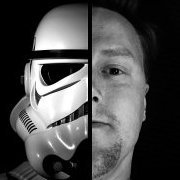
Hahahahahahaha! Finished my helmet and it's the coolest thing ever! My wife took a pic... What you don't see is the big, dumb grin on my face. I still need to install padding and do something more permanent than masking tape for the lease and mesh, but I'm loving it. I also sanded that smaller ab plate: Tony, does this look acceptable? Next I'm going to start assembling the torso. Seems logical to me, for the sake of fit, to build that first and add the limbs from there. I feel like I'm making progress and, in case anyone missed it, I'm having more fun than....well, a really fun thing.1 point
-
Great call on that, Tino! I have found the best way to do the teeth is to invest 4 bucks in a needle file set from Lowe's, https://www.lowes.com/pd/Project-Source-6-Piece-Needle-File-Set/4777067. It comes with an assortment of files that can do the trick. If you have no further use for them after that, you can sell or loan them to someone in your Squad/Garrison that is doing a build. And yes, I meant the hovi-tip mesh, lol. I blame that on it being 4 a.m. and not having my diet Mountain Dew fix yet. BUT.. it seems Anovos has changed their hovi-tip mesh and the one that is shown will be just dandy! You may be able to add a 4 or 5 inch strip of heavy duty Velcro to the center part of your belt. For the TD plate, I would suggest popping the entire thing in the freezer for about an hour. This will stiffen the glue (hopefully you used E-6000) and it should pop off fairly easily. The drop boxes will be a super easy fix by adding a dab of E-6000 on the inside of the loop as you mentioned.1 point
-
Got the rivets installed a couple of days ago, and threw on the torso. It was both encouraging and disappointing at the same time. Encouraging because it all came together, and disappointing because I had to adjust some straps. Threw on the rest of my half finished pieces and stumbled around the house, holding up my thighs. Didn't have a free hand to take pictures. Moved some snaps in the armor a little, which saved me from having to shorten the chest straps an inch and a bit (that would have taken 4 more female snaps). Need to get some more snaps anyways, another pack should do. Put on just the torso today to open up for comments. I'm not strapped down under, that's one strap I seriously misjudged, and need to make longer. Looked really funny being so short. Also need to trim the sides of the posterior a little. Sent from my HTC One M9 using Tapatalk1 point
-
Still need to take some pictures, but making good headway on the trimming. Have a few more pieces left which I will get done tonight (following ukswrath thread for trim order, I am done to the shoulder bells.) Next will be to do some sanding to cleanup edges, then the daunting part (to me anyway) of how to tie everything together.1 point
-
Getting supplies, and should start building my pack by this Sat... With our legion brother Jose (TK.91673) My artistic eye loves detail, plus it gives the prop character.... I was wondering for those of you WHO did go with antenna, what brand or model?.... Thank you in advance... * unquestionable loyalty MAD TK.450011 point
-
Thanks! It's definitely a new kind of hobby, but I'm looking forward to join my armored brothers!1 point
-
Copy, keep up the good work1 point
-
Okay, when installing the speaker inside the scope (as shown in your picture below), it will sit very close to the big lens. The short distance between speaker back and big lens affects the magnification - in a negative way. It needs more distance to work good. You can test this by holding the big lens in your hand, look at an object and then change the distance between lens and object. Anyway, with the speaker so close to the lens, magnification will most likely not work. Hiding the speaker under a target picture is a good idea then. I would suggest to go for the biggest picture possible.1 point
-
Trying to show the contour and " cup bend" of the guard.,,, hard to get a great pic...1 point
-
Did not think that the 3d and resin cast guuys would need these but i guess steel trigger guards may hold up better ........1 point
-
Yes, curves on the bottom.1 point
-
Fantastic! Well deserved!1 point
-
Yeah, I had to give my biceps a hot water bath last night to reshape them, the AM armor is great but was a little oval, so while I was there I made the hooks and installed them. I am hoping I did that right lol. Its super easy to do though so shouldn't be any issue for you to knock out1 point
-
Great work done on this armor, Giles! All thumbs up Just wanted to mention something that has not yet been stated: the white spaces between the teeth. Do you think you can carefully trim this with a key file to be more square? Not sure if the current look would cause any issues with the higher levels. I just noticed it when looking at your helmet.1 point
-
To answer your new questions. For the belt About 1/4" up. So the plastic portion of the belt is hitting just below your bottom button. Hovi tips. Just a lil white paint on the outer edge. For the frown mesh i used window screen, doubled up. Easy pass for basic approval. Good job1 point
-
Indeed Dan - and he has not done it all yet... The first two photos are really scaring. Let's keep fingers crossed you'll never have to disassemble that blaster for maintenance after filling the screw holes...1 point
-
Hi Nick and welcome! Good luck on your build. If you have any questions as you progress, let us know! Photos are helpful for us helping you :). Keep us updated on your progress.1 point
-
Hi Robert, a bit more info and maybe some photos will help us answer your questions, as Jeff mentioned.1 point
-
You are going to have lots of fun Sent from my Pixel XL using Tapatalk1 point
-
Dan, I can't believe I missed cutting the return edge off the small button plate. Good to have Troopers watching my back : ) I will for sure make those changes. Thanks for the great advice. Giles1 point
-
Both thighs done. Hopefully putting the ammo belt on today. As I have been waiting for glue to set I have worked some on the abdomen button panel, putting in some reinforcements on the inside of the cover strip parts and preparing the shoulderparts of the backarmor for reshaping. A little each day. Sent fra min SM-G960F via Tapatalk1 point
-
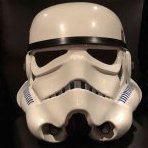
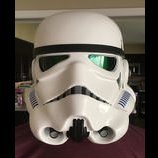
talk about necro posting It was one of the early Anovos marketing kits. The clean helmet is a modded Anovos standard helmet, the bloody Finn one is the one that came with the kit (also modded a fair bit). The armour has gone through quite a few upgrades and changes since, but it's essentially still the Anovos marketing kit.1 point
-
1 point
-
Am I getting a reputation here, lol?! This should be an easy pass for basic, so any suggestions below (along with Randy's mention of the drop boxes and belt) will pertain to level 3. Dan is spot on about the helmet frown and small ab button plate. .. those will need to be fixed before you reach level 3. Side note: I did the exact same thing with both my small and large ab button plates on my first build. I would also suggest trimming down the return edge at the top your left thigh. I can't tell from the photo, but your TD plate may be a bit low. The O ring should be facing more toward the top. Reference image Lastly, the frown mesh will need to be replaced. Anovos is still using the fine mesh, and it needs to be wider, as in Dan's reference photo above. Fantastic job on that armor, Giles, and once you get basic approval I look forward to seeing your EI submission!1 point
-
Wow - I can’t believe how much stuff you can fit inside the DD!! Good work, Jesse. :-)1 point
-
Hope everyone had a good weekend! I fabricated a return edge for the rear thigh - I don't plan on cutting a semi circle as it does ride high enough for me to bend my knee 90degrees without problem. I plan to do this for the right thigh as well. I'm digging the way the front turned out. I'm going to start the brackets soon on the torso, I started by painting the screws white. Wish me luck!1 point
-
Looks great Giles! Hey @Pyrates , do you not agree? Couple of minor things needed for L2/L3, but basic is an easy pass.1 point
-
Started on strapping. Using double snap system. E6000 to glue the female snaps to the armor, clamp it in place (turns out they slide pretty bad if you don’t) Sent from my iPhone using Tapatalk1 point
-
Congratulations trooper and welcome to the ranks1 point
-
Pass!........................ ..NEXT!! Great job! Definitely a pass no problem. When you go for EIB Joseph will say tuck that belt a little higher and get them drop boxes out to edge of plastic belt. I won't say it! Well done Future Trooper!1 point
-
Flipping great build thread dude, Jim's V5 looks great! I'd recommend you to figure out fan/mic/padding/electronics placements before you plastidip the inside of the helmet, then put those velcro patches in and mask them before spraying. This is so the velcro will stick well to the material instead of the plastidip which can be peeled off. Although i've heard many just velcroing straight on to plastidip and having no problems, it can be something you can consider doing Thigh knee-side cut looks good, most of us do it anyway (and to the back). You should also consider trimming the thigh shape (towards the cod) to make it more accurate and also more comfortable. Jim's thighs seem to be very "symmetrical", if that makes sense. I think ANOVOS gets it pretty bang on. You won't get 100% exactly like the screen used with Jim's kit though. I should've cut more on mine since my thighs rub against my cod leaving nasty marks Also are you planning to plastidip the entire insides of the armor? If it is because of the itching you only have to sand the insides with 120grit and 220grit then wash. That's what I did and I have had exactly zero itching since.1 point
-
Awesome work! Congrats on the approval - well deserved!1 point
-
Ukswrath, sanding has got to be the most monotonous part of this build. I had a lot of sanding to do when I built my Mandalorian armor but nowhere near this amount. Mostly because the finish of this armor is required to be sleek and shiny. Thumpy, thank you for the suggestion. I will look into the Sky Trooper and see what all is involved. After all, you guys know that once you build one costume, that is never the end, rather, only the beginning of your collection. Brian (Bulldog Props), you are most welcome. You deserve recognition for the awesome product you make. It will most likely be sometime in early 2019 before I get around to building the new Rogue One E-11 and adding the 1943 M38. I still need to source the Hengstler and power cells but I am slowly collecting all the necessary parts. I will post the build here and/or in the Rogue One E-11 thread. Updates, Well I did sand all the remaining parts but the once-over was not enough for all the parts. The thighs are giving me a real hard time. Here they are sanded and at first glance, they look good but a closer inspection reveals numerous issues. Because of all the issues I found with them, I re-coated them with primer and now you can clearly see the problem. While I waited for the primer to cure, I finished sanding the remaining parts. Here is what is ready for masking and painting. So the parts remaining are the two thigh pieces and the thermal detonator. I glazed the larger pinholes in the thighs and will sand them again. As you can see in this picture (yellow arrow) there are large areas on both sides of the thighs that are look very rough. The feel smooth but the primer brings them out. I am hoping that the next sanding will smooth some of this out and then the three layers of automotive primer will bring it all together when I actually start painting. I cannot sand them any finer than 220 grit or the primer and paint will not adhere properly. The thermal detonator is a completely different issue. There is a seam that runs along it lengthwise where Jim must have made it in two parts and sealed it together. The seam is very thin and I have sanded through it in a few areas. I have backed the inside of the seam with PC-7 and then glazed the outside but it need to set for 24 hours before I can sand on it. I may be obsessing a bit and seeing issues that will be covered by primer and paint but I would hate to paint everything and then realize I needed to redo these parts. So, my garrison has a racing shirt run that ends on July 22nd. I really wanted to finish this build in time to get approved and order the shirt but I do not think I will make the cut off. I also do not want to rush anything and end up with a less than centurion level set of armor. Adding to this time constraint is the fact that I will lose a whole week in July due to work. I am not a happy camper but I will persevere. I plan on finishing the sanding tonight and clean up my workshop and begin construction on the paint booth. I will need to get creative on how I will hang everything inside the booth but I have a few ideas on that front. The saga continues… Thanks for the interest.1 point
-
You look awesome1 point
-
1 point
-
Finally a visual update this time, and no new questions so far I went over the helmet again to fit the lens more properly and also to correct the way I painted the vocoder, thanks to @justjoseph63 for pointing that out again! And also yesterday I cut all the cover strips which was quite a tough work. It might have just been my lack of appropriate tools, but I ended up marking the widths of the strips and then went over the ABS, first with a needle, then with a razor knife. This worked pretty well but I still slipped a couple of times. Well whatever - just gotta use the other side of the strip for the front then This was before : And this is after: And also, yesterday the first cover strip was glued: Just a small step for the armor, but a big step for me Next update will probably follow on Friday or Saturday, don't go anywhere Freddy1 point
-
Submission Photos: I'm very happy with how it all turned out. As you can see in the rear photo, the belt still rides up a little bit and I am working on a fix for that. That didn't stop me from getting approved however. I've been on active duty for the First Order since May 14th! A BIG HUGE GINORMOUS thank you to all who helped me along the way! I hope this thread will help future builders in some way. Hit me up in this thread or via PM with any questions. I have added a table of contents to the OP for easier navigation and still have to finish my Executioner pieces. So I'm not done yet! I'll update with progress on those at a later date after I finish them. For now I am enjoying the fruits of my labor and resting for a bit!1 point
-
Decided to paint the buttons prior to glueing. Not sure yet whether it is a logical thing, but I did it anyway Realized I have no elasticband for the dropboxes, so sending the wife out tomorrow to get me some. that way I can finish the belt as well.1 point
-
So my build hasn't progressed as fast as i'd want to, but i've been taking my time getting to know ABS and how it behaves. Continued trimming, quickly realized even though score and snap is scarier, it is way faster and requires less cleanup. Left ATA bicep all wonky as heck. After completely removing the lower return edge and some more at the top it fit nicely. Still going to give this one a hot water bath to make it fit even better. Right now it is very tight, if I flex it moves/shifts, hope it'll be better after the bath. Right side did fit well without such "drastic" measures. One thing that I figured out is that i'm not really 79kg/175lbs, i'm 83kg/183lbs So the ab/kidney didn't fit as well as I had hoped. This pic was with me pushing my stomach all the way out. If I really really sucked it in they'd touch eachother but that's not doable so i'm gonna have to shim this. Arms are trimmed and fitted. Shins are trimmed but not fitted yet. This pile took a long time but it makes me happy nonetheless Also ordered rivets, screws, and handguards from Joseph. Big thanks for that man1 point
-
Congrats on your BBB day! I'll be following your build closely. I too ordered this exact v5 kit from Jim. I can't wait until I get my FOTK armor too. Hoping for no cracks as well. Good luck and keep us updated when you can.1 point
-
Great info. I've got the opposite problem I'm going to have to resize the legs a bit larger, so ABS plastic strips and bondo to fill the gaps haha.1 point