Leaderboard


Popular Content
Showing content with the highest reputation on 02/05/2018 in all areas
-
My belt snaps didnt work out, they werent aligned quite right. Didnt bother swapping them out, just added some velcro and its still holding up after a year of trooping. Sent from my SM-G935V using Tapatalk3 points
-
Yea, a different family member helps me suit up each time so the shin position tends to vary a bit. I agree with your opinion on placement, though. The shoulder strap will be an easy fix this weekend when I have a little free time. In reviewing the photo checklist, it appears that the photos you mention are on the Centurion list, not the EIB list. I have them, though, and will be happy to include them here if they're required. Thanks for your help in making my costume the best it can be!2 points
-
Quick update - I've gone and scaled down my styrene plastic templated magazine. My initial attempts didn't account for overlap of styrene pieces which made some parts of it think and bulky looking. After streamlining it and gauging its fit in my modified doopydoos magazine housing; I am quite happy with the detail and correctness of the overall look. I do need to hollow my magazine well more too; so need to thin out the walls even more. Gotta be very careful here; don't want to break the walls! I also did some research about Bondo - automotive body filler (2 part resin) and gaining confidence on how best to apply it - popsicle sticks are ready! Thanks for reading2 points
-
The links to the PDF files are available in three different postings and this specific document was updated in only two of them. Thank you for highlighting this. Found and fixed that broken link.2 points
-
Hehe - hadn’t thought of that. Maybe my next project. Erm....it’s like you have CCTV in my brain!! 10 points to Tino. i have one extra mod planned too. I’ll keep that for next time.2 points
-
Oooh, good. Thanks, T-Jay. I was actually working on the scope this weekend. But first let me quickly wrap up the power cylinders. With the gentle nudging from T-Jay and DracoTrooper, I did go back and make two more changes to the Power Cylinders. I added two little "wing" tabs using the ABS sheet from T-Jays Completion Kit and then I sanded down the edge of the power cylinder frame to make them angled. But just the sides. I couldn't do anything with the middle as I had already wired up the back of the fuses with the red wire. Here's a couple of photos: Ok, the scope... I started off with the grand idea that the scope would be fairly straight forward. I have a drill press (pillar drill) and I already have some spade bits. I set off marking the center of the scope and went to the drill press... And that's about where things took a turn. I tried using the drill press to hollow out the scope but about 1 mm in I could already see the drill was going too fast to be able to aim down the tube. As soon as the spade bit reached the frame of the lens I could see it was off and I lost a bit of the lens ring. I immediately stopped. The drill press was out. Back to my friend the dremel. I found I had way more control with a burr tip. I used the burr to go in about an inch. Widening the hole as I went. Then I used a larger sanding drum to open and round off the hole to the correct size. Once I had the opening to the correct size, then I went back to the spade bits but this time in a hand drill. I found it a lot easier to use a spade bit once I already had the opening a good inch deep. I could angle the bits slightly as I was heading deep into the scope tube to avoid getting too close to the sides. Once I was fairly deep I switched back to a regular drill bit. Similarly, I used several sizes of drill bit on the smaller lens end (front) and then drilled at an angle toward the main shaft. Surprisingly, both holes met up fairly uneventfully. Next I took apart the monocular from T-Jay's kit. You can see how the monocular comes apart from his pictures one message back. Unscrewing the pieces was easy but I ended up cutting a little sheet of brass to unscrew the smaller lens. It needed a tool to fit in and unscrew the inner lenses and I didn't have a pocket knife as shown in his photos. Ya gotta make due with what you have. :-) Once I removed the lenses then I started breaking apart the chrome outer plastic, as well. I wanted the lens housing from the center. I ended up using a burr tool in the dremel to carefully cut away the plastic. What I was left with was the smaller lens pieces. Next I used CableGuy's fancy trick of using Playdoh and a lego flag pole to help glue (CA) one of the small lenses back into the lens tube. And used E6000 to glue the cross-hair lens onto the bottom of large lens. At this point I used a sanding drum to get both ends of the scope to the right size. The large lens with the cross-hair disk could fit in the large end of the scope and the small lens tube with the lens glued in the front could fit in the small end of the scope. Once everything was dry I sprayed some flat black paint into the inside of the scope to stop reflections. And when that was all dry I used E6000 to glue the small and larger lens tubes in place. Woo-hoo!! Scope done. Except for paint. Mark2 points
-
Last few things and I’m ready to suit up for the first time. And then the tweaking and upgrading. Anyway, before all that... Installing the dark green lens from trooperbay. By the way, he has a great video on YouTube for this. Fit to the ear screws- I used the top two screws I each side - and drill holes and cut away part for nose. I sanded the edges and polished the whole lens. Added s-trim. Wow, that was harder than I expected. I read some place to cut the piece about an inch too long and cram it into place to hold it together better. This is what I did. I didn’t glue it, so we’ll see how it holds up Done Sent from my iPhone using Tapatalk2 points
-
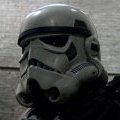
Hello all, First of all, thanks for having me! I've been lurking around the forum and seen some amazing builds. I grew up watching Star Wars with my Dad and made my first Vader suit when I was 12... from papermaché and cardboard. I couldn't find the picture of it but let me say... I needed some more practice I've been doing props for 4 years now and a while back I decided to go for a 3d printer... find out to model my own stuff. Over a year ago I wanted to make a File for the new Storm Trooper Armor for myself that would be approvable for the 501st. Reference was scarce (for polygonal modeling) and I just made the Helmet back then. It was pretty decent but some details were off and the shape of the dome wasn't 100%. A buddy of mine sent me a low poly game model to look at and it came with textures. That was awesome because that gave me something to start with. A lot of details on the textures were just right and the overall proportions looked correct. I used it as a base reference to make my own model. I have sinced tracked down the origin of the model and I believe that it was JakeGreen163 on DeviantArt who made it available. I've since had help from some dedicated Star Wars Costume Pros who pointed out various mistakes and things to improve at. A lot of hours and dedication have gone into making this a very high quality model, as close to the real thing as possible. 501st, here I come :D Some details on the model: - The hexagonal structure on the Helmet would have been really hard to model and post process, so I came up with two 3d printer-friendly solution. First: A glue-on solution: The hexagonal structure is printed flat and then glued in place. Second: The hexagonal structure can be inserted into a small undercut and is held in place by the "Nose"-section. If you don't understand what I mean, look at the pictures. - Visor-Stencil: I have a vacformer but I figured, since it is not a requirement for the 501st approval to have a bubble lens. I could just as well make a cutout for the visor since that is easier to apply a black tint to. So I made a stencil that would fit just right. I already printed the helmet. I'm prepping the rest of the suit next. Progress on this will not be super fast because I print a lot for customers as well. TFA Helmet: TLJ Helmet: Hexagonal inserts: Rest of the suit: Helmet with undercut that even Anovos was missing until now:1 point
-
Thanks Shane That's going to take a new pack unfortunately I had just squeezed in before the sandy backpacks where no longer allowed for HWT1 point
-
Yeah I don't usually expand or contract by much. 2 or 3 pounds depending on how much my salt intake was for the weekend.1 point
-
That was fast. Thanks, Tino!!! Mark1 point
-
You’ll find the instructions here:1 point
-
Not in your brain, in your house. Feeling stalked now? Looking forward to your revealing posting...1 point
-
Great work. You are really paying attention to details here and I see you completing a fantastic build. Keep up the good work trooper!1 point
-
Just got off the messenger app with Walt. Shins are assembled correctly and confirmed with the same picture above. He states do not go off of length but go off of the curve in the calf. So in my instance my "long" will be on the inside due to the calf bend1 point
-
I have the belt system and I’ve got issues with it not holding that well. Just assumed it was me because nobody else had any issues. It’s a well made set certainly worth the money and he was very helpful in figuring out what was causing some issues. Just don’t feel they are 100%. I use them in conjunction with a secondary strapping system just in case. Maybe it’s my snap placement, my belly, my thighs... who knows. I do know I’ve had the snaps in 3 different spots and none seemed better then the other. I think the suspenders might help but I’ve already got suspenders on my cod so that might be suspender overload. Sent from my iPhone using Tapatalk1 point
-
(Hehe - #Legoflagpoles) Really like you power cylinders, Mark. Very neatly done. It’s not too late to shape the backplate of the power cylinders, if you wanted too. I did the same as you, fitted the wires at the back etc., then Tino kindly mentioned the possible backplate adjustment (which I’d totally forgotten to do). I carefully shaped mine with a Dremel sander, coming in from the front end to avoid damage to the wires. IF you accidentally caught the wires, they could either be repainted or classed as weathering. Personally, I was inspired by Tino’s and lightly roughed up the wires to show a little red, as seen on the trooper behind Leia. (Not overly clear in this pic, but can be seen on a big screen). Scope is looking great, too. As Tino mentioned, don’t forget the replacement screws from your pack. They really add to the piece. Best wishes, Dan1 point
-
Here is a full kit I made for someone recently. I will get some work done on my parts soon and post detailed photos.1 point
-
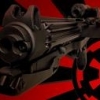
Okay, so I got to work 3d modelling the cut down magazine. Not to shabby.1 point
-
Most Impressive...... (Spoke like Lord Vader, of course)1 point
-
Wow, Greg! That looks superb! Hard to believe that’s your first time kitting up - looks more like a Centurion application. BTW - lovely job on your lid. Great paint job, plus I really like the ears. Top job!1 point
-
Shortened the straps between the biceps and forearms by about 5/8". It definitely looks better. If I need to take up more, i'll probably do it by decreasing the gap between the shoulder bells and shoulder straps. thanks for the keen eyes!1 point
-
I’d say err on the side of consistency — all or none. Sent from my iPhone using Tapatalk1 point
-
I think you mean the supporter badge, that now shows 2018? This is supposed to be only for those guys who gave some of their cash to our server funding. Somehow every member is now a supporter by default. We'll be updating this, but as you can think of.... ... after the elections1 point
-
I did read that, I should have said, post updated info1 point
-
I might be up to something... But what could it be. ;-) Sent from my iPhone using Tapatalk1 point
-
Cheers for that. I’ll have to see how my popper snaps go. I’ll probably either replace them or perhaps do what you did.1 point
-
Great work, Matt. Lovely and even between elbow and wrist gaps. Top job.1 point
-
Hehe - of course, I only jest. Your kit is incredibly comprehensive and doesn’t really need additions. As you say, a straw or many other small, pole like objects would do the trick. However, as you’ve probably guessed, I have easy access to lots of Lego and play-doh! (Thank you, children) Hehe1 point
-
Hi Mark, you asked the question below in a different thread so I just wanted to help. But instead of posting it there, I thought it might make more sense to reply here instead. That photo shows how to dismantle the other half of the monocular and get a total of two small lenses, both in same size and suitable for our resin scopes. And here is one option, how such a lens can be installed during the build. Of course you can also just add it from the outside by using a Lego flagpole, play-doh and superglue. Very glad, that Dan (CableGuy) had covered you so fast.1 point
-
How on earth did we all miss that?! Good call1 point
-
Shay your thermal det is upside down. Overall pretty good, perhaps bring your shoulder bells closer in.1 point
-
Hi Mark, Thanks to your message, I now have an answer to that question. ;-) Until tonight, I just had an open front to my scope. Your message spurred me on to finally fit the front lens. The lens that I’ve used is part of the same monocular as the eyepiece end. I cut the housing away to leave just the lens. To fit it just now, I used (don’t laugh) a Lego flag pole, Play-Doh and superglue. If I’m honest, it could be a lot nicer than this if more thought went into it. Here’s some pics. :-) Loving the work on your counter, btw. :-) Dan Sent from my iPhone using Tapatalk1 point
-
Woo!1 point
-
I received my folding stock, front sight housing, front sight pin, bolt handle, and magazine well. Chris, photos do not do these justice. THEY ARE AMAZING!!!! With each piece I own, I get more excited about building your E-11. Thank you for making these.1 point
-
Believe the film blasters are cast rubber grips, you could probably print some out of ninjaflex or similar.1 point
-
Correct. The pull on the WTF center buttons is quite deep. Grinding down and adding a backer plate is the way to go. Sent from my XT1254 using Tapatalk1 point
-
@ukswrath — I totally understand your paranoia and fear of not being able to cut the straight lines. I’ve got a bit of a tremor condition, so that poses a challenge. A few things that have helped me out: • Don’t stress out about being perfectly straight if it’s going to be hidden by a coverstrip. Just get them reasonably straight so there’s not sweeping gaps between the two halves of armor. • If you don’t own one, get one of those flexible, transparent plastic rulers/straightedge — preferably something that is about a half meter or thereabouts (in America, I have one that’s a “two foot” ruler, which is roughly a half meter). Use that flexible ruler/straightedge — held in place with clamps — to mark your lines. • When it comes to trimming armor, I prefer using lexan style scissors — I use both a curved and straight scissors. To me they’re much easier to manage than using a shop knife. You can make your trims slow and deliberate and still get a pretty clean edge that doesn’t take long to sand down to a smooth edge. I just use a flexible bit of 220 grit sandpaper to go back over my trimmed edges to make them smooth and clean. • On some pieces — particularly those that have level surfaces and require an even trim/cut (like the ends of the thermal detonators) — you can just prop up your pencil in place up at the appropriate height, and just turn whatever it is you’re marking without moving the pencil. I did this for the thermal detonator and some of the other armor pieces, making it really easy to ensure a level surface or straight line. • I have used shop knives and exacto knives on my trimming, too, but generally just for taking off really small snippets. I don’t trust myself with making longer cuts. • If you’re trimming your cover strips make sure you clamp down the ABS plastic and your metal straight edge on top of it securely to your work surface. You don’t want the ABS or your straight edge moving at all when you’re marking, scoring, and cutting your coverstrips. And as others may have mentioned or you’ve probably seen in videos, the first two or three passes with your shop knife should be pretty light, and SLOWLY increases in pressure/depth with each pass of the blade. You really only need to get down to about half the depth of the ABS before you can bend and snap your coverstrips off. Hope this helps a little! If you have any questions, I’d love to help as well. I just finished my first build about a week ago and learned a LOT from the process. Sent from my iPhone using Tapatalk1 point
-
Unfortunately, the Comic Style boot is really only available from Gio. I don't know if it's based off any sort of shoe style out there, but I've never been able to find an existing shoe that looks like it.1 point
-
5'10" isn't that bad IMHO. The only real issue with the ebay link you have is the front flap, but to be honest if the shin covers up most of the boot, I bet it will look right and no one could really tell. You could just cut off the rugged tread I supposed.1 point
-
I've only ordered from him once IIRC. The wait time was long indeed. Not sure about accuracy - I'd need to see pix.1 point
-
Hi, we have been in touch with Bobby (tk31100) about making new boots for the femtrooper detachment. These new boots will be available for pre-order in March on our website. We do not know if the current design will still be acceptable as we do not interfere with the writting of the CRL, however we know that the new design will be significantly different. You probably should contact Bobby directly for further check1 point
-
That looks so good I just saluted!1 point
-
Completely awesome Sent from my iPhone using Tapatalk1 point
-
I’ve heard from a couple of local members the shipping times can take awhile but his products look solid1 point
-
I formed some more parts the other day. Looks like I will have to reload the photos again.1 point
-
Also starting on my build and hope to have it finalized by the end of march. Is the run white only? Going for Shadow.1 point
-
I know this doesn't have that much relevance but just thought you might be interested! Sent from my iPad using Tapatalk1 point
-
GF, he sculpted the original FX kit, and later on sold TE derivatives in a deal he made with TE back in the day. One of the first guys to sell TK kits. He went on to sell his moulds to AP I think. He was also as far as I know the only maker to get a cease and desist order from LFL.1 point


.thumb.webp.27f7939d37871f319ff836257d4a3668.webp)