Leaderboard


Popular Content
Showing content with the highest reputation on 01/23/2018 in Posts
-
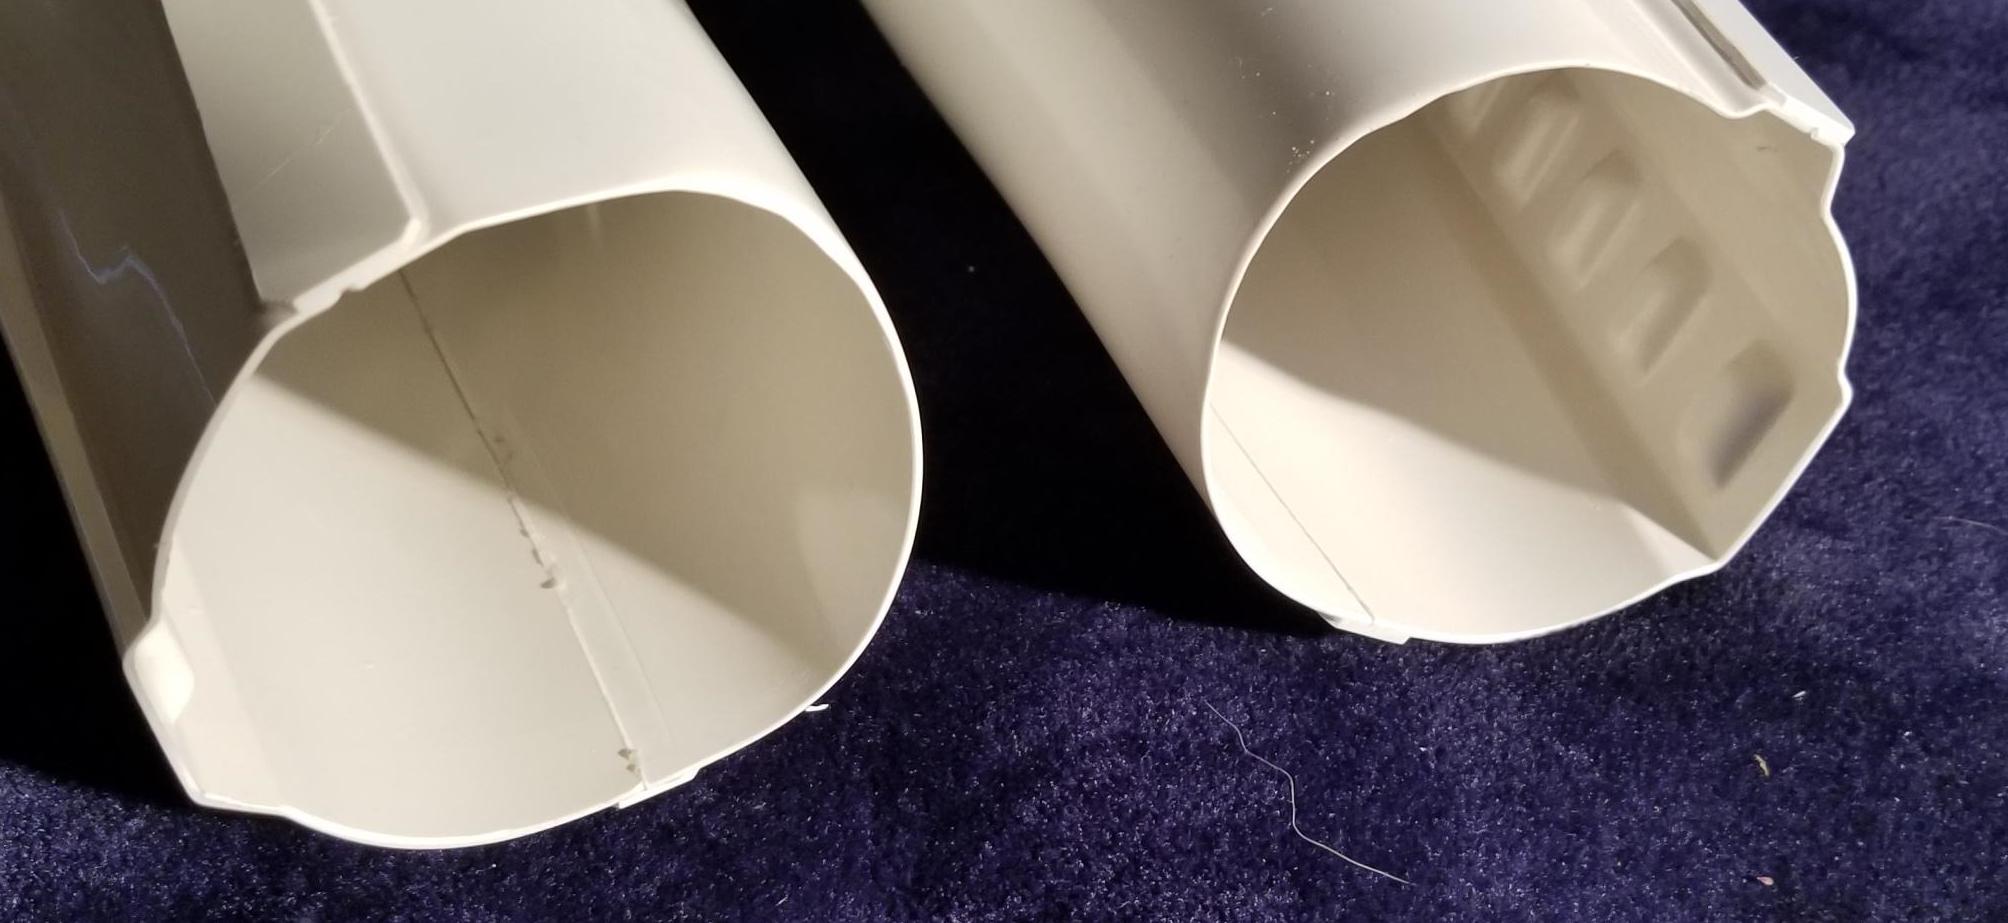
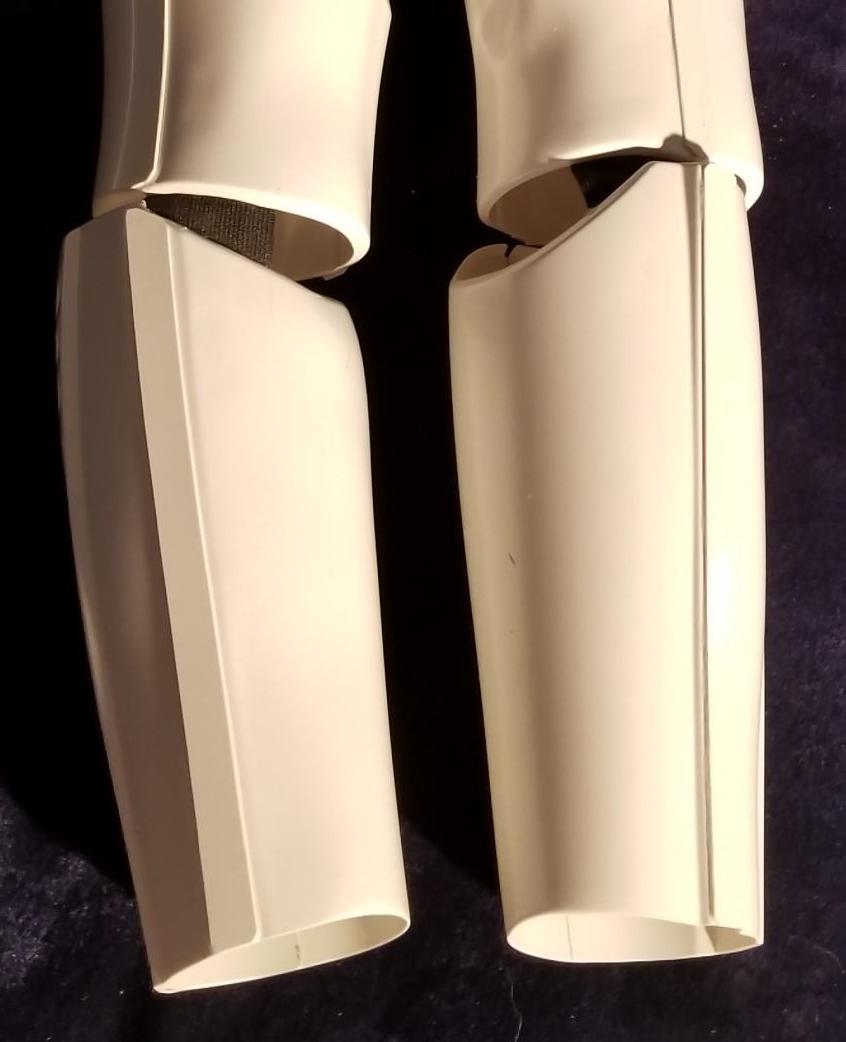
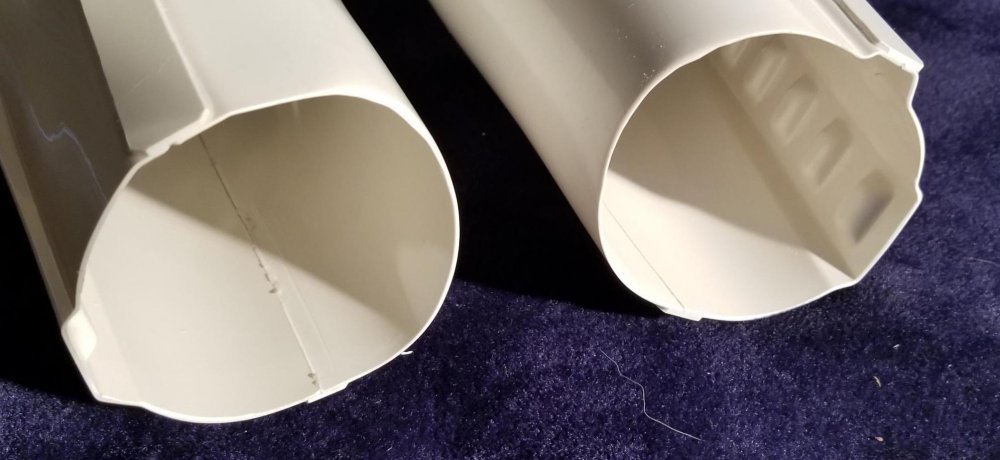
More Shin work: Continuing on from last night, I set out to create faux shelfs to have a more even seam on either side. So I used some excess ABS and glued it with some overlap then glued the front piece onto that overlap. After removing magnets: On the other side, I added a shelf onto the back portion of the shin so the overlap goes from front to back. This was per Ruthar's recommendation in his build to create a cleaner look from the front. Down the line I will add velcro to the shelf and front half that overlaps to close it up. I'm a bit worried that I may have cut off too much ABS here so that when I close it, it won't create a good seam as there will be too much tension pulling outward. Test fitting it around my calf is totally fine but I won't know how it truly looks until much later after painting and such. I may just add some velcro to it as soon as it arrives from Amazon just to know for sure. I might replace this shelf with a slightly longer one too. That's still up in the air. I then set out to do the right shin, leaving a little more ABS to allow for easier overlap on the open inner side this time around. For symmetry's sake, I measured the distance from the indent to the seam of my left shin and copied that on the right. I'm not sure what the exact measurement should be but I wanted to be consistent with mine and kept it about 10 mm. I also added a slightly larger shelf to allow more velcro and adhesion. Maybe too much. I can always trim that piece down the road though. Here are the differences in gaps on the open side for comparison. About 3 inches on the left and 2 inches on the right. All in all though I'm pleased with how the curves turned out on both shins and felt it was worth the trouble.4 points
-
I’m so EXCITED !!! Any and All info is highly WELCOMED Sent from my iPhone using Tapatalk2 points
-
Absolutely, the trigger will be a well-worn part of the blaster; designing for maintenance around those inevitable tight trigger squeezes, for replacement etc. are smart moves. In reflecting on your pointers, I think I will do significant carving into the trigger housing and install a removable cover plate. This way, I can make sure alignment is there and access for future maintenance is there too. Oooh, important. Will install the trigger switch while the trigger is at maximum throw, point taken - thanks again.2 points
-
You are going to be putting some force behind squeezing the trigger (gloves and excitement at trooping) so you want it to be robust. Not to mention letting a child play with it for a "sec" and them really pulling on the trigger. Figure out the max throw you want (in mine it is 1/4 inch) and set your forward spring to bottom out on something solid. You could even simplify and use a piece of bent metal (like the bottom of the tube retainer at the rear). Over time whatever you use will need to be replaced so keep that in mind as well. More I think about it why not use the top part of a clicker ball point pen? Once you have the maximum throw, hot glue the switch in place where the contact is just made. This way you wont put any significant pressure on the switch. In mine the two small posts broke off, but the hot glue is more than strong enough to hold it.2 points
-
I need to get my butt out there and troop with you guys too. Maybe this summer.2 points
-
And another; check your local community college. We just got a great space in Santa Cruz... Cabrillo College Makerspace2 points
-
So (after what seems like ages), you finally received your official 501st I.D. number and signed up for your first Troop. Now what? Depending on the event, there may be a few differences in protocol. For instance, a "Canon" event (usually one authorized by LFL or Disney) may be more serious in nature and regimented, while other times we are there to make the occasion a lot more fun, (parades, movie premiers, etc.). Here are a few basics to think about in regards of what (and what not) to do on your inaugural appearance with your local Garrison. Of course, all events are different.. some will be indoors, some will be outdoors, or a combination of the two.. some will have just a few members, others may have over a hundred, but the basics stay the same. This list is by no means meant to be complete, so all Troopers are welcome to add their own ideas, tips and fun things to do! 1. Before you leave- If you have not had the chance to wear your armor for any length of time, put it on (including your bucket) and wear it while walking around the house and maybe in your yard for a while. This will give you an idea of your range of vision, movement limitations, and let you know what you are in for. Walking up and down stairs will help. 2. Be prepared- Double (and triple) check your armor to make sure you have all your accessories and all your connections are secure before leaving your house. I would suggest carrying a small repair kit in your bin as well. I have a thread here which will help: https://www.whitearmor.net/forum/topic/48390-emergency-trooping-kit/?tab=comments#comment-674403 2. BE ON TIME- I cannot stress this enough. When you sign up for a troop, they will have an arrival time, (usually an hour or so before), and a "step off" time when you should be completely suited up and ready. The hour gives you the chance to get your armor on, and make any adjustments. There should be "handlers", but any fellow Trooper will be glad to help you out. The POC (point of contact) person for the troop or event coordinator will give you any details you might need beforehand, (directions, special notes). Feel free to ask them any specific questions. If you have any concerns, let your handler or the person in charge know about these. They are there to help. 3. Be aware of you surroundings- Due to the limited visibility in a bucket, watch out for curbs, steps, obstacles, etc. Small children will often run up to you and stand close, so be aware that they may be right below you and cannot be seen. When raising or lowering your weapon, take it slowly as not to clock anyone in the head. 4. Photos- You will be asked (sometimes hundreds of times) "Can I take a picture with you"? Be patient, and get used to it! But be aware of where your arms are to avoid touching anyone inappropriately by accident. Often, people will ask "Can I hold your gun"? That is entirely up to you. A lot of us have spent a great deal of time building our weapons, and they (especially the resin cast) can be damaged if dropped. Many of us carry Hyperfirms for this reason. If you don't want to let someone hold it, you can say something to the effect of "The Emperor forbids it" or "It's against Imperial regulations". Side note: Never, EVER point your blaster at a child for any reason. This is just in really bad taste. UPDATE: In this day and age it's not a good idea to point your blaster at ANYONE. This includes those trooping with you (even Rebel types) and anyone taking the photo. 5. Hydration- Another item that is VERY important, especially in warmer areas and extended troops. FISD legend Steve (gazmosis) wrote a great post on this subject, and it is used here (with permission): "Big troops, big crowds, lots of kids, lots of chances to show off your hard work. With the hot weather, there are also lots of chances to be become quickly dehydrated and sick. Don't let this happen!! There is no greater cooling system than hydration. But drinking a ton of water is not the solution....it's how and when you drink it that is. Let's be clear here!!! We are talking about WATER! Not soda, not energy drinks, not juice. WATER...H2O. Leave the Gatorade in the cooler for after the troop. Proper hydration should begin a full day prior to a hot troop. Steady intake of water (8-16 oz. an hour) is fine. Too much water at one time can actually be harmful but a slow and steady intake will allow the body to properly absorb and distribute it until you are hydrated down to a CELLULAR level. Yes, you will be in the bathroom a lot. But when the pee is clear...you are there! Continue this until just before bedtime. On the day of your troop, avoid coffee and other caffeinated drinks that can dehydrate you. Your bathroom trips will have evened out overnight. Have one more bottle or serving of water before suiting up. Once in your suit, you will sweat. No matter what fans you have in your lid....you will sweat. THIS is your cooling system. If you are properly hydrated, you will have the fluids so that your body will adjust to the rise in temperature and cool itself properly. If not, your body will use the water in it twice as fast and without the proper reserves, you will risk not only dehydration but elevated internal temps, dizziness, and possible heat stroke. The long and short of it is be safe and smart. We need out troopers vertical!!!!!" On that subject, if you do feel dizzy or need a break, tell your handler immediately. It's nothing to be ashamed of... safety first! 6. Changing areas- Most events will have a secure and private changing area, but some may not, so ask ahead of time. If it happens to be an outside area, you can wear your under suit to the event underneath your clothes. 7. Armor bin storage- Again, most troops will have a secure area designated to store your armor bin, away from the public. If this is the case, you are fine. Some have asked "Do I need to keep it locked during the troop"? That's up to you. We tend to be a very honest bunch, treat each other's belongings like our own and keep an eye out for one another. (I have never felt the need to lock mine). If it is a parking lot suit up and your bin will be visible to the public while you are away from your vehicle, that's a different story. 8. Conduct- Have a blast on your troop, but keep it civil. Some Troopers clown around a bit occasionally (myself included) depending on the circumstances, but remember, you are a representative of the 501st Legion, the FISD and your Garrison/Squad, so act accordingly. When in doubt, ask someone who has done that event before. Side note: If you happen to be a smoker or vaper, please do not do it in public view while in armor. 9. Handlers- Handlers are an absolutely integral part of a troop, and make our lives much easier. They take photos for the public, warn us of obstacles, escort us to the restrooms/break areas, pick up fallen armor pieces, protect us from kids smacking us with toy lightsabers, guard our stuff, bring us water, keep us informed, and a myriad of other things. After your troop, be sure to thank them for all they do to make an event possible and allow those in costume to have a better time. 10. Trooping in other Garrisons/Squads- Once you have your official TK #, you are welcome to troop with any 501st unit in the world. You may need to sign up at that Garrison, as many do not list their upcoming events for the general public to see. Once you have access to their site, you will need to sign up for the particular troop that you want. Most importantly of all....... HAVE FUN!!!!! UPDATE! The thread below was posted by Caleb (Thrawndike bar), and contains some awesome responses/TK chatter while in public. https://www.whitearmor.net/forum/topic/47603-howto-talk-like-a-stormtrooper/1 point
-
Hi all! After two years having it laying around, I finally accomplished to finish my Anovos TK kit. Please have a look on it and enjoy or - if necessary - correct. I've also worked on the Anovos helmet, slightly trimmed the eyes, repainted the teeth, cleaned the frown, changed the Mic Tips and screws. Please have a look on my DLT-19 if it's Centurion usable. Best Regards, Danny TK-55550 INFORMATION: First/last name: Christoph Daniel Lauber (Future) Garrison/Squad/Outpost or local area: German Garrison / Custodes Euroi Squad (SESQ) / Bavaria Armor maker: Anovos Helmet maker: Anovos Cloth belt maker: Selfmade Neckseal maker: Anovos Boot maker: Imperialboots Blaster maker: MercSupplyShop Gasket maker: Trooper Undersuit from Odlo (Ski Underwear) Height: 179cm Weight: ~68kg TK type: ANH Stunt Name of any Troopers who significantly helped: TK-55550 PHOTOS: Front view (arms down) Back view (arms down) Left side (arms raised) Right side (arms raised) Ab plate close-up Helmet close-up front Helmet close-up right Helmet close-up left Detail photos of any parts you have questions on Interior Strapping ============================================= Have a nice day1 point
-
I brought this up a while ago, as it was a deleted scene and not in the movie it doesn’t count as a reference. This trooper also wears a shoulder pouch, can see more clearly in side photo speaking with JJ The CRL was going to be updated as I did supply other references of troopers with vests and pauldrons1 point
-
So, new CRL says you can't have a pauldron and a flak vest for L3. What about this fellow in the deleted scene? Or does that not count?1 point
-
Nice eye! The whole thing is a miss-mash of parts and vendors I thought "why not". One day the t-tracks will come in and I can post completion pictures.1 point
-
That's great! I thought I had read somewhere that you couldn't take a weathered TK to Centurion, but that level of weathering is exactly what I was thinking. He did a great job with that! Interesting... . This is never going to end, is it?1 point
-
Look what shapeways sent...1 point
-
It looks great. I'm glad you fixed that gap. That particular scene you referenced isn't the best, as far as being a measuring stick for our armor goes... if I'm not mistaken, the same trooper's entire right arm configuration begins to fall off by the end of the scene. I've always wondered what was going on, on the set that day.1 point
-
HI all, Here are some proof of concept pictures I have for the trigger components. I am really liking my custom trigger; after light sanding the aluminum, the rough edges are off and it feels pretty soft and the piece is sturdy. E-6000 worked great to adhere the metal, resin, and green stuff together. As for the trigger plunger, still want to tidy it up and deciding on how long to make its channel. I may have to pull the compression spring apart some to give the trigger some real pull action. Still brainstorming on how best to stabilize the trigger switch. Raymond (Blaster Master) pegs it, then hot glues it. Perhaps I can find tiny screws and do so that way? Nails? Thanks for reading although update only really a brainstorming session at best. If you have any ideas on how best to install / stabilize the various components, give me a shout, Have a terrific day!1 point
-
Congratulations!1 point
-
Looks like the thighs will fit you fine, perhaps some fine-tuning in the back but like Daryl said - don`t cut any until you are absolutely sure. How cool is this - awesome! Did you try and sneak in?1 point
-
Hey Yiqiao, nice armour, we appologise for the delay but promise we will be with you soon.1 point
-
Big day!! Sent from my iPhone using Tapatalk1 point
-
Thanks Dan. matt1 point
-
Approved! Next Step: EIB!1 point
-
Congrats on your new arrival. Looking forward to your build.1 point
-
Yay and congrats on your BBB day. Sent from my VK815 using Tapatalk1 point
-
Congrats! Which kit did you get?1 point
-
Yup, my ex-wife did all their vehicle lease deliveries and I did some construction right down the road from the ranch.1 point
-
Lucas's backyard lol1 point
-
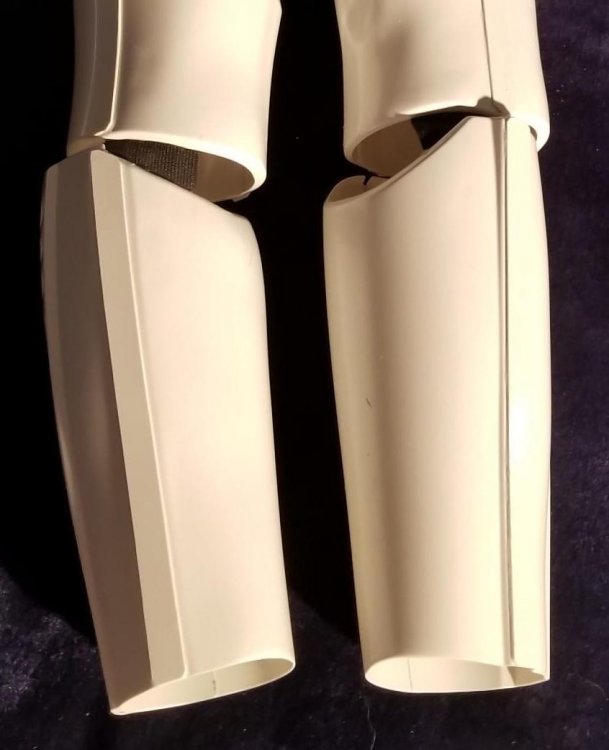
Trimming shins for size. The front got the standard 20mm coverstrip, so all the sizing is getting done on the back. Pretty straightforward. Did a fitting and figured the overlap. Top of shin. Bottom Measure overlap and divide by two. I always try to error on the large side, so I measure a little less than half. Apply to other side. Draw line and I cut with lexan scissors. Makes for a pretty clean cut. Shins are sized (slightly on large side, just in case). I will have to give the bottoms a hot bath to make the openings a bit more oval in shape. I think this is the right, my left shin is already a bit oval shaped. Then I tackled the sniper knee and everything went... not as smooth. Sent from my iPhone using Tapatalk1 point
-
Glad to see that [TK] badge there, now on to EI and Centurion.1 point
-
I'm going to the Half Moon Bay event on Saturday.1 point
-
Thank you . Since the front has a nice flat return edge and 90% of what the fans will see do that side first. Unless you live south of the equator allow 48+ hours for the glue to dry. It's in the 50s in my area so I let it dry 3+ days. Then work on the back.1 point
-
I also reminded myself that my thighs are still just rough trimmed and I still need to trim the front 10mm for the cover strips. So I think most likely I will have to do very little to the rear thigh so far as trimming goes for sizing. Edited for clarity.1 point
-
No, it just takes a lot of patience and some practice. In my Anovos build thread I illustrate how to keep armor sections straight as they glue. Keeping them straight allows the armor to form in a more circular shape. Thanks for the kudos1 point
-
Dang it, I need to sign up for something so I can come hang out with you chaps1 point
-
So I just finished helping a fellow garrison member build his Anovos TK, meaning I did a good majority of the work. The guy is 6'1" roughly 140lbs and his arms look like this, which is pretty much what every other build looks like I do. BTW, No hot water bath. It can be done .
 1 point
 -
Rob Rouse TK-73178 Florida Garrison 501st profile: https://www.501st.com/members/displaymemberdetails.php?userID=26044 EIB submission: https://www.whitearmor.net/forum/topic/43554-tk-73178-requesting-eib-status-anh-stuntap-785/ Armor: AP Boots: TK Boots Neck seal: Darmans Props Blaster: Praetorian Blasters Height: 5’7” Sent from my iPhone using Tapatalk1 point
-
Some great tips there1 point
-
That is true, and you're really lucky to have some video tutorials for you specific armor build! I know that the TrooperBay video tutorial is not done using an AP, but I guess that it can be pretty similar to an AP, isn't it? And that makes me think : is there an "official" - or at least a very reference one - video build for the AP armor models? (I am not aware of any, so if there is one, feel free to point it to me and thanks!) On another note, I started to tackle very roughly some "fit" tests for the forearms. I have a few questions, obviously, and I'll let you know, but I'll post some pictures with them... Some should be coming shortly! ^^1 point
-
I managed to open the CA glue without damaging the thigh, so I reglued it with a much smaller gap.1 point
-
I'll post a sticky somewhere. Detachment affiliation is only updated once a year before census, via automated process by the Legion web team for FISD. Detachment affiliation is used by nothing, zero, nada, nowhere else, for no other reason. This is why we only bother with it annually.1 point
-
Greetings fellow SW enthusiasts! This is my plan as I set out to install the electrical components of my build into the grip. There's a small handful of custom pieces like the trigger guard and trigger plunger and have modified the doopydoos trigger. Also will be using Tino's rotary switch that comes with his Completion Set. Although it would be neat and tidy to chop up the wiring of my already operational BlastFX to funnel wires and reconnect to minimize the amount of resin destruction, I chose to keep my wiring intact and will go about with some creative work with thin styrene plastic pieces and aluminum sheets. That's right, I am going to gut out channels and housing compartments and recess them as needed, then cover up with plastic then mold in with green stuff (pattern Knurling where necessary). I will then have two aluminum sheets, cut to shape of the trigger housing part and cover it as well as have the little odd shaped piece around the base area of the selector switch. Feeling a little apprehensive but with careful planning, I hope I can pull this off half decent. Cheers, and happy building!1 point
-
It really takes a lot for me to remove the helmet. I've had issues where I really wanted to remove it and did not. However, if I am terrifying a child, I will show them I am a person under that helmet. Only as a last resort. At the last con I went to, a service dog was very upset by me. The owner asked me to let the animal see me and I complied. The dog realized I was not a threat and was not intimidated by the rest of the troops. I don't remove my helmet easily, but sometimes it is necessary. Real life sometimes calls for it.1 point
-
Had another great test fit, I learned a lot. I'll be making some changes as I found some problems. For one the butt plate is too low. Also the shoulder bells need to be higher more flush with the sholder straps. I'm still not happy with the shins. I think my mods helped but I'm looking into some alternative. I really don't want to rebuild them1 point
-
Thanks Randy Thanks again Dan don`t think you get a new certificate but that would be quite nice come to think of it.... EIB and for which costume - ANH Stunt/ANH Hero/ESB etc...hmm, gonna pop a question about that I think1 point
-
Someone asked for pictures? Dec 23. First Appearance of Captain Phasma and Captain Cardinal in the same place.... and World First appearance of Captain Cardinal. The Sandbox, PixelArts Props, and KB Props are to credit for the costume process for both costumes. KB Props supplied the Kit. PixelArts Props built the Kits. The Sandbox is the Facility we all work out of. (Phasma built in 3 weeks, Cardinal done in 1)1 point
-
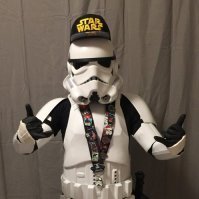
Thanks so much, guys! First outing was a lot of fun. Got a nice shot with the boss: And managed a really neat picture that I like a lot - the three generations of troopers!1 point
-
Strapping Gaskets Installing the gaskets is very simple. The marvelous gaskets I received have a 1" strip of velcro at the top and bottom of every piece, so all I did was install a matching strip of 1" velcro into the edges of the armour to hold them in place. by Taylor Goodson, on Flickr by Taylor Goodson, on Flickr by Taylor Goodson, on Flickr Knee Plates To strap the knee plates to the gaskets, I used Tony's method from his TFA Anovos build thread. 1) Cut out two strips of scrap ABS. I round off the corners to keep the edges from snagging on the gasket material. by Taylor Goodson, on Flickr 2) Using a heat gun, bend the plastic into the same shape as the interior of the knee plates. by Taylor Goodson, on Flickr 3) Drill a pair of holes into the ABS plates wide enough to receive chicago screws. Then, make a mark on the gaskets that line up with the pair of holes in the plastic. by Taylor Goodson, on Flickr 4) Install the ABS plates through the gaskets with washers and chicago screws. I used a trio of washers between every layer to try to not allow the screws to tear through the gasket material. by Taylor Goodson, on Flickr 5) Install a piece of industrial velcro onto the surface of the ABS plates. by Taylor Goodson, on Flickr 6) Press the knee plate against the velcro to hold it in place. by Taylor Goodson, on Flickr1 point
-
Painting Sanding and Surface Prep Now that the construction is behind us, it's time to move on to painting. Before I started spraying anything, however, I spent a good deal of time sanding away any and all imperfections and getting a nice, smooth finish to the armour. I started with 80 grit sandpaper to take away any of the larger blemishes - scratches, scuffs, residual glue, etc. Then, I moved on to 220 grit over all of the parts for a nice, uniform finish. The sanding really helps take the first coat of gloss off of the plastic which will aid in paint adhesion. Untitled by Taylor Goodson, on Flickr After the sanding was complete, I gave each piece a bath to get all of the residue off of them. Then, I set the parts out on the workbench to dry overnight. Untitled by Taylor Goodson, on Flickr Untitled by Taylor Goodson, on Flickr Untitled by Taylor Goodson, on Flickr Priming Now that the armour is ready, it's time to dive on into the spraying. First, I set up the garage for painting by covering the tables and floor with plastic sheets as well as moving things out of the way. I suspended the round armour pieces (leg and arm pieces) to allow for easier painting as well as propped up the remainder of the pieces in various ways to enable me to get all the edges, corners, and detail pieces with the spray paint. Untitled by Taylor Goodson, on Flickr Next, and possibly most importantly, is the ventilation mask. There will be a lot of paint happening and the fumes can get pretty brutal (even in a well ventilated space), so I would highly suggest getting a pretty good ventilator for the process. Untitled by Taylor Goodson, on Flickr Now it's time to add the first coats of primer. I used Rustoleum 2x flat white primer for this build. I started with a relatively light coat first (quite a bit of black still showing through(, then proceeded with a second coat for full coverage, and finally a third and final heavier coat. It took about 6.5 cans of the primer to cover all of the pieces. Untitled by Taylor Goodson, on Flickr At the conclusion of the final coat, I let the parts dry for 30 minutes. The Rustoleum primers tend to dry nice and quickly with a recommended handling time of 20 minutes, so you're pretty safe if you wait for 30. After the 30 minutes were up, I used 800 grit sandpaper on all of the surfaces to get a nice, smooth finish that was ready to receive the gloss.1 point
-
Alright guys, sorry for the lack of updates. Back at the trimming. Still pretty fresh into the process, but trucking along! I got three kids, so it can be difficult! I'm sure a lot of you know what's up lol. Had some time tonight, so turned on some Clone Wars and started cuttin away with the Lexan's. Anyway, check out these edges on the chest and back plates. How do they look? Thanks for the input!1 point
-
Guess it all depends on your size. Mark's kit leaves room for varying body types; we ordered our kit already trimmed so for my son and I we seem to be ok, but my brother is thinner so we're going to need some more removed from his. Would recommend after you trim all the parts, try to do a full fitment (using good old painters tape and an extra pair of hands). That will give you an idea of where you might need to make some adjustments. Check out my build thread and you can see the comparisons across our three suits when we tried it. There's plenty of AP builds out there to reference and if you need to reach out to Mark, he's really good about responding.1 point
-
hero is a term used for anything that is the best quality item used for up close camera work. stunt are all suits used to run, jump fall and be far from the camera where you aren't worried about details not showing. Sent from my DROIDX using Tapatalk 21 point


.thumb.jpg.fe734c2874fe147a5789e833ad00772e.jpg)