Leaderboard
Popular Content
Showing content with the highest reputation on 12/05/2019 in all areas
-
Hey all - I was asked this question via email and thought I may as well answer it for everyone, as I get this question a lot: Boy Scouts was started by Lord Baden Powell, who was a General in the British Army and used boys for reconnaissance and scouting tasks during the Siege of Mafeking. On his return, he wrote Scouting for Boys (published in 1908), and later formed the Boy Scouts Association in 1910. He did a lot of things that are certainly worth reading about. Daniel Carter Beard was a Freemason who founded Sons of Daniel Boone in 1905 and later merged in to to the Boy Scouts of America, which was brought over to the US from the UK by W.D. Boyce in 1910. He also organized Camp Fire Girls. He did many other things, but being an active Freemason as well as one of the pioneers in of the Scouting movement in the US was part of the reason why the Daniel Carter Beard Masonic Scouting award was created. The eligibility requirements are: And yes, I'm a recent recipient of this award. I think everyone has had some experience with Scouting either as a youth or as an adult. Boy Scouts USA has recently renamed itself to Scouting BSA and opened it's program to girls, which is now growing rapidly (though unlike outside the US, in the US the girls and boys are in separate units). It is certainly one of the best program in developing youth of character, integrity, citizenship, and leadership. The aims of Freemasonry are very similar to the aims of the Scouting Movement, and until recently in the US at least, it was pretty common for men of character in a community to also be Freemasons, which you can glean from this person's experience - and one I hear a lot - of "my grandfather & father were Masons, but I am not and I'm not sure why". It started in the 60's with the counter culture movement in the US, where many social and fraternal organizations saw a significant and continued drop in membership. There are very few avenues for men today to form bonds with other men of character, and to be part of a world-wide (and oldest) fraternity in the world, who's stated goal is to provide a path for men to mentor each other to be better men. My goal in all this is to help increase collaboration between these two groups, hence getting this graphic going to help with the marketing. People who have been in scouting as youth or adults tend to be the same type of people who make excellent Freemasons.3 points
-
We will not have to worry as they will never be delivered.2 points
-
And in other news.. just got a message from 850! Sent from my iPhone using The Force2 points
-
Hi all, Trigger group and grip ready for install onto receiver tube. Gloss black on grip to resemble rubber. Flat black on other components. Tricky to paint the fine line between black and metallic silver, finally happy with it. Yet to glue the selector switch and trigger guard will sit correctly when installed on reciever. [emoji106] I will need to do some final touches on the receiver tube before installation, stay tuned [emoji1] Sent from my SM-G960W using Tapatalk2 points
-
Well, it’s SBB day here in Australia. Wilson...this kit is jaw-droppingly beautiful. I’ve purchased many 3D printed products over the last three years and this is hands down THE most exceptional. I can’t wait to put this kit together. Great work, my friend. Sent from my iPhone using Tapatalk Pro2 points
-
Hi folks! I've come back from a long hiatus! Life got really busy so stepped away from things to build over the Spring months and got busy in the Summer building a steampunk costume to go Halloweening with my kiddies. I pulled off custom boots, even gauntlets and also made-over a nerf blaster with steampunk color palette. A whole lot of fun but I digress .... My E-11 Blaster! It's been a long haul, a fun one, but I need to finish!! With all parts painted and weathering and sealant clear coat remaining, I am assembling the various parts. Rear of the Exposed Bolt I scratch built my ROTEB (rear of the exposed bolt) to originally accomodate electronics. It is a bit odd shaped with an enclave that was to accomodate electronics coming out of the trigger assembly part. I placed some green stuff inside the enclave so to better stabalize the wood screw that holds the charging handle in place. On instalation, I dare not install the screw to close inside the handle because it narrows quite a bit. Custom Barrel I custom built a barrel to kinda look like the real-deal. As the doopydoos muzzel has the screws poking inside the reciever tube already, I had to pull back the support end from the front of my barrel and pulled it back to around behind the bayonet lug. Spring Cup I'm a sucker for trying to build my doopydoos to closely resemble the real sterling piece as close as possible. I made a spring cup to place inside the ROTEB complete with 'spring' inside. JK, I faked it with an appropriate gauge of solder and curled to correct OD shape. ROTEB Stopper I placed, what I'll call a 'Stopper' for the ROTEB. Again, fashioned to orginally accomodate electronics. I was sure to install the barrel first =) Installing the ROTEB Here is the ROTEB in it's semi-installed state. The whole shows where the wood screw will come up from to grab the charging handle and have it put in place. ROTEB Cover It was perplexingly fun to scratch build my ROTEB cover with clearing strip. Thanks T-Jay for your detailed post =) I cut numerous sheets of plastic to size / shape and glued with E-6000. Metallic paint on-top with the clearing strip sanded down to show wear. The end closets to the charging handle was rounded off so to accomodate the round bottom of the charging handle. The other end of the cover was made a bit short to mimic the lip of the spring cup. Exposed bold Plate My custom exposed bolt with extractor and plunger took a while to get right. Again, was made as a plate to accomodate electronics. I had to bend my alluminum piece just right so it sat recessed, giving the illusion that it can enter the reciever by showing off one mm or so of reciever lip. I refrained from attempting to put in serial numbers on my exposed bolt; didn't have the correct number sizes. Up next ... Grip and Trigger Group Install That's how my build stands at the moment. Grip and trigger group are painted and ready to get on to that reciever tube! Ah, this is the moment when the build really starts to resemble a blaster. Thanks for dropping by; have a great day!!2 points
-
2 points
-
This list is for Original Trilogy (OT) builds. ANH, ESB and ROTJ) For those who are about to embark on a TK build, in addition to the kit itself and the supplies you will need** to do that we are often asked about other items to complete the ensemble and get approved. These are known as "soft parts", and include the holster, under suit, boots, gloves, neck seal and canvas belt. Be aware that some armorers may include one or more of these items with their kit, but some do not. Also be aware that just because the seller includes them it does not always mean that they are the correct type/style and are eligible for approval (especially at higher levels). When in doubt, always ask your armorer which items are part of the package or feel free to ask here if you have doubts/questions. We are here to help! If there is a particular soft part you need, below is a list of "tried and true" vendors who have an excellent reputation, as well as suggestions for where to get other pieces or even make your own! NOTE: If you are a vendor and would like to add your sales thread here or you have a tutorial on how to make your own please PM me before posting here. **https://www.whitearmor.net/forum/topic/31404-supply-list-for-your-tk-build/page/11/ White Canvas Belt: NOTE: not all belts are created equal! The belts used in the films were firm and sturdy with no creasing or sagging. Vendor- Rob Kittel https://www.whitearmor.net/forum/topic/19803-fs-white-canvas-belts/ Soulart https://www.whitearmor.net/forum/topic/40849-geeky-pinks-phantastic-gaskets-and-so-much-more/ Trooperbay- https://trooperbay.com/stormtrooper-sandtrooper-white-canvas-belt Make your own: https://www.whitearmor.net/forum/topic/665-howto-a-guide-to-making-a-canvas-bel Neck Seal: Vendor: Darman https://www.whitearmor.net/forum/topic/21385-darmans-neck-seals/ Soulart https://www.whitearmor.net/forum/topic/40849-geeky-pinks-phantastic-gaskets-and-so-much-more/ Trooperbay- https://trooperbay.com/costuming-accessories/headgear-neck-seals/stormtrooper-neck-seal Make your own: https://www.whitearmor.net/forum/topic/34548-10-diy-neck-seal-v1/ Holster: NOTE: Holster straps differ for various costumes. Please see the CRL for your particular style here: http://databank.501st.com/databank/Costuming:FISD_CRL Vendor- Darman https://www.whitearmor.net/forum/topic/16744-leather-e-11-holsters-35/ Trooperbay https://trooperbay.com/costuming-accessories/ammo-pouches/stormtrooper-genuine-leather-blaster-holster Make your own: https://www.whitearmor.net/forum/topic/23643-making-a-holster-for-anh-stunt/ Boots: Vendor: Imperial Boots https://www.imperialboots.com/product/421/ NOTE: Imperial boots are 100% approvable at every level, but they only open once a month for orders. They can run a bit small, so I suggest ordering a half size larger than what you normally wear. Make your own: https://www.whitearmor.net/forum/topic/27565-how-i-did-my-boots-tkboots-alternative/ Under Suit: Under suits can be purchased from many sources, and you have the choice of one or two piece types. I have found Amazon to be among the least expensive sources. The easiest thing to do is visit that site and search for it, for instance "Mens compression suit top black long sleeve". Examples: Mens compression suit top black long sleeve- https://www.amazon.com/s?k=mens+compression+suit+top+black+long+sleeve&ref=nb_sb_noss Mens compression suit pants black- https://www.amazon.com/s?k=mens+compression+suit+pants+black&ref=nb_sb_noss Vendor Trooperbay https://trooperbay.com/star-wars-stormtrooper-sandtrooper-black-undersuit NOTE: While some prefer the one-piece type, the two piece tends to be better when you have to... uhhh, let's just say "answer nature's call". IMPORTANT! When ordering an under suit, be aware that many have printed logos, white stitching etc. These can not be visible while wearing your armor. Hand guards (Flexible) Vendor: justjoseph63 - https://www.whitearmor.net/forum/topic/35702-fs-flexible-hand-guards-for-centurion-level/ Vendor: Trooperbay- https://trooperbay.com/flexible-hand-guards-in-white-black-or-plain Gloves: NOTE: As per the CRL for Basic 501st OT TK approval, gloves must be all black with no visible straps/logos/designs and can be rubber, Nomex, leather or a leather-like material. For Level 2 (Expert Infantry) and Level 3 (Centurion) they must be made of rubber or a rubber-like material. I highly suggest finding ones with a long wrist, which prevents it from sliding out from underneath your forearm armor. Vendor: Trooperbay- https://trooperbay.com/accurate-trooper-black-latex-gloves Vendor: justjoseph63- https://www.whitearmor.net/forum/topic/49156-fs-rubber-gloves-for-expert-infantrycenturion-level/ eBay is also an alternative. Just search Black Nomex (or leather, rubber etc.) gloves. Be sure when ordering the rubber type from eBay that you are purchasing the heavier duty type and not the disposable kind. Thigh Garter system: Vendor: Pencap510 https://www.whitearmor.net/forum/topic/29991-thigh-garter-system/ NOTE: These are not a requirement, but they are AWESOME! Pauldrons- (For Heavy Weapons Troopers) Vendor: Soulart https://www.whitearmor.net/forum/topic/40849-geeky-pinks-phantastic-gaskets-and-so-much-more/1 point
-
Thanks to a great friend, Derrek (DDay), I was able to obtain some nice sterling smg parts. Thank you billions Derrek! His kit paved the way to a whole new era of E-11 kit building and these parts were the backbone of his endeavors. Also these parts are in fact the exact ones seen in the Blaster Reference Photo Compendium. Some parts I have added to the lot recently for alternative molding choices and some to replace (the bolt). I am honored to be the next caretaker and hope to see what new life I can add to them. Another special thanks to Aaron (Usaeatt2) as he was instrumental in bringing each piece to its full glory. He put a ton of work into making these parts ready to mold part for part. He also helped guide me on a number of things with these parts like how to remove the D ring from the end cap undamaged. His knowledge on these parts has been invaluable and deeply appreciated. Here is what I have in total: (Some parts missing from the photo as they were being molded. Some smaller pins/springs and parts are missing and I will replace at a later date. The only main part I do not have yet is the barrel) Over a 2 week period during the midnight hours of my summer break I was able to make molds of the parts. Hoping to test them out soon. Unfortunately I had to leave the parts back home to avoid breaking any international laws. TSA actually upheld the box of molds and it was forwarded to me a few days after I got back to Japan. Luckily there is not offense to send silicone gun part molds abroad. So for now I will cast what I can with the molds and also create sub castings as my master molds for future castings until I get back to the US in the future. This is just a test and see project so hopefully the results will be good. Already there are amazing other resin blaster kit/part makers like RA Props (http://www.stormtrooperblaster.com/the-stormtrooper-blaster-project.html) and Doopys is not a bad option if you successfully get one, but since casting the resin scopes I have always wanted to try my hand at casting real sterling parts. I am not expected these to be extremely clean castings. These will be fairly raw with potentially lots of areas to fill or sand. No pressure pot to use as well so that puts a cap on what I can achieve as far as total quality goes. Stay tuned for updates in the coming weeks.1 point
-
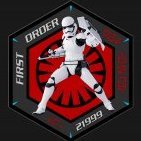
Hey guys - I got this graphic from a friend and wanted to make something the same but with just two alterations: 1. Swap out Connecticut for Washington 2. Change the purple fleur de lis to the same green as the WA state flag. I'm hoping it will be simple, and am offering up FISD swag to anyone who can help out with this. Yup, I have coins, patches, whatcha want? And yes, I'm a Freemason (20 years, past master of my Lodge) and a Scouter (Assistant Scoutmaster for my daughter's troop and Troop Committee for my son's troop), so this means a lot to me. A1 point
-
1 point
-
Ah, yeah I see the grain difference too. I’ll ask and see what he says. Sent from my iPhone using The Force1 point
-
Wow, great comeback :-)! Did you use glue to mount the extractor?1 point
-
Mine is 42, maybe 42.5 so it’s gonna be snug!! The problem is the yoke join. As they are pre trimmed there really is no room for adjustment.1 point
-
As sad is this reply is, it is funny. Sent from my iPhone using Tapatalk1 point
-
Man, what an update! Okay, you had more than 8 months to come around with this. No seriously, great to have you back, Jesse. And I am really glad to hear, your hiatus was 'just' life getting busy, but not because of any serious issues. Looking forward to your next steps and to finally see this blaster completed...1 point
-
Nice job, Art! If there is one thing I could suggest, it would be to raise the cod. As of now, it is sitting a bit low. In looking at the reference pics note that the bottom of the cod sits above the inside thigh openings. Well above them in some cases. Looking forward to seeing the rest of your build!!1 point
-
Thanks! What bothers me about Imperial Warfighters is that the Blaster isn't hollowed out. I'll post a photo later. And RS Prop Masters only sells the E11 with the full armor.1 point
-
OP (MV) Post #3 Thank you all for your helpful comments! Family life with an 8-month old has been busy, and since my time on FISD is primarily squeezed in here and there on Tapatalk, it takes me a couple of days to get back to my desktop machine and type out a post such as this. So here's an update. MBB (medium brown box) Day was the day before yesterday!!! Christmas came early! Needless to say, I was eager to rush home from work. While I don't have anything to compare it to, that rubber E-11 is sweet. I still plan on posting a review in the appropriate Weapons Locker forum, but based on reviews I've read, the quality of this one from TB and Hellhounds appears better than at least the old Grade B Hyperfirms (I've never seen photos of the top level). Praetorian does seem to have cleaner seams, and a few fine details which this one doesn't, but here's the kicker: this rubber E-11 has a separate metal scope rail, with open space underneath! I know, the image above doesn't clearly depict that. Stay tuned for my review post! (I'm also curious to know if this E-11 would be approved at level 3). I also checked out my local Michael's store for paint, and only found Testors. Perhaps Humbrol is only available in the UK or online. This was a tiny 0.25 fl oz bottle I got for $0.90. I wonder how much I will need for just the frown, since I plan on using "painted-style" decals for the traps and tears. I may try Hobby Lobby to see if they have larger bottles, and also the satin black and French blue colors. On the armor front, I've been in touch with Terrell (ATA) and he says that his right-side thigh piece is 16" tall with the recommended trim lines, and the left-side piece is a little over 15" tall, I imagine to accommodate the sniper plate. In my previous post I mentioned that the distance from the top of my knee cap to my belt-line is 18", but since I've never worn armor before I don't know how far below a Trooper's normal belt-line the top of the thigh pieces should end. I know the black gap is supposed to be minimal. Below you'll find diagrams of what I'm attempting to describe. That's me on the left, and the Legion ANH Stunt TK CRL model on the right. I'd assume that a TK's normal belt-line would be somewhere underneath the actual armor belt, but my question is would the thigh armor end any closer than two or three inches below said belt-line. I don't want increased gaps to disqualify me from Level 3. Imperial Boots opens up their next wave this Friday, so I'll be grabbing some 421s, ordering half to a whole size up from my regular shoe size. It's too bad that the shipping cost is equal to half of the price of the shoes. Perhaps I'll ask my local squad (Mos Nooga of the Midsouth Garrison) if anybody else is planning on ordering, and potentially pool shipping costs. Finally, I've decided to give Flickr a try for image hosting, since I'm already a user on that platform, but I'm still having trouble pasting BBCode here into FISD. Am I supposed to use the Code feature on the menu above, or just past here into the body? I will continue to try imgur as well, to see what ends up working for me. I did discover the image resizing feature here on this forum's platform, so that has been helpful. Now to continue sourcing snaps, rivets, and Chicago screws/rivets... MV p.s. It's no Throne Room or Imperial March, but currently my 8-month old daughter loves when I sing her the Cantina Band song. Amusing.1 point
-
It’s about 0.6 kg, pretty light compared to others I have seen on troops. Sent from my iPhone using Tapatalk1 point
-
Hiya, For ready built, high quality blasters in the UK, I’d suggest looking at Imperial Warfighters (I believe they do resin and rubber), ShearTech (rubber) and RS Prop Masters. The first two supplier are on Facebook. Best wishes Dan1 point
-
Jayke - please also email me your info to feibao@gmail.com. Alas I'm not getting notifications from FISD, so have to manually check-in to see any new responses to this thread. Philip - got your email and responded. THANK YOU GUYS!!!1 point
-
THANK YOU! That’s excellent info. Soon as I get the ABS in hand, I’ll be making any necessary changes.1 point
-
Ok guys, I trooped with this T-21 for short periods since I built it; however, for Halloween I trooped all day and I really got tired of lugging the thing. It is rather heavy since I used resin parts, plywood base, and electrical conduit. Because of this, I have built a version 2 where I built all new 3 models and made the T-21 from 3D prints, Sentra base, and used thin walled pvc and abs pipes. The models are all available on my thingiverse page for free download. Since this T-21 is also for my RO Sandtrooper, the entire build is here is anyone is interested. http://forum.mepd.net/index.php?/topic/16557-11b30b4s-ro-t-21-version-2-build/1 point
-
Hi theshape.78, A popular choice for those seeking resin builds is the doopydoos complete E-11 Blaster kit going for 45 Pounds. https://www.doopydoos.com/stormtrooper-e-11-complete-anh-e-11-blaster-kit-offer-2685-p.asp It certainly can be allot of work, as Mupfel pointed out and involves a level of overhread, with the purchase of a rotary tool and paint for starters. The effort is well worth it as you'll come away with a really quite accurate blaster. I recall Cableguy has taken his resin e-11 to upwards of two dozen troops with no issues and T-jay for nearly the same amount of troops with a minor mishap with his magazine. I'm nearing the end of my Doopydoos E-11 build, in the assembly stage after doing some significant modifications. I hope this helps Marc, cheers1 point
-
For all those wanting to see your kit, here you go... Sent from my iPhone using Tapatalk Pro1 point
-
I got my approval email this morning!!! Thank you so much to everyone who helped me along the way!! My childhood dream has finally come true!!1 point
-
I’m not exactly sure which step got Anovos to refund but I : - emailled 3 times a week - cc’d all emails to Joe and Dana - cc’d emails to LFL licencing - contact Disney vendor services - complained to Partial.ly - threatened legal action - registered complaint with BBB - filed complaint with the Attourney General in California, they have a consumer rights webform to do this. It all took about 4/5 weeks and they refunded through Partial.ly as I paid by the installment plan. I am now three credit card numbers on since the order but with the same bank and it arrived safely. At NO point did I advise of my 501st membership and would ask others to follow that, its irrelevant and we shouldn’t bring the Legion into this. Just keep on at Anovos and then never make that mistake again!! As for my FOTK kit, I ordered and saw it arrive with a week and I’m slowly working through it, but it’s not an easy build. Sorry but I’m not in a position to disclose what kit it is, I got 7 kits and hopefully my team will all be done in the near future.1 point
-
Welcome to the Legion Trooper, enjoy being a Bad Guy Doing Good !!1 point
-
Congrats and welcome to the Legion Trooper Sent from my SM-G960F using Tapatalk1 point
-
Sorry there have not been any updates to post yet. I had issues casting the stock and the end cap without bubbles but think I solved how to do the stock but end cap still needs a bit of tinkering . Also just ordered more resin and silicone to get small parts made. These take time as there are a few with irregular shapes that pose a challenge to cast. My goal is to minimize the seam lines. Hope to have more updates soon for you. Thanks for following this project . Stay tuned !1 point
-
1 point
-
Latest Test Casts- slow progress, no time to work at night much but managed to test the parts seem below. The main stock wishbone frame still has a few trapped air issues but think I can solve that. The end cap was getting me worried as I could not cast one decent one after 4 attempts. Finally figured out a way to get the trapped air out.1 point
-
Recent Test Castings- Some parts still coming out of the molds a bit rough looking. Grip came out the best so far. End cap had some bubble issues. Bolt is good but wish I molded it so the cocking handle holes were more sunken. They will need to be drilled out. Hope for more to come later this week (folding stock parts) Grip- Grip with Trigger assembly- Bolt, Magazine Housing and magazine Front nozzle section and end cap1 point
-
For everyone with a Husky armor box..., lets make a more usable workspace. This build will explain how to easily add shelving to your armor box, giving you more staging room when you’re suiting up for a troop. First let’s start by removing the 2 plugs on the opposite side of the handle. Same location, opposite side, of where the handle slides into the box, there are 2 plugs that need to be removed. From the underside of the ledge, push the locking-foot up and start working the plug out. For me one plug just popped out and the other was very difficult to remove. To make it easier, you can drill a screw into the face of the plug, then clamp vice-grips to the screw, making it easier to pull the plug out. Don’t forget to push the locking-foot up. Removed? Great! Next you’ll need 2 each, 1/2” pvc 90s and some 1/2” pvc pipe. 1 piece roughly 19” long and 2 pieces roughly 15” long. Leave the lengths a hair long just to make sure you get the best fit. You can trim them down as needed. The 19” piece of pipe is your center and the 15” pieces are the legs. Connect the pipe with the 90s to make a U. Now take your U of pvc and slip each leg into the Box where you removed the plugs. Take your Tote that came with the Box and set it in the pvc U and mark the pipe, near the Box, so you know what the maximum distance the pipe needs to be extended to hold the Tote. As long as you’re happy with the fit, go ahead and glue that pipe to the 90s to make your U solid. To hold the U in place while in travel I used a Velcro cord wrap. I drilled 3 small holes side-by-side and trimmed between the holes to shape a slot. Then I feed the Velcro strap through the slot and secure the U. NOTE - Do not use the U, secured or extended, as a handle to lift your box. Lid shelf frame - You’ll need some 3/16” steel rod which should be available at any hardware store. I bought 36” lengths for my small shelf frame. Measure the distance apart of the eye ports on the underside of the lid. Mine measured about 12” apart. That will be the width of your shelf. Next decide the depth of your shelf. I went with 10”. Now take your 3/16” steel rod and measure the depth first (again, mine was 10”). Bend there 90 degrees. From that bend measure the width (again, mine was 12”). Bend another 90 degrees making a U. Now the last leg will be to long and will need to be cut. Hacksaw, bolt cutters or I used a copper pipe wheel cutter. Cut the last leg the same length as the first leg. WARNING - CUT EDGES ARE SHARP! Use a file, grinder, stone or concrete to round off and smooth out the cut edges. Take your steel rod U and test fit it to your lid. If it’s angled up to high, remove the U and bend the last inch or so of each leg down a little, then reinstall. Repeat until you get the angle you like. Like magic, you made a shelf frame. Repeat to make an additional shelf frame if needed. Next you need a shelf platform for your pvc U and your steel U. I used fabric for mine. Basically you’ll need a piece like a pillowcase that will slip over the frame you made. With that said, it’s possible a pillowcase might work for the pvc U. But an even easier option would be a tee shirt ab section. Take an old tee shirt you don’t mind cutting up, see if the opening securely slides on the pvc. If so, trim it down, cutting straight across from armpit to armpit. For the steel shelf frame find yourself an infants tee shirt and do the same thing. You can always make your own if you, or someone you know, is handy with a sewing machine. That’s it! Now you have more room to set out and access your armor for a troop. Upon closing up your Box, pack up your armor, return your Tote to its position, remove the fabric platforms and toss them in the Tote. Next remove the steel frame U and turn it legs-down, over your Tote, against one of the inside walls, it will just hang there. Slide in the pvc U and secure it with the Velcro. Happy Trooping!1 point
-
Hope I’m not too late mate: Bicep hooks: I used a piece of cover strip abs 3/4” wide by 4” long Mark one end in two segments 1” long, once done trim and sand the edges of the piece so it doesn’t fray the elastic. Break out a heat gun, and have another piece of abs cover strip available to help form the abs when it’s malleable. Heat up the abs, keeping 4” to 8” away, I highly recommend having some heat resistant gloves to avoid burning yourself. You will see the abs start to soften, once this starts to happen, place your other piece of abs on the warm abs and begin to fold it over. Take your time shaping the abs into position, and I highly recommend doing a few practice runs. Once you have the hook shaped, it can be tightened up applying some more heat, and a ruler. Next heat the abs again to shape the bicep hook to match the contours of your bicep.1 point


