Leaderboard


Popular Content
Showing content with the highest reputation on 09/23/2020 in Posts
-
Hi folks, Checking in today and I’ve just noticed I’ve reached 3000+ posts on this wonderful forum!! Wowza... For me, this all started back in 2017. I wanted to renovate my yellowing SDS helmet and stumbled across “whitearmor” on google. I followed some excellent videos by Mike of Trooperbay and resprayed that helmet. Following that, I read more and more on white armor and, not too far down the line, I bought my first helmet kit from Ross at RWA. I documented that here on FISD and received excellent support and advice. That was a big part of the build, helping and supporting the build. After finishing the build, along with the armor kit, and clearing it up to Centurion, I was asked if I’d like to join the Imperial Attaché team - “HELL YES”, I said. :-) I later joined the DO team, helping troopers reach THEIR goals of EIB and CENTURION. If it weren’t for the changing of the guard that year, I’d have likely carried on in the role, along with the legends that are Joseph and Tony. Alas, things changed, however, this year the FISD is back on track under the exquisite leadership of Andrew. Anyway, enough waffling from me. I just wanted to say a huge THANK YOU to the FISD community. I won’t get into shout outs as I don’t want to exclude anyone, however, I’m pretty sure many of you know who you are - people that have made this forum, this community, so welcoming, supportive, and knowledgeable. Keep up the great work, everyone.---------- Best wishes Dan / CableGuy4 points
-
Hi all, I created this account several months ago and started doing a lot of digging. Since then, I ordered an RS Propmasters kit and officially had my BBB Day. With COVID and the lack of build parties, I really haven't worked on anything with the exception of some minor trimming. I have just about all of the tools required for it. Looking forward to getting it completed.2 points
-
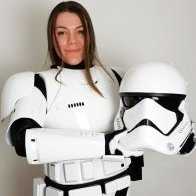
Off topic yet still Star Wars related, here I am in my daily Pandemic Work Attire2 points
-
Hey thank you! I was really leaning on ATA as well, they got back to me within a day. As well as I did join the LA Squad on FB and those guys are so nice made me feel right at home in their barracks. Today I’m going to talk to them about the companies they went through for armor and what their process was. Good luck on your build and I’ll be checking in to see your progress!2 points
-
Nice work, double snaps I love to see and great preventative measure adding some backing to your shoulder straps. In regards to the curve on the shoulder bell, although screen accurate some armor maker shoulder bells are quite narrow compared to the original armor so definitely do not trim a curve until you've actually fitted them to see how the sit. You basically want to be wearing your top half of the armor to really see how much room you have2 points
-
Yes Actually my shoulder straps have a extra small tab and a big one for larger trooper.2 points
-
The main reason some kits have them like AP for example was so they gave a little more room for larger troopers. If you dont need that bit then yes, cut it off for centurion for accuracy.2 points
-
This is a mini tutorial about the use of Neodymium ("rare earth") magnets. As you may have read here in different build threads, these little devils are invaluable when constructing a set of TK armor. BUT.. there are a few things to consider before purchasing and then using them... For purposes of this tutorial, I will be referring to magnets that are 7/8 inches (23mm) in diameter and 1/8 inch (4mm) thick, (as seen below) with a strength of N40. First, know that these things are STRONG! (Imagine a regular magnet the same size, but 10 times more powerful). This is a good thing for our purposes, but you should know a few quick facts first: 1. I mentioned that these are strong already, but know that the strength is such that they can (and will) jump up to 8 inches to reconnect with each other or another metal object. If your finger is between the magnets and this happens, it can cause injury, from bruising to serious cuts. They also can (and will) shatter if allowed to connect from a distance, and flying chips can cause eye injuries. In a word, be careful. I highly suggest wearing eye protection. That is up to you, but please read this post from Glen located below. 2. Due to the strong magnetic field, those with pacemakers or the like should take extra caution when handling these. 3. Whatever you do, keep these away from children. Now that I've scared you a bit, on with the show! When considering what size to buy for your build, I cannot recommend the 7/8 x 1/8 size enough. The reason being is that you will only need one on each side of the connection you are gluing, and they have a large surface area. Anything smaller (or thinner) and you run the risk of having to "double up" (stack) them to get the proper adhesion, and the thinner ones shatter more easily. When you receive them, they will have little plastic separators between each one. To get them apart, the easiest (and safest) way is to slide them. As you separate them, again, be sure to keep them as far apart as possible to prevent shattering or injury. (Save the plastic inserts). After separating them, I strongly recommend doing one of 2 things... 1. Wrapping each one in masking or painter's tape, (this will prevent them from scratching your armor) or 2. Making mini "sachets" for each one. The tape method is quick and easy, but the sachets are really handy if you have the time. To make them: Cut 4" (10cm) squares from a piece of fairly thick cloth, (not t-shirt type material) for as many magnets as you have. Place one magnet in each one**, and secure it with a zip-tie. (I used a rubber band for the photo, which will not work in real life). This gives you a "handle". NOTES: **Be SURE that you do half facing one direction out and half facing the other (north/south poles). Otherwise they won't adhere. Using a sachet will not prevent them from shattering. Cricket added a great example photo and tips in a post below. After you have applied the E-6000** to the seam you are gluing, place one magnet on the top of the cover strip, and carefully add one to the opposite side (inside). To keep the cover strip tight to the join along the entire length, I suggest placing magnets every 3-4 inches apart. If you see any areas where the cover strips are not flush with the armor, add more magnets. For the ends, you can use clamps as seen above. Be sure they have rubber or plastic on the ends, though. After the E-6000 has cured (usually 12-24 hours) it's time to remove the magnets! IMPORTANT! I have found the best way to remove them is this: First, remove the clamps. Then, using one hand, grasp the magnet on the top closest to the end. Using the other hand, SLIDE the one on the inside out, keeping them well apart. Stack them using the plastic separators they came with. Now, it's time to look at that perfect seam and think "Hey, I'm one step closer to approval"! NOTES: ** As the vast majority of TKs will tell you, E-6000 is really the best adhesive out there for armor. Unless you are an experienced builder, if you choose to use CA (super) glue, know that if it drips, you run the risk of it running onto your armor or causing the magnets/sachets to adhere to your seam. You have been warned. 1. There is no such thing as having "too many magnets". I know they are not cheap, but the more you have the more pieces you can glue at one time. I recommend having no less than 12. 2. There are many sources to purchase this size magnet, and the prices can run up to $3.00 each. But, you can find them on eBay most of the time for a lot less. This seller for instance offers them for $9.99 for six, which includes postage. https://www.ebay.com/itm/6pcs-Super-Strong-Neodymium-Rare-earth-Magnet-Disc-for-sale-7-8-dia-x-1-8-thick/281060567507?ssPageName=STRK%3AMEBIDX%3AIT&_trksid=p2057872.m2749.l2649 Another good source is here: https://totalelement.com/products/3-4-x-1-8-inch-neodymium-rare-earth-disc-magnets-n52-8-pack Tim (PICTreed) found a great site that is a fantastic magnet source here: https://appliedmagnets.com/neodymium-disc-magnets-1-in-x-1-8-in-w-countersunk-hole-p-601.html 3. When you have completed your build, please consider "paying it forward" to someone in your Garrison/Squad who is starting their build by selling them your magnets at a reduced price. "Troopers helping Troopers"!1 point
-
Using nylon will work, I do prefer doubled over elastic, just allows a little give when bending and stretching.1 point
-
Nice work Dan1 point
-
Great progress, stick with it1 point
-
Great to have another recruit for the SCG! I've been in contact with Kaleb as well1 point
-
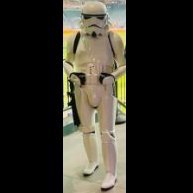
I've recently submitted for Centurion (pending approval) with my SDS armor. Yes, gasp! SDS!!! Hold the gunfire please. There are many issues with it and the company that I won't go into here, but I was told SDS would never be accepted for EIB or Cent without ALLOT of work. Well, I did it and am almost there. Just takes some mods, patience and perseverance.1 point
-
Well done Dan. Lets hope we can catch up at the Excel next year, even it that means in October!1 point
-
Hi Ted! As others have said, almost any armor from the vetted vendors list can taken to EI and Centurion levels; some kits may simply require more work than others. The first two links below are the L2 and L3 request forums which you can browse to see the common armor makers. The last link is to a resource thread I made which includes a long list of what I thought were extra-helpful/quality build and submission/request threads towards the bottom of my initial post (you'll need to scroll down quite a bit). https://www.whitearmor.net/forum/forum/19-request-expert-infantryman-status/ https://www.whitearmor.net/forum/forum/72-request-centurion-status/ https://www.whitearmor.net/forum/topic/49412-all-in-one-tk-anh-stunt-index-of-resources-by-maskedvengeance/ I hope this is helpful to you!1 point
-
Ah, many thanks. I hadn't read anything like that yet. I'll leave trimming the bells until after final fitting and adjustments - likely how it happened for the movies! Sent from my Imperial Communicator1 point
-
Copy that will do! That is a great reference. Thanks! I'm very happy with it. I'm glad I went with your fans and hovi tip mics. They are awesome. Thanks again! Okay great I'll definitely clean all that up! Good to know!1 point
-
Hi Kaleb and welcome. I'm still a newbie here myself, just received my ATA armor a couple weeks ago, so my build is still in it's infancy. Check out all the pinned threads in the "Getting Started" section, but I found the following particularly valuable when I started my research. Acronyms are widely used here on FISD and this thread is super useful for understanding them: As far as armor makers, the following thread is a must read. You really can't go wrong if you stick to the vendors on this list. And yes, I did read all 57 pages! As mentioned above, research is key. Good luck!1 point
-
We both went for Centurion and joined the ranks of IA around the same time (and staff too), so I’ve always considered you my FISD twin. You have been a great asset to the detachment, cheers to 3k more posts.1 point
-
Ive given the LMO's a heads up that you might be sending them an email. They are ready when you are1 point
-
Hello to all the Brothers in arms. I'm technically not a "New" person on here, I guess you could say I'm a "Re-New" user. I received my Big Browns from RS Props about three years ago and started right in. As a lot of you know, life can have other plans for you and thing get put on the back burner for a while. So after two moves, a new job, buying a new house, and two ill family members I'm back again with encouragement from Ukswrath. I have a build thread that I will be updating because I've done nothing since my last post. So, good building to all and I'll see you around!1 point
-
Hello. I am a diehard Star Wars Fan. San Antonio, TX. After debating if I wanted to choose to be a Stormtrooper.. Was brought down by decision due to height. I met many new friends through Cosplaying. Some that are 501st as well. After talking with them I decided to forget about my height of 5'4" and chose to jump right into doing research on where they told me I could see and ask a lot of questions. After final decision of choosing ESB I decided to make the leap. With help from friends on assisting me. I was able to get my ESB. I put in for 501st and was accepted. Newbie here but can't wait to be able to Troop. TK87227.1 point
-
Hi Luke, what we are suggesting is something like this. note: mine is an Anovos helmet too and I did those changes and it looks great now. Vocoder reference images cheers1 point
-
Second post of the day. This one's a little more fun because I'm making progress, not just playing around with a printer. On Saturday, I also stated that I hoped to have a gold helmet. For anyone keeping up with this thread, you've probably seen how I've gone crazy with the gold metallic Rustoleum. While I'm very happy with the results, I've decided it's totally pointless to do this with all the armor pieces. Essentially, at $4.00 a can, it's a colossal waste of money. For the helmets though, I'm definitely a believer. Additionally, I vowed to get over my fear of clear coat and used my Mando build as a test. Please bear with me for a moment, I know this isn't a TK, but the results speak for itself. I got a large run on the opposite side, but after watching a few hours of YouTube body shop videos, I'm ready to take care of it. The Mando helmet got a metallic silver base coat, 3 light coats of gloss black, two light coats of clear, and a final wet coat. I'll be ordering alumaluster and finishing this off soon. Having overcome my fear of clear coat, I set out to take care of my main project. On Saturday, I posted a pic of the helmet covered in white primer. Since I follow this up with gold, wet sanding may be unnecessary, but it really helps the gold lay down smooth. I love this pic. I didn't use any filters on it, this is just how it looked on a very sunny Sunday afternoon. I really want to do a Commander Pyre build now. While the bucket was drying, I circled back to take care of a few loose ends. First, I mentioned previously that I was going to print a new vocoder nice and slow. This was the result: Looking at it up close you can see the printer lines. These are only .1mm layers though, so they all but disappeared once I sprayed it with primer. But of course, I dropped it face down tonight. It's just going to take a little sanding. One good thing about primer is how it really brings out the flaws. In the first pic you could see the lines, but overall the tubes looked smooth. After priming, you can see a few rough edges. These get filed off and sand real easy. Speaking of sanding, I decided to re-work the forearms. I posted a pic of the runs a few days ago, but the more I looked at them, the more errors I discovered. I prepped them again and took to sanding and repainting. Additionally, I discovered that it was a bit premature of me to install the elastic on the inside. Originally I was thinking that I wanted to paint the clam shells while everything was together, but then I realized that the seams looked very amateur. It kind of reminded me of a basic MAACO paint job where they don't paint the door jambs. Also getting overspray on the elastic made them totally stiff and no longer flexible. Lesson learned. I didn't hit these with the gold paint and they turned out great. This is what made me think that the gold was overkill on anything other than the helmet. I also hit my abdominal armor with one last coat of sandable primer. I know I wanted to get this part sprayed white by tonight, but I think as long as it's done this week, I'll still make my self-imposed deadline. Also, when I was digging through my parts tub, I found my thermal detonator which I had totally forgotten about. Since I'm working on the belt again, I decided to finish this off. Yes! I remembered the ammo boxes with the trapezoid top. I did spray the cod and thermal detonator with gold. The Cod had a line going through it that I wanted to fill, and the detonator had a lot of detail work. Both turned out great, but as is typical, I have issues with dropping things. I tried to smooth it out and repaint, but really, I had been defeated. I already wiped it down with thinner and will try again tomorrow. At times, I feel like I'm writing a Comedy of Errors, but ultimately, everything I've screwed up has turned out ten times better on the second go-around. The Thermal Detonator didn't give me as hard of a time. The gold went on a little dry which gave me some weird flakes on the inside of the cap, but all that meant was that I would have to sand it down a little before spraying. Typically, I wet-sand the gold paint, but for this, I dry sanded at 400 and 800 grit. Everything laid down smooth. I don't know why, but this Thermal Detonator has turned into one of my favorite parts. It just looks cool. Also, I have a few ideas about it, but someone stop me if it's not allowed. The CRL states that the thermal detonator is "mounted to the rear hard belt and there are no visible screws or clips and is accurate in detail and proportion to official references." Additionally per the CRL, the mount is "fully enclosed with solid walls on all four sides." This all makes sense, but nothing's stated about how the detonator itself is mounted to... the mount. I want to use magnets, but wanted to check first before I finish the belt. Speaking of the belt, I started fitting it to the abdominal armor again. I mentioned this last week, but I've been running into clearance issues with the tabs and ab greeblies. In this pic, everything looks like it fits great, but the little tabs on the left keep rubbing the box. Even after I sanded off the glazing and spot putty, I was having to force it into place to get the belt to sit correctly. As a former mechanic, I know that this isn't a good sign, so I broke off the tabs, spaced them out appropriately, and epoxied them back into place. All it took was moving both tabs about a 16th of an inch. In these pics, only the left tab was moved. Really, it doesn't even look like I did anything to them, but the extra 1/4 inch total was night and day. Following this adjustment, I took a few measurements and installed the fastening system. So, I love snaps for some applications, but it dawned on me later that they have their place. Sometimes they don't work well. For the belt, they work great. I turned my attention to finishing the upper body armor and arms. This is where the snaps probably aren't the best idea. This is me going crazy with snaps. I've got the bicep closed here and the snaps installed on the outside. The bicep and shoulder fit together good enough, but I can't seem to put this on without unsnapping everything. Basically, I have to put on the arms and then have someone else snap me up to my shoulder straps. I may toss this fastening system in favor of plastic buckles. This is what ends up happening. My right bicep sits fine, but the left came unsnapped and droops down. This pic is funny, I felt like a teenager taking Instagram selfies. Finally, back to the helmet. Tonight I wet sanded the gold paint to 800 and let it dry for a few hours. On the last helmet I built, I rushed to paint and got a few errant water marks in the corners of the ears. This caused bad runs that were almost impossible to sand and polish out. For this, I let it dry on the work bench, then used the air hose on it. I followed this up with a microfiber towel, and then a tack cloth. This was after two light coats and one wet coat of gloss white. I waited 10 minutes between coats. Following this, I set a timer for 45 minutes and stressed about clear coat while I ate dinner. After going downstairs and looking at my Mando helmet, I worked up enough courage to get out the clear and hit the bucket with 2 very light coats and one flow coat. While it doesn't have the same wow-factor as high gloss black, I couldn't be happier with the results. Head on looks good and I'm very proud of how the eye bump turned out. And some 3/4 shot in front of its birth place; the CR-10s. Not sure why the pics came out blotchy. I think it's the lighting in the basement. Regardless, I am so happy with the results. I did have a stupid bug land on it while it was drying, but I should be able to touch that up no problem. Also, I got one tiny run that you can't even see from five feet away, so I may just leave it as a reminder of all the crap I went through with the original helmet. I'm going to let this sit for a few days before I attack the brow and trim. Also, since all my drama began with the Sharpie oil based paint pen, I'm a little nervous about trimming the tears and traps. Is this the best method or does anyone else have any tricks/ advise they can offer? Anyways, I'm nearing the home-stretch and am still aiming for the fourth. Good night and thanks for viewing.1 point
-
There are some updates needed to the standard Anovos TK kits you may want to look through Tony's build1 point
-
Regardless of the cape style I'd love to have this costume1 point
-
Fantastic job on your helmet overhaul Luke1 point
-
And a huge thank you back at ya Dan. You have been a fantastic member and asset to the FISD and admin team1 point
-
Amazing work !! , Thank you for your service. Fix It Glen !!!1 point
-
I agree with everyone and will email the LMO to get their input on the cape and boots, what I have posted already, and their thoughts on primarily using the figure minus the helmet. Sent from my iPhone using Tapatalk1 point
-
Congratulations! Members like you keep the awesome vibe on this forum. Thanks for dedicating so much here and helping troopers.1 point
-
And Phasma made her armor by using scans from a FOTK and adding her spin to it unlike Cardinal's first order supplied armor1 point
-
Nice work on the updates, you could take a little more paint off the top of the teeth if you wanted, here are some references1 point
-
Well, like the DO team says " some observations may lead to suggestions to improve the overall look of your armour." Most of the suggested fixes are simply strapping issues, like the gap between the shoulder armor and the chest/back plates or the belt position . The most complicated can be your larger Ab buttons plates. But following the indications of @TKSpartan , it is not very complicated... You will get the most screen accurate armor possible!!!!!1 point
-
Thank you Dan for the level of detail and help you bring to these forums. You are an asset to the Detachment sir.1 point
-
Look how small the belt cover caps should be, there's actually space on each side of the cap, IMHO this should be adressed like the AB buttons, I see many details less obvious than this being scrutanized1 point
-
Excellent!! thanks - that's very well done. I deeply appreciate your help and work documenting that process!1 point
-
Hey everyone, thank you so much for taking the time to respond, react and give feedback to my armor. =) I started out in Star Wars costumes five years ago after seeing TFA with a Rey costume - I always loved the dark side but to be honest with me being 1,66m and not knowing shucks about armors, I thought trooping next to my boyfriends Kylo Ren as one of this Stormtroopers would be near impossible. Well, life is strange and amazing and here we are years, costumes and experiences later and we both have Level 2 approved Stormtroopers during a pandemic. What is life even. I am beyong honered to be #1001 (feels like a great number) in the Expert Infantry and I am very much looking forward to work on the required changes for Centurion status. Thanks a lot folks, this community is a great batch. I'll be back!1 point
-
This is a very good and complete newsletter... I'm sorry to read about the losses.1 point
-
Note for centurion you can loose the large tab on the rear of the straps.1 point
-
Gonna try that to see if I can improve the shape. In my panic, I added a shim where the 2 halves connect which may have solved my main issue. They still dont connect very pretty, but at least now they are not trying to come apart and they can actually stay together with masking tape long enough to get a few shots in. I need to find a way to connect these together, the neodymium magnets are too big to fit behind the greeblie clip that goes where these 2 halves connect and I feel like velcro is still too weak to hold these together while trooping. I'm very animated while in costume So I dont want parts coming off when I bust a pose. Gonna add this strip to the other spat and then gonna go see if I can reshape these with a heat gun I got from Ace Hardware. Last time I played around with heat with an iron it didnt go so well. Maybe this heat gun will go better.1 point
-
Very nice. Can’t wait for the “all angles” shots to see how it all looks. :-)1 point
-
Nice work trooper, a couple of suggestions: Andrew already mentioned your cod and butt plate rivet/snaps Your drop boxes don't appear to be aligned with the ends of the belt Butt plate is flaring out on your left side at the rear. Shoulder straps could me event to sit in the middle of the backplate areas Appears your shoulder bells are a different lengths in the back image Left thigh is just hitting your butt plate Right back shin appears to be slightly more overlapped than needed Belt is also a little high in the back Side ab/kidney rivets are a little off line and quite a way from the end of the ab There is a dirty section on your belt Also there is normally a small amount of belt after the button cover on the end. Han snap is a little far from the edge of the ab plate Sniper plate should follow the angle of the shin top ridge. You also appear to have a crack you may want to glue/fill before it gets any worse Thigh ammo strip rivet is normally a little further away (and lower) from the end ESB blaster should not have counter attached and have correct style scope: You may also want to check on the CRL for mods for Hasbro blasters No ammo counter shall be present. Correct style scope. Could not see the straps on your handplates: If rubber gloves are worn the hand plates are affixed via an elastic strap over the palm. Detonator end caps do not look straight compared to control panel and gap is a little small There are just a couple of areas that the decals don't quite fill on the helmet Ideally the fall of the tube stripes should be forward back///////front, you also have a dented section under the back right ear Could you also add some other images. Inside thigh ammo strip rivet connectors Close up of your side ab/kidney rivets (no belt covering) As I say these are just suggestions, DO's have the final say on your application. Good luck
.jpg.290c0f3707e8eb0f337d693ff27d1097.jpg)
.jpg.b44cfb11eb49401ee3c24a3b461cb400.jpg)
.jpg.2ce7c161b92b8e11693a0c09357a6a74.jpg)
.jpg.0ce4d6c3186df9083eb9f0b595004a18.jpg) 1 point
1 point -
5% is pretty good. My CC is 2%. Mod note, moved this to NCO as it not an item for sale/trade.1 point


.thumb.jpg.a22c59871126b71e159a4adfd3e00414.jpg)