Leaderboard


Popular Content
Showing content with the highest reputation on 07/22/2020 in Posts
-
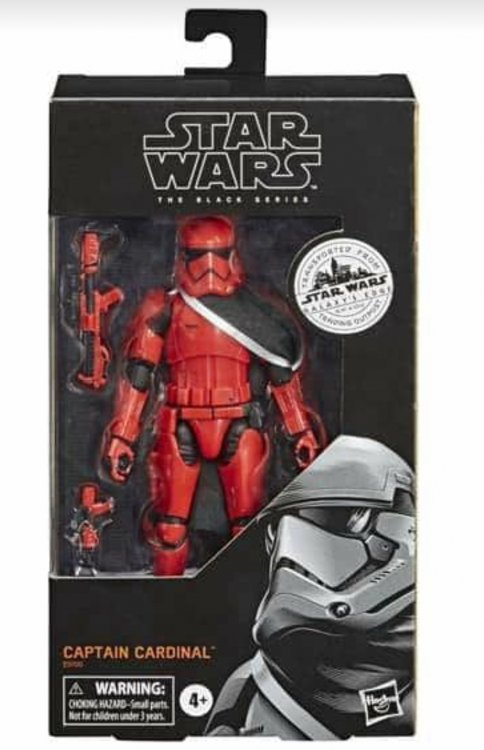
Going to be some happy people who built Captain Cardinal costumes, there is now a Black Series figure, depending on the current LMO's this could see a new CRL, then it would be what detachment does it fall under. https://www.target.com/p/star-wars-the-black-series-captain-cardinal-toy-figure/-/A-79416662 GUEST_e57a74e0-f763-4064-92f4-a07a77b1af77.webp
 3 points
 -
Test fitting today!!! Test fittings are awesome, but also a challenge to get through. I love seeing everything together for the first time. But I am not a fan of all the fine tuning that is so necessary at this stage. I still need to add black paint to the ab boxes. Adjustments need to be sewn into the belt for the thighs and rotations adjusted. Suspenders also need adjustment. The big one is that while I thought I had the biceps rigged in well, they just weren't hanging correctly with the strap I had installed in them. I have velcro sewn into the ends of the vest sleeves, so I used that to temporarily secure the biceps on the arms. The biceps kept slipping down as Cameron moved around, and as a result the forearm ends were cutting into his wrists. I'll have to make this connection more robust for the next fitting so the biceps stay put. Oh, and I put the leg gaskets on in the wrong orientation, so I couldn't put on the knee caps (and we weren't up for taking off parts again). D'oh! Now for the pics! Short test fit video. Again, biceps were slipping and will be fixed. Cameron is always so animated until I get the camera on him, then he's Mr. Serious! His boots arrived right after we took pics- how's that for timing? And I'm still adding paint to finish the helmet, but that should be done soon. Very close to being finished!!! Time for me to take a well-deserved break before finishing the detail work. I always get a little sad at the end of a build, so I want to prolong things just a little to enjoy it without feeling exhausted. EDIT: and spats are currently in assembly mode!3 points
-
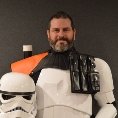
I wanted to send a special shout out to [mention=22112]justjoseph63[/mention] for going above and beyond. He PM'd me after my first post. Frankly I was feeling a bit intimidated and unsure I could build acceptable armor. His outreach and interaction made a huge difference. The difference between me just getting basic approval, and possibly trooping once in awhile and wanting to strive to build armor to the best of my ability! Higher level armor like EI and now I'll be shooting for Centurion. All this when I haven't even done a single troop (darn Covid). But I am sure that I will love trooping as much as I love working on the armor. So thanks Joseph (and others like him) and keep up the good work. You are truly a great ambassador for the 501st (and Vader[emoji6]). Awesome job mentoring and motivating newbies like myself to not only want to build better armor, but also want to be a part of the 501st.3 points
-
CENTURION PHOTO CHECKLIST (for all non-FO TK costumes) Mandatory Information: PHOTO GUIDELINES ___ Armor Maker Photo size- At least 800 X 600 (preferably 1280 X 960) ___ Helmet Maker Good lighting ___ Blaster Maker A neutral (solid) background color is suggested ___ Link to your EI Approval thread ___ Permission photos social media: Yes IMPORTANT!- Example photos can be seen below, but all photos MUST be 800 x 600 or larger to show details. You MUST include a link to your EI Approval Thread with your submission PDF Available for download/printing here:CENTURION PHOTO CHECKLIST-converted.pdf Optional information: ___ Full name ___ Height/weight ___ Boot maker ___ Canvas belt supplier ___ Hand guard supplier ___ Holster maker Please be aware that all photos listed below are required for approval Full Body 1. ___ Front (Arms flat by side, no weapon) 2. ___ Back (Arms flat by side) 3. ___ Left side (Arms raised) 4. ___ Right side (Arms raised) 5. ___ Left side detail (arms raised) 6. ___ Right side detail (arms raised) Armor Details 7. ___ Cod and posterior plate connections showing rivet/snaps (exterior) 8. ___ Shoulder bridges- Front/rear/sides 9. ___ Thigh ammo pack connections (interior and exterior, left and right sides) 10. ___ Sniper knee plate (left and right sides) 11. ___ Wrist openings 12. ___ Abdomen button plates (close-up) 13. ___ Posterior plate/kidney connection (back and/or front) Helmet Details 14. ___ Front 15. ___ Left side 16. ___ Right side 17. ___ Rear 18. ___ Close-up of Hovi tips 19. ___ S-trim (side view) 20. ___ Ear screws (close up, left, right and bottom). Accessories 21. ___ TD (Thermal Detonator) front and rear showing screw type 22. ___ Hand guards bent showing flexibility 23. ___ Holster attachment 24. ___ ABS/canvas belt (rear, showing drop boxes) 25. ___ Boots (tops and sides) BLASTER 26. ___ Left side 27. ___ Right side 28. ___ Rear (showing D-ring) Important! IF A PARTICULAR DETAIL IS NOT CLEARLY VISIBLE, THE APPLICANT MAY BE ASKED TO PROVIDE ADDITIONAL PHOTOS. Model: Philip Aitken (Ruffalo) TK 41808 Armor type: ANH Stunt FULL BODY 1. 2. 3. 4. 5. 6. ARMOR DETAILS 7. 8. (Front) 8. (Rear) 8. (Side) 9. (Left) 9. (Right) 10. (Left) 10. (Right) 11. 12. 13. HELMET DETAILS 14. 15. 16. 17. 18. 19. 20. ACCESSORIES 21. (Front/top) 21. (Rear) 22. 23. 24. 25. BLASTER 26. 27. 28. A big shout-out (and many thanks) to Andrew (Sly11) for doing the PDF for this!2 points
-
This is getting exciting. I remember when I first joined, and reading up on the March to 1000. C'mon people get those apps in.2 points
-
Greetings Troopers! With this thread being one of my top builds for referencing I thought I would compile it into a downloadable/printable PDF document. The Table of Contents is clickable—scrolling the document straight to the selected section—at least on a computer, and each main thread entry has a URL link straight back to the web posting. Also included are AJ's Pre-Approval, EI, and Centurion submissions, so the full scope of his armor build process could be documented and seen in one place. I've already shared the PDF file with AJ, but below is the link for all of you to have. AJ's O.F. AM TK Build https://drive.google.com/file/d/1kXZnv64H9fERK9rwoCWrDxKVy_71ovbU/view?usp=sharing Bonus! For my All-In-One TK reference thread I had also created a PDF document of AJ's reinforced shoulder bridge thread, which is linked below. I hope some of you will find AJ's threads as helpful as I have, and that these documents will add additional value to his work! AJ's Reinforced Shoulder Bridges https://drive.google.com/file/d/1GgREnqxtqXmQ_QsZJmK2C_6tD16Nro4y/view?usp=sharing2 points
-
Next reveal at 152 points
-
We have the PDF complete for this, Just removed them all from the planning thread and have add it to the post as a downloadable PDF version.2 points
-
Not to worry, sir. Even if you don't make the first 1000, there are still perks for reaching Expert Infantry! Special challenge coin/merch runs for EI's, having that badge listed under your name, a cool certificate, etc. But most of all, knowing that you have a set of armor that stands out and is more screen accurate than many will make you proud to be a TK!2 points
-
Hi Ken, and thanks for your application for ANH Stunt! CRL and EIB Application Requirements All required photos are now in and, after review, we are pleased to welcome you to Expert Infantry rank. On behalf of Sha Sha, Mario and myself, congratulations! Other-Armor Fit/Assembly In this area we review observations made by your fellow troopers and the DO team. Some observations may lead to suggestions to improve the overall look of your armor. Note that we consider both text (CRL) and pictures (screen caps/reference images) when reviewing submissions Awesome job on fitting this armor, Ken, especially since you are a "taller" trooper, and below are some suggestions to make it look even better! All small issues that can be easily remedied in just a few minutes, (except for the last one, which may take a bit longer). The brow trim could be trimmed back just a tad to where it lines up more with the rear of the trap line. Easy! Reference images It looks as if your TD could be pushed down on the belt some more. This would be a task for whoever attaches it, and something to consider when getting suited up. Reference images Another easy item here... although the left one is perfect, watch the alignment on the top rear of the calves. Reference images We know some of the ones in the films can be seen outside their "ideal" positions (usually in action scenes), but in a perfect world the top of the posterior plate should sit evenly with the bottom of the kidney. A simple strapping adjustment and you are golden! Reference images Although not a deal-breaker for Level 3, we are strongly suggesting that you bring down the sides of the thigh ammo pack about 5 mm. (Hopefully you didn't use CA glue)! Last up in this area is the inside of the sniper knee plate. I know you went to a great deal of trouble realigning it recently, and it looks MUCH better ! The reason I am adding it in the "suggested" area is because; A. It's not crazy noticeable. B. I know you are aiming for Centurion, and since you have to whip up some ABS paste for the shim (listed below) you can hit this at the same time! (Hint hint). Centurion Requirements In this section we prepare you for Centurion. More photos may be requested in the future that allow us to make better decisions on possible adjustments. If there are any areas of concern they will be discussed here. Because Centurion photos show much more detail than EIB, items to pertaining to Centurion might be seen there and not here. We try to point out all that we can from what is seen, but the final accuracy is the responsibility of the trooper. Your kidney shims turned out fantastic, but as you and I have discussed for Level 3 they cannot have a seam present. Making ABS paste to cover them and then sanding/polishing is actually not as daunting of a task as you may think, and I can offer some tricks/tips for ya'... just PM me. Your right one looks perfect, but the left drop box appears to be riding forward just a bit. After getting it lined up with the edge of the ABS belt, some E-6000 (orange area) behind the strap(s) will hold it securely in place. Reference images Last up, as you are aware, Hasbro blasters are not permitted at Level 3 so that will need to be replaced. (SUPER nice job on that weathering, though) And that's it, brother! You have a few issues to deal with, but I have already seen a few minor miracles you have performed on this kit so I have every faith that you can bring this armor to the next level... and I can't wait to see your Centurion submission!2 points
-
Gloves. Impossible to locate somewhat screen-accurate gloves in Cameron's size. I even bought a pair of FOTK gloves from Endor Finders in their smallest size, but they are huge on him. I decided to upgrade the old gloves he wore with the old suit instead. These are Rubie's kids size FOTK gloves. Essentially, they are made of stretchy polyester, white on the palm side, black on the back of the hand, and a piece of white foam stitched on the back of the hand to simulate a hand plate. It was simple to remove the foam plate with a seam ripper. Then I added velcro to the backs of the plates and back of the gloves. Done! Next, I decided that I could do better for Cameron's leggings for his undersuit. While they seemed somewhat suitable under the armor, they were really too big. I was constantly failing at finding a pair made from the stretchy shiny material I wanted that would actually fit his toothpick-legs. The only solution left was to make a pair. Which I have never done before. Still, sewing a pair of leggings looks easier than sewing a shirt... So I taped together a bunch of tissue paper to make a very large sheet I could draw on. I folded the "too-large" pair of leggings in half and traced the shape. Then I cut out the leggings shape slightly smaller than the original (ha! I now have a PATTERN!), and placed it on two layers of stretchy shiny black fabric. I traced the pattern piece on the fabric, cut out the fabric, sewed the edges, and voila, I ended up with some slick leggings. Big hurdle was trying to sew the waistband on these, though. The material likes to stick and stretch on the sewing machine plate. I ended up applying blue tape to the areas where I needed to sew to stabilize the material and allow for it to better slip under the presser foot. It worked well, but man, a total PITA to remove. Once I sewed the waistband and removed the tape, I had myself some leggings! Shiny! Here's what the old leggings vs the new leggings look like. Cameron is thrilled with the better fitting leggings! He reports that these new leggings are so comfortable that he did not want to take them off. Seriously, I had to do an incredible amount of pleading to get Cameron to change out of them. And I guess I'll keep the larger leggings for when he (eventually) grows.2 points
-
Hello all, Just a quick introduction. My name is Cley and I live in Western Canada. Currently having Dave's Darkside Depot create a set of ANH stunt trooper armor for me so I can take the next steps to join this prestigious group. Looking forward to my own BBB day so I can show off my new armor to you all. I already have most of my soft parts ordered (boots from Imperial Boots and an undersuit from Amazon). Just looking for a good neckseal. Found a few on Etsy but making sure they conform before I buy. Anyway, hello all. Looking forward to meeting you all and becoming an active member.1 point
-
After pining over this character for nearly five years, I have finally committed to building my own set of armor. This will be my very first armored costume, so I’m quite nervous about it. Depending on who is measuring me, I am about 6’ tall (give or take an inch), so the prospect of portraying a tall character like Captain Phasma is something I am really looking forward to doing. I chose to do The Last Jedi version simply because I like the bright chrome look over the weathered version. Pieces of my costume: Helmet: Shawn Thorsson (first run, 2015) Armor Kit: KB Props (on order) Boots: Dr. Martens Flora Chelsea Boots Neck Seal: Geeky Pink’s Fabric Gaskets: Geeky Pink’s Rubber Gaskets (for EIB): ??? Belt: ??? Undersuit: ??? Cape: Sewn by me I’m still in the early stages of building this costume, so my first steps are to prepare the helmet, order everything else I need, and start on my cape. I do plan to eventually submit it for EIB status, so I am not cutting any corners along the way. This is going to be fun, I think. Terrifying, but fun.1 point
-
TK41469 Requesting ANH Stunt TK EIB Status [ANOVOS] Armor: Anovos Helmet: Anovos Blaster: Doopy Doos E-11 / 3D Parts / BlastFX Height: 5’07 Weight: 160 Boots: Imperial Boots Belt: Kittell Hand Plates: Trooper Bay Electronics: TK Talkie /Self Made Hearing assist Neck Seal: Darman Holster: Anovos Full Body Front Full Body Back Full Right Full Left Right Side Detail Left Side Detail Armor Details Leg Detail Helmet Detail Photos Front Side Back Hovi tip detail Lens color (Backlit if necessary) Accessory Photos Gloves Ammo belt Neck seal Boots Blaster left side Blaster right side Blaster Rear Thermal detonator back1 point
-
Congratulations.1 point
-
Congratulations trooper!!!! Next stop, centurion level!!!1 point
-
Some useful threads https://www.whitearmor.net/forum/topic/29077-adding-the-kidney-shim-not-bad-but/ https://www.whitearmor.net/forum/topic/30226-side-shims-on-abkidney-help/1 point
-
Hi Adam, This is definitely a "So stranger thing" , I was going to suggest Super glue too as the last resource and let it dry ,clamped, at least 24 hours. Good luck Trooper1 point
-
That's exactly what mine did. The superglue sets so hard that it stops the E6000 pulling away and traveling alone the whole strip. Sent from my SM-G920F using Tapatalk1 point
-
Hello Troopers, I have a question and I would like to make some improvements to my armor, which is made of ABS. Is there a special pair of scissors for ABS (thickness approx. 2mm) and what is it called? What do you have to watch out for with scissors with which you cut ABS because I want to do without a saw, Dremel, cutter. -Thank you for the answer- imperial greetings Marcel1 point
-
Thanks for the neck seal info. I'll look her up for sure. Located in Alberta. I have signed up to the Badlands Garrison forum, just awaiting acceptance email. I have a friend (Yango) who is already part of the Badlands as well.1 point
-
I cannot express enough how valuable this resource will be to me. I was unaware of your build thread until I noticed this post under the New Posts tab. I've begun a build of two AM 4.5 kits and have been pouring over this thread for an hour now. The work you put into the PDF document is professional quality and will no doubt be used by many troopers to come. Thank you!1 point
-
These are what I used on mine. https://www.amazon.com/Excel-Curved-Lexan-Scissors-2-Inch/dp/B0006O5KEG along with the "score and snap" method.1 point
-
HI, I'm not sure but I think I saw your post of the ebay helmet. If it's the one I think, the main issue was not the two parts, it was that they were selling just the plastic pieces but did not included the additional components to build the helmet correctly. Most of the vetted sellers here sell the Helmet kit but they include all the pieces you need for a complete build. Also you can ask them if they can built it for you for adittional cost. Hope this can help. Cheers1 point
-
Congratulations Trooper! Great job on your armor!1 point
-
Congratulations Trooper , Welcome to EIB. Centurion next, Why not?1 point
-
Thank you to everyone: Joseph, Tony, Q, Andrew and everyone for the input, guidance and support. TK-88667 reporting for duty1 point
-
Hi Stephanie! The kind of paint you have there is acrylic, which may adhere to your helmet (and ab buttons) at first, but unfortunately it will simply not last, and will flake/rub off very quickly. Water based paints simply do not bond to plastic the way enamel (oil based) paints do, so it's better to go with enamel from the start. (Trust me on this one). You can pick up small containers of enamel paint at any hobby/craft store, and I also suggest purchasing some quality brushes to apply it with, not those cheap "throw away" ones you find at discount stores. Bad brushes = bad results. I would also recommend picking up some mineral spirits to clean the brushes with (thoroughly) after each use. This is your build thread, so please feel free to ask ALL the questions you have... we are here to help every step of the way! Posting photos will be very helpful, especially when you come across an issue that you need assistance with.1 point
-
Stay on target, this is getting there1 point
-
Congratulations Ken, welcome to the rank.1 point
-
Another step closer1 point
-
Congratulations and welcome to the EI ranks trooper1 point
-
Just saw your post over on Facebook and had to come check out your build thread! Amazing work!1 point
-
Only had time to sand the putty on the hand plates today and rinse them off. Hopefully tomorrow I can spray primer on the exterior and sand them again. Nothing else got done today as we were super busy.1 point
-
Thanks, Caleb! Andrew is working on the PDF at the moment so give him a bit of time. You, sir, ROCK!1 point
-
Hi Scott, and THANKS for your EI submission! I have PM'd you the updated EI photo checklist.1 point
-
Congratulations Sergio fantastic build. Welcome to EI1 point
-
Congratulations Ken, great job and welcome to EI1 point
-
HOLY CROW! Down into the teen numbers now thanks to our newest EI, Ken (ForeverFanFirstTimeRecruit) TK 88667. Way to go Ken!1 point
-
Nice work trooper a couple of things you could address: Mic tips should be white on the rim, also check the mesh size, Anovos is quite small, from the CRL: Screens used shall be of a wide type mesh, with the rim of the mic and the inside white or painted white. Small ab plate could be trimmed a little more, could touch up those ab buttons too From the sides it doesn't appear your ab rivets aren't in alignment, you may want to post a close up of those without the armor on You will need to post an outside image of the snaps Also include an image of your D ring on the blaster. If you want some real screen accuracy you would replace your TD brackets, should not have rounded corners and screws are closer to the ends Good luck with approval1 point
-
There are certain events we are not allowed to carry a blaster, hospital visits and such, I don't bother carrying anything else, end up putting your hands on your belt a lot1 point
-
Woo-hoo!! Congrats son! Told you all that detail work would pay off.1 point
-
Congratulations trooper and welcome to the EI ranks1 point
-
Greetings! “Lexan” scissors are what you want for cutting ABS. Some also use tin snips, but they are larger and less maneuverable. Having both curved and straight lexan scissors will greatly help you with ABS trimming. Sent from my iPhone using Tapatalk1 point
-
Power cylinders are complete, thank to T-Jay's kit1 point
-
Welcome, Erina! You're definitely on the right track with Christine's and ShaSha's builds! If you hadn't already found it, here is a link to resources I spent the past eight months collecting and bookmarking, like you. Hopefully it can be of help!1 point
-
Hi, Here you can find a quick guide on each Stormtrooper Ep 4,5,6 Cheers1 point
-
Welcome to FISD. I see you are (or will be) in CCG... I would reach out to @sharkbait who has built a Phasma as well, and is in our Garrison.1 point
-
For the shoulder bells if you use snaps you should be able to attach them to the bridges before putting on the chest/back. That is what I do, so it goes on like a shirt. For the TD, yeah that is a pain at times but you could also put your belt on sideways, add the TD and rotate it back. The belt doesn't have to be perfectly horizontal - you can see in the movies at times they move around a bit.1 point
-
The final push............... So after months of surface prep work, adjustments to various pieces and decals added I finally got to a position where I could get fully kitted up to see where / what I needed to adjust before putting in for clearance.... this is how it looked Few minor dressing issues noticed that were easily fixed but apparently this was good for clearance so I requested through my local garrison.... That was it I was finally cleared with a note to paint out the screws on my belt and to make sure the dressing issues were sorted.... Now it was time to get out and troop, pics below are a couple form my first outing.... So i was now cleared but there is more yet to come......I will update the thread next with improvements i made after getting a few troops under my belt in this kit as well as some improvements I am yet to make but have planned......1 point