Leaderboard


Popular Content
Showing content with the highest reputation on 07/08/2020 in all areas
-
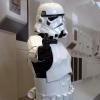
Alright, been a couple of days since I've updated, but I've been hard at work at finishing this helmet. I've been told by friends that the helmet is the hardest part, and frankly I believe them now. But finally I'm done with the painting! Granted, I definitely do not have the hands of a painter (my hands shake a lot), but I think I did a pretty OK job on this I had a lot of trouble with the lenses, mostly because the lens wasn't long enough to reach the ear screws, so I made some pretty bad cuts in it's place...oops. I tried using hot clue, but it just didn't work that well. Before I knew it the lenses were pretty scratched making it rather hard to see out of the helmet, so I ordered a new lens to replace it. Oh well, looks pretty good though otherwise! Now onto the arm portions of the armor. Hoping it will be much easier lol2 points
-
Mil gracias por todo. Tendre en cuenta todas las modificaciones aunque tardare en repararlas . Gracias2 points
-
Sorry to hear you got a bump back. Not sure I understand the pauldron comment - is it simply a dressing issue that a snap is visible? The backpack issue is a bugger, but it should be relatively easy to slice the pour plug off and fit a cover.2 points
-
I'm not quite starting my build yet and I'm not sure how swiftly updates will happen. However, a big brown box was waiting for me when i got home today and I was all too excited to open it up and take an inventory of my kit. It's MTK armor from Trooperbay. I knew it was coming soon but somehow still surprised me how quickly today became the day. cap n' back, faceplate ears (I'm not quite sure if there's a difference between the two or simply a spare set. I swear they both have the 4 ridges but maybe i'm crazy) fastener kit, mic tips, split rivets and washers assorted rubbers: brow trim, neck trim, gloves frown mesh, tube stripes, ear pinstripe tape assorted decals: ab plate, ear rank, helmet chest, abdomen, butt upper back kidney shoulder straps, shoulder bells biceps forearms, handguards (will most likely by ordering/using flexible guards) thighs and calves rivet covers, knee plate, drop boxes, thigh ammo boxes, belt detonator: pipe, panel, caps and swag (not pictured but also included: green lens and extra plastic) Now to wait for more supplies, read some more, watch some more videos, read some more, and formulate the plan of attack. The links and resources in response to my introduction post as well as poking around the forum in general surely prove invaluable. That said, any comments and suggestions are extremely welcomed2 points
-
I'm glad to hear you guys have found this thread helpful! If definitely took a long time to compile, and it will ever be a work-in-progress to update as I continue to come across other resources. As for pinning, I believe that is up to certain staff members, and I've recently seen @Daetrin and @Ripper_L take such action, though I'm not sure what the criteria are. Either way, I'm glad this thread will be helpful to future builders!2 points
-
Congrats to Laura (TK 17144) of the Dutch garrison on her recent EI level badge! Only 27 spots left, folks....2 points
-
https://www.amazon.com/dp/B01BLVEGHO/ref=cm_sw_r_cp_apap_8BsiH9AXfTDHq2 points
-
I have two things on my list to do when my son and I finish our armor. The first is to make a surprise visit to my brother, who loves SW as much as I do, with a set of binders to arrest him for being a rebel sympathizer. He has no idea of our projects and I think it would be a good memory for us to share over a beer years down the road. The other thing we would like to do is show up unannounced at my nephew's birthday party. What are some of your best memories when it comes to making random appearances?1 point
-
Hello brothers: Just waiting for the approval of the garryson of my country... these are the pictures that i have.... hope good news this year... cross fingers. Hope you like it1 point
-
Velcro can be tough but can occasionally come apart if knocked or rubbed against, I would suggest the bolted method would work better. Very easy to get dry spots and runs on one item, trying to get a consistent coat all over a model with curves and dips is very difficult, just try to remember when applying coats exactly how far away you are with the spray can and how areas can build up if recessed or curved.1 point
-
Yes Andreas, Basic is from your Garrison, EIB and Centurion you apply Here in FISD.1 point
-
Just to get it right. The basic approval is given by my Garrison? In my case the German Garrison. I´m actually in the process being approved. EIB or even Centurion will be done by FISD? I´ve built my armor following Level3, just Boots and undersuit are for basic.1 point
-
I went to car supplier who had a lot of colourcards in several shades of white. It took a while to find the matching one. But eventually i got two rattlecans filled. With a label on the cans I´m able to get the colour any time I will need one. I only used it on my helmet. I don´t like the idea painting the whole armor, because of chipping and cracking due to the flex ABS has.1 point
-
Next thing you know there are 40 applications within a week. Haha. Get to it Troopers! Sent from my iPhone using Tapatalk1 point
-
26 spots and counting down . Last approved EIB Fernando (TK29415) from Spain. The D.O. Team needs more action. !!1 point
-
You got this, Nada! Slicing off the knob on the backpack should be pretty easy. Can you remove that rivet on the pauldron? Is there any room to bring the thighs up, either by trimming any remaining return edges at the top (though it doesn't look like you have any), or widening the thighs with larger rear cover strips? Don't lose heart - you can do it!1 point
-
27 to go, the numbers are falling and the intensity increases. Get those applications in people1 point
-
The swagger came well before a started this project. Sent from my iPhone using Tapatalk1 point
-
Great to know mate!! looking forward for your TK ID.1 point
-
For my liking it´s good. Movement is also a bit better.1 point
-
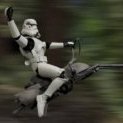
Hope you are studying that small amount of screen time this guy got, cause you need to also master that swagger1 point
-
1 point
-
I am curious to see how HSP armour comes out, I have their helmet but 850 AW armour.1 point
-
Thanks, Mario. I worked yesterday on my armor, and finally I´m satsified with the result. I openend the neck cutout a bit for more movement, tweaked the helmet also. New fotos are made. Approval should be in sight.1 point
-
Hi Laura, and thank you for your EI submission for ANH Hero! In the following review I will be going over items pertaining to your current submission, as well as those that will be required for Centurion level should you choose to apply. (And you should)! CRL and EIB Application Requirements: All required submission photos have been posted and I am very pleased to announce your armor displays all the necessary elements to qualify for Heavy Weapons Trooper Expert Infantry. On behalf of Sha Sha, Mario and myself, Congratulations! Other-Armor Fit/Assembly: In this section we review observations made by your fellow troopers and ourselves. Some observations may lead to suggestions to improve the overall look of your armor. Note that we consider both text (CRL) and pictures (screen caps/reference images) when reviewing submissions. First, fantastic job on this TM kit, and always exciting to see an awesome set of Hero armor ! Also, thanks for the updated photos/fixes and adding that new D-ring!! There are a few areas below that could use some tweaking, but in looking at the rest of your build I have complete faith that you can jump on these and make this Hero armor look spectacular! Although the screen used buckets certainly had more than a few gaps under the ears (part of their charm), some trimming and tightening could make these less apparent. Reference image In looking at the screen used references, you can also see that the tops (and lower sections) were quite a bit thinner. Trimming them down a bit could allow you eliminate some of those gaps as well. Reference images Not a deal-breaker, but if you feel up to it we are also suggesting that you trim down the ends of the TD clips. Reference image For closer screen accuracy, squaring off the ab-button plates would give a much better appearance. Reference image Centurion Requirements In this section we prepare you for Centurion. More photos may be requested in the future that allow us to make better decisions on possible adjustments. If there are any areas of concern they will be discussed here. Because Centurion photos show much more detail than those for Expert Infantry, items to pertaining to Centurion might be seen there and not here. We try to point out all that we can from what is seen, but the final accuracy is the responsibility of the trooper. While not specifically mentioned in the CRL, the interior sides of the Hovi-tips should be black. Note that the rear portion inside stays white, and having some white on the rim would help. Easy fix with some black paint! Also note that the screens in most of these tips are painted black, but doing that particular part is only a suggestion. Reference images As stated in the CRL, "Ab button paint shall not extend beyond the bottom of the actual raised button". Without a close-up shot of these it's a bit difficult to tell, but note in the reference image below that some of the white is seen at the bases. If the paint does go all all the way to the bottoms, some (non acetone) paint remover, a toothpick and a few rags would tighten these up nicely! Reference image A pretty quick fix here: The outside edge of the drop boxes need to line up with the rear edge of the ABS belt. A dab of E-6000 under the rear strap should hold it in place. Reference images And that's it! Again, great job on this armor, trooper... just a few items to work on, and then I honestly hope to see your Centurion submission soon! .1 point
-
thanks... i need to replace it soon because is a little crancked... so i will put it better then now.1 point
-
Hello! Great build! I myself just purchased a E-11 from Chris and am looking forward to finishing it. I got some great tips from this thread. Again, Great Job!1 point
-
Hi, I'm not a R1 armor expert, but looking some building threads and references, what I think can work could be: 1- Afix the Chest tho the Ab and kidney section plate using Velcro ? or 2-To lengthen back the shoulder bridges, (I'm not sure if they can move) and this allows the chest and back to down a bit (maybe 1 inch or 2). Note: When in armor, it's not easy to move your head freely, to see down you need to bend on and side movement is limited. Hope this can help or a least give you a tip . Cheers1 point
-
Welcome aboard! If it hasn't been mentioned yet, make sure you start a build post once you do get your kit. We all love seeing new kits getting built and it is a great way to show off your work and get help with parts you aren't sure meet the requirements! Good Luck selecting and building the kit for you!1 point
-
Helmet looks great although I agree it looks a little large, be interesting to see it on the armor for size.1 point
-
Welcome! Sent from my iPhone using Tapatalk1 point
-
Thanks boss!1 point
-
So HSP is making the armor now and looks like 850 is starting on the helmet.1 point
-
Well, it looks like I made a step forward by finding a sturdy strapping system for my torso......bad news is that I messed up my split rivet placement. Lesson learned: even though the CRL states something that might sound pretty straightforward.......still refer to reference photos. I need to decide if I still want higher approval. I still need to fix my butt to better match the kidney (I keep thinking I have the butt perfect, but then see it still needs reshaping). Hopefully after this final butt reshaping i would have my mind made up if redoing the split rivets and try and go centurion is still worth it.1 point
-
It looks fantastic! Sent from my iPhone using Tapatalk1 point
-
Nice work, trooper. Just a little tip for you - if you take your photos from around 6 feet back (perhaps with 2x zoom) the proportions will appear better. Theo’s is handy for those trying to give advice on your build. :-) Keep up the good work. :-)1 point
-
Perfect! Thanks @justjoseph63 Just before I start going back to my tools for coloring/weathering/attach it to the blaster, will this D-ring shape do?1 point
-
Hey Laura, great to see you back I’m no longer with the D.O Office so I will page one of them for you @shashachu1 point
-
Nice work Justin1 point
-
This is awesome to find out about, I can't wait to see what the benefits will look like!1 point