Leaderboard


Popular Content
Showing content with the highest reputation on 06/23/2020 in Posts
-
I decided to make a video showing how I pack my TK for a troop. Hope this is of some help to others! ---------- Sent from my LM-V450 using Tapatalk6 points
-
Hello all! Longtime lurker, first time poster. After years of having the Anovos TK armor (pre-ordered from the original run), I'm thrilled to say I'm finally at a place to put it together. I recently moved to Los Angeles from Chicago so I've had a lot going on but I'm finally set up and ready to build! The Stormtrooper is my dream costume so I'm very excited to get this going. I figured there was no better time than now to get a build thread started in case I have questions (I know I will). I've been a part of the Rebel Legion in the past so I've been around the 501st quite a bit but I've never dived into armor until now so I'm very excited! I've been doing much research around the forums and have been looking closely and a bunch of threads. The main build thread I'm drawing from is Ukswrath's Anovos build thread which has been extremely informative thus far. I decided to make the jump and go for L3 Centurion status right off the bat for the ANH Stunt TK so wish me luck! Some of the pieces I've sourced so far are: EDITED 8/8/20: Acquired Hovi Tip speakers from Ukswrath as well as a cooling bracket for the fans. Armor: Anovos Helmet: Anovos Undersuit: Under Armour-type from Amazon Neck Seal: TrooperBay Holster: Anovos Gloves: TrooperBay Belt: Kittle Boots: TK Boots Flexible Handguards: justjoseph63 E-11: Hellhounds Fans (with cooling bracket): Ukswrath Helmet Electronics (Hovi Tip Speakers): Ukswrath My plan is to replace the waist belt with a Kittle belt as well as install a com set. Also need to get the neck seal. So far I have the armor cut out and am currently in the process of sanding the edges and removing the return edges on the wrists. Will post progress pics as I go but I just wanted to introduce myself and say thanks in advance! Luke4 points
-
Requesting pre approval review for my armour. INFORMATION: 1. First/Last Name: Nadas McCartin-Cole 2. Future Garrison/Squad/Outpost: Southern Cross Garrison 3. Armour Maker: AM 4.5 4. Helmet Maker: AM 4.5 5. Cloth Belt Maker: SCG Member 6. Neck Seal Maker: Imperial Boots 7. Boot Maker: Imperial Boots 9. Blaster Maker: N/A 11. Height: 5’ 7” 12. Weight: 120 kg 13. TK Type: HWT 14. Names of Troopers that have helped me significant helped with your build: Ben Gordon (TK-15378), Michael McBride (TK-29379), Jade Pemberton (TI-12718), Andy Price (TK-42542) and Dave Conklin Backpack Maker: Dave’s Darkside Depot Ammo Pouches Maker: Jade Pemberton Pouldran Maker: Trooper Bay Sent from my iPhone using Tapatalk2 points
-
I finished the additional bicep/forearm gasket, then decided to dive straight into building the shoulder gaskets. For my pattern, I asked Cameron to donate a shirt that he didn't wear anymore, but still fit loosely on him. I marked roughly where the gasket vest would fit on the shirt, and then cut it up. I made a similar style vest for my shoretrooper kit, so I'm somewhat familiar with how to make this from scratch. I traced out the pieces of the cut up shirt onto headliner foam. I made sure that the front and back halves were well marked, because they are different! Same for the shoulder/sleeves. Here you can see how I clipped things together. Beginning with the sleeves, I attached a corresponding piece of ribbed fabric to the foam. I sewed along the bottom edge with right sides together (where my finger is pointing). This results in a nice finished edge at the end of the sleeve. Once sewn together, it looks like this: Next, I used some adhesive spray to attach the fabric to the foam more securely. Then I flipped the fabric and stuck the two halves together. Easy! Next, I stitched a length of hook velcro onto the end of the sleeve. Setting the sleeve aside, I moved on to the chest/back part of the vest. I attached the fabric to the headliner foam with the basting adhesive spray first. Then, I sewed along the shoulder seams. Because I had raw edges on the inside seams, I finished them off with a zig-zag stitch that emulates a serger stitch. This way, there shouldn't be any fraying of the edges inside the vest. Here's how it looks. Then I attached the sleeve along the shoulders and sewed things together along the curve, making sure that the raw edges were also finished with a zig-zag stitch. Sleeve on! Here's what it looks like before the final stitching, all flat. Next, I sewed under the arms and along the inside chest to close off the sleeve and vest half. And that's all I had time to finish today! Tomorrow I'll finish the other half of the vest assembly, then connect the halves with a few elastics in the back and a quick connect buckle in the front. I'm thinking that I'll make some black bias tape to finish the raw edges of the vest off... or I might just do a zig-zag serger style finish instead. Still trying to decide on that. I've got the pieces for the knee gaskets already cut out, so those will be easy to quickly finish. Very happy with how these are turning out.2 points
-
Friend finished printing my helmet! Once its sanded and primed it's being sent my way to get painted and finished. I also received my pauldron and ammo pouch from Trooperbay (will get a backpack once the build is done to more resemble the Squad Leader/Commander).2 points
-
First time making gaskets. Started with this photo. Figured it wouldn't be difficult to emulate this kind of thing on my own and save some money. Using shiny ribbed black pleather and headliner foam to add bulk. I took my measurements from the bottom circumference of the bicep. I want the gasket to fill in the space, not fit skin tight. For Cameron, it's 10 inches in there. I added three inches for seam allowances because I was sewing two pieces of fabric together first. Total piece I started with was 9x13 inches for the biceps. Attached right sides together, securing everything so it wouldn't slip while sewing. After sewing three sides, it looks like this. Clipped the corners and extra material along the seam allowance, then flipped it right side out. To finish the open end and hide the raw edge, I folded in the edges like this. Secured the folded in edges: And sewed along the outer edge to close. Next I secured strips of hook velcro to the material and sewed them on. Next, I folded the long ends together with the right sides together, lining up the edges. Sewed the edges together with a 1/2" seam allowance. This closed the bicep gasket. Laying flat, it measures 5 inches- exactly the size I need for Cameron's biceps gaskets. Finished. And seam side is clean. I had Cameron try it on with the armor pieces. The armor is currently in "scuffed" state because I'm waiting for a cooler, drier day to paint the armor with the final coat of white and 2k gloss. Hopefully I'll have time tomorrow to finish the rest of the arms and legs. I think the shoulders might take me a little longer than these simple tubes, but I know I'll get them tackled eventually!2 points
-
CONGRATULATIONS ON YOUR CENTURION ACHIEVEMENT! In order to receive your certificate, you will need to supply the information listed below in your post on this thread. Please double check your spelling and TK number, as corrections can not be made once it is generated. Do NOT add forum names, armor designations (Stunt, Hero, HWT etc.) as these will not be listed. All information MUST be included, or your certificate will not be issued. PLEASE NOTE: Only one certificate will be issued to each TK number. ONCE YOUR CERTIFICATE IS GENERATED, A LINK WILL BE ADDED TO YOUR REQUEST POST 1. First Name 2. Last name 3. 501st ID (TK number) 4. Paper size* (See below) 5. The name of the DO that did your final approval. (Sha Sha or myself). This is an example of how your post should look. Joseph Pedigo 10963 Centurion letter Sha Sha PLEASE READ THIS CAREFULLY BEFORE SUBMITTING YOUR REQUEST!!!! * If you are American and want a letter (8 1/2 x 11) certificate, write Letter. If you want an A4 sized certificate, write A4. PLEASE NOTE that the A4 is a completely different size than the letter, and those in the U.S. may have trouble printing it. It also will NOT fit correctly in a standard 8 1/2 x 11 frame. I will then reply to your post with a link to your certificate. It comes in a 300 dpi png-format picture, so you can send it straight to your printer if you want. Your Certificate data will only be stored here and available for you to download for 12 months, after that the back end data is removed for storage purposes and you would need to request a certificate to be reproduced. Please be prudent in downloading and saving your file to a PC or device. ********************************************************************************************************************************************************************************* IMPORTANT, PLEASE NOTE: I will try my best to get these to you within 24 to 48 hours. If you have not received it within that time frame please feel free to PM me. Thanks!1 point
-
So I am new to the 501st and this is my first time buying armor, (I am 5’8 and 156 lbs). I am planning on going straight for centurion level I am considering the AM 4.5 ANH kit and wanted to know the thoughts of some more experienced builders. Thanks in advance everyone! Stephanie Felton Cadet #20251 point
-
hello, I'm Tanner, since I'm going to be getting a suit from ATA Works soon, i figured it would be the time to introduce myself on these forums. I'm in the final stages on getting my first armor approved, a Clone trooper Sergeant Appo. i was going to wait until next year before i got a new armor but I've needed another project to work on. I'm excited to have my second suit of armor and hopefully get to know some of you. as of the current moment i really only have one question, and its about weathering. not that it makes much a difference, but is weathering of TK armor allowed?1 point
-
I’m 6-2 and apparently long legged. Is this knee gap acceptable? ATA kit.1 point
-
Great Job! Good Luck with submission!1 point
-
Looking good. Good luck with your submission.1 point
-
Very, very good work Nadas1 point
-
You’ve done a nice job with the shims on your sides! Take a look at the back of your left shin and see if you can tighten up the gap. The right one is tighter. From the front you look like an imposing trooper and I wouldn’t want to mess with you!! Nice work!!!!1 point
-
Took an around hour to glue some of the parts together this afternoon. The butt plate is fully built now. Bit worried about this for the same reason as my abdomen, I have hips. Hopefully it will be okay. Cod is done too. This isn't the one from CG Traders but a more accurate TLJ style one my friend provided. Think I'm okay sizing wise but may need a tweak closer once I can get more suited up. Made a start building up the chest plate. Minor miss-alignment on the part I fixed. I may have miss shaped it a tiny bit when I was making the changes. Nothing that can't be filled though. Also started on the helmet dome. Again 1 small miss alignment, right most part is a shade high in the centre of dome. I've filed off some of this to even the levels but I daren't take any more off. The rest will be handled with filler. I just need to take care to align the rest of the dome with a shade more care. This is the big problem with using super glue, you get a few seconds to see any errors before it's forever. None of this has been welded on the back yet. I will do this before I start on the filler work to help with strength. I may also fibreglass some parts, certainly the broken abdomen plate, but maybe others. I'm not overly worried about the filler work, none of it is any worse than what I have seen a Jimiroqui kit need.1 point
-
tots jelly... That is amazing. I have to start work on a Backpack. Good job Trooper!1 point
-
Thanks, Tony! Not sure if I'm worthy, but I do like cutting, sanding, and gluing plastic, LOL! Thanks again!1 point
-
Great work Trooper !!1 point
-
Looks good to me as well, Fred. Troopers come in all sizes, and I think you did a darned good job on fitting this armor for your height! (Ideally, the ABS belt could come up some, though). Nice work, sir!1 point
-
Lookin' sharp, sir!1 point
-
Model paint (enamel) and house paint (latex) are two different animals, Thomas. Oil base paints are much more durable and designed for wear and tear, whereas latex is not. With latex, even if you sand down and prime the rivet heads first it will not last very long, sad to say. Sanding is a key part of painting most items, as it gives the paint a better surface to adhere to. Enamel is the only way to go with anything on your armor... trust me.1 point
-
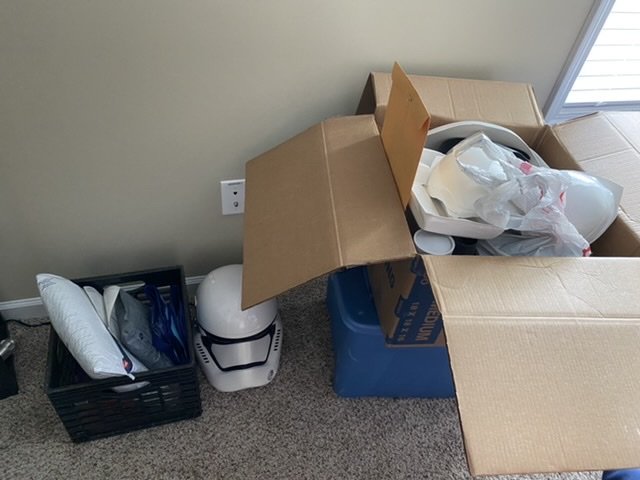
The box is here so I can finally get started. Placed an order New Year’s Day and afternoon some significant waiting everything is ready to go. Will be posting as progress happens and can’t wait to share. Tips/corrections encouraged. Now... how to take my first steps...
 1 point
 -
I'm 6" and I brought my shins up a little on my boots, just added some foam behind, helps reduce the gaps a little. I don't think it looks too bad.1 point
-
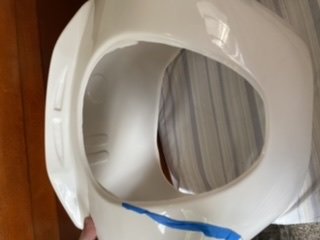
I’ve been trying to do hot water baths for the past hour to try to get these to lineup but with no luck, I’m calling it quits right now but will be back at it again tomorrow! Any suggestions on what I may be able to do during the hot water bath to help my situation? Thanks! Sent from my iPhone using Tapatalk1 point
-
That is probably good enough, the cover strips and glue should force them the rest of the way. Mine weren’t perfect either.1 point
-
Welcome trooper! feel free to ask, to search the forum, we are here to help you!1 point
-
Welcome aboard Luke! Can't wait to see those pictures as you build! Be sure to ask lots of questions, that is one of the reasons we are here!1 point
-
I'm going the decal route for my ATA helmet. Are these the proper decals to get? http://trooperbay.com/anh-stormtooper-dave-m-helmet-decals/1 point
-
Hi Luke, welcome to FISD. looking fordward to see your progress photos. Remember: "Measure twice or more, cut ans glue once. " Post photos, ask for opinions, tips and feedback. Here we have so skilled Troopers willing to help. Good luck and enjoy.1 point
-
Hello and welcome aboard, good luck with the build, looking forward to seeing the progress1 point
-
Welcome Luke, great to see you are in a position to get your build underway.1 point
-
Congratulations Peter, welcome to Centurion1 point
-
PETER TELEP TK-33348 Centurion letter Sha Sha http://www.whitearmor.net/eib/certificates/33348-centurion.png1 point
-
Thanks so very, very much, Sha Sha for your guidance and encouragement! I wasn't even sure I could get basic approval when I began, let alone EIB and Centurion! Needless to say I am thrilled and looking forward to getting out there and trooping with my squad. After all, we're here to put smiles on faces and spread our love and joy of Star Wars to everyone! I look forward to more builds and for continued contributions to the FISD and the 501st. Thanks again!!!!1 point
-
Congrats Peter! Well done, Professor! Sent from my iPhone using Tapatalk1 point
-
Congratulations Trooper !! Welcome to the ranks1 point
-
Congratulations trooper a stellar build1 point
-
Perhaps try all the arm pieces on together first to make sure you have the right gaps before doing any trimming, easy to cut off but harder to replace1 point
-
Beautiful work, well done1 point
-
Since the AP arms are the same, I noticed on the right side that it digs into my armpit since that side is higher. Did anyone trim the inside part of the right bicep similar to this?1 point
-
By some miracle I fixed the first shin. After much tinkering with various options, I was somehow able to separate the strip which ended up being the ultimate issue - it was way too stiff to conform to the curves of the shin and allow the halves to mate together. Found a bit of abs that was far more flexible and used that to ultimately get the shin together. There are a couple spots it didn't fully adhere, so I need to go back and sneak some more glue in there. There's a small gap at the top, but I'll figure that out later. Maybe abs sludge and then sand down to make the seam again. Forgot to mention before, I cut out the insert part because the pull was super wonky there. It's still got one part with a weird lip but I don't really want to sand it down any more. If I recall though, it's supposed to be solid there with a black sticker and not cut out with gaffers tape like on the chest, correct?1 point
-
Ok. So the yoke design changed into one piece. Convenient! I cut out the head and trimmed the back plate as well. I’m way too afraid to do cut the arm holes till I get further along in the build and do proper measurements on them. I think I’ll pause here on the body and start cutting out limbs next. Also. I’m covered in plastic.
 1 point
 -
Just did some tests with our other snaps that we had, they seem just as weak! Also my new legs in all there leg glory: (I did the lower trimming after this was taken!)1 point
-
Sometimes it helps to step cut the top of the ear as the face-cap/back overlap hinders the ear placement. If you do get new ears leave more meat on the front and take little off the back then little off the front that way you don’t take too much off. I didn’t drill or mount my ears until I got them in the right spot but it took 2 sets to get it right. If you were in Sydney or close to Sydney we could have had this settled ages ago, don’t give up you are almost there.1 point
-
How it shines !!!1 point
-
Definitely and are acceptable for EIB and Centurion, the soapy water trick is the way to go, allows you to move the decals into the right position when applying, oh and just in case you didn't know the cheek stripes should be positioned a pencil thickness from the sides1 point
-
Hey Ron! Yep. Those are the decals I've got. Watch trooperbays tutorial on how to apply them using a soap and water spray. Super easy.1 point
-
Yes, the Dave M decals are good, if you don't want to hand paint.1 point