Leaderboard


Popular Content
Showing content with the highest reputation on 05/05/2020 in all areas
-
Greetings everyone! It has been a very longtime goal of mine to be able to join the 501st. The reality has finally come full circle and I am at the cusp of attaining my set and applying for membership. I will be ordering a Full Commission build from Daves Darkside Depot. After treating and transporting numerous COVID-19 patients over the last 8 weeks (I'm a flight paramedic), I have decided that I need something to keep me sane. I am extremely interested in the charity work that the 501st offers and will thoroughly enjoy being apart of that (as long as I am accepted). I really look forward to meeting you all in the coming days/months! You guys and gals are amazing.4 points
-
A nice article here https://www.e6000.com.au/e6000-blog/did-i-buy-genuine2 points
-
I don't know why you FISD staff always focus on the sides of the knee plate lining up with the ridges on the sides of the shin, making the front pate stick inwards towards your knee. It's madness. The ends of the knee plate should blend into the shin top ridge as best you can - not follow the angle. More importantly is the front of the knee plate is glued flat to your shin - not angled. I know some knee armour can be tricky to fit but it's simple when you don't have to incorrectly follow the angle of the top of the shins with the knee plate. Red line - bad. Blue line - good. Real deal.2 points
-
Welcome to FISD and Garrison Tyranus Paul. If you haven't joined us on our forum, please be sure to do so. We are always looking for more Troopers! http://garrisontyranus.com/forum/ Be safe! Looking forward to trooping with you.2 points
-
LEGS ASSEMBLY Time to assemble all the components of the legs together. First, I made 2 straps with buckles, one for each leg assembly. Then I glued one end to the inside of my abdomen piece, between boxes 1 and 2, and 6 and 7. The buckles will be just below the belt, and inside the thigh armour. The other end was then glued to the inside of the thigh, after measuring how high the thigh piece should be on my leg. 2 elastic straps with velcro was glued to the inside of the knee gasket, and the corresponding side on the inside of the lower thigh. This is how it looks assembled. The same thing was done to the Shin piece. Next, I used a thin elastic cord and stuck it to the back of the knee armour, and also glued a piece of velcro in the center. I later realised that the velcro was not even needed, as the elastic cord rested snugly in the rib of the knee gasket and held the knee in place very well. Finally, this is how the whole set up looks. Only thing missing is the ankle spats. Did another test fit with everything on, to see that the distances and proportions are correct.2 points
-
This a Million Dollars Question . One thing made my wife to get onboard at least as a Photographer or handler sometimes is when I showed her photos of the Charity Work, visits to orphanages, nursing homes and Hospital that the 501 st Legion is doing. ( I was Not authorized for Birthdays,weddings etc) Good luck with your project.2 points
-
Thank you for your suggestions! Will be doing that later tonight. In other news, my IMP Boots arrived! I'll be using these ones for trooper, and I'll be using my old, more scrappy ones for rougher terrian. EDIT- It's actually kind of a blessing in disguise, as it will be hand having two pairs of boots!2 points
-
I too have an ANOVOS kit and I had a lot of fun building it. Always remember the folder rule, measure twice, cut once. Find someone in the 501st in a garrison you will be joining and seek out an armour specialist that could help you through the process. I’ve had a tremendous amount of help from a couple of legion members from my garrison that helped me out a lot. good luck brother!2 points
-
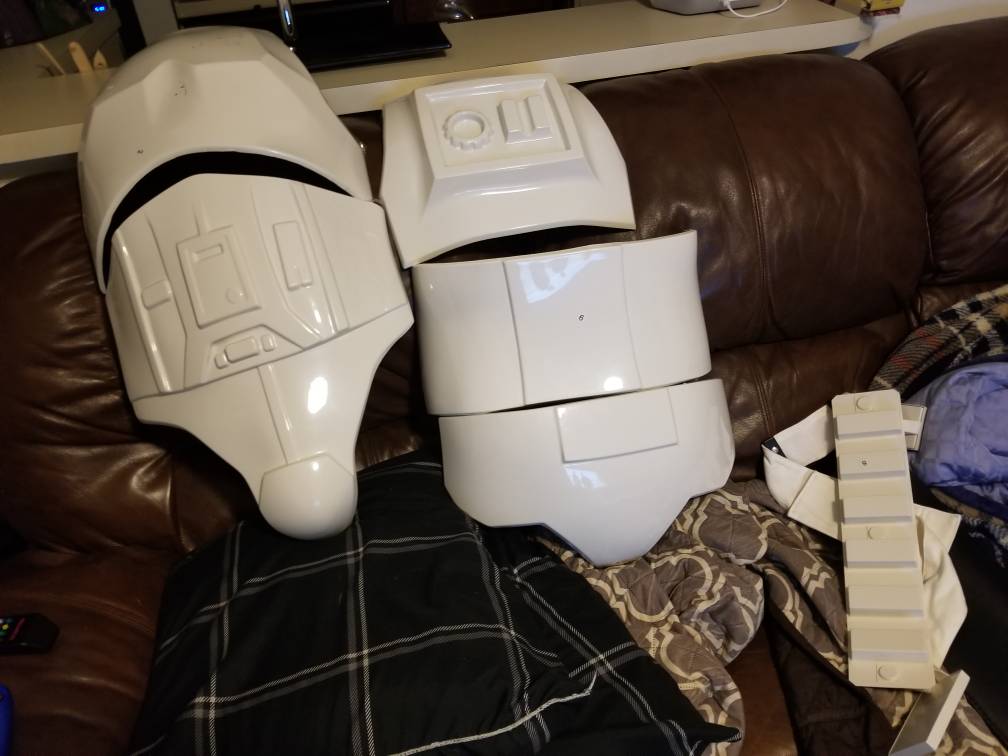
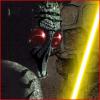
Alright, so I've taken my big brown box out of storage and started to lay out everything. I had forgotten I had actually bought some E6000 for this build so that's a good start. I will probably follow Ukswrath's build closely. The more I've studied it the more I have liked how he has things put together. Here are some pics of part of the kit. I also included a picture of the harness that fell out, a look into the bucket etc. It looks like the lense also fell off with the harness. Also attached are pictures of the E-11 I was talking about. Here goes nothing. [emoji2369] Sent from my SM-N950U using Tapatalk


 2 points
 -
Hi. Congrats for starting your build! A really good resource for building is this: This is a really detailed account of building the Anovos kit. For adhesive, it depends what you are trying to glue, but many of us use E-6000. You don't technically need a blaster for basic approval - but what trooper doesn't have a blaster, right? Post some pics and we'll let you know (you will need a imgur or tapatalk (or something similar) account to post pics on the forums). There are a few vendors that offer good belts. Check out the for-sale section: https://www.whitearmor.net/forum/forum/16-ongoing-sales-project-runs/ Good luck with your build.2 points
-
As we continue to improve our support for the FOTK we've comprised a list of all the Hard & Soft goods vendors to help you with your build. We will continue to monitor and update the list as needed. Just a reminder the FISD does not endorse any particular vendor, nor is responsible for any transaction between you and the vendor. Please do your research before purchasing. Armor/Helmet: Jimmiroquai - Origin PHILIPPINES: Kits are partially assembled/fully trimmed lightweight fiberglass (ready for rigging and painting). No issues with quality or service reported. Contact for delivery times/price details. FB Link Here, Email Here or send a private message @jimmiroquai Imperial Surplus (Kevin Weir) - Origin USA: Kits are made of ABS and require trimming and assembly. Armour kit is vac-formed with ABS and cast detail parts and decals are included with the kit. Quality has been solid, communication and service good. Kits ship out in 4 weeks or less Link Here WTF - Origin USA: TFA and TLJ new kit awaiting member feed back and reviews for quality etc. Kit made of ABS with some resin parts. Link Here Denuo Novo - Origin USA: Purchase Anovos and are now supplying kits are made of ABS and will need to be trimmed and assembled. Website Link Here KB PROPS Unavailable Origin USA: Kits are made of ABS and will need to be trimmed and assembled. No issues with quality or service reported. Contact for delivery times/price details. Link Here, Email Here Armoryshop Props - Origin RUSSIA: Supplies a range of First Order Armour and Specialised 3Dprinted Helmets Link Here No longer Listed 850 - Origin USA: Kits are made of ABS and will need to be trimmed and assembled. No issues with quality or service reported. Contact for delivery times/price details. Link Here No longer Available Anovos- Offers a "Pre-order" FO kit at this time, but due to legal issues and extended (1 year plus) wait times is no longer recommended or available Soft goods vendors: Soft goods assorted (Soulart) - Origin CANADA: Neck seals, Harnesses, Shiny biker shorts, First Order gaskets, Phasma capes. Link Here Soft goods assorted (Imperial Gaskets) - Origin USA: Rubber gaskets, Pauldrons and Waist belts. FB contact Soft goods Rubber gaskets (Thorsson Associates Workshop) - Origin USA: Link Here Email: [email protected] FB: https://www.facebook.com/Thorsson-Associates-Workshop-112076042142986 Soft goods assorted (Trooper Bay) - Origin USA: Link Here Under Suit - Stormtrooperundersuit Link Here link not working Gaskets - Sheev's Emporium - Link Here (Facebook sales page) Belt - Trooperbay Origin USA: Link Here ?Belt - Belts of the First Order (JAFO)- Origin AUSTRALIA: Link Here Boots - Keep Trooping (formerly Imperial Boots) Origin CHINA: Link Here Crow Props Origin Ecuador South America: Link Here Gloves - Keep Trooping (formerly Imperial Boots) Origin CHINA: Link Here Endor Finders Origin USA: Link Here Trooperbay Origin USA: Link Here Neck Seal - The Dark Side Closet Link Here (Facebook sales page) Sheev's Emporium - Link Here (Facebook sales page) Suspension - Awaiting vendor Waist belt pouches - Trooperbay Origin USA: Link here Hardware vendors: Holster - R2Dan. Origin GERMANY: Other hard accessories available by application. V2 Link Here Hand Plates - As above Shoulder bell supports- (Accuracy upgrade) - ukswrath Origin USA: Link Here Waist belt center box base (Accuracy upgrade) (Empire 3D) - Origin AUSTRALIA Link Here Machined metal components - Justin Morrison Origin UK: Parts for Blaster rifle and pistol mounting, Resin holsters and other greeblies, machined metal components and more. Email Here FB links https://www.facebook.com/groups/1654472361474254/user/802819468 https://www.facebook.com/kingleezard Helmet Lens - OPLE props Origin GERMANY: Link Here Accessories: Pauldron - Denuo Novo (No stock currently) Pauldron - Trooperbay Link Here Riot Shield - Awaiting vendor Tactical Vest - Awaiting vendor 3D files: 3D print files TLJ helmet (Sano) Sanotized Creations - Link Here 3D print files F11D (The5thHorseman) - Link Here 3D print files SE-44C (The5thHorseman) - Link Here Holster 3D files: 3D print files Holster (TheRascalKing) - Link Here Commission builders: Crooknight - [email protected] dbetters - [email protected] Building Guides/Thread,Tutorials & How To: Please refer to Building guides ... Weapons: General - Link Here F11D - Branfurh Studios (Etsy shop) Link Here Executioner Laser Axe - Armory Shop (Facebook sales page) Link Here / Etsy shop Link Here 3D print blaster kits - The Imperial Factory - ( Facebook sales page) Link Here Email Link Here Electroprod - (Empire 3D) - Email here. Link Here Picatinny rails: Purchase: F-11D/E-11 Picatinny Rails - (justloseph63) - Link (purchase) F-11D/E-11 Picatinny Rails - (evike.com) - Link (purchase) F-11D/E-11 Picatinny Rails - (m416gelblaster) - Link (purchase) Free 3D files: F-11D Picatinny Rails - (themaninthesuitcase) - Link 3D files E-11 Picatinny Rails - (TK14082) -Link Part of Rogue One 3D files Tactical Vest 3D files - Tactical Vest Slider Buckle Link Please refer to Vendors weapons list for up to date links/info1 point
-
WARNING: The following content may be controversial! DISCLAIMER: These are my opinions from years of experience, pure and simple. Over the years I have noticed many future Troopers doing an OT (Original Trilogy) TK ask about return edges before, during (and after) their build... If this is a subject that you are curious about, grab a cup of coffee or a tall glass of frosty blue milk (this is a long post, lol) and read on.... QUESTION: "What are they, what do they do, and should I leave them, trim them down some or remove them"? ANSWER: Return edges are part of the molding process and provide strength in certain areas on the edges of your armor. They also provide a heftier look to some pieces. To help you decide whether or not to keep them is why I started this thread. Here I will attempt to go into a few details about them. Know in advance that as mentioned I personally am NOT a fan of them in many areas for several reasons (listed below). Some people love them and some may disagree with my opinions... many of you may trooped for years with no problems which is AWESOME, but many folks have had issues and questions. 1. In most areas they are not screen accurate- In looking at the screen caps and film used armor photos below you will notice their scarcity. 2. They can (and in many cases will) get very uncomfortable- Many folks like the "thicker" look it gives their armor, but they can cut into you, especially in the area where your arm bends ("armor bite") and the groin area (chafing). As Troopers we do a lot of walking and arm bending carrying a weapon, so keep this in mind. 3. If aiming for higher levels they can cause fitting issues- Examples: A. If you leave them on your forearm openings and glue on the cover strips, they will need to be completely removed at the wrists for Centurion level, making the opening too wide. This can lead to you having to remove the cover strips, reduce the sides of the forearms and re-attach the strips. Quite a pain in the posterior plate to say the least. *** See EXAMPLE 1 below. B. If they are overly thick on the bottoms of your shoulder bells, they can prevent them from lying snug against the biceps. 4. They can cause splits/cracks- Especially on some armor areas. ABS is designed to flex, and in some cases a small amount of return edge is fine, but too much can cause stress on those areas. *** See EXAMPLE 2 below Over time that stress will take it's toll somewhere, and that is usually the return edge. Anovos armor is especially prone to this on the sides of the chest/back plates and neck openings. I suggest shimming these on the rear with ABS strips and E-6000 to prevent it. Let's start with the chest plate: Note how the ones below (including the back plate) have either no or minimal edges with no cracks or splits. Now here is a screen used one with a pretty prominent edge, Notice the stress crack. Now, onto the ab/kidney/back plate: To keep them in line and prevent them from overlapping, it is suggested that you LEAVE a fair amount of the edges on the top/bottoms of the kidney and bottom of the back plate, especially if using the "classic" strapping method. Yes, these can split/crack as well but not normally. Shoulder Bells Trimming off the entire edge on the bottoms is not only screen accurate (first two photos), it allows them to rest close to the bicep (bottom photo). Third photo shows "suggested" trim lines (red) of an untrimmed bicep. My recommendation is the blue line. Biceps/forearms For sheer comfort and a sleeker look, I recommend removing ALL of the top and bottom edges before fitting/gluing them. First, no one sees the tops (covered by the shoulder bell) and the bottoms can cut into your arms (armor bite). Suggested cut lines in red. Again, if you do get armor bite you will have to take them both completely apart, remove the edge and re-fit. Better to think ahead. Some (myself included) like to leave a bit of the return edge on the outside of the top of the forearm for a thicker look. However, I highly suggest removing all from the inside part (the "scoop") where your arm bends. Again, an armor bite issue. This should also be done BEFORE final fitting. Here are some screen used examples: For level 3 (Centurion) all of the return edge on the wrist opening must be removed, including the area inside the "hump" as seen below: Posterior (butt) plate: Again, it is suggested that you leave some of the return edge on the top (and bottom in most cases) to keep it from riding under/over the kidney. Now, the BOTTOM of the posterior plate is where we often find splitting issues. Should you leave some return edge? Sure! BUT(T), when trimming the corners, (see below) be SURE not to give it a sharp angle... this is where the trouble usually starts. Instead, give it a slightly rounded angle (as shown in green). Thigh tops The tops of the thighs are where we see a lot of questions. I recommend removing all the return edges from the entire upper parts, and here is why: As mentioned above, you will be doing a lot of walking. If you have the edges (or at least a large portion of them) intact, the friction and inside facing angles can really chafe the heck out of you, especially on the inside of the groin area. (Ouch). If there are sharp edges/points on the tops (below) these will poke into you. When trimming these, just follow the existing line. Also, if you do your final fitting, glue everything together and find this out afterward, you will have to take the entire thing apart, remove the return edges, trim down the sides and then re-build/glue them back together. The reason is that afterward the opening will be entirely too large and you will have a giant gap all the way around. Not a good look. Easier to do it beforehand, trust me. As seen below, there were no return edges (or at least minimal ones) used in the films. Sniper knee plate The bottom of this piece is an area often not trimmed enough. To allow it to sit flat (or very close to flat) against the top of the calf enough for the glue to adhere properly I suggest removing most if not all of the bottom edge. Note how in the first and third photos how the sniper knee is parallel to the front of the calf. Last up, a photo that best illustrates my point about return edges and how they were not really present in many places on ANH armor. *** Example 1. of what happens when you have to reduce the return edge(s) after attaching cover strips. NOTE: For the example below I am using an ATA bicep (first 3 photos). Be aware that ATA makes the "suggested" cut line on their return edges pretty slim (a GREAT thing in my opinion). As seen on the armor in the 4th photo, if followed, the "suggested" cut line makes the return edges much wider (red line). Top view Bottom view For the purposes of this tutorial, we will assume that the ATA has those wider suggested return edges. Okay, let's say you really like the thicker look the return edges give your armor, so you left them pretty wide during fitting and then glued on the cover strips. Enough to get your arm through with a little extra room. Should be good to go, correct? BUT, you find that after having your arm bent for a while they cut into you (armor bite), so you find you have to reduce or remove most or all of it. No biggie, right? Just break out the Lexan scissors or Dremel and cut away, leaving the cover strips attached. Easy! So you remove it and then you run into the fact that the opening is now enormous. This is not a good look, and can result in the piece(s) jangling around and not being approvable at higher levels (or even Basic depending on your GML). What I am getting at with the above info. is that if you decide to remove them, it's better to do it before final fitting/gluing. Side note: Many biceps have an unusual shape at the tops (in red, below) normally located on the inside. This can be completely removed. Doing this will not affect approval at any level, and is screen accurate. It sits under the shoulder bell so no one sees it anyway! Screen used bicep USELESS TRIVIA: Many have asked about the "thumbprint" that many armorers have on the left bicep (screen used example below). Some think it is so you can tell them apart, but I was speaking with Brian Muir a few years ago (he sculpted the original armor used in ANH) and asked him about it: "To be honest, I have no idea... it was not in my original sculpt, and must have been a mistake in casting". There you have it. *** EXAMPLE 2: What causes cracks/splits: ABS bends pretty well, just as it's designed to. BUT, when there are return edges involved that changes the game. For the below example I used a 2 inch wide strip of ABS with a 1/2 inch "return edge". Looks pretty solid, right? That's because the edge provides stability. Now I am bending it up/in to simulate use over time. (More than it normally gets bent in many cases, but only to prove a point). That stress has got to go somewhere, and it's the return edge that takes it all and gives way, again causing cracks/splits. The red arrow shows a weak area where the stress in concentrated and cracks can form. Even if trimmed off afterward that area will be prone to splitting, so a small shim behind it is suggested. To sum it up, return edges are not meant to bend a lot. I suggest inspecting your armor occasionally to spot any existing/potential cracks/splits so that you can catch them before they get worse. I hope this helps answer any basic questions you may have, and always feel free to ask more detailed ones here or offer differing opinions.1 point
-
Now updated to match current CRL requirements. Note: This checklist has been updated on 1/18/2024. wingnut65 Visual guides updated by TK-50297 Wingnut65 Printable PDF checklists are at the bottom. This new Hero Helmet visual checklist is added on 1/18/2024. wingnut65 Printable PDF below: 03 FISD ANH Hero L2 IEB - Ver 02 1-2024.pdf 31 ANH Hero Helmet - Ver 01 1-2024.pdf1 point
-
Now updated to match current CRL requirements. Note: This checklist has been updated on 1/18/2024. wingnut65 Visual guides updated by TK-50297 Wingnut65 Printable PDF available at bottom. TK50297 wingnut65 latest addition NEW exploded view fine detail visual guides. Note: This checklist has been updated on 1/18/2024. wingnut65 Printable PDF below 04 FISD ANH Stunt L2 EIB - Ver 03 1-2024.pdf 30 ANH Stunt Helmet - Ver 02 1-2024.pdf1 point
-
ONLY 5, 4, 3 2 1 SPOT LEFT, TROOPERS, SO TIME TO STEP-UP! 1000 Expert Infantry reached! Now that many of us are unfortunately stuck at home and boredom is beginning to take it's toll, it's time to wipe the dust off of that armor bin and become a part of FISD history! Instead of binge-watching re-runs, we are suggesting that you put the D.O. Staff to the test and spend some time on that white armor you miss wearing so much by applying for your Expert Infantry badge! As you may be aware, we are aiming to have #1000 approved by the end of the year. We only have 2 to go, so in order to reach that goal we are asking that you read over the CRLs for your particular armor, (this thread will help) make any necessary adjustments and post up your submission! Photo Checklist- Link here Apply Here Questions: 1. Not sure if I have what it takes to get my EI badge- You don't know until you try, and you have not only the D.O. staff but an entire Detachment to help! 2. I need some repairs/fixes first- This is why we are here! We honestly want you to succeed and are here to help in any way we can. 3. I am happy with the way my armor looks, so why bother?- It not only makes you look more screen accurate, it instills a sense of pride and "esprit de corps"! 4. What if I don't make it? No worries, we will provide detailed suggestions on how to reach your goal! Benefits: 1 Bragging rights for being one of the "Original 1000" 2. You get a cool badge under your name here on the FISD. (Street cred). 3. Access to EI rocker badges (coming soon) to go above your FISD patch (also coming soon)! 4. Access to coin runs for EI awardees only. 5. Certificate for your accomplishment. 6. You will have a more screen accurate looking set of armor, and be one step closer to Centurion!! 7. We are planning a VERY special piece of one-time-only FISD Exclusive merch to honor hitting this milestone! Know that the entire Staff and those who have reached Levels 2 (and 3) are here to help in any way we can, and that you are more than welcome (and encouraged) to ask any and all questions you may have here on this thread, or contact myself or Sha Sha. You can do it, Troopers. Let's turn this "anno horribilis" into a banner year for the FISD!1 point
-
Hey guys: In investigating the effort it might take to put together a passable DLT-19 for my coming Anovos armor build, I noticed a lot of people using the Hasbro "Build Your Own Blaster" (Clone Commander Blaster) as a base for what is essentially a PVC pipe build. As you may know, this blaster comes in pieces, and you can attach the pieces in various configurations to make different kinds of blasters. There are 7-8 different firing sounds that go off when you pull the trigger, the selection of which depends on what parts you have attached to the main "core grip" piece. What isn't quite clear on the packaging is that you cannot control the sounds except by having certain parts attached in certain ways. This is a shame, because the sounds are all great, and when you have all the pieces stacked into the full length rifle, the blaster plays a perfect DLT-19 sound effect (similar to AT-AT walker blasters in ESB). But how do we get it to play that sound when all you want to use is the core grip (and maybe the stock)? I took a risk and bought a used blaster on eBay, gambling that I could figure out a way to hotwire it somehow so that I could get the blaster to play the DLT-19 rifle sound (complete with rapid fire capability), yet not have any of the parts attached. Turns out that this was a very easy mod to make, and only requires a soldering iron and a few inches of basic solder. I have no knowledge or skill with a soldering iron, but I can tell you that this was not a problem. I did not have to open up the blaster at all, although you could achieve the same results by connecting the right wires inside. Me, I wanted to spend no more than 5 minutes of unskilled soldering and be done. So let's have a look at the core grip. If you look in at the barrel end, you will see a bunch of pins. They are spring loaded, but they do not need to be pushed in. Instead, the right combination of pins need to be connected in order for a particular sound effect to be selected: See those three pins? Just use something conductive: a wire, solder, aluminum foil, anything metal to join them, completing a particular circuit, and you will have the DLT-19 sound permanently selected. All I did was put a large glob of solder between the three pins. My process was messy and unprofessional, but a glob at the base of the three pins (and touching no other pins) was all it took: The pins don't necessarily have to be joined at their tips, since they are all metal. It's easier just to put the drops of solder at the base of them all. Once the solder cools and you turn the blaster on, voila! DLT-19 rifle sounds only! I then decided to take this one step further. I noticed that when the blue plastic magazine is plugged in to the core grip, all the blaster's sound effects become "rapid-fire" capable, meaning you can hit the trigger in rapid succession and repeat the sound effect. The cavity where the magazine plugs in looks like this (ignore the scope, it is not necessary): After some testing, I realized that if you somehow connect the rear two "squares" to each other, the blaster thinks the magazine is plugged in at all times. I accomplished this by dropping a glob of solder on each of the two squares, followed by a glob of solder between them, thus joining up all three. We're done! Wanna see it in action? Here's my YouTube video, trying it out after everything was done: https://youtu.be/H89UyyoZ79M If you're familiar with this toy, you know that every few shots, the shooting sound effect is followed by a random explosion sound. This feature is still present after this mod. Also, after excessive out-of-control rapid firing for several seconds , I sometimes have to turn the blaster off and then back on to reset it. I think this is typical as well. So there you go, simple, cheap, and easy to turn a really cool toy into the basis for a homemade DLT-19, complete with the proper sound effect. These blasters are out of production and quite expensive in the original packaging, but there are quite a few very affordable used ones on eBay, especially if you go for just the core grip and stock. Hope someone can get some benefit from this! Bill1 point
-
Hello Troopers! I am currently going through a mid-life crisis and decided I want to be a Stormtrooper so here I am... Okay that is only about half true, mid-life yes, crisis no. I've been interested in the 501st since I found out about it years ago. Like many of you I'm sure, I have put off getting involved because of other adult things like food, shelter, kids, etc. Well I think I am getting close to ordering my kit so I thought I would become more active on the site. I can already see years worth of tips and advice I want to go through so if you are a contributor, Thanks!! My plan is to order the untrimmed AP kit and go slow. Thanks for so many resourses! Until later, from the Great White North, take care and be safe! Scott1 point
-
My wife helps as support in all the events she can ... This is how she began to love the world of Star Wars...1 point
-
The first layer should be very, very light ... Wait 10 or 15 minutes between layers... I gave it about 5 layers I think ... Shake the plastidip well before using it and spray about 20 cm from the helmet. When finished, spray face down until no more plastidip comes out.1 point
-
I sent the two images above to the files designer and about 90 minutes later had an updated file with some really nice triangles! Image for those who don't want videos, just I was struggling to show them well in an image. Just need to reapply my resizing now and add the side holes.1 point
-
Seems like some Rebels messed with the Imperial supply lines... Imagination ran wild on that post and had to laugh (sorry)1 point
-
Congratulations Robert.1 point
-
Welcome fellow new recruit! Stay strong and safe out there!1 point
-
Hello and you've landed in a fantastic place for all things trooping related.1 point
-
Hi Caleb, for you to have and idea I have collected the following photos of approved Centurion RS Amor. Cheers.1 point
-
And lo there was much sanding. I found the 120 I was using was actually too much and blunting too fast. I swapped to a 3M Sandblaster 150 paper and it was both faster and gave a better finish for less hard work. It actually managed to save a few parts I was going to reprint Next step is to get all the modified parts printed out so I can test for wire routing before I start messing about with any primer. Doing a quick holding things together I found 1 or 2 more parts I need to modify before reprinting. For some parts I'm just going to take a drill to them. I also printed my modified torch ring and mounts. Pro: they fitted perfectly. Con: the torch is too long (but I'll saw it off anyway to get to the wiring) and well, there wasn't much meat left: So it broke into many pieces as I wasn't very careful removing it from the bed. I've redesigned the part adding in as much meat as I can, I don't need access to the torch now so I no longer need to leave space for access. Finally I was digging through the reference and discovered the TLJ F-11Ds all have a pica tinny rail on them. I couldn't find an accurate enough one on amazon/eBay and so modelled one up from the specs on Wikipedia and the reference images. I might tweak the end angles but looks close enough for government work to me. I'm going to print this in resin and possibly try add a light texture to it to break up a solid mass of satin black. Maybe use a different brand of paint too to give a slightly different hue and again break up a solid mass.1 point
-
Congratulations trooper.1 point
-
Some excellent advice from @TKSpartan there, Scott. If you can get her to volunteer as a handler, she can meet the folks in your Garrison and see just how much fun we have as well as see the smiles we put on people's faces. Binge watching the entire SW series couldn't hurt either.1 point
-
Wow! Congrats bro!1 point
-
Thanks guys, I decided to just go with what the wife likes better, so the shin with tape will stay on the left. Now I'm working on the sniper knee. I found this reference page I did find a few videos and threads here with techniques from other builders (yes I know, build off the reference photos). I did a rough trim of the top and bottom of the sniper knee part. The return edge is completely removed on the bottom but it's not sanded yet. The upper part looks kinda funny, and I'm not exactly sure where to put it when I install it. I of course took some pictures to get your opinions. I drew a line as a guess as to where I should trim the back edge, and I have another line around the top with my final trim estimation. Also I'm tempted to bathe these to get them to match the shin's curves better. I'm not too worried about the shin being off centered when looking from behind, it appears that the reference pics knees are also off centered, matching mine pretty well. this pic is a good reference for the back of the sniper knee. I did manage to finish attaching cover strips to the arms. I'm not sure if I need internal cover strips for those, but I do have the scrap material for that if it's recommended. I'm thinking the biceps will be fine, but I could see the forearms needing it with the extra movement and possible bumps that they would get in the future. The right forearm smooth cover strip area had a lot of excess bend in it, so I attached it while the protruding (top when wearing) cover strip area was not attached, then after that had cured I was able to bend the forearm and attach the top cover strip). sorry if that doesn't make sense, I can post a pic if anyone is confused. I haven't done much else today, just research and reading other build threads. I did read that the belt screw/rivet covers were 1" squares, so I marked mine out but wanted to find the actual reference to that before cutting them out. Heres where I marked the back side before cutting. That's it, I think tomorrow I want to get the thigh pieces fitted, and possibly finished. Well see how far I get1 point
-
Ted Christian Quisumbing 35679 EIB A4 justjoseoh63 Sent from my LYA-L29 using Tapatalk http://www.whitearmor.net/eib/certificates/35679-eib.png 2811 point
-
Thank you all! I already fixed some of the recommendations given. Hoping to get to the next level! Sent from my LYA-L29 using Tapatalk1 point
-
Hi Dax...We are here to help you... Welcome to FISD...1 point
-
Congratulations trooper... Next stop Centurion!!!1 point
-
Congratulations and welcome to the EI ranks trooper1 point
-
Hello and welcome aboard1 point
-
Welcome to FISD Dan, you're not alone, here you can find a lot of info and feedback and tips from our so experienced troopers. good luck with your build and looking forward to see your advance.1 point
-
Congratulations Trooper welcome to EIB. just few adjustment and go for the next level.1 point
-
Welcome to the FISD, Dax! Always great to see a future Carolina Garrison member, and I'm looking forward to watching your build thread! Just remember... ask questions, post lots of photos (especially if you have an issue) and have fun with your build. If you get nervous about a particular item, just post up a few pics of the issue before cutting or gluing and we will steer you in the right direction, I promise.1 point
-
Battle damage, lol. The tops of the biceps are just... well... amazing! Fantastic to see that you rounded off those corners, Shane. I see that you haven't removed too much of the "scoop" on the top of your forearm, but no biggie. Some troopers have no issues with armor bite there, but you have them fitted in a way that if you do need to remove more in the future you are in good shape. Gotta' say that this is one of the best build threads I have seen in a long, long time. Keep it up!1 point
-
Hi Ted, and thank you for your EI submission! In the following review I will be going over items pertaining to your current submission, as well as those that will be required for Centurion level should you choose to apply. CRL and EIB Application Requirements: All required submission photos have been posted and I am very pleased to announce your armor displays all the necessary elements to qualify for ANH Stunt Expert Infantry. On behalf of Sha Sha and myself, Congratulations! Other-Armor Fit/Assembly: In this section we review observations made by your fellow troopers and ourselves. Some observations may lead to suggestions to improve the overall look of your armor. Note that we consider both text (CRL) and pictures (screen caps/reference images) when reviewing submissions. First, THANKS for the fast fixes on the trap paint, kapatid ko. (Nice job, by the way)! We are suggesting that (if possible) you line the ears up a little better, sir. Ideally, the ear screws should line up with the rear angle of the trap above them. The top two on the right are pretty close, but the bottom sits a lot farther back than the left. The entire left one could come forward a centimeter or thereabouts, and you may have to remove one or two tube stripes so that the ear doesn't cover them. Reference images Centurion Requirements In this section we prepare you for Centurion. More photos may be requested in the future that allow us to make better decisions on possible adjustments. If there are any areas of concern they will be discussed here. Because Centurion photos show much more detail than those for Expert Infantry, items to pertaining to Centurion might be seen there and not here. We try to point out all that we can from what is seen, but the final accuracy is the responsibility of the trooper. As per the CRLs for Level 3, there should be "...a minimal gap between the shoulder armor and the chest/back plates". You have quite large spaces in those areas which would unfortunately not meet that requirement at this time. The tops of the shoulder bells should also ideally touch the ABS shoulder bridge. Reference image It looks to me that the sides of the bells supplied with the SE kit are a lot more narrow than most other makers, or that they may have been over-trimmed and will need to be replaced, sad to say. Reference image Reference images Although the left ab/kidney connection is perfect, the CRL also states that there should be "... no gap between the abdomen and kidney armor". The gap you have is minimal, and could probably be eliminated by tightening up the connection. Reference images The ABS belt will need to come up about 1.5 cm (2 would be better) to where the top covers the bottom of the ab-button plates. Reference images It may be the camera angle, but the ridge at the bottom of the the left front thigh looks to have a small gap. A piece of scrap ABS behind this would be good or better yet you cold fill the gap with ABS paste. Reference image Last up, (another easy fix here) the paint on the outside rivet on your ammo pack needs a paint touch-up. Reference images And that's it! You did a really nice job on this set of armor, Ted, and you should be proud! Although the shoulder bells are the main issue, the rest of the items should be pretty easy to address, and I really hope you can get these taken care of so that we can see that Centurion application soon. I know we can't troop right now, but the next time you do it will be as a member of the Expert Infantry!1 point
-
I don't know if you'll be a good trooper, because if you served in Afghanistan, I'm sure you have good aim......Just kidding... I like the emotion you have every time you get a part of the armor...I'm sure you'll take your armor to centurion level...I'm sure. Regards...1 point
-
GASKETS PART 2 And my arm pieces are back from the painters! Couldn't wait but to test fit my gaskets with the armour to see how my measurements were. It looks good, and this is before I strapped the gaskets across my body, which is why you see a little section near the top of my shoulders where there are no ribbing. So, strapping! After measuring the distance I need, I made 2 straps, and 2 more rectangular pieces. The rubber will be sandwiched between these 2 pieces of strapping, glued together, and then sewn. In this way, when there is tension, the strapping won't pull and tear the rubber. They would pull against strapping. And here they are glued and sewn together. For the front, I made a simple clip so I can get in and out of the gaskets. Did the same thing as the back: sandwich the rubber between 2 pieces of strapping glued together. And here it is completed. Notice that the ribbing now sits beyond the top of my shoulders, so when I wear my chest and yoke piece, only ribbing will be revealed. Calling this part done!1 point
-
Now updated to match current CRL requirements. Visual guides updated by TK-50297 Wingnut65 Printable PDF below 09 HWT L2 EIB - Ver 002.2020.pdf1 point
-
More filling and sanding happened this week, and the weather is good today, so that means... Priming!!!! Priming!!! Priming!!! So glad to be at this stage of the build. I like this part very much; all the hard work starts to look like a thing now! I thought I'd share a little shortcut for painting parts. I'm sure some of you already know this tip, but for those who don't, this can help you with spray painting your parts! We all know that some parts are kind of difficult to spray paint. They don't have flat surfaces, or are just oddly shaped. This is a way to get even coverage and eliminate any drips. You'll need some craft foam, hot glue, and coat hanger wires. If you don't have craft foam, styrofoam works nicely, as well as cardboard. You'll want your pieces large/thick enough to put your hanger into. Make sure your coat hanger wire is kind of straightened out. Stress on "kind of" for me because I don't have the patience to straighten out coat hanger wires. Keep the large hook in one end, and put a smaller hook in the other end. Length doesn't matter. Hot glue your foam block right onto the armor. Make sure it's fully cooled before proceeding. Once the hot glue has cooled and your block is secure, put your small hook end firmly into the block. Fishin' for armor! It should look like this when you're ready to move outside to paint. Now hang the larger hook end from a branch, pole, or whatever location where you can spray from all sides. Lucky me, we have a nice tree right outside of our garage with some relatively low branches. The length of the coat hanger puts the part exactly at eye level for me to paint. Before and just a few minutes after, I've got the first coat of primer done. And I love seeing the chest plate finally look like one part instead of a bunch of smaller assembled bits. I have a bunch of these coat wires, but not enough to paint all the armor at once. While these dry, I can easily hang them in my garage. I will leave the foam glued to the armor until I've completely finished the filling/sanding/painting process, so I can quickly hook up my parts again when necessary for paint. Using the foam and coat hanger method to paint parts allows for quick, even, drip-free coats. It also makes for keeping the parts off the ground and clean while they dry. The foam easily can be removed from the armor once everything is all painted. At this stage, I'm also out of filler primer. Boo!!! More will be arriving next Saturday, so the rest of the armor bits will just have to wait for their primer coats. In the meantime, once the primer has cured, I'll be applying spot putty, wet sanding, then applying gloss white. Can't wait!1 point
-
I feel inspired! I will be posting pictures tomorrow, hopefully I can get approved as one of the first thousand Expert Infantry, and if not, well I’ve got plenty of time on my hands to make the necessary adjustments. Thanks Troopers!1 point