Leaderboard


Popular Content
Showing content with the highest reputation on 02/27/2019 in Posts
-
Approval email received! Just need to wait for the election dust to settle and I'll have my TKID!4 points
-
None of them are an exact match. ATA is probably close enough, but it is whiter than Anovos, most noticeable in direct sunlight.2 points
-
It’s anovos attempting to pad the timeline.2 points
-
Strange that the glue is failing like that. You can try a slight bend in the strips to match your shape before gluing, and also try roughing up each surface with an aggressive sandpaper before gluing to help give it something to stick to.2 points
-
Hi agin Lars and thank you for your patience, we are hard at work trying to keep on top of things during this transaction period after the election and as you can imagine it´s a bit hectic - but we are loving every minute of it With that said I will have your review ready in the next couple of days, hopefully sooner2 points
-
hahaha Awesome Chris congratulations!!!!!2 points
-
Day-amn, Lorelei! You're a TK! I second Frank's request that you try for Sun at Brickfest. I'll be there that day with my wee jawa girls in tow. This all started Labor Day weekend with a boiling pot of water, a deep breath and "here goes nothing". Looks like you've enjoyed the ride. :-)2 points
-
Here are the clearer pics, taken today:2 points
-
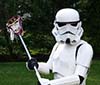
Thanks, Rat! Still alive over here. Garrison elections have finally gotten sorted and I've soft-picked my debut troop in April so all that remains is to get approved by then. which shouldn't be TOO hard, considering how much I'm beginning to look like a tk... another armor party on Saturday afforded the opportunity to finalize some strapping lengths and shave down some armor-bitey areas around the cod, as well as pass on some paint and advice to a couple fellow cadets who recently started their TK builds. Turns out I know a decent bit now, y'all... and what I can't remember off the top of my head, I can find in my reference photo album. Anyway, here's the (SHOULDER STRAPPING NOT IN) look: Also, pardon the lighting. This was before I reshaped the inner thighs. They're currently slimmer (but with the same curves). Forgot my holster hanging straps so no holster in pic. Loving the hinge on that side though! The other side, not so much. It has elastic strapping which is stretching far too readily, and then when it would go back together, the tab system provides just enough pressure to keep it spread apart. Also the lower snap hits my hip bone. I will be rethinking that closure. Ignore the black everywhere up top. Bib needs to be hemmed/tamed, had it on for sizing purposes. Think I'll trim my shoulder straps in the back. Anybody have input on how much I take off? Then I had to run upstairs to get cell signal. So I did. I sounded like a pile of Tupperware in a large mixer, but it was perfectly comfortable and I came downstairs with no problems. Only snag was that my left chest snaps came undone then, and whenever else I moved much. I'll have to readdress them. Then, when nobody was watching my potentially really really stupid move, I set up my camera on a timer and tried to sit down. And boy was it fun! I'll reinforce my butt plate with fiberglass tape and monitor for cracks. And try not to sit a lot. Maybe. Left to do: Sew in second halves of shoulder strap snaps (say that five times fast) Create shoulder bell-bicep wrap strap and bell-bicep hang strap Make elastic boot top cinchers Pad back thigh Rethink right ab-kidney connection Reshape lower calf openings Make strap from gloves to upper edge of forearm armor to keep cuffs from slipping down Repaint tube stripes with new brushes Mount ears, hovi mics, pad bucket Paint various hardware white Purchase ski mask/helmet liner Finish edges of neck seal bib And, longer term, I have to refinish my blaster and mess with helmet electronics. But the stuff above is more immediately necessary for approval. So.2 points
-
I have been using the chat quite a bit lately and it sounds like the customer service department is very limited and they don’t get much information at all. As we know Anovos in general has a horrible communication problem with customers and apparently within too. The CSR’s always say they are asking for the information and can only give what the production department is giving to them. In my opinion it’s the production department and their lack of communication with everyone that is driving Anovos down. It sure would be nice if upper management would address customers and fans at a Con or something. I wonder if a small group of customers went to an Anovos booth at an event with posters listing our first hand experiences with Anovos, wait times and lack of communication. Something civil and factual like “Hello I am an Anovos customer and am still waiting on my order/refund for 2 years now and still no hard shipping dates”. Maybe that would get their attention.1 point
-
Congratulations and welcome to Centurion trooper1 point
-
I also chose to work with e6000 as its very forgiving. My RS armor is pvc and the glue they gave me at the time did not set properly. Had same issues. Takes more time to set but worth it in my opinion.1 point
-
Hi Robert. One thing that worked for me when gluing the outer strips was to glue only one half of the strip at a time. First I made sure where I wanted the strip to be, then I sanded the area on the armor part & the glue side of the strip. Again, I glued only half the strip down let it set properly and then I glued the other half afterwRds. This helped keep things in place better for more and much easier to work with than trying to get both halves to stay aligned& under stress while setting.1 point
-
Thank you Sent from my LYA-L09 using Tapatalk1 point
-
What happened to the plastic sample database (or whatever it got called)? Who was looking after that? Yeah, Anovos certainly has a creamy color when compared to AP. I have no idea about ATA.1 point
-
Good luck, mate. :-)1 point
-
Hi Jennifer, and welcome to your Expert Infantry review. CRL and EIB Application Requirements: Thank you for adding the additional photos requested. All required photos are now in and, after review, we are pleased to welcome you to Expert Infantry rank. On behalf of the DO team and myself, many congratulations! Other-Armor Fit/Assembly; In this area we review observations made by your fellow troopers and the DO team. Some observations may lead to suggestions to improve the overall look of your armour. Starting from the top and working our way down, overall your lid looks fantastic. Thank you for swapping out those Hovi-Tips. Whilst there are quite a few variations of the frown paint in ANH, many had the paint extending beyond the un-drilled 5th hole. This is very common across the trooping community and can add that extra touch of detail. This could be a consideration. Frown references; Looking from the front, I can't help but notice that your face appears to be visible through the frown holes. Whilst this is not a requirement at any level, and was not part of the original screen used armour, you could consider affixing some black mesh behind the frown to help cover your face from the punters. This will help increase the illusion that they are meeting an actual Stormtrooper (especially the children). Also, if there is any wiggle room with your shoulder bells, you could try bringing them a little closer to the chest armour. It looks like you possibly have some extra return edge on the lower area of the bells which could be trimmed back a bot to help reduce the gap. Shoulder reference; The upgraded mesh on your Hovi tips is much better. Going that extra mile, we might just suggest slightly weathering the front edges (note the white edges on the screen used on the majority of stunt helmets). Whilst the forearm to hand guard gap is not that visible from the front, it does appear to be a little out from the rear. As below, you could consider adjusting your strapping to bring that right forearm more in line with the left, evening out the wrist to hand guard gap at the same time. We can also see that your gloves seem to be very shiny. The original gloves appeared to be more matt in appearance, so this could be a potential upgrade down the line for something a little more accurate. Moving down to the ab plates, the painted buttons look great. For a slightly more screen accurate look, you could consider trimming down the smaller button plate a little, and also paint the chest fixing screws white. Ab button reference; I've highlighted your holster to belt attachment purely as the right hand one, shown here, looks a little loose. If possible, this could be tightened/shortened to bring it closer to the canvas belt. On to the thermal detonator, the screw positioning could be closer to the edge of the clips, as shown below. This won't affect application at any level, just something that could be considered for that extra level of detail. A simple dressing issue on the calves, by the looks of it. We would suggest a final check on these when kitting up to get that alignment nice and even. Whilst there are examples of a few thigh ammo packs "hanging low", your looks a little lower than would be ideal. Ideally, it would be best not to see black between the ammo pack and the thigh armour so we would suggest moving this up by at least 1cm or so. Sniper knees can be a real pain to fit, however, you appear to have fitted yours really well. All we'd suggest here is to adjust the profile a little to match the screen used examples. (thanks to Glen for the excellent reference image). Sniper knee examples; Moving our attention to your blaster, as with many rubber blasters, the weathering is a little on the heavy side. Also, the makers appear to have inserted the magazine a long way into the magazine housing. As this is probably glued in, it might not be adjustable; however, we couldn't go without mentioning it. On the weathering front, certain areas like the grip and the rear half of the Hengstler counter were made of plastic on the original screen used blasters - as such, they would not have the silver/metalic weathering effect which appears to be present in these photos. You could consider toning down the silver a little with black paint, although colour matching might be tricky (on rubber). The bronze effect on the scope is also very strong. We would suggest adjusting this for a more screen accurate appearance. Blaster example; Centurion Suggestions; In this section we prepare you for Centurion. Because Centurion photos show more detail than EIB, items pertaining to Centurion might be seen there and not here. We try to point out all that we can from what we see but the final accuracy is the responsibility of the trooper. From the pictures provided so far, we only really have one thing to highlight which would be the lower ear screw positioning. As it stands, they are quite a bit higher up the ear than screen used examples. Your's is a fantastic build and it looks like you've had Centurion quality in mind from the off, so this little change would be the icing on the cake. Reference; Many congratulations again, Jennifer. We hope to see you applying for Centurion in the not to distant future...1 point
-
1 point
-
Congratulations and welcome to the ranks!1 point
-
Congratulations and welcome to the Legion Trooper1 point
-
Congratulations, Jordan!1 point
-
You could also try adding some CA to the inner strips when you glue them to get a bond. The E6000 and the outer strip should reinforce it.1 point
-
Thanks! Been super busy lately with life and the Vader build, but they will get done within a week or so! I'll post the updates here Sent from my SM-G950U using Tapatalk1 point
-
That's strange indeed. I used E6000 and they held the forearms together very well - even with the odd shape. All I can recommend is that you give the areas being glued a quick sanding with coarse grit sandpaper. Use painters tape to hold the arm together along with the clamps, and let the glue set for at least 24 hours - 48 ideally. The hot water will soften the E6000 - so hot bathing with the tape still on helps. Filling a sink up with mix of hot tap water and boiling water from a pot should work - the AP armor is 2mm, so it takes a bit longer for the plastic to soften up when compared to other kits. You've got this, Robert!1 point
-
Hi Jordan Thank you for your Centurion Application AND for your patience - I´m getting right on this for you1 point
-
Nice build thus far Candido. I reviewed your EIB submission from back in October and can see you made all of the recommended amendments that DO suggested so Great job there! Ive got a few more things to look at so shouldnt take more than a few days to process. Thanks Andy1 point
-
Look everyone see sitting isnt that hard to do if you build it correctly! Great work!1 point
-
Clean build indeed ! Very good job !! Goodluck with your application !!1 point
-
Clean armor ! Goodluck on that EIB application!!1 point
-
Lightspeed! Thanks for the quick turnaround and for bearing with us as we navigate the Command Staff transition. I'll be with you soon.1 point
-
Looking great!1 point
-
I never did understand why the Chinese New Year celebrations (which last for 23 days) would cause a TWO MONTH delay in shipping....1 point
-
Approval email received! Just need to wait for the election dust to settle and I'll have my TKID!1 point
-
From your last photo post, in the first photo, be careful when suiting up that your yoke is nicely on your shoulders. The left side appears to be poking out a bit, which can get uncomfortable. Doesn't appear to be consistent based on your other photos, so I believe it's just a suiting up thing. Looking good to me!1 point
-
But of course that was the first time I'd ever put my td on the belt. It would be nice to have a mannequin so I could work on the back of me... anyway that's on the list now, thanks for noting it. Just finished hemming the bib and sewing in the #10 snaps. I also took the large bump off of the back of the shoulder straps - I'll leave it at that for now as it's easy enough to take more off should someone suggest it down the road.1 point
-
1 point
-
I should probably do that. It’s such a pain to load photos from a phone. To this day I’ve never been on a forum that has made it easy. I plan on working more Thursday and will take photos just for you1 point
-
Hi Candido. Thanks for your patience. I’ll be doing your review and will take me a few days but just wanted to say you did a great job and should be proud. Hold tight Trooper.1 point
-
Looking smart1 point
-
Belt is done. All boxes are mounted just need to get more snaps so I can mount the belt to the ab. Butt plate has it’s hanging mount as well. Cod is next but I ran out of snaps. Working on 3D printing hangers for the TD and I’ll use Velcro at the bottom to attach it to the kidney area.1 point
-
Added those shots!1 point
-
Hi Eric, Great build and great photos! Could you please include the following additional photos: * Close-up of blaster D-ring * Close-up of TD screws * Straight-on photos of the left, front, and side of the sniper knee Thanks, Sha Sha1 point
-
Hi Sven, Sorry for the delay; things have been a bit chaotic as we work through the Command Staff transition. One of us will be with you shortly.1 point
-
Yup, just the paint itself. The panel trimming is1 point
-
Great point Glen1 point
-
FYI tube stripes can also go on two ways, but the correct way from back to front, they have a greater fall from the top, from back /////// front1 point
-
It can take some time so please be patient, someone will be with you soon, remember we are all volunteers who take on these rolls and real life can take preference1 point
-
Great job!1 point
-
Hi Brendan. Thanks for your patience. I’ll be doing your review and will take me a few days but just wanted to say you did a great job and should be proud. Hold tight Trooper.1 point
-
Prototype is finished. I'm happy with how it turned out, I just wish I was a better painter. I did some weathering because I'll be using it for the crystal patrol trooper.1 point