Leaderboard


Popular Content
Showing content with the highest reputation on 01/02/2019 in all areas
-
We already have levels, though. EIB and Centurion are optional programs. Nobody here at FISD is knocking on basic Legion standards, and if people choose to stop there they are more than welcome to. Trooping is what really matters, after all. EI is meant as a upgrade over basic Legion approval, but still leaves a lot of leeway. Centurion was added later for those who wanted something closer to screen accurate and as such, I personally see no problem with added most of these suggestions.5 points
-
As a leathercrafter, you never know what you will create since all customers have their different orders, wants and needs. I recently closed my shop due to construction work in the store area, so nowadays it´s crafting in the home instead and on a smaller scale. However, anything is possible still and here are a few examples of previous creations. I also create jewelry in silver, bronze, titanium, pearls, bones etc and specifically and very often, the Norse often seen Kingslink worn a lot by Viking reenactors. A note for the leather: All leather and skin used in the crafts are always from a Vegetable tanned source. No chrome products is, will or have ever been used and that is a very high importance for me. I only use Vegetable tanned materials, everything is hand crafted from the ground up and hand stitched, colored, engraved and made worn. So... as said...some mixed items coming. Starting with a hello from me at Birka 2018 A custom commission for a fantasy larp. Customer wanted a very specific setup with a light battle-worn patina and a crest their group uses. The armor is a two item setup with the Chest and Belt combination. The client had a Thors Hammer, but nothing else. We opted to make him a set of 925 Sterling silver Wolf´s heads clasping rings attached through a twisted silver bar that went through the hammer and held everything in place on the 65 cm long chain. The following picture is the same weave but on a thinner scale and in copper. All these rings where created by hand one at the time, then hand sawed and mounted. Some light engraving for a restaurant to put the customers check´s and credit cards in. And to close with, the old Cosplay pics from Gamex when we did a job for EA / Bioware for Dragon Age Inquisition. Here i used an old Chest armor etc i had at home and a bud´s sword , but we only had 14 days to make the stuff so, sometimes a shortcut is needed haha. Keyword to make it work when in a rush. Layers layers layers.2 points
-
I have a vice in the garage - so I just stuck an end in there and give it a quick bend. I'm not creative enough to think of another way to do it. As for the Velcro - you will want your TD to move with your belt, so I'd be hesitant to add hook Velcro to the armour - plus it would make it really hard to get it on while dressing. I've never had an issue with the TD working its way off the belt.2 points
-
Happy New Year, BBB day
 2 points
 -
The suggestion I made for the ear angle was indeed for Centurion level, "... I am proposing the following changes to the CRLs for ANH Stunt and ANH Hero for level 3. " I suggested this so that those in the build process would have more of a guideline to work from during a build, rather than have to try to fix it afterward. Much better!2 points
-
Hi again! I've finished both ears. And the result: Like I said, I'm pretty sure this is the best I can do. Is anything about this going to be a barrier to Centurion? Thanks for all of your ongoing help, everyone!2 points
-
I suppose it's all down to perspective and how picky you really want to be, there does appear a difference between Hero and Stunt as show below, Hero vocoder appears a little narrower and the tiers (steps) are a little lower on the sides. Stunt appears fuller. Han and Luke's helmets do appear to have a little more paint in the centre top of the vocoder and the side of the tiers (steps) appear a little lower in the below image when compared to Stunt versions No matter what though Brendan your touch up to the vocoder looks a lot better now, good work.2 points
-
FISD: come for the detailed analysis and critiques of TK armour... stay for Matt's and Frank's banter.2 points
-
How about a slightly crooked one for the TK that spent too much time at the imperial bar last night while off duty. Sent from my iPhone using Tapatalk2 points
-
I just finished my Old Republic Havoc Trooper for submission to The Rebel Legion.1 point
-
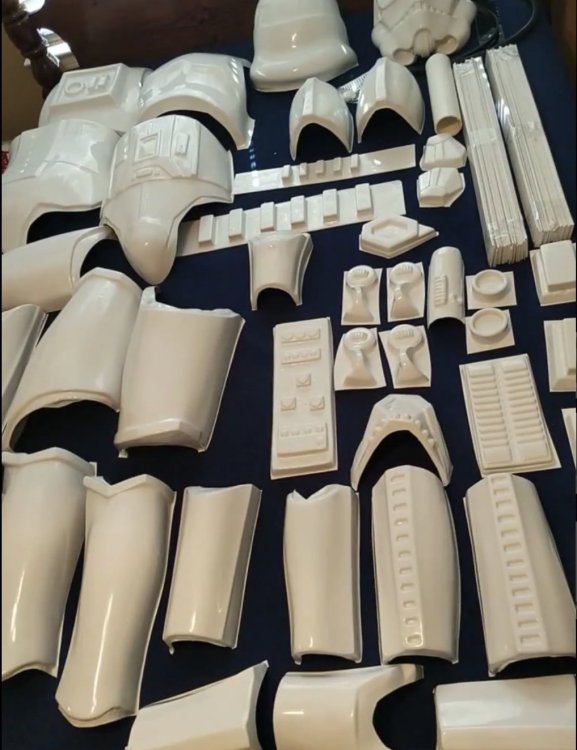
First time armor builder here. I received my BBB from Walt back in September, and have finally got the nerve to begin after reading many other threads. I’m 5’5”, 125 lbs, so I will doing a lot of trimming. Here are a few pics of what I have done so far. Any input will be much appreciated.
 1 point
 -
I’ll try Tapatalk before resorting to the desktop. And I think I will stay on this forum, I see there is a sub forum for build threads. Thanks1 point
-
I would never have thought to search for that, that’s a great idea. Thanks :-D Sent from my iPhone using Tapatalk1 point
-
He just claims he can't make it himself but I can't let biometry like that go to waste! and I'm still here, still here, hurry up and make the Emperor proud with more progress already.1 point
-
There are a few videos out there that show people getting dressed. Worth a watch - gives some good insight into a few things.1 point
-
Cool. Thanks! Sent from my iPhone using Tapatalk1 point
-
Correct1 point
-
Happy new year Patrick and wow - what a start you made! Loving this build.1 point
-
Just an FYI regarding the tube stripes: they are beeing revised for 2019 CRL update and the suggestion is that for Centurion they will need to be no more than a standard pencil width from the cheek. It’s not implemented yet but it’s likely it will.1 point
-
Thank you =) There are plans ahead this spring that will be posted here as well. Got some Artifacts, both Jedi and Sith in planning and am looking a bit for concept arts to make versions of the Force books from the Last Jedi. In short...i can´t afford collectors items, so i´l be making my own1 point
-
Coming on nicely! I love a good blaster build, and this is certainly a good one. :-)1 point
-
Happy New Year everyone! Time for the first update of 2019. So what’s new? New tools Received packages containing a set of wax carving tools (with nice knurling pattern; thanks Dan ) and 2mm stamps. 20181229_135813 Fixed loose end cap The end cap of my kit was very loose when mounted on the tube. Fixed this by gluing 3 ABS squares inside. Much better now! 20181230_183335 20190102_171449 Inner bolt details Recreated the inner bolt serial number using the 2mm stamps, and the extractor and plunger from some scrap metal/aluminum parts. In retrospect I probably made the layer of green stuff for the serial number too thick, resulting in a bit of “waviness”. Unfortunately this was the best I could achieve after numerous attempts... 20181230_215754 More folding stock details Recreated the figures on the sides of the folding stock that had nearly disappeared in the resin cast, using engraving/carving. 20190102_171343 More carving to create the illusion of separate parts. 20181230_220320 Scope Assembled the beautiful scope supplied by Bulldog Props Japan. Thanks Brian! 20181231_162453 Mounted the scope and Hengstler counter Mounted the scope and Hengstler counter to the rail. Thanks Tino and Brian for clarifying the correct position of the Hengstler counter! 20190102_133143 Different angle. Notice the knurling pattern on the front sight guard. Thanks Jesse! 20190102_133259 Cheers mates!1 point
-
Hi Paul, No worries. I always try to be careful with my wording but apologies if it came across wrong. I agree that there is not a defining “hero” vocoder. Stunt does appear to have a consistently full style which Brendan has now done. Always appreciate your input. Awesome job on the ears and vocoder!! You’re making great progress. Regarding the tube stripes, you’re not a million miles of so we wouldn’t penalise you for it. When you apply for EIB and Centurion, you will likely find myself or one of the other Deployment Officers ‘suggesting’ that the tube stripes would ideally be approximately a pencil width from the cheek. Keep up the great work, Trooper.1 point
-
Yeah. Here is a pic of the profile from the RS suit. If you click the pic and follow the link, you will end up at the RS gallery - there are a bunch of reference shots of screen used armour.1 point
-
I’ve seen people try it on Scouts only to take it off because it causes issues when removing it. I’ve personally never lost mine but I’m still fairly new so I’m sure it is possible. I have mine wrapped in leftover felt fabric, same concept just softer. As for the little bend I bought mine premade, but it’s a thin metal so I’d say if you wrap it around the the TD for the big bend, screw it in, then place a pencil or screwdriver in there for the little bend it should work but again I’m newer so I’m sure you’ll get a few ideas on it. Sent from my iPhone using Tapatalk1 point
-
Haha!! I guess I only took that seriously because I've been in similar spots before, trying to get things from overseas - glad to hear you're not actually stuck with that! Oh boy. Expectations run high around here. I do have a friend who's perfect stormtrooper size who I've been considering making an RS kit for... have to finish mine, first! But I'll certainly have lost the "don't know what it takes to make a replica" excuse if I stick around here much longer. *unfollows*1 point
-
I was only joking about that particular sale, but thanks - good to know I have a supplier if all else fails And now that you let the cat out of the bag I expect a replica helmet from you as well1 point
-
I put foam padding in my forearm to hold it on snug. No elastic from forearm to bicep is needed for me. It helps with the removal of my helmet better. Sent from my iPhone using Tapatalk1 point
-
I mean let me check on regulations about shipping aerosols but I'm pretty sure I could ship it to you for less than $100 if you haven't pulled the trigger yet - we sell it here at my store, after all!1 point
-
Whilst this accuracy is all well and good when it comes down to it, this is not a replica group. I don't feel we should be enforcing the exact angle of the ear or brow height at anything less than Centurion. Troopers should, for the most part, look the same. If we're down to such minutiae as the brow gap being 5mm off or the ears being off by ~10° then I'd suggest we're already doing a pretty decent job. Provide the information, those who wish to built to it will always exist but I don't feel this level of detail should be overly enforced.1 point
-
1 point
-
Looks much much better, great job!1 point
-
yeah, to be fair I didn't see these pics until well after I was done my TD build (well, the helmet anyways). I watched a bit of the videos - I did see one of these videos awhile ago - just forgot about it.1 point
-
Only for a millisecond when I had the feeling I didn´t see any of these photos on your build but you probably did...I know….I should know better And just to change the awkwardness….watched the videos yet?1 point
-
Saw it. All over that.1 point
-
Sorry bud, bit slow at this time of night, good luck in your build, looking forward to seeing it finished :-)1 point
-
Thanks, Frank! I don't mind the work! It's just that constant, naggy fear of botching something up beyond repair. I dunno what I'd do if that happened—I don't speak botchi!1 point
-
Looking really nice. I know it seemed like a lot for just ears but they look great. Sent from my iPhone using Tapatalk1 point
-
Sure thing, although I don't think new and/or professionally trimmed ears would fare any differently than mine are now. As far as I can tell, because of the shape of how my helmet came together, I'll have to be dealing with either a gap, or return edge. Based on my photos above, do you think more work needs to be done? Unfortunately I don't think I can do anything else without ordering a new helmet and starting over (and possibly shrinking my head). :-( If there is anything else I can do with what I have, of course I'm open to hearing it.1 point
-
I thought so too, All was not lost. The 3 cans I bought were used as undercoat on the helmets I planned to use them on, so they came in handy after all1 point
-
I like most of these but the there are a couple that concern me, one is the ear angle, many struggle with assembly of ears on helmets so this may not be achievable for some. I wonder what happens if you can't get this angle this from a certain make of helmet as it's just not obtainable due to how the helmets are moulded, would you have to buy a replacement from another maker? Would it be feasible to research the majority of helmet makes to see how many could achieve this? Or could just change the wording to 1. Ideally ears shall be tilted back at an angle to where the screws align closely with the rear angle of the trap located above the rear of the brow. Secondly the shoulder bell gap, some makes have smaller shoulder bells than others, having little to no gap just isn't obtainable but most troopers seen on screen have no gap, the wording does still allow a gap but would it be better changed to 5. Minimal (or no) gap is preffered between the top of the shoulder bell and the shoulder bridge. Additionally for L3 I'd like to suggest the fall or angle of the tube stripes be correct as seen below, not sure about the wording for this. As we see in these images the tube stripes fall / angle forward from the top and many point this out in applications.1 point
-
@ Basic that's up to your GTML but doubt it. @ L2 Again, no problem but you will be requested to correct it @ L3 Corrected before approval1 point
-
I can actually hook you up with a few of the items you will need, Dave (no charge). I have the flash guard, ejection port guard and charging handle made in black resin. You will need to drill a hole in the front of the barrell for the flash guard to be mounted next to, though. If interested, just PM me your shipping info.1 point
-
Exactly what Joseph said. Would suggest to focus on the outstanding issues first. Maybe you also find a stripe of aluminum to recreate that trigger guard.1 point
-
1 point
-
It´s the ever elusive Stromtrooper-unicorn1 point
-
Congrats and welcome to the 501st!1 point
-
Congrats!!1 point
-
You should use an external image hosting site for your images. Here's a quick tutorial on using imgur.1 point
-
4. Finishing Arms and Ready for Strapping! After finishing with gluing my forearms and biceps, I took a pair of abs scissors and did some trimming on the return edges. I removed all return edges on the wrist portions of the forearms and took off most of the return edge on the "U" portion of the forearms facing my elbow to allow for better movement. I then evened out all other return edges on my forearms and biceps to a little under half of a centimeter. Then I took some 120 grit sandpaper to all the edges to smooth everything out then finishing with 320 grit then 400 grit. Nice and smooth edges! YAY! I then took off the protected plastic covers that came with the Anovos armour on the forearms and biceps, and cleaned up some of the excess e6000 around the glued cover strips. I'm pretty happy with how the forearm and bicep pieces turned out. ^left forearm ^right forearm. You can see the much less pronounced top "edge" on the top of thee right forearm as compared to the left. Overall, I'm pretty happy about how the forarms turned out, considering the 3+ in Iches I have had to reduce on the width and the gap that I had to overcome. (See post 1) I did not end up needing to heatgun/ hot water bath my forearms, as careful lining up and gluing was sufficient and made the forearms round. Here's a picture of my finished forearms and biceps together. Then, I decided to try on the arms pre strapping along with the should bell. held together with some blue tape. I put on the anovos undershirt, it is the smallest size they come in, but still a bit too bit for my liking. I think I will just be wearing my black underarmour base layer instead. ^Please do not show this to Lord Vader, I heard he doesn't approve of happy tks. To be continued....1 point