Leaderboard


Popular Content
Showing content with the highest reputation on 09/11/2018 in all areas
-
The left shin's rear cover strip is glued on and drying. Next will be giving the shins a hot bath if needed and scuffing up the magnet surfaces and gluing them on under the cover strips. I need to reposition my bicep hooks, they aren't quite right and pull my biceps/forearms up too high on my arms. Easy enough to fix after another test fit. That will help me measure for the snaps/straps that I'll be using to connect the shoulder bells to biceps too. I did a test run for making the shin magnet covers since I don't have a spare magnet to sacrifice to the heat gun. Let me see if I can lay this out so it makes sense: - One of my 9mm sockets is just a bit larger in diameter than the 12mm magnet, which is perfect to let the magnet just drop in place in the ABS. - I drilled a 1/2" hole through one piece of wood, this piece serves as a guide for pushing the socket straight down and also helps press the ABS corners back flat after being warped by the heat gun. The thickness of this piece is less than the length of the socket. I was prepared to countersink the hole so that I could push far enough into the ABS for the magnet to sit flush, but the thickness is just right. The socket adapter bottoms out on the wood and the recess in the ABS is just right. - The second piece of wood is the base and I simply drilled a 1/2" diameter recess into it to push down into. And here's the first test piece that came from this crude setup. Perfect fit. I've since marked the wood base with alignment lines and each piece of ABS will get marked as well so that the magnets are as centered as possible when I press them. So I had planned to make a tab/slot connection for the right side kidney/ab connection, but playing with magnets sparked a crazy idea. With a buddy's help, we 3D printed some ABS bases, seen here with the N52 magnets already installed: The alignment when connected is perfect: The N52s have a crazy strong pull and I had to twist the bases to pull them apart, something that wouldn't be possible when they were glued to the armor, so I added thin ABS covers to them and that did the trick. They still have the super strong pull but they don't have to be twisted to pull apart. And installed: I intentionally left a 1mm gap between the ab and kidney just in case adding the belt causes some weird closure problems (didn't want to run into any weird issues I didn't account for), if everything is ok I'll just reposition two of the magnet bases on one side to close that gap. But these work exceptionally well with the existing straps and should those ever fail these will hold that connection closed very well.3 points
-
No turning back now Making cutline #2 Cut made Checking..this could work And it did, glued an inner strip and it’s ready to be glued together, some abs paste and sanding and it will be ready for paint. Very pleased how it turned out, much better shape to it Before to the right and after to the left.3 points
-
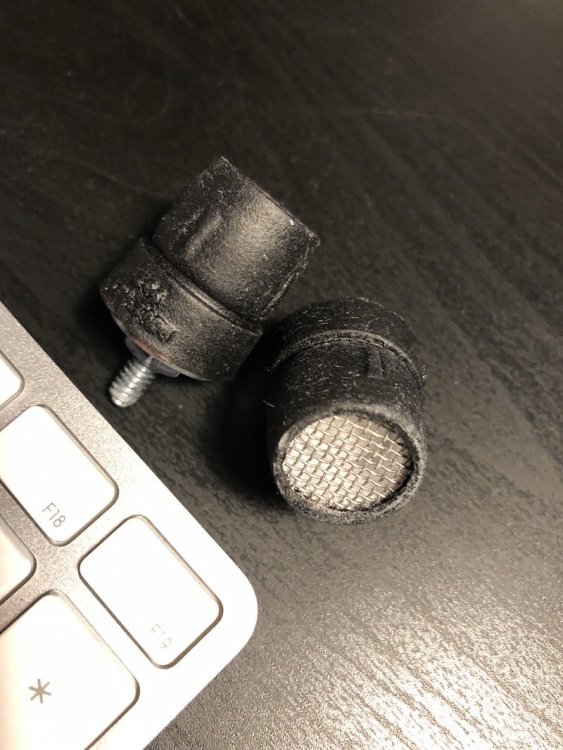
Thanks for looking into that. I was looking a thread from Darthanael who bought the AP kit in 2015, and he posted a pic comparing what he received in the kit vs. the Hovi mics that are required for centurion and bought elsewhere. You can see it here, the left one is what he received from AP, and the right one is what he bought for Centurion. AP may have changed the tips because looking at that pic vs what I have, it DOES look like my Hovi mics might actually be good for Centurion, but if someone can please confirm, that would be great! Here is the pic of what I have: Your reply was amazing and I almost quoted the whole thing. I'll look at that S-Trim, but I'm still going to see if there's any way I can get it in Canada. I hate paying duty fees. As for the decals, I'm going to leave those until the end, as I may decide to paint it instead, but thanks for clarifying that they'll work for Centurion. Biggest thank you goes to that link you sent me. That is definitely going to be my main research source now. Yeah, this makes total sense. I think I'll end up painting them as well, or maybe ask my girlfriend to do it as she is quite the arteeeste. It does really take it to that next level of badassery! I'll keep that in my back pocket as that's a great tip, thanks! YES! That is a great suggestion too, and makes total sense! And thank you everyone for the support already. This is already fun and I've done nothing for my build still heheh. As I'm going to try to keep my main progress posts contained to one post per part, I'm going to update that post with the information I've learned from you all. Thanks so much again, I really really appreciate this
 3 points
 -
You'll be surprised what some 2000 grit sandpaper and Novus will do. I've had a few cracks on my armor that would seem like the end, but adding backing material with some ABS paste over the crack followed by a good polishing take care of it every time.2 points
-
Been a while, but just figured I’d share a quick update. I’ve been approved and now have my TKID! Glad to be trooping!2 points
-
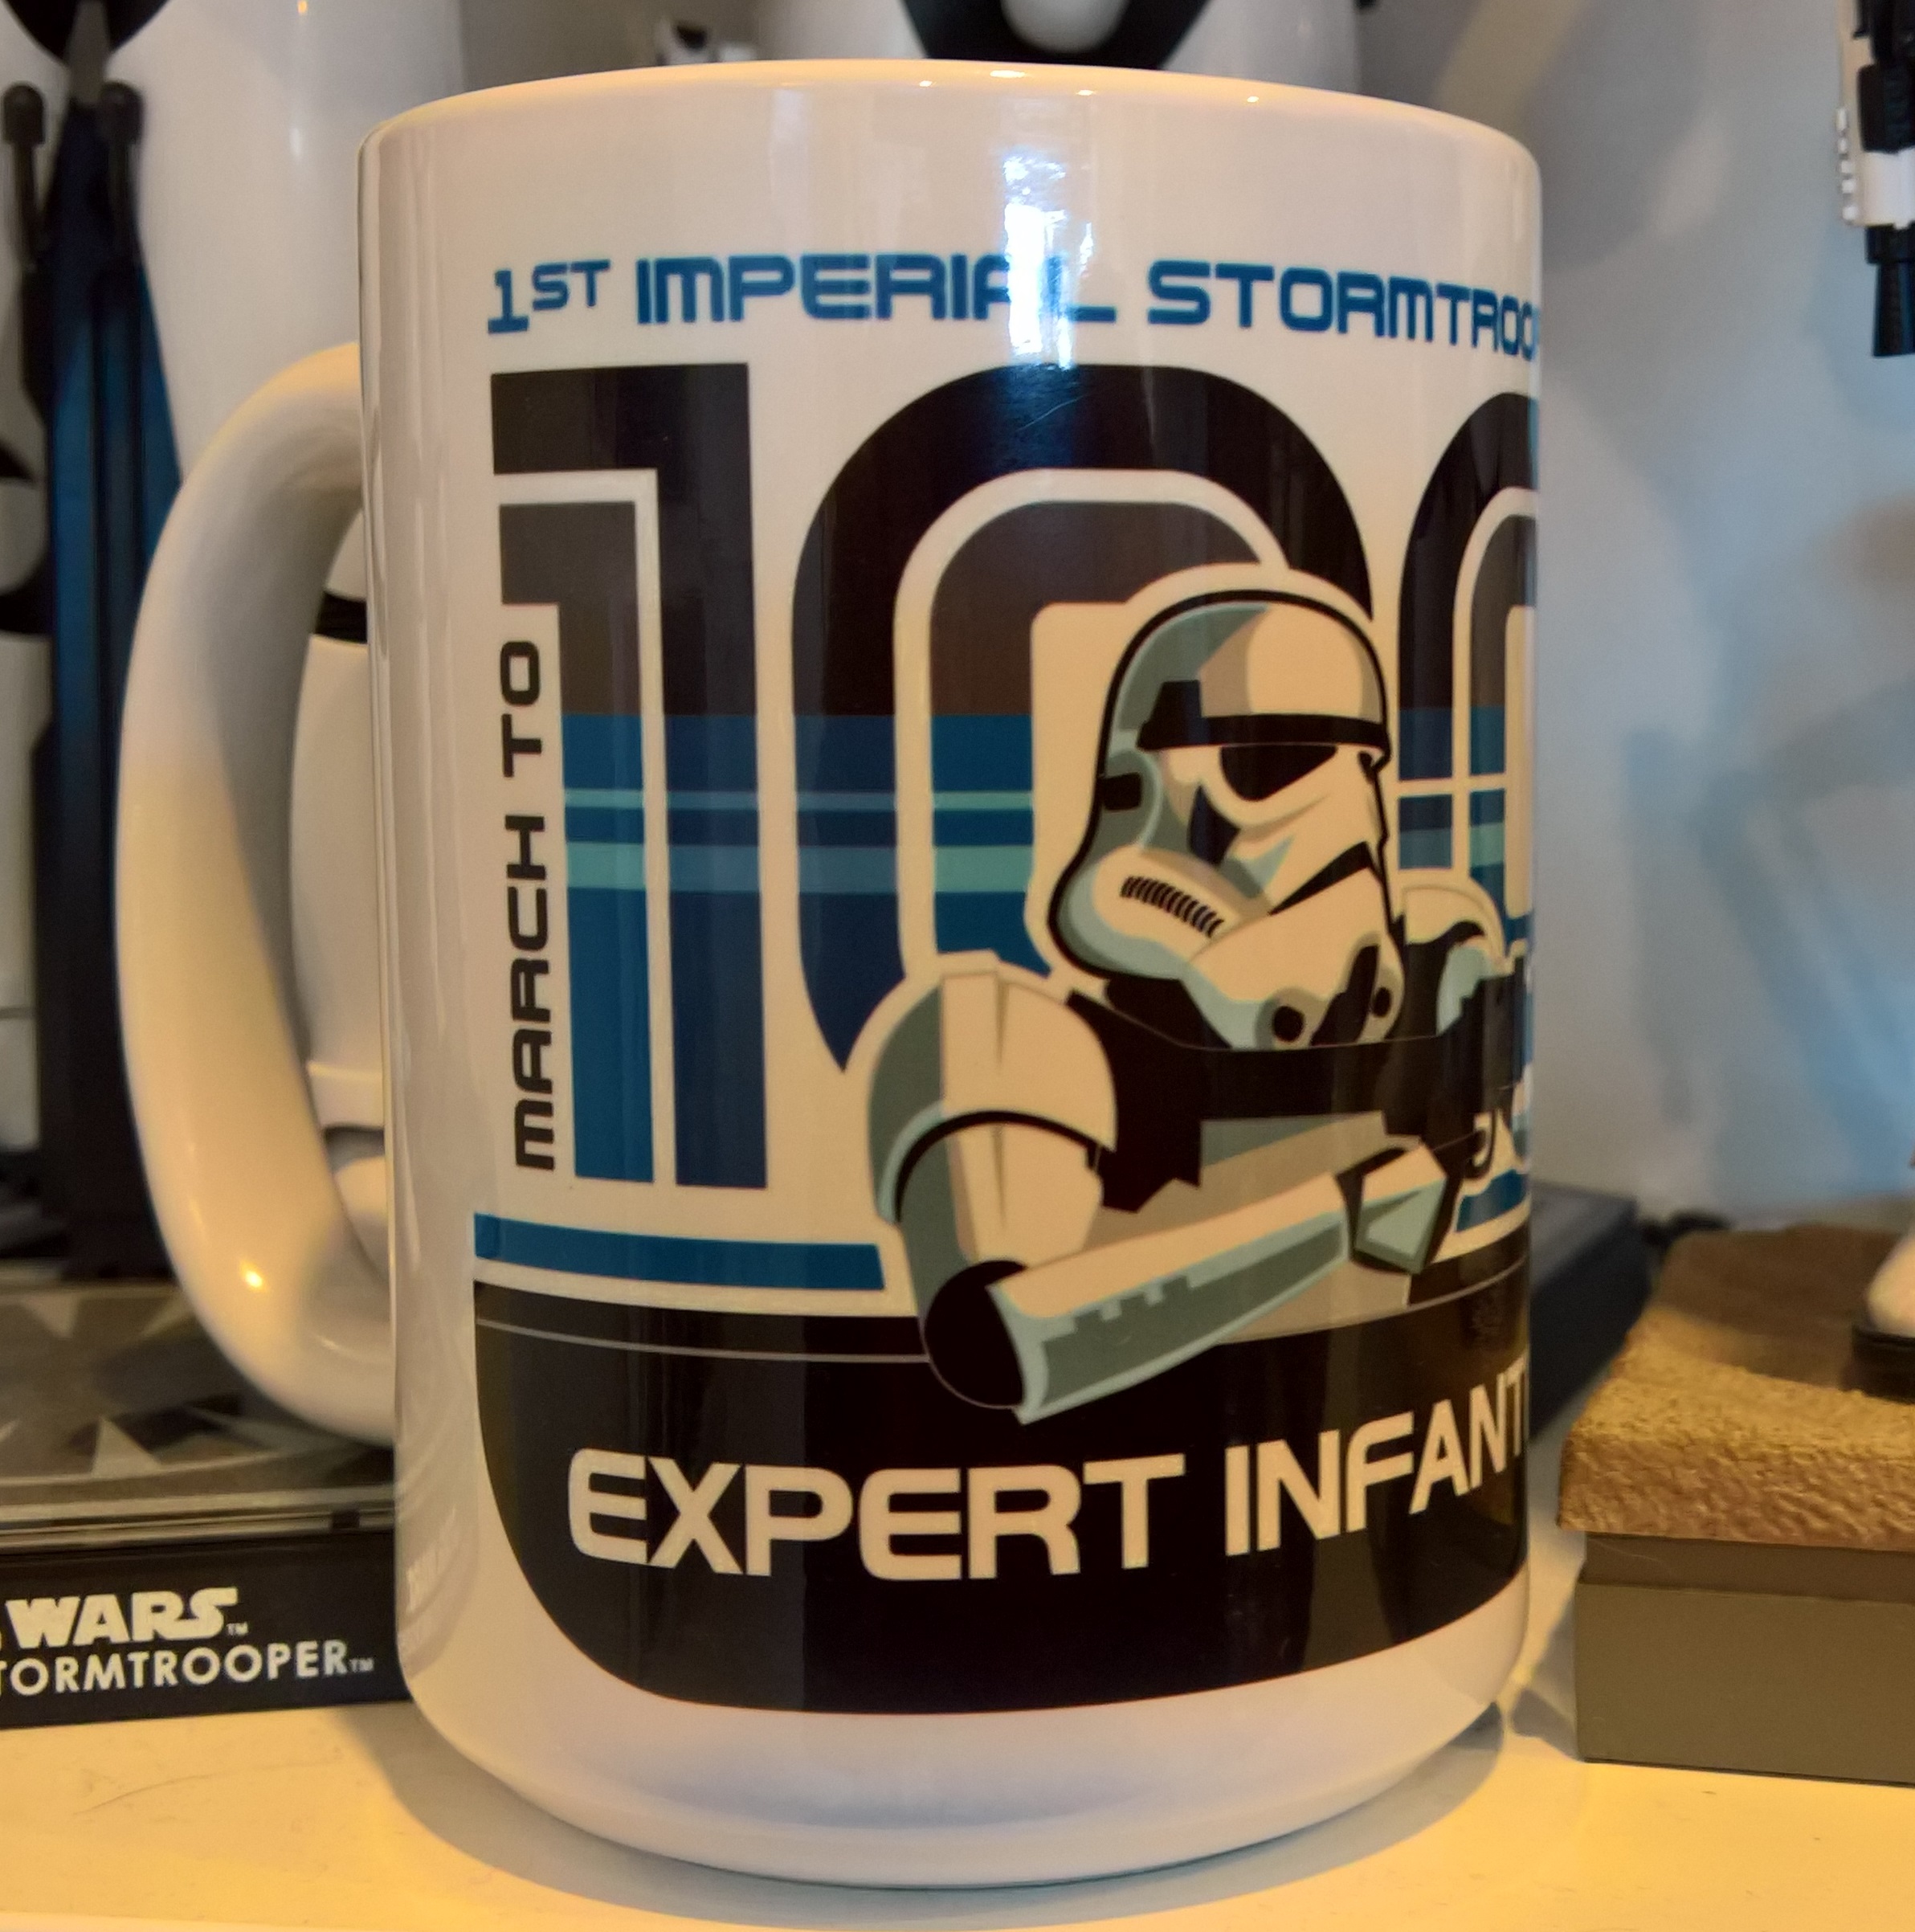
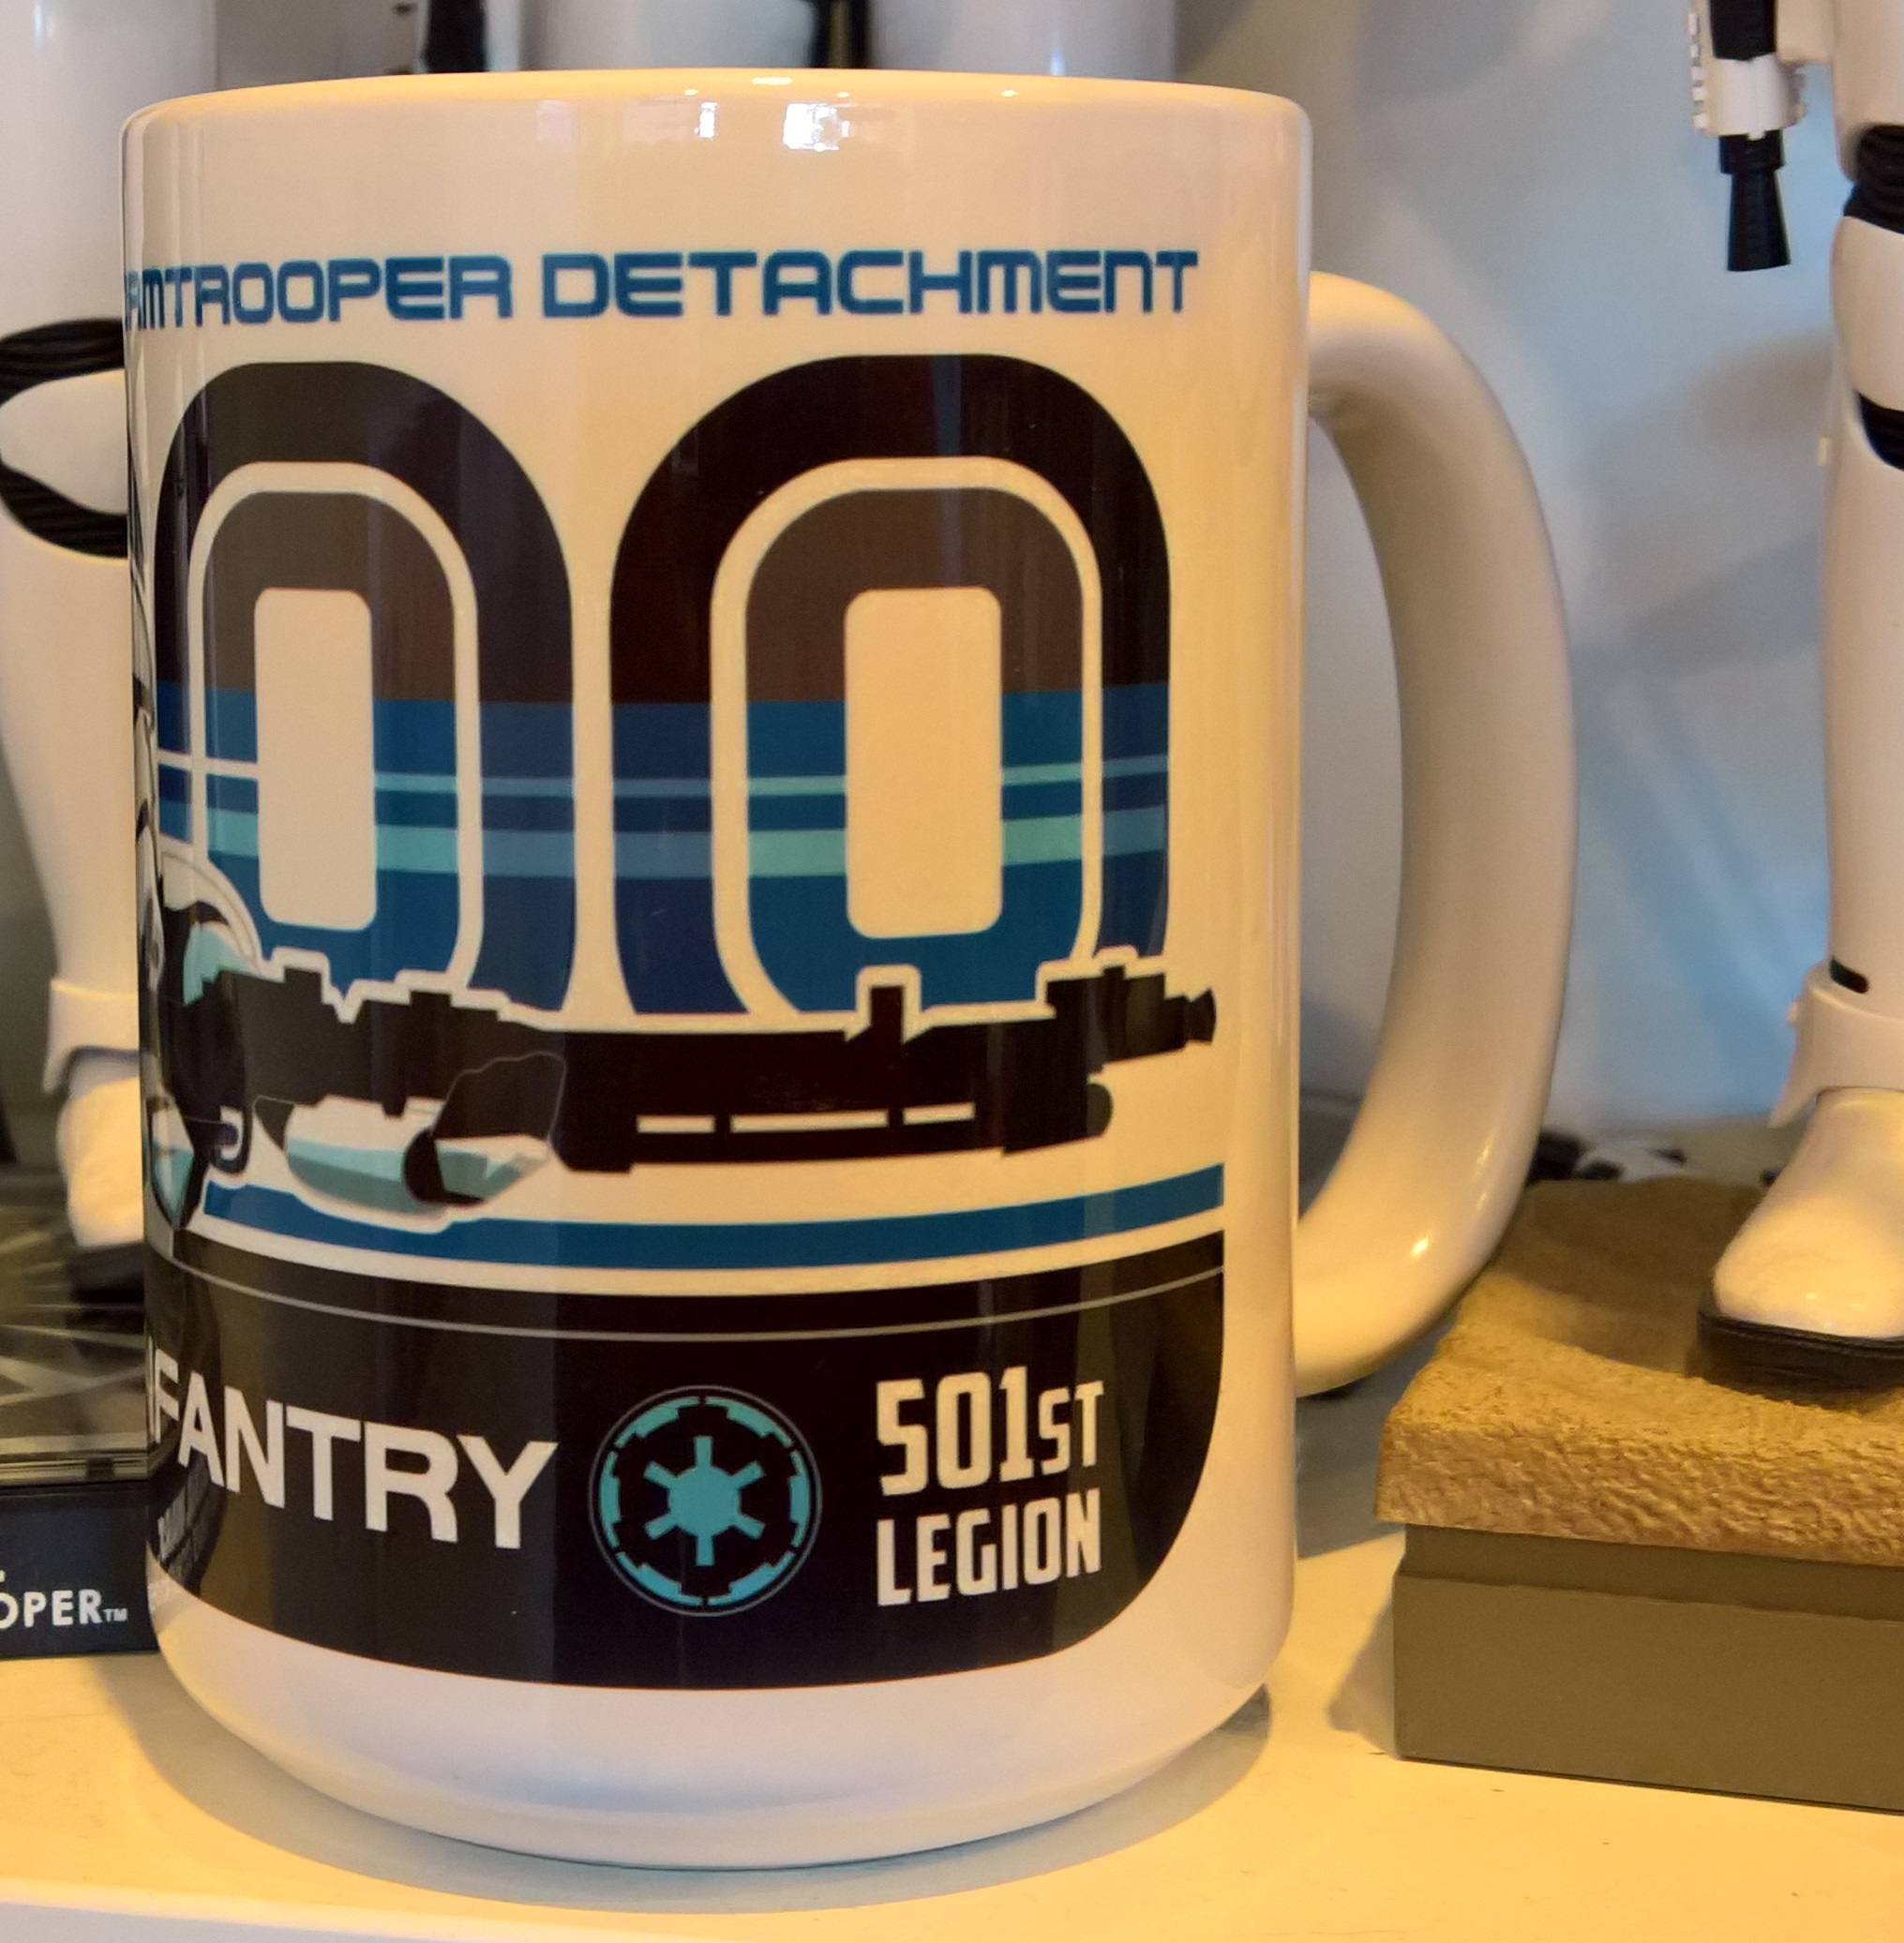
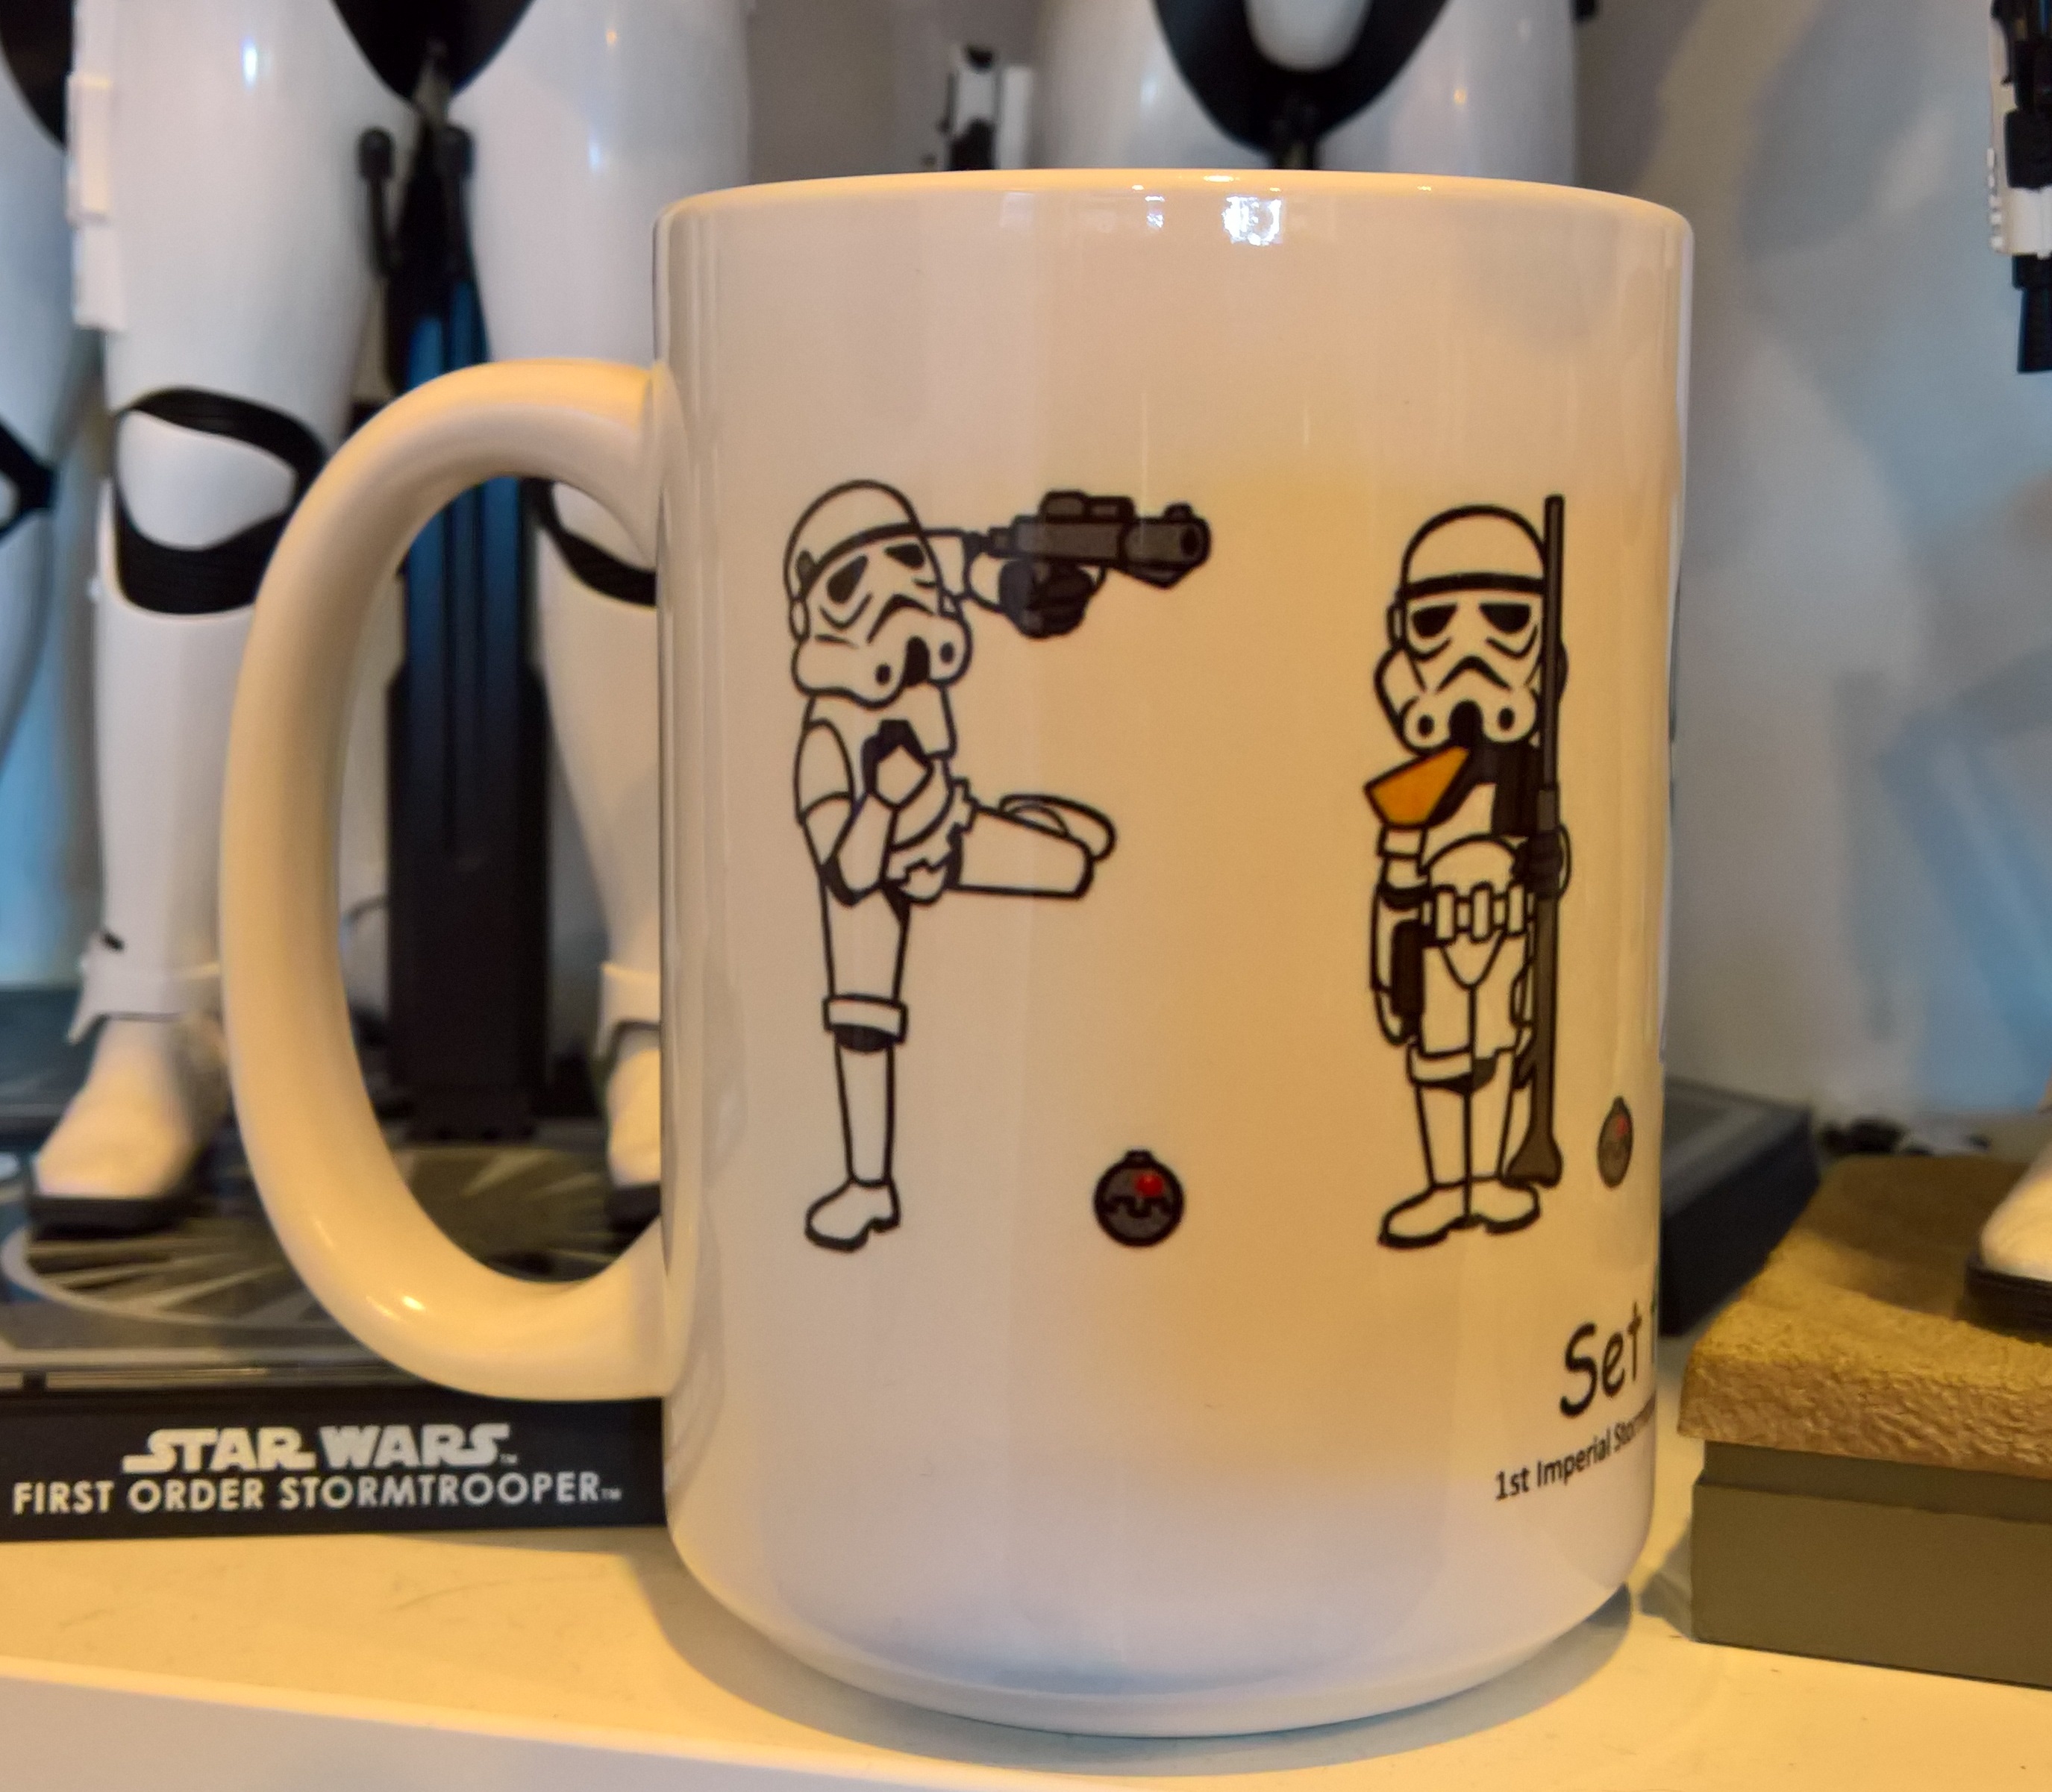
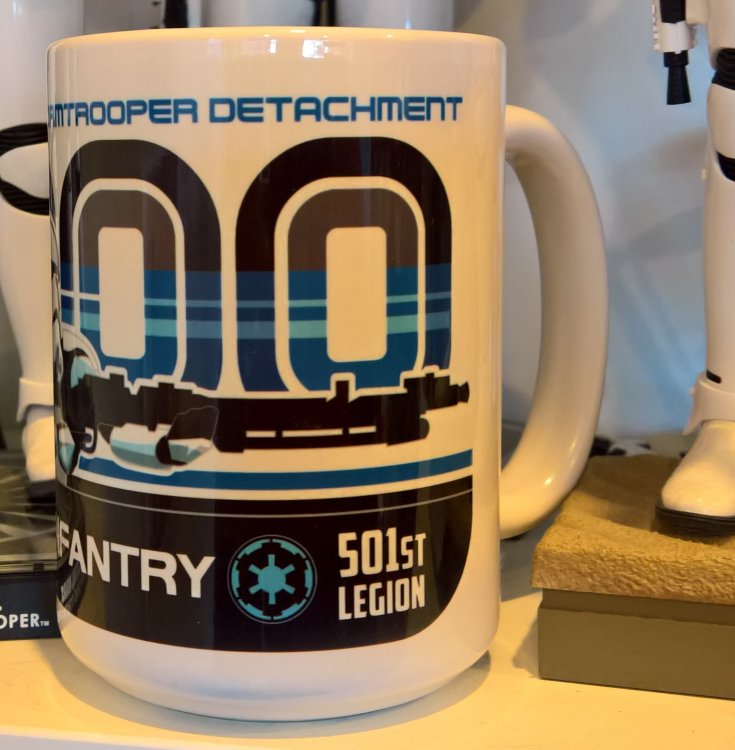
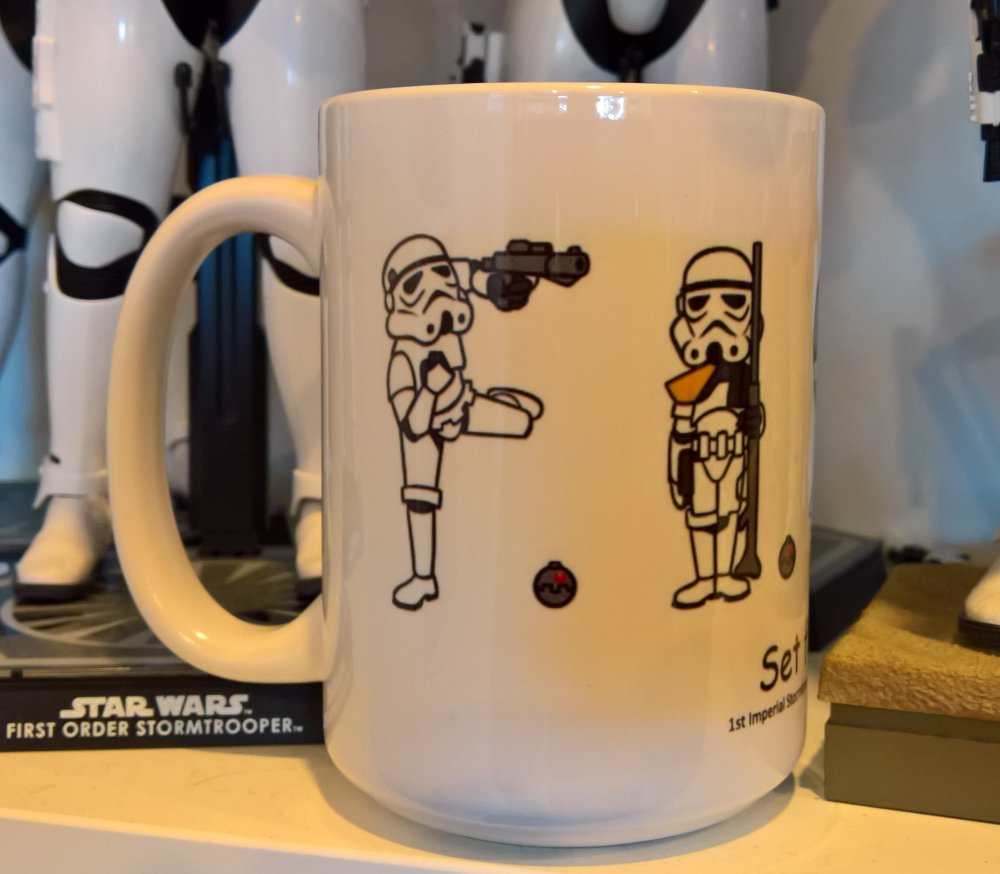
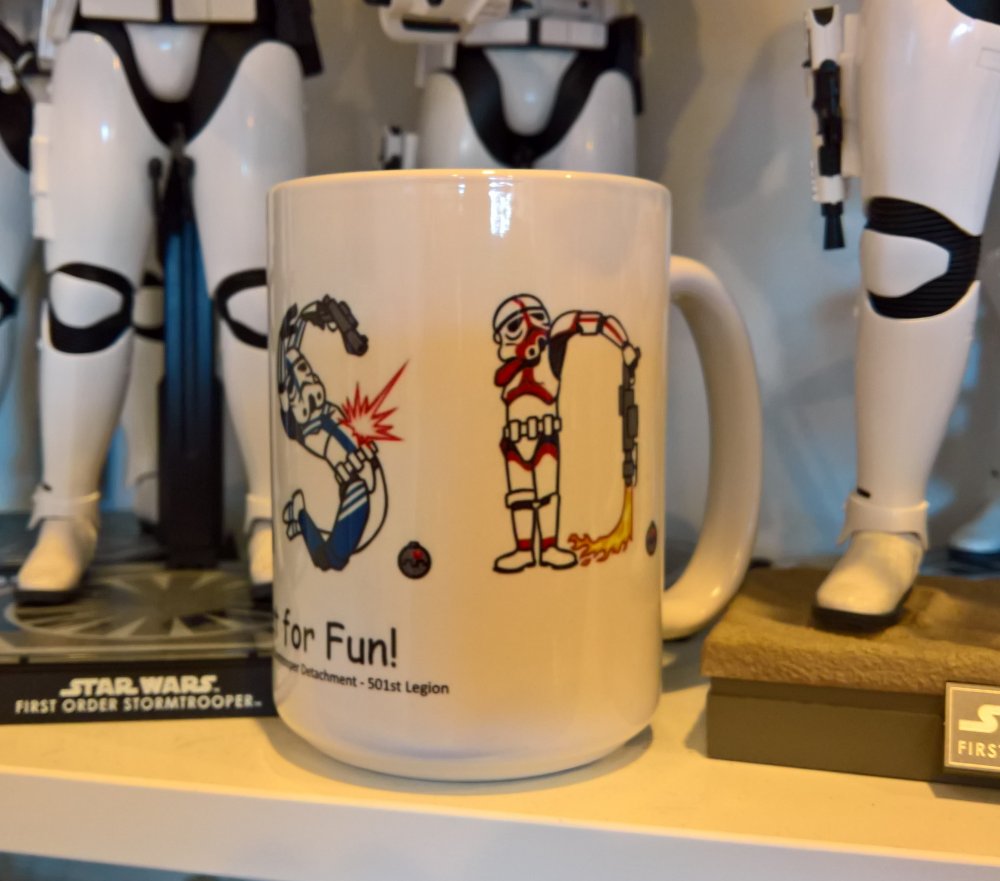
In Memoriam Detachment Leader Executive Officer Deployment Officers Pre Approval Forum CRL Updates 3D Section Feedback Needed Legion News - Census, It's Nearly That Time Again Detachment Affiliation Hall of Fame Just For Laughs Competitions Trooping Trooping Opportunities Imperial Attaché Program EIB & Centurion: What do these terms mean? Advanced Tactics Awards EIB - The March To 1000 Merch Reform Merchandise Public Relations Follow FISD It is sad news that we report the passing of another brother, Wong Chung Kent (TK-96350) of the Singapore Garrison. A few words from Fellow trooper Dennis Maloom "NINJAMOVE" TK-16112 It is unfortunate for me to relay this news to you but we lost another good trooper in our ranks. Honestly, I'm not familiar if there are procedures in informing this sad news to you guys. But this is how I can share my memories with my fellow brother. Wong Chung Kent (TK-96350) was the first friend I had when I decided to join the legion. He is literally the first guy who I've talked to when we first attended an armor party. Though he may have struggled to finish his armor, he was persistent to complete it so he can attend our first troop back in STGCC 2016. He will be remembered as a gentle giant with lots of words of wisdom. He would sacrifice trooping just to look after us as a handler/ minder or even lend us his hand in buying us all lunch when we were all too busy. There may be dramas or conflicts within the Garrison but he keeps on reminding us to keep cool and always aim for the better good, that this is only a hobby, an outlet where we should enjoy and share Star Wars as plastic space men. He may have rested in peace but he have ran a good race. We have been grateful for his friendship and company and our 501st experience wont be complete without him touching our lives. Thank you so much for your time reading this. Appreciate all the support and more power to you. Our condolences go out to his family and friends. "Buckets Off" In my part of the word September marks the time when the kids return to school, the hot summer is finally over, and American football kicks off the regular season. After a nice break in August (with thanks so the Hong Kong Garrison), it’s time again to kick off the second half of the 501st “year” as FISD resets to get back to work. My family vacation to Hong Kong was fabulous and we loved it so much we’re already talking of going back. Yes, it’s a big city but everyone is so friendly it was like being in Hawaii. But in a city. I met with members of the Hong Kong garrison on my final night and they were as gracious as could be. I’m still writing up my trip report so you can read more there when posted (it should be out any day), but in short if you can ever find a way to get to Hong Kong you should go, as it’s a fantastic place to vacation. On the merchandise front, we’ve sold out the last of the coins and patches are about closed out as of this writing. As I’m sure you’ve heard from your GCOs, LFL is working on changing the guidelines by which 501st merch can be created and sold, so we’re working on getting a few items in while we can as it’s not clear what those changes will be, though the rumour is that they will lead to less items being produced less often. Items currently in the queue that we are looking at doing are a re-issues of our standard items (coin, gold EI coin, patches) and FOTK version of the racer shirt, and perhaps a founder’s coin before end of year. There are some CRL changes that you’ll want to keep an eye on that should be completed soon. The first is an update of the TKC (Stormtrooper Commander) that is long overdue, based on meticulous research by our very own Glen (gmrhodes13). We’ll have one last pass for open comment this month then they’ll be baked. They will likely also carry over to the ICN (Incinerator) as the details are highly similar. We are on the cusp of having The Last Jedi Phasma done – only a few photos left and when published will be the last open CRL we have in the works. For the second half of the term, our focus will shift from creating new policies and initiatives to investing and delivering on ensuring that FISD remains the best resource for stormtroopers and stormtrooper costuming worldwide. The landscape is always changing (new vendors, new ways of making props, new details found in research) and you can count on FISD to provide all the details you need. Keep on trooping, With Unquestioned Loyalty Paul Hoeffer TK8020 “Daetrin” Detachment Leader Members, Centurions, Expert Infantryman, lend me your ears This year is charging along at light speed and at its current rate we shall do the Kessel run in less than 12 parsecs with a couple to spare, and before you know it 2019 will have landed. Detachment planning for the remainder of the term is underway so I will discuss a few items that are still happening or are going to happen in the very near future as we work together to achieves a few goals. March to 1000: Yes this is still running, so please keep those builds going and EI applications rolling in. The deployment office has employed another Deputy and are on top of submissions so so don’t delay, become an Expert infantryman today New Merch: A thread is up for expressions of interest on a First Order FISD race shirt variant here We have one design that reflects closely our current branding model, but this is not to say it can be our only option. If you are one of our talented members who would like to offer some alternate designs, here is your chance. We are working with a short time frame for reasons which I will explain shortly, but please If you can get something together in the next week or so, go for it!! As mentioned in the shirt thread, there are some things that need to be organised before this shirt run can become a reality. 1. A final decision on a design, so if we have some choices, that will be decided on consensus. 2. Approximate numbers interested, we have a thread running but this will soon contain another design I hope, numbers will effect the final price, the more in, the cheaper they will become. 3. LMBO approval, Paul and I will look after part. 4. Most important outside of the above is for someone to helm the run. This is a great opportunity, to help your Detachment and learn a few things along the way. You will have assistance, you will have someone to answer any questions and you will have support through the process. I have spoken with Pretzel (Preston) our Attache Ambassador, and he would like to offer this opportunity up to the Attaches, so he will discuss this further in his section of the newsletter. Our last shirt run was handled by Alay (Sarah) who did and outstanding and thorough job, so she has offered guidance to whoever takes on the responsibility of this new run. I wrote further up in this article that there is a limited time frame for shirt designs and execution for this run. As you may or may not be aware, LFL/Disney will be releasing a statement regarding all legion merch. Now we can only speculate what that may entail, but it has been suggested that merch runs might be restricted in type and quantity compared to how legion operates them currently, so moving quickly to gain approval from the LMBO on these shirts could prove very important in the near future. New Staff Member I would like you all to welcome our newest addition to the Deployment officer team Dan "CableGuy" As part of future proofing high time demand roles like costume approvals, we now have our regulars Tony, Joseph supported by two Deputies in Shane and Dan. These guys will be getting up to speed on everything required to give balanced and informative EIB and Centurion reviews in this quieter period. The aim is to make sure in any events such as vacations, sickness or even someone wanting to take a break, that the day to day approvals will continue in a timely fashion and decrease work load in busy periods. Until next time With Unquestioned Loyalty Andrew Franke TK-11469 "Sly11" Executive Officer An Introduction From Dan Dear Troopers, (and aspiring troopers), of the FISD, After 7 months working with the Imperial Attache team, it’s a great honour to have been asked to join the team of Deployment Officers. As a deputy DO, I will continue to do my best at assisting the community with their builds and queries, whilst also assisting with the EIB and Centurion applications. For those that don't know much about me, I share the same story as many - from the first time I saw Star Wars: A New Hope as a child, I wanted to be a Stormtrooper! Seeing them blast their way onto Tantive IV was eye opening. When running around the house with my brother as children, shouting "pew pew", we were pretending to be the Stormtroopers. As an adult, I stumbled across starwarshelmets.com and spotted a sign behind a picture of two TKs for “SDS”. Reading further, Shepperton Design Studios was (at that stage) regarded as holy grail of TK lids and was based around 5 miles from my house - so I bought one in 2005: ANH stunt number 330. My dream of a full suit of armour then remained dormant for many years - 12 to be exact. My first experience of the UKG was in 2015, Legoland UK, and I was blown away! That certainly spurred me on. My SDS lid had become yellow after all those years - my decision to renovate (full respray) in 2017 lead me to whitearmor.net and, as they say, the rest is history. So, I’m now a cleared Imperial Stormtrooper (Centurion) with the UKG 501st with my RWA Creations armour and modified DoopyDoos E-11. With 9 troops under my belt, I'm enjoying each one more and more. As a father of two children, (2 yrs and 6 yrs), it is always a pleasure bringing smiles to faces young and old, my own children included. Working alongside Tony (ukswrath) and Joseph (JustJoseph) is an exciting opportunity, especially given their high regard within the FISD community. I look forward to helping members new and old in the future. The FISD community has played a huge part in my journey so far, and I feel I have seen this get even better over the last year or so. I look forward to helping more and more troopers reach their dream of becoming an Imperial Stormtrooper. With Unquestioned Loyalty Dan Branton TK- 42911 "CableGuy" Deployment Officers With Unquestioned Loyalty Tony Jobe TK-10116 "ukswrath" Deployment Officer With Unquestioned Loyalty Joseph Pedigo TK-10963 "justjoseph63" Deployment Officer Deputies With Unquestioned Loyalty Shane Aubrey TK- 71969 "Shanester" Deputy Deployment Officer With Unquestioned Loyalty Dan Branton TK- 42911 "CableGuy" Deputy Deployment Officer The FISD is pleased to announce the addition of a new area in the Advanced Tactics forum dedicated to those ready to submit for basic 501st TK approval. This section will allow future Troopers the opportunity to submit photos of their completed build to be reviewed by the Staff, Imperial Attaches and others in preparation for forwarding it to their GML for approval. Any and all advice/suggestions given will be specific, constructive, helpful and respectful. Please note that this program will NOT take the place of your local GML, as Detachments are not chartered for costume approval and can not override a GMLs decision, but is instead a peer review program designed to help you look your best and offer guidance and positive feedback. You will have the opportunity to ask questions about your completed armor, weapons (if applicable), accessories, etc. and get accurate information from the experts here at the FISD.. the definitive home of TKs worldwide. For more information on this program, please visit the link here TKC - A new thread has been started to discuss some recently found inconstancies with this costume and suggested changes, you can find the discussion here and the CRL here Don't forget to check out the new 3D section, and please contribute where you can, also see the link at the bottom for the new Contributor award details Contributor Awards Main forum title: 3D Parts and Technical Sub topics: 3D Printer owners Your place to discuss what printer/s you own, recommendations, tech talk and the like, It’s a place to learn something new 3D CAD Designers Home of talented 3D cad designers, show off your 3D renders, of FISD related costume parts and accessories. Offer help and advice on programs, or offer to commission a piece for a fellow member 3D File Depository A home for 3D file sharing, Troopers helping Troopers is what this section is all about; yes a single location to keep any 3D files offered up by our extremely generous membership. This will be a 501st member’s only section and rules will apply to any usage of the content. I will be looking for content to get these new sections started so If you are interested in helping drive these new forums, then please send me a PM and let’s get the threads and the filament flowing. 3D printer heads will understand that last comment Here is a link to the New FISD 3D Contributor program. With Unquestioned Loyalty Andrew Franke TK-11469 "Sly11" Executive Officer Census, It's Nearly That Time Again 501st Legion Census begins on 1st October so if you haven't yet trooped in this census year (1st October 2017 - 30th September 2018) then you best get out there soon. Here's what the charter says about activity definitions: Operations Protocol/Membership An Active Member is defined as a member in good standing who meets the following requirements: Meets all 501st Membership Requirements (i.e. ownership of an approved costume, is over 18 years of age, etc). Has an approved membership record in the 501st Legion Membership Database Maintains active contact with their Garrison CO or GML. Active contact and participation will be confirmed during the annual Legion Census held each year during the month of October. Maintains contact information/membership record in the 501st Legion database either through their Garrison CO or GML. Participates in at least one Garrison or Legion activity per year while wearing an approved 501st costume owned by said member as recorded in the Legion Census. (One year is defined as the period from Legion Census to Legion Census). Examples of an activity include, but are not limited to conventions, charity events, or any activity designated as an official event by a coordinating administrative unit of the Legion. Members who serve in military branches are exempt from activity level requirements if their service renders them unable to meet these requirements. These Minimum Activity Level Requirements should be administered as justly and with as much common sense as possible. A member may retain active status, even if they do not meet all of the requirements listed above at the discretion of their unit Commanding Officer or Legion Command. Remember if you haven't trooped in this census year you may find yourself marked RESERVE, which will mean you will not be able to vote in the next election. From October 1st you can access the census here Note you must be registered on the main forums to participate in the census, register:here OK, it happens. You look at your Legion profile and it shows that your detachment affiliation to FISD is pending, or otherwise incorrect. Why does this happen, and what is detachment affiliation anyway, and what will FISD do about it? The answer is that detachment affiliation is only ever used once a year, and for one purpose. The only time the Legion ever uses it for anything is to determine who can run for DL and who can vote in detachment elections. That's it. Otherwise it is pretty much ignored and not used for anything. The process of validating detachment membership is cumbersome and time consuming because people use different email information between their Legion and detachment logins, and that there is no way to bulk update the rosters. For a small detachment it is not a big deal to do this manually, but for a detachment the size of FISD with hundreds and soon thousands of 501st members, it's impossible. Fortunately we have technical folk both on FISD and in the Legion web team. Once a year they take a feed from FISD's database and do a bulk update on the Legion database. This occurs right before the election cycle starts and is done once per year. Pro tips: 1) Ensure the email address you use on the Legion & FISD boards are the exact same. 2) Ensure that your FISD profile has the correct TKID. 3) If after the bulk update is complete and your profile is still not updated, and you are 100% sure your info is in sync between the two boards, then ask for to the Legion web team. They should get feedback on why this isn't working. 4) If all else fails, ping the FISD staff. Which basically means that we'll simply tell the 501st web team to bulk approve everyone To check detachment affiliation go to the 501st Mb database here then click Your Profile Data. Hope that answers everyone's questions! http://i.imgur.com/AsVHyev.jpg Well with the summer on it’s way out (for some of us), this month’s inductee couldn’t have caught a better back drop for this photo! I’m captioning this one: “Cosmic sunset or Death Star destruction? Whatever happened either way, these Troopers made it look cool!” Please join me in welcoming TK - 94616 Carl Ray to the Stormtrooper Hall of Fame. With Unquestioned Loyalty Aaron Gibson TK99725 "Pyrates" Imperial Propaganda CLOSED Troopers Helping Troopers Photo Contest Unfortunately due to the lack of submissions this competition has been closed. thread here With Unquestioned Loyalty With Unquestioned Loyalty Preston Christman TK-91488 "Pretzel" Attaché Ambassador Want Your Troop to be Included? Just a reminder if you would lie your troop added please post your troop report in the Field Training Exercises section here Those with troop logs please post a separate troop report as it is easier to link too. August - September Dragon Con More here By: Christine, Cricket, TK10401 Perth Airport Troop More here By: Glen, gmrhodes13, TK85421 Retail Embargo Lift For most of the year we are under an embargo from LFL and can not attend retail locations unless prior approval has been given by them. At certain times of the year this embargo is lifted, generally around Blu-Ray / movie releases, May 4th and Force Friday, the recent correspondence from LFL outlines the lift of the embargo: "While there is currently a retail moratorium on character appearances in effect, it is being lifted for the week of September 24th - 30th for the SOLO Blu-Ray release and then again for the weeks between November 15th - December 31st to celebrate the holiday season. All fans, costumed or otherwise, can participate with retailers of their choice within these windows with the restriction that costumed appearances must not be used in the advertising for the event. Although these store appearances will be treated like an open invite, we’ll leave it to the fan groups to independently organize around these events as they see fit. LFL will not need to approve or coordinate these". "Please note that retail locations should not include restaurants, bars, or venues with no apparent reason to feature Star Wars characters. If the retail location does not stock Star Wars products you should NOT be attending." As always there are strict rules, please speak to your Garrison Commanding Officer, Squad Leader or if you have one Garrison Events Coordinator before organising any event. *REMEMBER* Always follow your garrison/squad's guidelines when in comes to organising Disney/LFL promotional troops, only command staff can deal direct with LFL. Serve proudly, ladies and gentlemen, and as Tim (Dark CMF) says: "Keep doing what it is that got you here"! Are you an approved TK that spends more time on the boards than the average Trooper? Do you enjoy using your knowledge to help out future and existing Troopers? If so, we would like to invite you to join the Imperial Attaché program! Members of the I.A. team are chosen to help out not only those here on the boards, but on a local level as well. Our aim is to have at least one in each and every Garrison, Squad and Outpost in the entire legion to be the eyes and ears of the FISD on a local level. A suggested level of EIB or above is preferred, as part of the duties include assisting those aiming for levels 2 and 3, but is not a requirement. Being active on the boards on a regular basis , welcoming new members and helping out where you can is, though. Some of the benefits: 1. Access to exclusive Attaché merch., including patches, etc. 2. Having the Imperial Attaché title under your name. 3. Being a part of the team that welcomes new and prospective members of the FISD. 4. Being the "go-to" person in your Garrison, Squad or Outpost. 5. Exclusive access to the Attaché HQ area, Imperial Propaganda Machine (newsletter) and merchandise discussions. We are currently in need of Attaches in many units, especially International Garrisons/Squads and Outposts. For more information on this program, please head here and if you should have any questions or concerns, feel free to contact me at any time. (Pretzel) For a complete list of Imperial Attaches, go here NEW ATTACHES! Please join me in welcoming our newest Imperial Attache! 1. Arthur @giskard8 is the first Imperial Attache for the Hong Kong Garrison and is the current XO. We look forward to his contributions! Please give him a warm welcome when you see him on the boards. Serve proudly, Gentlemen, and as Tim (Dark CMF) says: "Keep doing what it is that got you here"! IMPERIAL ATTACHE AWARD Imperial Attaché Award for those attaché's who have gone above and beyond [minimum 1 year of service] You can find a list of prior recipients here ATTACHE MERCHANDISE Attaché Patch NOW AVAILABLE For those of you on the Imperial Attaché staff, I am pleased to announce that the official I.A. patches will soon be available... again! Here are the details.. PLEASE READ CAREFULLY! Patches will be limited to TWO per person, and will only be sold to those who are current FISD Imperial Attaches. The cost will be $5.00 each for those in the U.S. and P.R. and $6.00 each for those outside the U.S You can find the thread here Attachés? We need YOU! Fellow Attaches, Let me first start off in saying THANK YOU for your continued service on the FISD boards. You have all done well on welcoming new members and providing build advice to members making the journey into the White Zone. As the topic suggests, we need ONE of you to step up! To go above and beyond the call of duty. We need one brave soul to host the next run of FISD racing shirts for the FIRST ORDER! Is it hard? YUP Will you get help? Absolutely. Will hundreds of troopers appreciate your hard work and dedication? You bet. Will you question why you volunteered? Oh yes. Ask @Alay But.. It is a rewarding experience, and a journey you will not make alone. If you feel up to the task. PM me or post in this thread here, and I will fill you in on the details. THANK YOU With Unquestioned Loyalty Preston Christman TK-91488 "Pretzel" Attaché Ambassador So what exactly are EIB (Expert Infantry Badge) and Centurion levels? These programs were designed for those who choose to take their armor above and beyond the minimum requirements for basic 501st Legion approval. It gives you the chance to show a level of dedication and pride that takes your armor closer to being as "screen accurate" as possible, without as much extra work as you may realize! It also works on giving a better look to the Legion as an entity, and you can bet others will take notice of your hard work. The 501st has a list of detailed requirements for Basic approval, (level 1), EIB, (level 2) and Centurion, (level 3) which can be found here in the Costume Reference Library, (CRL) http://databank.501st.com/databank/Costuming:FISD_CRL Here are a few of the questions people may be wondering about: 1. "I am a (tall/short/heavy/thin) Trooper. Can I still apply? Of course! These programs are open and encouraged for all sizes of TKs, as long as the costume is correct and meets the guidelines. There are many specific build tutorials to every option, as well as a vast network of fellow TKs on the FISD to help you out and offer suggestions. 2. "How much extra will I have to pay for extra items"? The cost is actually quite reasonable, considering the few extra supplies you will need, which are listed in the requirements area. While it may run you a little more to implement these additions to your costume, they will go a long way to improving accuracy. All needed items can be found for sale on this thread: https://www.whitearmor.net/forum/forum/16-ongoing-sales-project-orders/ While blasters are not required for basic approval, for EIB and Centurion levels they are, and may need upgrades (also listed in the CRL). 3. "I haven't even got my kit yet, is it too early to start planning"? Actually, aiming for Centurion is easiest to do right out of the box. 4. "I have my basic TK approval, can I still get in these programs"? In a word... absolutely! 5. "Are there any "perks" to this extra work and cost"? Besides knowing that you have a great looking set of armor, the 501st and FISD believes you should be deservedly recognized for your achievement(s), and allows you to wear the appropriate embroidered "rocker" badge of rank (available for a very minimum cost) on your shirt, helmet bag, etc., as well as rank decals to put on your armor bin. You will also have access to select "challenge coin" runs, receive (free) a cool certificate for your new rank, and have your title posted below your name in your FISD signature. Plus, once you reach these levels, you will have the extra knowledge to help out those who are looking to apply as well. 6. "Is it hard to apply, and what happens then"? After basic approval, all you do is make sure your armor is up to the standards set forth in the CRL, post a thread with the required photos in the appropriate area (see below), and wait a bit for the D.O.s (Deployment Officers) to address it. (Hint: Studying other people's threads before you submit can be a GREAT help). These are also listed on the main page of the FISD site. While waiting for approval, you will get some comments from others who will offer suggestions and constructive advice to help you out. If you should need any changes, the DOs will let you know, so you can adjust accordingly. Don't be dismayed if you do need changes... it's all for your benefit! After you are approved for EIB, then you can submit for Centurion. EIB https://www.whitearmor.net/forum/forum/19-request-expert-infantryman-status/ Centurion https://www.whitearmor.net/forum/forum/72-request-centurion-status/ Just remember that the FISD is here to help you every step of the way with whatever other questions you may have, but if you can't seem to find what you are looking for in your research, just ask away here on the forums! With Unquestioned Loyalty Joseph Pedigo TK-10963 "justjoseph63" Deployment Officer This area lists all those who have gone above and beyond basic approval toward screen accuracy. FOR August - September the 1st Imperial Stormtrooper Detachment would like to congratulate: Expert Infantry Badge Award: Dave Gilmore "ATAUK" TK 73076 EIB 849 Jose G. Garcia "TK 71627" TK 71627 EIB 850 Arthur Wong "giskard8" TK 39093 EIB 851 Christopher Bailey "nosferachew" TK 66401 (HWT) Second EI award! GREAT job on your approval, now on to Level 3! Request your free EIB certificate here Centurion Badge Award: http://www.whitearmor.net/eib/centurion_badge.png Jeff Rich "11b30b4" TK 20980 Centurion 407 Lionel Gallardo "Lionel Noronha Gallardo" TK 27056 Centurion 408 Ignacio Garcia "501 pendragon" TK 13912 Centurion 409 Arthur Wong "giskard" TK 39093 Centurion 410 Outstanding job on reaching Centurion, Troopers! Request your free Centurion certificate here If you see any of these Troopers around your Garrison or Squad, be sure to congratulate them! As many of you are aware, the FISD is currently in our March to 1000 program. Our goal is to reach the one thousand mark of Troopers who have earned their Expert Infantry Badge, and although we are well on our way to this goal and have just passed the 800 mark! The amount of approved submissions is increasing (over 80 this year alone) thanks to the dedication of those willing to go the "extra mile" toward screen accuracy. Here is a brief description of EIB as written by Paul (Daetrin), our founder: "Expert Infantryman status is not required for members of this detachment. It should be viewed as an optional set of requirements for those who wish to take the accuracy of their costumes to the next level, and be recognized accordingly. We're a costuming club - think of it as an award for costuming excellence and you get the picture. The requirements will not replace or supersede 501st standards, but only serve as an inspiration for the level of accuracy that can be achieved. The standards are meant to be high but achievable..." Besides the added pride you will have in your armor, those reaching this level can purchase exclusive EIB gear (patches, decals, coins etc.) and get a free certificate for your accomplishment. If you are interested or would like more information about the program head here that will help. You can also contact myself "Pretzel" or any Imperial Attaché, and we will be more than happy to assist you! FISD Merch Reform The FISD for sale and merchandise rules have been in a place for a long time - they were liberally taken directly from CTN (the 501st clonetroopers detachment) and haven’t had to be tweaked much in 10+ years. For the most part things have been going well, however we’ve seen an increasing amount of reports of buyers making demands that fall outside reasonable expectations. We have had more than one occasion during merch runs, where a member files a PayPal dispute immediately upon seeing someone else post that they have received their items, and the filing member has not received theirs yet. This is a major pain. It locks up the PayPal account of the person managing the run, and could potentially cause other members to panic and file claims. Nobody wins in this situation. It clogs up the management of the run, creates a mob mentality, and cannot lead to anything productive regarding possible resolution to what wasn't a problem until that PayPal dispute was filed. The run manager (whether the DMBO or not) is acting on behalf of the Detachment to include the membership, and going straight to PayPal disputes is disrespectful of everyone involved, to include other members who ordered the item(s). Filing PayPal disputes without seeking resolution or an answer from the run manager/Detachment Command Staff should carry a suspension of no more than 30 days - really it is the same as someone messing up the forum experience for others, except that this is actually messing with people's lives and money. To protect against this, the following changes are being made to merch runs for FISD effective immediately: 1. Buyers have 30 days from shipment to report a missing or lost item for domestic runs. Sellers are only required to retain proof of shipment for 30 days. Why? Domestic shipments should normally arrive in about 7 days. Some people are claiming items never shipped 5 months after a run was closed, which is way too long to ask people to retain shipping material. If your domestically shipped item hasn’t arrived after 30 days IOW, you lose the right to claim it was never shipped. 2. Buyers have 60 days from shipment to report a missing/lost item for international runs. Most items are received in under 30 days, however we know some countries are pretty bad. Sellers must keep shipping documentation for 60 days on international items. If the shipper can provide tracking information (e.g. a tracking number for domestic or a customs form for international), they are not held liable for items lost or missing in the mail. Any concerns post them on the announcement thread due shortly. With Unquestioned Loyalty Paul Hoeffer TK8020 “Daetrin” Detachment Leader Interest Thread - FOTK version FISD Racing Shirt This one is something that many have been waiting for. This is an interest thread to gauge numbers, please post if you would like to see this run eventuate. You can find the thread here OR FISD Coffee Mugs - 2 Designs! $14 each + $5 shipping in the US + $10 shipped international Sales thread here Design One Design Two FISD Brothers in Arms Sticker 3.5 inch round stickers $4.00, shipping included Reference: Brothers in Arms Thread here paypal [email protected] Newsletter We are always on the look out for content, ideas, funny photos or even your TK adventure story so feel free to contact either Danny, Tim, Marcus, Preston or myself. With Unquestioned Loyalty Glen "Q" Rhodes TK85421 "gmrhodes13" PRO - Newsletter Facebook & Twitter With Unquestioned Loyalty Daniel Lauber TK55550 - "Ripper_L" PRO - Facebook Page Instagram With Unquestioned Loyalty Preston Christman TK-91488 "Pretzel" PRO - Instagram FISD Facebook Group With Unquestioned Loyalty Tim Waychoff TK-51878 "Dark CMF" PRO - Facebook Group With Unquestioned Loyalty Marcus Dohring TK-14057 “JODOKAST” PRO - Facebook Group Don't Forget We're on Facebook and Twitter! Facebook: www.facebook.com/whitearmor If you're on FB, stop by and say hi, ask questions, and share stories! NEW Facebook Group: 1st Imperial Stormtrooper Detachment (FISD) Official If you're on FB, stop by and say hi, ask questions, and share stories! Twitter: www.twitter.com/FISD501st or @FISD501st follow FISD on Twitter! Instagram: www.instagram.com/fisd501st On behalf of the 1st Imperial Stormtrooper Detachment Command Staff and the Imperial Propaganda Department

 2 points
 -
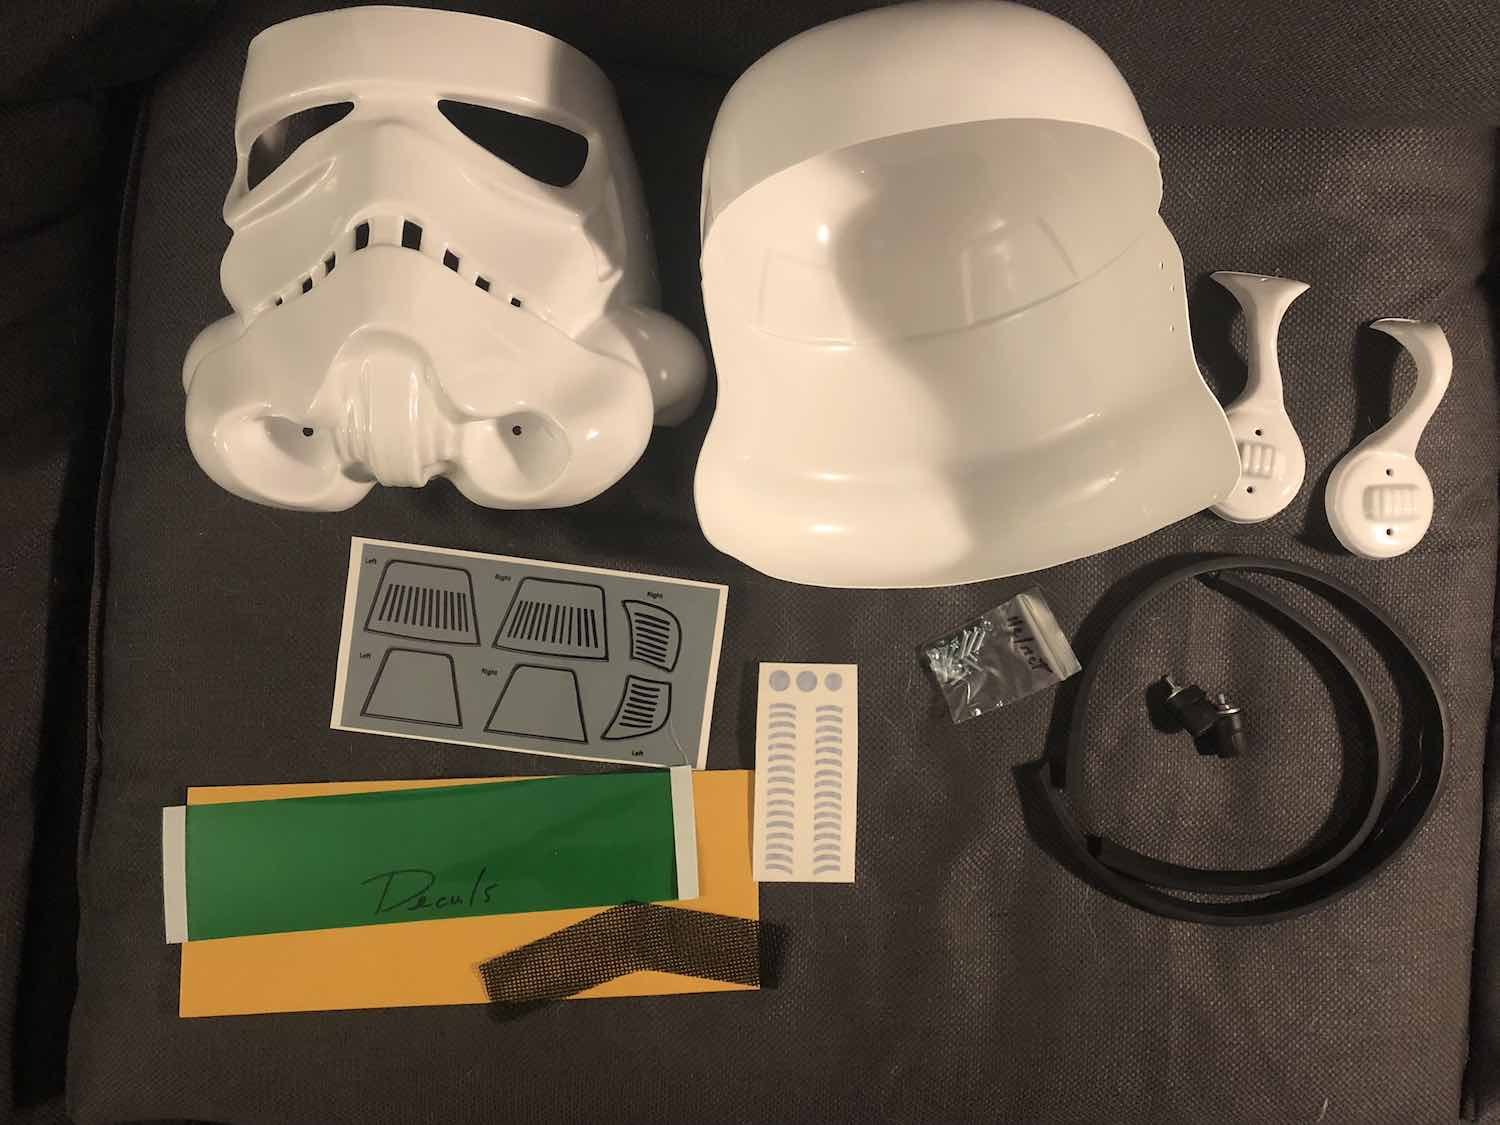
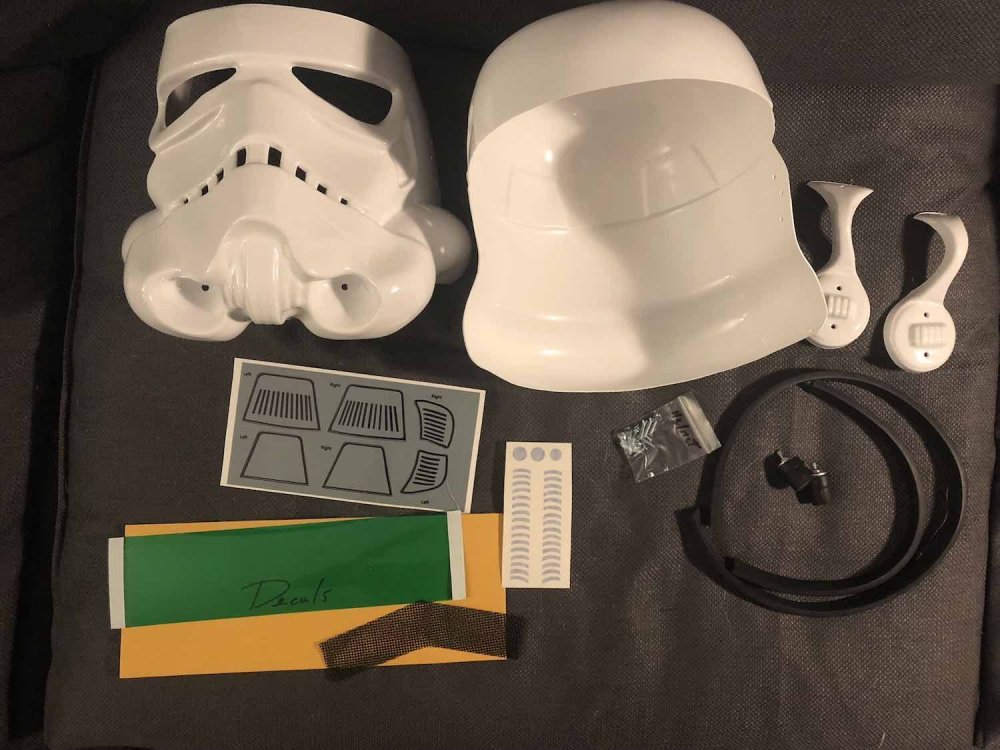
Hi everyone, first time poster here! As the title of thread sums up, I bought the trimmed Authentic Props build from Mark. This is my first build, and I've decided to go for the Centurion designation because.. well, it sounds awesome.. and if I'm going to put in a lot of work to get into the 501st, I may as well put in a bit more and go for the level 3 designation. I've been looking at a lot of build threads and trying to do as much research as I can to reduce the number of questions I have, but I also thought I should be documenting my questions as I go in order to help other newbs like me, and that I should probably still ask them because I may not know that I don't know the answer to them. I'm no stranger to costume and prop building, but I've never worked with a kit. I bought my kit in February 2018 and have only really had a chance to go through it now as I ended up moving places and have been trying to set this new place up. Anyways, life story over. Let's get to it, Mama needs a Stormtrooper! Thank you in advance to everyone who takes the time to help me out, I really really appreciate it MY STRATEGY Because I live in a tiny place right now, my strategy is to remove all of the pieces I need from the box ONLY for the specific part I'm working on, and just work with those. Once done, I'll do the same for the next piece, and so on and so on... I'll unbox all of the pieces that came in the box for that part, then I'll point out which ones need to be modified/removed/ignored. I'll also point out what additional things I bought for them. Hopefully it makes it easier for people to follow along, and to also point out if I am doing something wrong. I'll do my best to keep my main posts organized, and I'll edit them to include all of the best information I learn at each step, either as I learn from my mistakes or from all of you. PART 01 - THE HELMET I already know that if I'm going for Centurion, I'm going to need to make some modifications to the helmet, and will have to order a few different pieces, BUT, I believe I can still assemble the main bits of it. ... So here is what I THINK are all of the pieces I'll need for the helmet from the AP Armour kit (excluding the stuff that goes in the inside of the helmet): I'm using the Costume Reference Library - ANH (Stunt) as my checklist for the different levels of certification. As a newb, it's a bit confusing, but with all the other threads, this shouldn't be too tough. What I'm finding a bit difficult is if level 3 certification is something that happens on top of level 1 or 2, or if there are times when I skip certain items in the level 1 and 2 checklists and just jump to level 3. Here is what I think I need to do here, and please correct me if I'm wrong: Level 1 certification: - I believe I just need to put it all together with the materials I have. Level 2 certification: - I originally thought I didn't have the correct "Hovi mics" as I read some other threads from people using AP's kits, BUT, thanks to the help here, it turns out that I do. I guess I was reading some older threads before they shipped with the Centurion quality Hovi mics. You can see the post/replies below around this. Level 3 certification: - Other than some additional small bits of paint on a bump, I'm going to need to buy an S-Type next trim, and I guess, ignore the one shipped to me. - For those that don't know, the neck trim is that long black rubber thing curled in a circle in that photo. There's a smaller one for the brow, and a longer one for the neck. I guess the neck one needs to be a different style that looks more rounded in the end. I did some early digging and I can't seem to find it online at any hardware store here. I know many people order them at specific trooper sites, but I feel like this should easier to find. I've found "window seals" and "s-style rubber" that returns some decent search results, but nothing perfect and accessible. I'll update this once I make my decision and buy it. QUESTIONS 01. Just one for now; Level 3 certification says that "Tears/traps shall be hand painted or use decals that emulate hand painted (with correct ANH TK details)", and from the kit I ordered, it looks like the decals do just that, however, after looking at a few threads of those going for Centurion status using the AP kit, they all seemed to hand paint them. My question is "Are the decals for this kit adequate? or do I need different decals? or should I just hand paint it?" A. I was told that the decals will actually work for Centurion certification. Most people just paint them because that's how it was done in the films. I received a suggestion to try painting them, and if I screw up, then to use the decals overtop of it. That works for me! Update September 12, 2018 I want to keep all my main update notes in one post, to make it easier for others to follow along. Here is where I got today: Here is what I learned: - My Hovi mics shipped with the AP trimmed kit are already Centurion level - I still don't know the best place to buy the neck seal, however, the Centurion level submissions thread requires everyone post where they got their parts from, so I think I'll go through that and see what the majority of the Canadians did. - I'll paint the helmet and use the decals to cover them up if I screw it up. The decals are good enough for Centurion. - It was really easy to assemble this helmet! Only took about 15 minutes (and hours of research). I'm excited for the next step! Update September 16, 2018 This weekend I went out and bought the Humbrol paints (Suspend was kind enough to give me his extra French Blue!) and I did my first layer of paint on the helmet. I didn't end up doing the the tube stripes, as those seem the toughest, so I'll get to those after the rest of the paint on the helmet is finished. Here are some lessons from my experience: The decals that come with the AP build are really hard to peel off. I even had to post about it below because I thought maybe I had to glue them on. Thanks again to Suspend for clearing that up. I also realized afterwards that it is because they are vinyl stickers, so they are VERY thin. If you do wet the back of those stickers, the paper comes off more easily, but just be careful. Second thing about the decals is that I found them to be too large for the traps. The tears were well sized, but the traps seemed to run over the grooves. I originally wanted to create a stencil out of those decals, but because it all didn't add up, I just looked at the Centurion submissions and then freehand painted it.. which brings me to lesson number 3.. Freehanding it is way easier if you don't try to put painters tape around the edges! I tried putting tape around the edges but it all bled underneath it. Below you can see a freehand example vs the taped example. Mineral Spirits is amazing! If you're at all worried that you're not good at painting, just buy this stuff and some precision q-tips and you can fix anything! I accidentally put too much on the vocoder and it ended up running down the chin on the side. Trying to clean it up with paper towel smudged it, so I used Mineral Spirits and it was much better. I ended up cleaning up all of the traps too. This is what happened when I used tape around the edges - I recommend you don't do this: And this is what it looked like when I just freehand painted it. I actually used a pencil to feel the grooves out, and only painted to the pencil lines: You can see here that some paint got away from me and I smudged it, trying to clean it up: Mineral spirits fixed that up no problem! Get some, and get some precision Q-Tips: Tomorrow I'll do my second layer on the traps, tears, and vocoder. Thanks for reading! Update September 19, 2018 I've done the second layer of paint for the gray and the chin. It's not perfect, but when I put the black outlines on, it should cover up the imperfections around the edges. Here are some lessons from my experience: I found the thin layer technique works much better, and also gives the satin black and less glossy end result. It also dries much faster. Freehand is still better than stencil, in my opinion. Update September 25, 2018 - The Lenses! The moment I got my green welder's shield, I had to throw it in the bucket to see how it would work and look! For all you Canadians, I bought this for $12 CAD on Amazon and it ships with Prime. It's big enough to get 2, maybe 3 strips for the lenses out of it. Here is the Green Welder's Shield item on Amazon. And here is the result: I copied Uswrath's ANOVOS TK build (stunt) thread to install them. Here is the shot from the inside: I left the film on because I'm going to be taking this thing apart several more times before it's ready. Here are some lessons from my experience: Use Uswrath's thread to see how it's done! It takes some time to mark the drill holes, but be patient. If you buy this product from Amazon, you'll have extra material in case you screw it up. Just go for it! Thanks for reading!
 1 point
 -
cool stuff, I will be back with some updates on that!1 point
-
Great problem solving Daniel, if you have to paint it anyways may as well chop away.1 point
-
Easy - don`t let people grab it Kidding aside there`s no need for any protection, you would have to be pretty forceful to rub that off1 point
-
Detonator redo done. I’m happier. Will get the correct screws in there when I can get my hands on them but caps and panel resized and I tweaked the homemade clips as well Sent from my iPhone using Tapatalk1 point
-
Okay, so the cuts have been made, and interior has been temporarily strapped with gaffer's tape. Remember, the only cuts for my height have been to the chest and back plates (the ab/cod/kidney/butt are full size in the pics!). I have to say, I'm kind of pleased with how the front is coming along! I still may do a little more trimming at the neck and move the chest plate up a little. But on the right track, methinks! And the back view... Hm. I'm trying to get that back plate to sit more square on the kidney. Looking closely, I can see it's not the back plate that is the issue. It's the kidney. Now, I have done nothing to the kidney aside from heat shaping the curves on the sides. That kidney is taller on the left side than on the right, which causes the back plate to shift up a little bit. I've sanded the back plate down a bit on the left side, and that seems to have helped square up the OII box. In that pic, I still hadn't trimmed down the top of the back plate at the neck yet (this also causes the back plate to look a little 'off'). I ended up trimming the back plate at the shoulder straps to shorten things there, too. The whole back plate in general needs some heat adjusting for sure. And I'll be doing some more shaping to that kidney. Even though the torso as a whole fits me, the kidney is still too wide for my liking. I know I can get it tapered in a bit. Time for another pot o' Trooper Stew!1 point
-
That's exactly what I was concerned about - and it just now "clicked" as to how I avoid that while only sizing along the back seam, as per your post. Thank you! I was thinking you only trim the piece with the swoop on it, so you'd have to trim both sides of the swoop to maintain symmetry - but really I'll be trimming both the front and back along only the rear joining seam to just trim less of the swoop. Think I've got it now. Thanks again.1 point
-
Nice work on those shims! Once it's sanded down flush, hit the area with some Novus polish and it will be nearly impossible to see the seam.1 point
-
Rework on detonator is underway. Been doing some ab shim work in between. This is after 3 coats of abs sanded down with 150. Have 220, 320, 600, 800 and 1200 to go. Thought I’d get my licks in on ab shims before I go after the thighs. Sent from my iPhone using Tapatalk1 point
-
Ensure that your shins are as far down as they'll go on your boots. If you need to trim, there are a few options. Cut-outs in the back of the thigh and shin (don't cut past the ridges though) and you could trim the bottom of the shins or the tops of the thighs is required, but I'd say try to make this work as it is with the cut-outs in the knees. You'll need to see how you do once that sniper knee is on as you might feel the thigh pressing up against it, which could eventually lead to damage. Keep an eye on that.1 point
-
After some very non-scientific measurements of the full-sized torso on my frame, I figured out that I needed to remove 2 inches from the chest and back. I split this amount as 1.5" from the bottom of the chest, and .5" from the neck scoop. The same figures were applied to the back piece: 1.5" from the bottom of the back, and .5" from the neck scoop. This part is always terrifying to me. I heard in a creepy straight-outta-Disneyland voice, "There's no turning back now..."1 point
-
Yeah have both. Thought I'd try using Zap-a-Gap on this part since it seemed pretty straight forward. Used E6000 on about everything else. Considering I hadn't trimmed the part correctly, kinda glad that Zap-a-Gap was so brittle. It popped right off. Using E6000 to put it on, correctly now.1 point
-
Eric, Nice job on your build. While trooping, you'll have to be cognisant of how people are interacting with you. Those magnets around your midsection are right in the "hug-zone". Any electronic devices brought near those magnets might see some damage. "Zap! what happened to my phone!?"1 point
-
That is good news. Sent from my VK815 using Tapatalk1 point
-
This build just gets more and more interesting. Nicely done!1 point
-
According to the tracking number, it arrives tomorrow.1 point
-
Magnets FTW!!!! Great idea for those closures! And super cool magnet-jig thingy you created, too. Ingenious!1 point
-
Whilst the arms go off, I have started the internal strapping. Sent from my SM-A520F using Tapatalk1 point
-
It's always the built up... antici- Pation. It's nerve wracking. Glad I'm patient, but I love suspense. Sent from my VK815 using Tapatalk1 point
-
Looking good Nick1 point
-
Thanks Sent from my iPhone using Tapatalk1 point
-
Time to wrap up the bicep section with some lessons learned. On a side note, I left the 3/16 return on both upper and lower edges of biceps but I'll likely do one of two things to those return edges as I gain more experience wearing them and moving in them; A) Remove the upper returns if they, in any way, impede movement, comfort or add to the gap between shoulder bell and chest plate, reinforce the return area gap where both pieces come together with some ABS paste. Otherwise, in the interim, I'll attempt to maintain some level of uniformity by doing the same on the forearms. Lessons learned: When using the score and snap method, depending on how deep you go, the edge of the cut line can flare out resulting in a nice little raised ridge along the length of where the blade ran. This seems more likely to occur as your blade gets dull. Don't underestimate the length of the cover strips. Measure multiple times and even when you cut, do so ever so slightly larger, then re-measure before gluing. A very thinly spread layer of glue is in fact enough to strongly secure the ends. After handling the biceps and forearms quite a bit, I'm pretty confident in the strength of these joints. I continued to use a flat edged Popsicle sticks to spread the glue pretty thinly (on both surface and cover strip). The glue gets perfectly tacky in the few minutes that it takes to spread it on and this makes applying the cover strip nice and easy. The added benefit is, I had minimal glue squeezing out from the ends. Note: I'm using the "High Viscosity version of E-6000 glue but I'm really not sure if that is making a difference in the run-factor or ability to spread it thinner. I just know it's staying where I spread it!1 point
-
Pulled things up a little bit and made adjustments to the thigh belt which helped quite a bit. Belt popped off snap so thats the reason it looks a bit crooked. Still not able to walk without feeling like a robot however due to my height. Suggestions on where to trim?1 point
-
Just look out of the teeth of your bucket and you’ll be fine lol Sent from my iPhone using Tapatalk1 point
-
Those end caps are a bit big. They should be I believe 20mm. You should trim them down and move clips to touch them. Check the size of control panel. It could use a little sanding to even out wavy edge. Locutis has some great info in the gallery. Check out the one for detonator itself. He also has measurement photo's in the RS suit section that shows size of caps and control panel. You're doing great! Keep up the good work. And please for me and well everybody. Don't settle for basic. Think Centurion! and you'll get there. We'll help! Sent from my LGMS631 using Tapatalk1 point
-
Looking good Dave Dan @CableGuy should get cracking in getting you approved1 point
-
Great Hide-and-seek pic And as requested - good luck1 point
-
Inner cover strips have been glued in the thighs, forearms, and shins. The biceps need to be fitted to my size before trimming- those seem to be the only pieces that require some care in trimming before front-side gluing. If you're smaller like me, you want to keep the inner 'dips' of the biceps centered. If you trim too much on one side or the other on the bicep, it throws off the center alignment of the 'dip'. So it needs to be sized first. I'll get to that later. I decided to tackle shaping the kidney and ab with each other today. Befores and afters. The lovely wonkiness really stands out on this suit when it's shaped, doesn't it? In case you're wondering, the blue tape was just a visual guide to help me see how far to dip the pieces into the boiling water. I used a 16 quart pot, and it worked out great. Oh, and I haven't trimmed anything for width yet! My focus is just getting the torso shaped properly so all stress is minimal on the plastic when it's strapped together. I think I'll pad things with foam instead of trying to trim it down. If further down the line I decide that a slimmer torso would look better, I can always tackle that later. I forgot to take pics, but after this, I heat-gunned the crimps in the returns on top and bottom of the kidney. This happens when you shape your kidney in hot water. It's unavoidable, but easily remedied. Next I decided to get reinforcing the returns out of the way. I don't like this part. It's boring, but so necessary if you want to prevent future cracks in your armor (if you're using brackets, like me). I just traced my return edges on some thin sheets of ABS, cut, and glued them in with CA glue. I purposely keep these pieces wide. I will trim everything down with a Dremel once my brackets have been installed. I quickly taped the kidney, ab, and chest together to see how everything fits at full-size. This kind of reminded me of the "Kilroy Was Here" doodle... So, my plan to size this kit down is as follows: Keep the ab and kidney at full size- no trimming for length, not even the cod!! I will trim the back piece at the bottom for length, effectively removing the return off of it and making it shorter. I will also be removing a good amount from the bottom of the chest (no need to rebuild the bottom chest return for a Luke-style Hero TK, yay!) and trimming the neckline to create a deeper swoop in order to move the chest plate up. Wish me luck!1 point
-
Hey Dan, We are connecting with him now.1 point
-
Most often the reason for handpainting is that it`s the way it was made for the Movie (ANH as ESB/ROTJ had decals) and those going for Centurion, me included, want to emulate the screen used suits as much as possible and also it gives another level of pride to be able to say you did everything yourself Some, like me, also takes it a step further and assemble the suit just how they did using the bracket system, foam star in helmet and so on, inside is however totally upp to the builder and as long as it looks right from the outside your golden Welcome to FISD - looking forward seeing your build as you progress1 point
-
Welcome, and GREAT to hear that you are aiming for Centurion! Here are some answers that may help, but always feel free to ask as many questions as you like! 1. "What I'm finding a bit difficult is if level 3 certification is something that happens on top of level 1 or 2, or if there are times when I skip certain items in the level 1 and 2 checklists and just jump to level 3." Always build to level 3. 2. "I should have all of the proper materials except for the "Correct 'Hovi mic' aerator tips." I believe AP's hovi tips are good to go, as long as the inside is white and the screens are correct. If you can post a close-up pic we can let you know. 3. S-trim: https://trooperbay.com/trooper-helmet-s-neck-trim 4. "Just one for now; Level 3 certification says that "Tears/traps shall be hand painted or use decals that emulate hand painted (with correct ANH TK details)", and from the kit I ordered, it looks like the decals do just that, however, after looking at a few threads of those going for Centurion status using the AP kit, they all seemed to hand paint them. My question is "Are the decals for this kit adequate? or do I need different decals? or should I just hand paint it?" The decals that you have will do just fine for all levels. You will need to paint the ear bars/teeth yourself, though. If you have the time and talent, I always suggest painting everything yourself, though. If you decide to do that we can offer some tips! It looks as if all the hardware for the helmet assembly is correct, and since the eyes, teeth and ears are already trimmed you are way ahead of the game. Going over the CRLs is a fantastic idea, but I would also highly recommend looking over some the the approved Centurion submissions in the Advanced Tactics forum. You can really learn a lot about what we look for there. https://www.whitearmor.net/forum/forum/72-request-centurion-status/ Bets of luck on your build, and as mentioned, ask lots of questions and be sure to add as many detailed photos as you can.1 point
-
Had a small troop today, so that was good. My voice electronics failed again, so that sucked. But I think i conditionally finished my t21, so that is good. Added the tubing greeblie with some blue wire (sacrificed some cat5 wire). Added sling. Added coil wire. Just need weathering and one other thing. I put a couple of elastic bands around the barrel shroud. I’ve seen other builds where people use tubing. I think it is a bracket for a bipod. The elastic bands are temporary. Screen shot Actual Lewis gun. I will shape a piece of plastic to wrap around the barrel some time in the future. I also picked up some fuel line to test if I can fit it on the corrugated surface without looking ridiculous. My weapons locker is expanding. New member of the family. Sent from my iPhone using Tapatalk1 point
-
Got a lot of progress done last night, since I got to attend my first armor party! About 5 different people from the 501st were there helping me out, including a female just a tad larger than me height wise. She told me what all she had to do with her armor, and helped me trim everything I brought! It fits me a LOT better now, since I don't have a bunch of space. I do think I'll have to do a hot water bath or something to curve the pieces, since right now they lay pretty flat. I had to press against them to get them to curve. I made sure to ask if the cuts they were making were 501st approved, and was very relieved to hear they were. Gotta have someone help me so I can tape everything together to see how it all fits together. Sent from my LGLS992 using Tapatalk1 point
-
Had time for a little session today as well so sanded the biceps and added more paste and put some on the ab/kidney to then sat them aside and started on the forearms. KB updated the molds so they are now 2 pieces instead of 4 and apparently makes them a breeze to build - sounds good Identifying the parts that go together, this is the right. Ref pic The smaller piece goes inside, no trimming done yet though This made me nervous upon receiving the kit but according to KB you cut that off and that would look similar to ref pic above, the whole side was also paper-thin, almost see-through KB for reference, looks wierd but really don`t have an option but to cut. So that`s what I did - not liking the look of this…. The back side offers some option to size, not to much or they won`t line up properly as you can`t trim from both sides. Will look inte that more later. Rought trimmed the left and it was in "better" shape, also thicker, so did a gradul cut and to me that looks better so decided to rebuild the right with some abs but that`s for next time.1 point
-
I know this is an old post but I just wanted to say your armor looks amazing!! So clean and so much attention to detail!1 point
-
I need a beer1 point
-
Got my trooping crate. And no sooner did I get home than I got an email from ATA that my armor has shipped! BBB-Day coming soon! Sent from my MSE-6 droid using Tapatalk1 point
-
Cut Once Measure Twice. Keep at it!1 point
-
+1 for the little tabs that Q suggested (in this scenario). Usually, the butt return and the lower kidney return edges butt up again each other which helps to keep the butt from riding up. As you’ve have to remove the return edge from the butt plate, it will always want to ride up. Those tabs should help prevent that. :-)1 point
-
Me on the left, Rob from RS in the middle and Paul from Tramp on the right. It was a joint Troopacoola and Tramp visit [emoji846] Sent from my SM-G950F using Tapatalk1 point
-
Submission Photos: I'm very happy with how it all turned out. As you can see in the rear photo, the belt still rides up a little bit and I am working on a fix for that. That didn't stop me from getting approved however. I've been on active duty for the First Order since May 14th! A BIG HUGE GINORMOUS thank you to all who helped me along the way! I hope this thread will help future builders in some way. Hit me up in this thread or via PM with any questions. I have added a table of contents to the OP for easier navigation and still have to finish my Executioner pieces. So I'm not done yet! I'll update with progress on those at a later date after I finish them. For now I am enjoying the fruits of my labor and resting for a bit!1 point