Leaderboard


Popular Content
Showing content with the highest reputation on 09/06/2018 in Posts
-
T21 finally painted and assembled. Just need to add a few greeblies and sling. And clear coat. Sent from my iPhone using Tapatalk4 points
-
3 points
-
Magnets glued to buttons with E60003 points
-
The magnets and tape come off. Houston, we have a problem! Break out the pot and shape some more (thanks again to Cricket for confirming this is the way to correct). In the past the hot water method was a little scary, now not so much... Minimal pressure at the bottom Again minimal pressure3 points
-
2 points
-
E11 Trigger internal frame going through its ops2 points
-
FWIW most line 24 snaps have the same length post .2 points
-
DANG you are quick, lol!2 points
-
Yea, it was the angle of the photo making it look out of line. It is stitched in place, here's a close up. Sent from my SM-A520F using Tapatalk2 points
-
Looks great For Centurion you might want to trim that smaller ab plate a bit2 points
-
I'm quite fond of this thread for teeth/frown references. Good stuff. Standing by for answers on the glasses - I have hopes of mounting a pair of prescription lenses behind my green lenses as I heard somebody else did (once, maybe, somewhere), but also maybe it doesn't matter since you can't see anyway?...2 points
-
I got to see Lorelei's neck seal creation live and up close this weekend...it was pretty cool, and an ingenious approach. The rubber might get a little sweaty, but some fabric on the inside will fix that nicely. I think Lorelei got past some of the initial butterflies giving her biceps a workout, and she should be off to the races now! Watching with keen interest.2 points
-
"Note: It doesn't have to be perfect considering the cloth waist belt will cover most of the area. " I keep forgetting that. Thanks! A.J.1 point
-
Some armorers (like Anovos) send them in pre-cut widths. Most makers just send you a sheet of ABS and you cut them to the required widths.1 point
-
Suit from Lucas archives to help you decide1 point
-
Agreed 100%. My main armor is AM, and it is built like a tank. 3 years and countless troops with no cracks or yellowing. I am 5'11 / 155 and although I had to do some serious trimming it fits like a glove. Great customer service as well!1 point
-
Thanks Dan, Now that you mentioned the small ab plate does feel too much, I will take it down and shave it a bit more flat this weekend. The screws on the TD are flat head, I think the lighting and the fuzzy focus messed it up, I will have them re-take in the morning.1 point
-
Hence the reason I recommend DOT or Fasnap. Roghly the same cost as Tandy yet much higher quality.1 point
-
That makes sense. I've had four different "Line 24" snaps so far: the ones Mark (AP) included with the armor, the snaps that came with my setting tool (Home Depot), the Amazon snaps sold as Tandy snaps (but weren't), and the actual Tandy snaps. All 4 have different length posts, the Amazon fakes were really short, so that's why I said that.1 point
-
Now that is a thing of beauty1 point
-
Just trying to follow your lead in making our Troopers look their best1 point
-
1 point
-
On a positive note it's what we call battle damage! That said, if someone is producing an ABS version of this kit (without visible assembly joints) then most of your concerns seen in this kit will disappear. Lastly regarding this kit, if you'd pro painted it 85% of your paint issues would not exist, but then again that would have tacked on an additional $1K to the over all cost1 point
-
This is great! I'll take a closer look when I get some time. Thanks!1 point
-
I like the idea of tin snips ... I hadn't considered those. You know - I thought it looked kind of dangerous, but figured that must be how everyone is doing it! ... Oh well, I'm new at this1 point
-
Blimey!! That looks like an accident waiting to happen! Lol I did my build with a trusty pair or Lexan Scissors. Gives a lot of control. The only places I used score and snap was the visible straight edges, such as the coverstrips, ammo belt, ab buttons etc. Each to their own, though. It clearly worked for the guy in the video. :-)1 point
-
Awesome, thanks! I should have enough of the thinner ABS from the helmet trimmings to make that work. The ear pieces are really thick stock (around 1/16" I'm guessing), but the neck and side trimmings are much, much thinner.1 point
-
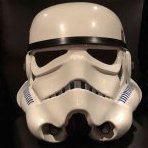
Hi Christopher, and thank you for your EIB application for HWT... let's dive right in, shall we? CRL and EIB Application Requirements: All submission photos are present, Trooper, and your armor displays all the elements required for your SECOND Level 2 Badge. Congratulations and welcome to Expert Infantry.... again!! Other-Armor Fit/Assembly: In this section we review observations made by us and your fellow Troopers. Suggestions made here are to improve the overall look of your armor. If these suggestions would effect an application they will be mentioned in the below sections. Just a few notes on this, brother, and as mentioned before, it's GREAT to see another HWT headed for level 3! (We are a very small club, but growing). I realize that you attained Centurion level with this armor as an ANH Stunt,, but there are a few issues that were noticed on your new submission. The paint on your vocoder could use some cleaning up. Just remove the extra paint from the edges on the right side and you will be golden! Reference image Your belt needs to be raised to where it covers at least the bottom of your large ab button plate. This can be seen in the screen cap below. Reference image Your left shin was absolutely spot-on in your ANH-S Centurion app, (photo one) but it seems to have shifted a bit and the needs to lined up more with your thigh. Photo 1 Reference image You might want adjust one of your pack straps to make it sit straighter on your back as seen in the game images and CRL photo. Although not a deal breaker by any means, your top leather ammo pack could be straightened out, also as seen in both the game and the CRL. Reference images Your 4 button ab plate could definitely use some trimming.. easy fix!: Reference image Centurion Suggestions: Because Centurion photos show much more detail than EIB, items pertaining to Centurion might be seen there and not here. We try to point out all we can from what is seen but the final accuracy is the responsibility of the trooper. The gap in you ab/kidney connection on the right hand side will need to be eliminated. Tightening up the strapping would fix that pretty quickly. Reference image Please center the sniper knee plate and reduce the gap between that and the actual calf. It should be pretty straightforward to do and will add to the look of this great build! Reference images It may be the angle of the photo, but it appears that the interiors of your hovi-mic tips are black. Hitting the insides (and maybe the outside edges if you feel like it) with a bit of white paint would get them to where they need to be. Reference image That is an amazing pack, but as stated in the CRL it will need some weathering on the entire thing, and not just the center canister. You don't have to go overboard, but some silver or grey paint for accents (battle wear) will make it look a lot better. CRL: "Backpack is scuffed and lightly battle worn, but not heavily weathered or dirty". Thanks again, and I look forward to seeing you at HWT Centurion with this armor!1 point
-
That is a lot of damage. Luckily nothing that takes you completely out of the game. I do agree, however, it shouldn't be in this condition after one troop. That said, I have seen similar issues with the flexible fiberglass FOTK kits, too. Hopefully, once these spots are repaired and reinforced they will no longer crack. I am curious what the vacuumed formed kit looks like vs fiberglass. I would imagine less detail if it is ABS, but it may be worth it for the sake of durability. Good luck man.1 point
-
So close now!!!! Can't wait to see them finished. They look great.1 point
-
Thanks for the feedback. Appreciate it. Will trim it down this evening.1 point
-
Precisely Dan. What works for some doesn't for others.1 point
-
Just remember to not go too thick on the ABS, otherwise you may not be able to get the snap post sufficiently through the combined layers of elastic and ABS to set it. I found that different brand snaps have different post lengths, of the ones I've had so far the Tandy snaps have the longest posts. Good luck with your build!!1 point
-
Update, Parade pic with some other Rogue One kits. Mando Con Crawl pic. Well DragonCon has passed and trooped (for the first time ever) my kit with the Crystal Patrol Pack for the parade. This was my first troop in this kit and I had some issues with the kit that I will detail here: 1. I needed to remove the thermal detonator from the back belt because the pack was pushing down on it and was causing the back belt to come off. Luckily, I realized this before the parade and made the adjustment. Thank God I made the thermal detonator removable. 2. Even with the added felt strips to the pack frame I still experienced some damage to the back plate. 3. One of my biggest concerns about the pack was that it would damage the armor shoulder straps but that turned out to not be an issue at all; however, when I packed all the armor in my transport box to take to DragonCon, I must have failed to pack everything correctly. When I unpacked everything in the hotel room I realized that one of the shoulder straps was cracked and the back plate on the left shoulder under the shoulder strap had cracked as well. 4. I had planned on getting a touch-up pin for the white paint I used but forgot to do so. When I noticed the crack in the armor and was already at DragonCon, I had a repair kit with me but no paint. 5. The backpack and pauldron worked out perfectly and took no damage at all. I even snagged the antenna a few times getting to and from the parade and the fishing pole held up great. 6. My left lower leg kept rotating outward. Even when I added Velcro inside the armor and sewn some on the boots, the Velcro simply detached from the armor and did nothing to hold the leg armor in place. I noticed the industrial strength was not staying stuck to the inside of the armor before I headed to DragonCon and I even used some non-sticky backed Velcro that was glued inside the armor with CA glue and that still came off. Not sure what to do to fix this issue. 7. Industrial strength sticky-backed Velcro failed all over the armor. Most of the time is came loose when it was stuck to a non-painted surface like the inside of armor. In these instances it was applied to the primed side of the armor that I did not coat with the flex seal. It seem to stick just fine at my house but in 90 degree weather with 100% humidity, it came loose in a lot of places. Not sure how I will address this either. Ok, so here is my damage assessment of the armor: The cracked left shoulder on the back plate, damaged in transport. The arrow shows that the crack continues under the shoulder strap. The right shoulder strap cracked during transport. I had CA glue in my repair kit but no paint. I found some white finger nail polish at CVS and used it over the superglue. It worked in a pinch but I need to get a touch-up paint pen. The damage to back plate from wearing the backpack. Paint worn off in several areas. I kind of expected this but I will need to add some foam to the pack frame to keep this from happening in the future. Left thigh experienced paint being worn away near the top front. The red circle is my attempt to cover with nail polish. I think this is being caused by the drop boxes or possibly if I bend over, by the belt boxes. This is a crack on the side of the left thigh. I actually did this a few weeks ago when I experminted with sticking my cell phone inside the thigh armor but I bent down and cracked the armor. The cell phone survived but the armor didn’t. I tried to use nail polish on this before the parade. Right thigh, same kind of paint wear. Left gauntlet paint wear, no idea what caused this. However, I did have issues with the gauntlets rotating on my arms. Not sure how to fix this. Right bicep paint wear in the armpit area and side. I guess this happened from just rubbing on the side of the abdomen. Similar type or wear on the left bicep as well. Right thigh cracked along the front cover strip. Since I do not open and close this part, I think this is caused when I squeeze the Velcro on the back closed. Right lower leg cracked on side of the front and again I think this is due to opening and closing the armor. Also notice the arrows point to paint damage. Right lower leg cracked along the front cover strip. Most likely due to opening and closing this part to put it on and off. Outside the right side lower leg paint damage. Also notice the Velcro that detached from the inside of the armor. Almost no adhesive left on it. Back cover plate, lots of paint damage. I guess this is just the back plate rubbing on it. Cod piece paint damage from under the front box belt. But plate cracked in two places. Abdomen plate cracked along front and paint worn. Possibly from wearing too tight and rubbing from chest plate. Abdomen plate worn on both sides along the top rim. I think this was the bicep armor. Right side outer box on the front belt. The bottom rivet has come loose. The thermal detonator before I took it off. This must have been the back pack frame. Lastly, those $65.00 gloves from Imperial Boots busted seams again. I am not happy with the quality of these gloves and will be contacting IB. So, I have my work cut out for the foreseeable future. Some of this stuff will be touch up but some of it will require more extensive repairs. Overall, I am not a happy camper. A $1,200 set of armor should not be this damaged from one troop. Granted it was parade, but come on, I am in the process to getting a full vacuumed formed rogue one kit and we will see if it holds up better. That’s the update, thanks for the interest.1 point
-
You're very welcome! If you have any questions as you dive in, don't hesitate to ask!1 point
-
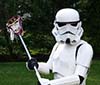
Update, Ok so DragonCon is over and I am back on the T-21 project. I may need to work on my TK as well. The TK kit experienced some damage during the parade but more about that in my TK build thread. Ok so I concentrated on the feed tray. First I cut off the three hex bolt heads and I will be replacing them with round head (rivet looking) greebles I also cut off the lip towards the front of the tray and cut down the tabs on the sides of the magazine cylinder. After sanding here is how it looks before I add the greebles. I will be adding a shorter lip where I cut the original one off. I am also looking to add the roll markings on the feed tray but I have not tested how I plan on doing this. I do not have a steady enough hand to scribe them myself. One Idea I have is to make a template and sand blast them on but I do not know if the basting with cut them into the resin deep enough to be seen so I will need to test this. Last resort is to just paint them on. We will see what works out best in the future. Next, I primed the barrel shroud parts and assembled them. Since I planned on glueing the 2.5” pipe into the transition, I needed to install the sling mount and tactical light rail during the assembly to be able to access the nuts on the back side of the screws. I will be building a 1.25” sling so the sling mounts needed to be 1.25” (32mm). I had a spare AK-47 sling mount for this and it fit perfectly. I also had a small rail mount for a bipod that I cut down and drilled holes in to mount it to the side for the tactical light. All this installed and mounted the 3” collar at the transition and glued everything together with E-6000. I clamped it all together and let it sit for 24 hours. I also cut a horizontal line on the feed tray to replicate a separation in some parts but I forgot to take pictures of it so I will add it later. And that is the update. Thanks for the interest.1 point
-
Yes, it looks like a mess, but, it's an organised mess! All parts initially sized up ready for trimming. Tapered the biceps, fore arms and thighs. A lot of excess being removed! Sent from my SM-A520F using Tapatalk1 point
-
The lid in its current state, dad decided to go mental with the interior, including keeping up the cooling systems. Sent from my SM-A520F using Tapatalk1 point
-
It is amazing how much info is actually on these forums, the more you search into a particular costume the more you find and I think I've just finished looking through every TKC thread now. Some of those differences, knee ammo strip placement with no rivets, 2 rivets on both sides of ab and kidney plates, angled stepped stripe on helmet, the info was there and has been brought up at least once, but either got lost or changed over time. It's only really when you stop looking at just one set of references and start comparing those with other references that you start seeing some of the differences and remember this is without including any references from figures, promo material or earlier renderings which had been found to be incorrect to screen versions. My take on this is that it's not like taking references from one movie like ANH where there is consistency between most of the costumes seen, with the odd exception of one of the costume helmets not having tube stripes, or one of the costumes with a belt positioned in a different spot and so on, the references are taken from different platforms and versions of the game so my thoughts would be that some of these are added to the CRL as options, after all the references are there. Some things do not change between the references so some adjustments may need to be made, some of those, position of the knee ammo strip with no rivets, the rivets on the sides of the ab and kidney, position and angle of the stripe on helmet and so on. And a few days ago I knew none of this, not until a recruit challenged something in the CRL, now I think I have the bug and I may have to look into building one1 point
-
Thank you. Hope so.1 point
-
Thank you for posting such a detailed build. Reading through your build gave me the confidence to start cutting on my KB FOTK armor ...1 point
-
You could try using your ruler and clamps to make sure your lines are straight.1 point
-
You're finding different images because they're made differently between game systems and PC. And probably from a few different games the character appears in. This is kinda starting to follow the HWT deal in where to decide what was the first varient and stick with it or decide to let it evolve and allow options. I prefer the latter as the Commander looks different on PC compared to console.1 point
-
Might be too late for this, but rather than rivets, I used Chicago screws to mount my ammo belt to my canvas belt. It's removable if I need it to be, but won't come off by accident. (use a tiny dab of E6000 on the threads to lock the screw)1 point
-
Of course, your ABS paste tutorial was/is a godsend. Thank you!1 point
-
You can always pull the rubber down above the ears to reduce the gap [emoji6] Sent from my SM-G950F using Tapatalk1 point
-
Hi all I haven't posted in ages as i've been busy with other projects. Sorry about that. My passion for stormtrooper armour never went away though. New projects i'm working on alongside my Youtube channel:- Mannequin conversion (possible arms) Rs props Anh tk build possibly centurion standard. Just finished a boots conversion video with links to the Ukg and the F.I.S.D on the description .... Hopefully to help others following this route. cheers1 point
-
Welcome aboard and a happy early birthday Mason. Now lets see that plastic spaceman come together. Sent from my VK815 using Tapatalk1 point
-
Hi all! During the recent changeover to the new server, the program for issuing certificates for EI and Centurion was affected. Mathias has worked like a madman to get this resolved and has come through like a hero! If you requested one during or since the 1st of August, I am working to get those issued. We appreciate your patience, and if there are any problems, just PM me. Thanks! Joseph1 point
-
I've used 2" PVC for the main receiver section where the chamber is. I've drawn some parallel lines down the length of the 2" pipe. I'll glue the sides of the pipe onto the receiver so that it looks like the chamber is really "part" of the wood. To draw the lines, simply lay the pipe on a flat surface and hold it up against a piece of wood to draw the lines Discard the scraps This is where the pipe will be glued. You can see that the pipe meets the surface of the stock almost perfectly. I've cut a small section of the pipe at the front so that it will be easier to assemble the cooling fins I've cut out the ejection port. I simply glued a section of pipe inside the port, and elevated it slightly with scrap plastic. I'll paint this silver later. Here's the cooling fin section, I've drawn a circle using the barrel profile. Cut it out and glue it to the pipe section I've cut out 10 cooling fins from sheet styrene, 5 fins per side. Glue them in place with Plastic weld Just a dry mockup (not glued / screwed in place yet) I forgot to cut out the trigger hole, so a little jig saw action and Dremel action will clean it up I started rounding the edges of the stock. I didn't have any fancy tools so I used... a knife. Seriously, I just whittled the edges to get the rough shape, used a file to clean it up, Dremeled a bit, then sanded it smooth. Here's a pic of the sanded stock, as well as some greeblies. This will work for the tube that's inside the real stock which is some kind of container and screw top brush which i assume is for gun oil or something. I used some sprinkler tuning parts, a short threaded tube and a couple end caps. One area I didn't get quite right was the area just behind the rear sight. It should extend from the stock to just below the sight. I just glue a small block of wood here and bondo it later I created the receiver detail by transferring the template drawings to sheet styrene of various thicknesses. Adding more detail. Gluing with Plastic Weld Finished receiver details. I glued them to the wood using E60001 point