Leaderboard


Popular Content
Showing content with the highest reputation on 08/27/2018 in all areas
-
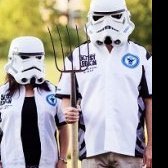
Yaaay! Basic approval is in! Now waiting for my TKID [emoji322] Sent from my SM-G800F using Tapatalk4 points
-
Great news! Those videos REALLY helped me - I watched them quite a few times, even before my armour arrived. It makes the whole process a lot clearer. I’ll just put a disclaimer here - this is just one build method. It worked well for me but it’s worth checking other methods too, just to see which one you like most. Best wishes Dan3 points
-
Suddenly I’m feeling better about this build now that I’ve watched how everything is held together and feel like I really might get it done before Halloween. It seems like the hardest or longest part of this whole build is waiting for glue to dry Sent from my iPhone using Tapatalk3 points
-
Hi Sean, Here’s the method I used. Some would double up on the snaps (poppers), however single works okay with good quality snaps. Best wishes Dan3 points
-
Went to an armor party and got lots of help from Cricket on the legs. Steve jumped in with a critical eye and we finally got the cuts to line up. Here is a shot of current state with another "aren't you short for a trooper" Just taped at this point Calves need a hot water bath to get as close as possible to reduce the strain on the closure Had to buy a 16qt pot And now the finished results. Could not have done it without cricket showing how to hot water bath as she shaped another members armor. Now I will try my hand at doing the "cricket closure" on the shins. Starting with the buttons.3 points
-
Morning, all! I recently got inspired by a thread in the NCO Club (Off Topic) section about the differences between OT TKs and if a spreadsheet laying them out existed. We came to the conclusion we didn't think one did, and then on Friday I didn't have any real work to do at work, so I made one. It's OT TK only for now; I may make one for FOTKs someday, but that is not this day. There are spreadsheets for OTTKs and FOTKs- now including TLJ Phasma as per the recent update to the CRL! They are also now in PDF format for easy viewing! Here's the link for viewing/downloading (it looks terrible in preview- Google Sheets or download are the way to go). OT TKs - https://drive.google.com/file/d/10tEVteIreh6AHMogW010cuH_Bf8TBfU6/view?usp=sharing FOTKs - https://drive.google.com/file/d/1GBkXIfRs9lYW6vnhVjqdEv5oNdp2ToTs/view?usp=sharing So my question is: Where should I post this for all to view? Armor discussion? Generic tutorials? My only thought is put it where it will be the most helpful, and I would prefer it not limited to the 501st-only areas, as it could help someone decide which TK to do for acceptance into the Legion (that was the point of the thread that inspired it). FURTHER EDIT: These have both been posted under the "Getting Started - Read this First!" Section. I note this post was pinned, but those weren't- those are the ones I'd recommend pining, as those are the ones I'll be updating with CRL changes.2 points
-
The xls is great! We should definitely memorialize it on FISD, right @Ripper_L?2 points
-
Are you referring to this gap? If so, it could just be the way the armour is sitting. The back piece will tilt towards the camera (as per the pic) when you are wearing it and hopefully close that gap. Sent from my iPhone using Tapatalk2 points
-
Hi everyone, This weekend was a crazy busy weekend – but I think I’m almost there and ready for basic approval. I did another try in gluing the sniper plate, build/painted the bucket and did a first photoshoot. The photos are not that sharp, but think they give a good idea. Helmet: Things I would like to improve: - The gap between the ears - The thighs can go a bit higher I would love to hear your feedback!2 points
-
You did an amazing job on getting those shins to line up. Great work!!! You also did well with those magnet buttons, too. Something I noticed (and I don't know how much it'll matter or not when assembled) is that you've made most of your buttons square. You will want a fair amount of surface for the glue to adhere onto the shins. With a rectangle shape, you'll have lots of area for the glue to adhere on the long part of the shin. With a square shape, you'll have less. Again, I don't know if it will make much of a difference with regards to the strength of your closures, but I thought I'd point it out. Here's what mine looked like before assembly into the shin:2 points
-
Maybe a little but it will be fine2 points
-
Hey Sean I'm not sure why I didn't think of this before, but there are some really good build and instructional videos out there. The first is building with TK-1636 and second is panda props both can be found on YouTube if your a more visual learner. They both helped me along with mine. Sent from my VK815 using Tapatalk2 points
-
I’m glad I read this. I am getting ready for my first troop, on September 9th. I’m getting Mynocks in my stomach thinking about it, but I am so stoked. I asked to be a handler because I’d like to see how Troops interact with the public, and get an idea of what that is like. I don’t have a blaster yet, but I was told that someone would most likely have a blaster I can borrow if I do decide to suit up. “Troopers Helping Troopers”! Thanks for this information.2 points
-
Here are the UPDATED PIX on my ears....I worked on them this weekend. I REALLY like how they came out, my bucket looks [emoji102] ALOT MORE LEGIT.... The RT EAR, I moved it about 1/4” down & 1/4” forward.... this REALLY helped me trim it nice & slim. I also placed my other eyebrow trim to fit. (The silver mark was where it was originally before I moved it ) (A lot thinner) The left ear I did some trimming & moved it about 1/2”. It is now aligned. TY, I eagerly await your reply Joseph. Sent from my iPhone using Tapatalk2 points
-
So it's done! Now time for her to submit photos for basic acceptance. I am so excited for her to be an official TK! Here's her big reveal at our armor party yesterday. All 4'11" of her! Thanks for following on this TK build. The adventure will continue on my next RS TK Hero build after DragonCon. Cheers, troopers!2 points
-
I have always dreamed of being a Stormtrooper since seeing Luke and Han infiltrate the Death Star in Episode IV. Now that dream has come true. It was quite a journey of sending emails, reading all kinds of information online, and eventually finding this forum. I consider myself a lucky TK, as I was able to acquire an Anovos Stormtrooper kit when they were first announced at Star Wars Celebration in Anaheim. I purchased it for a price of $350, a special price point they had it set at during that weekend. It came the week my first child was born so it had to sit for a bit while a adjusted to life with a newborn. I was invited to an Armor building party, a few months later and the fun began. Im going to keep this short because you may have already read many of the tips from the great folks on this forum. I would like to thank all those guys and gals that take so much time and effort to detail their builds, answer an email, or text, or in one case, have a nice conversation on the phone! I could not have gotten to the point I have without all the wonderful input from you! I look forward to helping out in whatever ways I can, like those of you helped me. Thanks for letting me be part of this wonderful family, and I look forward to serving the Empire for many years to come. Mark TK-421341 point
-
That's how we roll in NL [emoji41] Very happy with the swift reply of my GML. Thank youuu! Also for all the help!! So much appreciated! Sent from my SM-G800F using Tapatalk1 point
-
Got the "Deployed" artwork curtesy of the MEPD to their Police Officers - loving it! This ones background is curtesy of Wook1138 (thanks Greg) - loving that as well - going to make both into Posters1 point
-
Wait?! what?! Your approved already?? I thought you meant you submitted for approval If that`s not the case then let me rephrase: Wohoo! that`s awesome! congratulations and welcome to the Legion Trooper1 point
-
That’s awesome! Many congrats. :-)1 point
-
Yes, you should tighten the straps in teh middle and the back plate will kind of lean back and should sit flush with the kidney.1 point
-
Oops I didn’t see your whole post. So that is the gap. Sent from my iPhone using Tapatalk1 point
-
Alright... you inspired me. I do love my spreadsheets: https://drive.google.com/file/d/1xaRZxAlVwa327UFBSnwVS16tyRM5r9cU/view?usp=sharing It's broken down into Basic, EIB, and Centurion. OT only for now- maybe someday I'll get inspired to do one for the FOTKs, Rogue, and/or Solo, but that is not this day. Any questions or clarifications required on it, please let me know! I will say the preview you get when you first click sucks, so look at it in Google Sheets or download it and view in Excel/OpenOffice, etc., for best viewing. I reviewed this 3+ times, but please feel free to double check me and make sure I didn't transpose a column or something. There's a whole lot of info and a whole lot of little details.1 point
-
Congrats and happy trooping!1 point
-
Are you planning to stay HWT? Those can take some weathering so you could dirty up the bucket a bit to match. Otherwise if you plan to convert the HWT to a clean TK you could paint it or try a product called retrobright if the plastic has yellowed, but you'll need quite a bit (meant for for LEGO, old consoles, PC cases etc., not so much full-body armor) and there is some elbow grease required. Or... Live with it. I am getting a Hero bucket for my Anovos TK and I'm resigned that the plastics wont match 100%.1 point
-
Some people line up the wrists while others line up the tops of the forearms depending on the kit and your size (if that is what you mean). If you are a taller trooper, I would recommend lining up the wrists and dealing with offset at the elbow end. If you are shorter - line up the elbow end and trim one side of the wrists. Don't worry too much about getting them the exact same size - they have to fit the arm they are on. These parts are not symmetrical so the OCD can take a backseat every now and then1 point
-
I AGREE COMPLETELY, it’s this awesome feedback I find most helpful. As a builder we are biased on our builds lol . Sent from my iPhone using Tapatalk1 point
-
I was sick all weekend, I'll try again tonight1 point
-
1. Yes you can remove the return from the elbow if it is helpful for fitting. 2. Not sure what you mean by "Straight side"...can you post a photo or something?1 point
-
Ukswrath, were you able to glean any further details? I would really like more information about the shape and design for the big sight midway down the gun. Update, Ok so let me first say that before I started this build I did message Hyperfirm twice about pricing for a Rogue One T-21 with no reply. I figure they would be around $300.00. So based on that price, it is questionable if I would have been better to just buy one. After the $100.00 Spool86s kit, the knock off surefire scout light $40.00 and all the stuff I got from Home Depot and Lowes $200.00 ish I am already over the $300.00 price point; however, I get to build something and that cannot be quantified. Ok so here is Spool86’s kit and me doing some test fitting. I will say that I am glad I got this kit however, there are some things that I wish to change about the kit. I am basing my build somewhat on Yosh’s build and like him, I will be modifying Spool86s kit. Spool did an amazing job with this kit and nothing I say here should be interpreted as a criticism of his kit in any way. Test fitting the kit, I learned a few things. First the cooling fins seem to be sized for 3” (thin walled) waste water pipe rather than cellular core schedule 40 3” pipe. Both pipes have a 3” inside diameter but the outside diameter is different. Here you can see the cooling fin is not large enough to cover the edge of the schedule 40 pipe. The opposite seems to be the issue with the muzzle fins. Here you can see that the outside of the fins are larger than the inside diameter of the 2.5” electrical conduit. Looking at several reference pictures of an actual Lewis, I decided to cut down the feed tray. So one of the priorities I have set for this build is to make it as lite as possible. I may, at a later date, make a mold and cast this in rubber but for now, I wanted to just get it built and be as true to what I want as possible. So for the main support I chose to use ½” sanded plywood. I had considered several other options like making the center out of fiberglass or using a solid piece of wood but the strength of plywood cannot be questioned and it is hard to come up with something that is as easy to work with and as strong without it weighing a lot more. So I got a 2’ x 2’ piece of plywood and using panadatroopers template, drew out the shape. I decided to cut down the side receiver parts from Spool86s kit and make the chamber and bolt parts from PVC. This reduced the weight of these parts by about ½ and allows me to make the bolt look more realistic. Laying out the parts on the center support, I noticed an issue. If I stick with the schedule 40 pipe for the barrel, the cooling fins will not line up properly. On the bottom they look good. However, on the top the fins are not tall enough (red circle). Also because I cut down the feed tray, the center section of the support plywood is now 3/8” too short. So back to the hardware store I went and I purchased another 2’ x 2’ piece of plywood. I also picked up a 10’ section of the 3” waste water pipe. Home Depot did not have the pipe but Lowes did. So I retraced the support on the plywood but this time I added to the height of the receiver (where the feed tray would sit) and made a few other tweeks. Unfortunately, the 1” spade bit that I used to make the trigger opening bust out the bottom of the trigger guard. Honestly, I did not have high confidence that this thin section of the plywood would hold up for trooping so loosing this is not a huge deal. I had some ¾” wide and 1/8” thick aluminum in my shop so I needed to fabricate a trigger guard. A lot of cutting, bending and sanding later I had something that would work. Here is a side by side comparison of the 3” waste water pipe (Left) and the schedule 40 3” cellular core pipe (right). As you may expect the thinner pipe is liter by about ½ the weight. So no brainer, I’m going with the thinner walled pipe. I cut down Spool86s trigger. I routed out the insert of the support plywood and mounted the trigger with a spring. I also figured out how I would mount the trigger guard. A screw on the forward part and a nail (top of picture) used as a pin in the grip area. And around this time I was banging my head on how I would make the transition from the 3” pipe to the 2.5” pipe. Most people do this with a buildup of bondo but I wanted something different so I built a 3D model of the transition. This model is designed to be a sleeve that will fit inside the 3” waste water pipe and the ¾” wide collar then the 2.5” pipe slides into a channel at the other end of the transition. I designed this to only work with these pipe sizes: Waste Water 3” pipe ID 78mm OD 82mm Barrel Collar ¾” wide ID 83mm OD 89mm 2.5” Electrical Conduit ID 62mm OD 73mm The transition will be 60mm tall when assembled with a top opening of 73mm and the bottom opening of 89mm. So for anyone who wants this transition, please understand that it is still a work in progress; however, it is available for free download on my Thingiverse page. https://www.thingiverse.com/thing:3070308 Here are some pictures of the transition. This is it being printed. Here is a test fit. The top. The side. So feel free to grab this model if you have use of it. Next I sprayed primer on the support then I went in with Bondo to fill some of the gaps. I also started the stock. I forgot to take more pictures as I built it but basically I used two pieces of 1” thick poplar wood. Poplar is a hard wood (but it dents easily) and it weighs less than pine or oak. So I traced out the stock on both halves of the poplar, then I routed out the insert hole for the plywood support. Next I routed out the center of the stock to shed some weight. I basically kept about ¾” around the edges untouched then routed about ½” deep from the center area on both parts. Then I glued and clamped the two halves together and let it sit overnight. Now I am shaping the stock with various sanding drums and sanders. The flashlight and D- gasket tube came in on Sunday. So in a previous post I said that I wanted to replicate the milling marks on the outside of the barrel like an actual Lewis barrel shroud. However, that was before I realized two issue. First, moving to the waste water pipe, the wall thickness is only 2mm thick and milling anything from the pipe will weaken it considerably. Second, the maximum length I can mill in my lather is 20 inches and this does not take into account the center and 3 jaw mandrel. So I would need to make the barrel portion 18” rather than 19” to mill it. Another issue I did not consider is that the PVC pipe would not mill like other plastics. It basically develops a rough “hairy” face on the area milled. This can be cleaned up with sanding but a lot of the detail of the tooling would be smoothed in the process. This is from one 18” pipe. And even after milling about 1mm (1/2 the thickness of the pipe wall) this is the only detail I was able to produce. This is a picture of the wall thickness of this pipe. So to produce the milling on the barrel, I will need to find another solution or drop the idea all together. Something to ponder. Well that is it for the update. Thanks for the interest.1 point
-
That’s the spirit Trooper1 point
-
Congratulations Karli! Welcome to the Ranks!1 point
-
Hi @CableGuy Thank you!! Yes definitely agree with you - on my todo list for tonight!1 point
-
Talk about master builder Going to copy this method for my build, abs bracket and straps going under instead of through the yoke1 point
-
For the poppers that aren’t actually drilled through the armor, I assume it’s a dab of E6000 on the back side of the nylon with the popper on the other side? Sent from my iPhone using Tapatalk1 point
-
Hey Adam Dan provided great info for you and I would suggest you post some pics of the armor you got, maybe you will be able ti finish with help from us here at the FISD1 point
-
Hiya Tapatalk is a simple way to upload your posts, including pictures. Otherwise, a service like Imgur would work well. Upload your pics to your Imgur account, then copy and paste the “BBCode” link into your post. Here’s a great tutorial; https://www.whitearmor.net/forum/topic/42381-howto-post-images-in-threads-using-imgur-easy/ Hope that helps. Dan :-)1 point
-
Requested to join and forwarded to the wife to join as well!!!1 point
-
Recommend you read from a number of build posts (particularly the pinned ones in green cause they're quite good) to get a feel for how and what people present. Then you can decide on your particular style and how you want to present. As Wook indicated, by far the most important thing - post lotsa pictures and pose any/all question you have. This will remove any doubt because the folks here are great at helping.1 point
-
First real of TK club there is no TK club! Good work on the face plate so far! I like the twinkee teeth1 point
-
Welcome aboard, Karli. The good thing on this rare costume is, you can spot yourself on every group photo. Have fun with that unique armor.1 point
-
Welcome to the ranks Mark - and best regards to sunny California1 point
-
Got a little side-tracked...was about to glue the sides but made the conclusion that it would be easier to sand the parts separately so I started with that. But they are now glued. Also decided to close the back using snaps so drilled some holes, made som strapping, set some snaps and I think it will work. And made the strapping for the cod1 point
-
Congratulations Trooper!1 point
-
Last night I finished gluing the arm straps together, the end result is a 1/4" gap as recommended between the forearm and bicep. I also glued my ab button plates onto the ab and made the rookie mistake of gluing the large plate upside down. I blame my long work day. lol So I pulled it off and reglued it this evening. Tonight I've been preparing for my first armor party that Cricket is graciously hosting tomorrow and I am very excited to finally get to attend one! Meanwhile I threw on my boots and shins and marked the backs, but I decided that before I trim them down according to what I sized I'll take them tomorrow to get a second opinion. It just seems like what I sized is a lot of material to remove, even though I do have chicken legs. So I started looking for something else to do and ended up measuring and marking the ab & posterior for the lower rivet/snaps. And then I ended up drilling and countersinking the posterior for the snaps, which led to actually installing the snaps. I was going to hand countersink the holes with a 3/8" bit as I had noted from Ukswrath's build (I think it was his build) but I had recently broken that bit working on a car project, so I stepped down to 5/16" and it worked just as well. I practiced with the snap setting tools on a couple pieces of scrap plastic and that actually helped a lot, I definitely recommend going that route if you haven't ever set snaps before. Interior: Exterior: Interior: Exterior: Hopefully tomorrow I will make a LOT of progress!1 point
-
Look up justjosephs63’s “supply list for your tk build.....” thread. It will get you pointed in the right direction as to what you need including tools and supplies. Sent from my iPhone using Tapatalk1 point
-
I always found this pic helpful in showing folks the differences in lids...(apologies for not crediting the maker) As the ONLY non-ANH/S Imperial TK in my Garrison it's a handy visual aid to explain why my suit looks "crap"...it's supposed to! Sent from my SM-J320FN using Tapatalk1 point
-
TK 31275 requesting access Recently cleared with UK Garrison http://501st.com/members/displaymemberdetails.php?userID=28805 Thank you.1 point
-
The screws look correct, but the ideal placement of the slips will be touching the bottom of the control panel and touching the end caps. You'll need to paint the screws black as well.1 point
-
The sides of the boxes flare out just a little so take them down a few mm and that should help and I would start with the inner boxes and shave of 2mm and then test if they go in properly and then cut the outer to match Well I´m not a female but...based on your pic it looks like you can raise the whole torso section up and still have clerance at the neck/throat so I would try that first….and...if that`s not a GO then I call upon the "AB-slicer master" aka @Cricket as she most definetly can help you with that They are slotted pan heads so that`s all good, how do they match up to the TD size wize? Overall you made some great progress and besides from your questions I just want to ad a small note about the cover strips, they seem to be a bit long in general so you might want to check on that to avoid eventuell snagging and pinching And finally: Frank...there`s actually 4 screws for the TD (sorry, just couldn`t help my self) Oh BTW congrats on the "hall of fame"1 point