Leaderboard


Popular Content
Showing content with the highest reputation on 01/14/2018 in all areas
-
More Hengstler build getting closer still need and few more tiny screws5 points
-
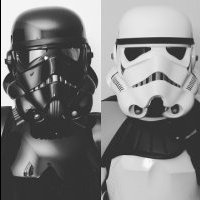
I see your point and I agree with you. Lucasfilm has never differentiated between Stormtroopers, Sandtroopers, Snowtroopers, or Scout Troopers. That was something the Legion initiated. I don’t disagree with MEPD getting the deployed troopers with extra gear and additional weathering to look “dirty”. That all makes sense. Though I was over at MEPD and the question was posed "Why can't both detachments have the pack" and to be honest that's a very valid question. The visual guide even says this "field specific kit can expand a standard stormtrooper's versatility." However I do still feel that the first Stormtrooper in the movie wearing the pack while using the ‘TK’ designation ON SCREEN is a pretty big issue that we need to address. Allowing the pack as an Optional Accessory with the new R1 TK CRL might be the simple solution to this issue.2 points
-
Please see below that I am copying from another thread. In reality we should actually ask MEPD if they will cover the BF2 version then on their detachment, and we stick with the original HWT. Unless there is some really strong reason otherwise, that is what we'll do. It will keep our HWT based on the original character it covered, which was the intent. SE sandtrooper CRL is currently being finalized on MEPD as it is. No reason to duplicate work. //// ::Raises Hand:: I can answer this one Actually in the original canon, every armored trooper is a stormtrooper. The term sandtrooper was coined by the Legion, and even Biker Scouts are stormtroopers in specialized gear. This is why in many books/sources they don't differentiate between stormtrooper subtypes. Just because something is a stormtrooper does not mean that FISD will have that costume. Detachments usually focus on a costume category and costume categories can also be logically grouped by armor type to avoid duplication of effort between detachments. In the old days, the split was that FISD had film canon TKs and SpecOps had everything else (MEPD had sandys as MEPD predates FISD). As more TK costumes came out in the EU that were pretty much painted TK's (e.g. TKC), it didn't make sense for them to to go SpecOps as aside from paint all the armor building and sourcing materials were already on FISD. So, the new split became: MEPD->Sandtroopers FISD->Clean TK based troopers (even painted TKs) SpecOps->Any TK that required specialized armor or parts (except for Magma/Blackhole for historical reasons) FISD kept HWT simply because MEPD didn't want it. It was originally supposed to go there. Times change and MEPD under a more visionary leadership wants to be home for all "deployed" TKs. This is why we are moving all dirty costumes to MEPD, including the Jeddha TK, Crystal Patrol TK and the Sullest Magma trooper, even though they are based on regular TK armor. But just like Black Hole/Magma stay with SpecOps as exceptions for historical reasons, the HWT remains on FISD. Hope that helps.2 points
-
I don’t have WTF but this is how mine looks like (the right one) and like stated above don’t just cut away...think, look att pics, look at CRL, ask questions, think some more and decide what works for you and start by cutting a little at a time, wrist-ends however just go ahead and cut and easiest is to cut from the inside and sand the edges smooth... unless you really want to feel like you were on the set ready to start filming - then just cut and leave as is2 points
-
No need to worry, easier said than done I know but you can do this and everyone here is ready to help as for your question, forearm-return edges - for Centurion there can’t be any on the wrist-ends, other than that it’s up to personal preference (look, comfort, mobility) having returns gives the armor the illusion of beeing thicker so my advise would be to remove all at the wrist (for Centurion and comfort) inside elbow (for comfort and mobility) and leave some on the outside elbow (for the look) and - all of it is screen accurate2 points
-
True. In my tests, I had to bend the plate to about 90 degrees before it would snap. Scrap ABS from the trimming for example will bend all the way over without snapping! However, I can't think of a scenario where the plate should bend to 90 degrees while trooping. If that happens, I think I have other problems . They are however very strong (perhaps stronger than standard plastic) in the direction of pushing/pulling on the snaps. I think that's because of the way printing works where I have layer upon layer of alternating directional "strands' acting almost like a carbon fiber weave. I tried to push snaps out of my earliest designs with tools and couldn't do it. I'm very confident these won't be the point of failure. -Dana2 points
-
And I also started to fiddle with displaying the armor and....it needs some more padding and the hands are just temporary but overall I´m happy with how it looks I´m Luke Skywalker and I`m here to rescue you But with a quick change of helmets you have TK 421 ready to serve the Empire2 points
-
Today it was time to give this Kit the "ultimate" Hero-look - namely adding the comlink and grappling hook/box.2 points
-
Thanks Dan and Tony. Though the link wouldn't open in tapatalk for me I just copied into my browser. Thanks for the link Dan. Sent from my VK815 using Tapatalk1 point
-
Just preference - and not necessary in a sence that it`s the only option. I don`t use them and my armor lines up just fine without the risk of said clip catching on the armor. To keep the bicep from sliding down to low I have them connected with elastic straps (some use webbing) on the outside ridge of bell and bicep, to my knowledge not screen-accurate though but I don`t like the look of the bicep clips (which can be seen in the movie) - personal preference So the choice is yours1 point
-
Though Dan has helped you out already, you can also go to the top of this page and select "Gallery"1 point
-
This one? https://www.whitearmor.net/forum/gallery/ It’s tricky to find through Tapatalk. :-) Sent from my iPhone using Tapatalk1 point
-
Email sent, take pity on me please1 point
-
Perfect, pics help a lot also a good angle give me an idea what to shoot for!! Thanks Sent from my iPhone using Tapatalk1 point
-
You are very welcome, Jeff! All of them should be flat at the ends. The exception can be on the tops of the thighs, where they can conform to the contour. Below is a set of screen used thighs so you can see what I mean.1 point
-
Folding stock: Cover the screw with thumb tack. Hengstler: I used magnets to make the internal accessible. I will put electronic inside it later. Charging bolt handle: I use magnet and tie nylon string to the handle. Assembly picture before taking apart for painting:1 point
-
::Raises Hand:: I can answer this one Actually in the original canon, every armored trooper is a stormtrooper. The term sandtrooper was coined by the Legion, and even Biker Scouts are stormtroopers in specialized gear. This is why in many books/sources they don't differentiate between stormtrooper subtypes. Just because something is a stormtrooper does not mean that FISD will have that costume. Detachments usually focus on a costume category and costume categories can also be logically grouped by armor type to avoid duplication of effort between detachments. In the old days, the split was that FISD had film canon TKs and SpecOps had everything else (MEPD had sandys as MEPD predates FISD). As more TK costumes came out in the EU that were pretty much painted TK's (e.g. TKC), it didn't make sense for them to to go SpecOps as aside from paint all the armor building and sourcing materials were already on FISD. So, the new split became: MEPD->Sandtroopers FISD->Clean TK based troopers (even painted TKs) SpecOps->Any TK that required specialized armor or parts (except for Magma/Blackhole for historical reasons) FISD kept HWT simply because MEPD didn't want it. It was originally supposed to go there. Times change and MEPD under a more visionary leadership wants to be home for all "deployed" TKs. This is why we are moving all dirty costumes to MEPD, including the Jeddha TK, Crystal Patrol TK and the Sullest Magma trooper, even though they are based on regular TK armor. But just like Black Hole/Magma stay with SpecOps as exceptions for historical reasons, the HWT remains on FISD. Hope that helps.1 point
-
Cheers Rat. Glad you got what I was talking about. :-) Apologies if I misled anyone. From what I could see, you were in the initial “tape pieces together to see how they fit” phase. Personally, I was advised to rough trim and size up (as you’re doing), glue the piece (cover strips), then do the final sanding (including removal of the return edge at wrist end) once the piece is glued together as one, allowing a nice join of the two limb parts. My pic was just to show the hand squeezing through the wrist end - not in any way referring to the return edge at the wrist end or a completed piece. Of course, this was only a suggestion. Best of luck with the rest of your build mate. :-) Sent from my iPhone using Tapatalk1 point
-
Lookin good. Oh and I’ll be over for pancakes tomorrow. Sent from my iPhone using Tapatalk1 point
-
Not much work tonight. Trimmed and glued the thighs and I got my sewing all lined up for tomorrow or whenever I can convince my wife to do it or at least show me how. I needed to add quite a lot of taper to the thighs. This is after trimming. I’ve skinny getaway sticks. I tried taping them up and hitting them with the heat gun on low. It helped a little. Back cover strip on and glue drying. Sent from my iPhone using Tapatalk1 point
-
Depends how they sit on your forearm and whether they will pinch when you bend your arm. I suggest trimming your fronts, leave a bit extra material on the rear ends and once assembled see how they feel on, you can always take off more material.1 point
-
Thanks for the quick reply!! Work on them some more tomorrow, not finding a lot of WTF pics to go by making me super nervous LOL1 point
-
Like 95% of my shadow stormtrooper armor is E6000 but I had used CA glue on my TK thighs and figured "oh, what could go wrong?" LOL of course... I even have the black E6000 too The only stuff I have left to finish is attach sniper knee, attach cover strip on back of shins, drill holes for snaps, and assemble the thermal detonator and I'm done.1 point
-
E6000 is one of those glues that works great for black armor, I now it takes a while to dry but you don't get that plume staining or marking, you just rub off the excess glue once it's dry with a rag or your thumb1 point
-
I cut to that line. For some reason I was really nervous figuring out how I wanted to attach the back belt. I'd love to see how others have done theres. For the front belt I have a snap in the middle front and velcro on the sides. For the back belt I did the opposite, snaps on the sides (hopefully will hold it in) and velcro in the middle.1 point
-
That sounds good enough to me, I'm always appreciative of additional information on what works to keep the dark appearance! I'm sure I'm making this a bigger deal than it has to be, like I usually do. I curse being a perfectionist sometimes! It was easier to hide any mistakes on the white stormtrooper armor, the black isn't as forgiving.1 point
-
I don't use the Novus polish but I do know they have one that is more for compound use than shine. You can try with what you have and then if it doesn't bring up the shine enough purchase more of a compound polish. I have used the black polish on gunner helmets and it does help to bring out the shine and give it a deep darker appearance, perhaps use this at the end. Good luck, I'm sure you won't need it1 point
-
Sand and polish is your best bet. There is probably something out there that will dissolve CA and not ABS but it's likely to be super toxic.1 point
-
Really depends how deep the marks are, buffing compound may work for slight marks, for deeper marks a combinations of different grade wet/dry sandpaper, use with soapy water as it will last longer. I would finish with a 1200 or 2000 ultra fine, the finer the sandpaper the less compound polish will be needed. Be very careful using alcohol or acetone, these can burn and dull the finish.1 point
-
Haha, you sir are absolutely on top of it! I did resin the bottom, I just haven't taken pictures yet. I was going to wait till I sanded it. I was worried that the bondo would crack if I hit something.1 point
-
Not to mention that these TK's are reletively clean. Scout Troopers can be dirty, but they're not in the MEPD. These TK's have a light dusting of sand, but that's about it. Call me the stirrer of the crowd, just thought it'd be nice to point out.1 point
-
Start sizing with your biceps. They’re the easiest.1 point
-
If I don’t have time to build, then I’ll make up for it elsewhere. Pancakes for the kids... Ok, this one was for me. Sent from my iPhone using Tapatalk1 point
-
Being able to be mobile is a really good pressure test. Ideally you can jog and move about and not have any mishap. It's not uncommon for people to build their TK and walk a few steps around the house, then get to a troop or parade and find that their mobility is restricted in the real world. For the arms, you can let the biceps down more. People some to like trying to tuck them up under the shoulder bells for some reason, but if you look at ANH on most troopers they don't really overlap. The strap from bell to bicep is really more to keep them from rotating than holding them up, and on one of my older suits I just used foam padding and not a strap at all.1 point
-
You can see what I cut away at the bottom. I cut plastic strips to recreate that bottom Glued Bondo in the gap and some sanding. E-6000, I'm on my 5th tube of E-600. A few time I've had to stop and go back to the store to pick up more. For some reason Home Depot and Lowe's stopped selling it. I can put together an Anovos kit with one tube. I'll have to go back to the store for more when I start working on the backpack again.1 point
-
Don’t glue them, frame those works of art. That’s a nice job. Sent from my iPhone using Tapatalk1 point
-
A few days back I was asking questions about the shoulder bell elastic and snaps that attach to the chest/back elastic. I wanted to assemble these and get some more experience with sewing. I've done a bit of sewing a long time ago for some other costumes/props. However, I haven't sewed elastic. I also wanted to get a sewing machine and this project has a few places where I could use one. So I bought a fairly inexpensive sewing machine - a Brother XM2701. After setting it up and testing an elastic stitch on some spare elastic pieces, I felt ready to try it for real. So here's the raw parts. I chose 1" wide elastic cut to 6" in length along with the Dritz size 10 snaps: I folded over one end of the elastic such that it was slightly bigger than the snap diameter. I think the folded area is a little over 1" long. Then I used the sewing machine to sew the loose edge down to hold it in place. This made it easy to handle when hand-sewing the Dritz snap and also should help prevent some fraying. The exposed edge is going to fray a bit, but it shouldn't get too out of hand with this stitch (I hope). Finally I used the same black thread to attach the snaps. This was more tedious than the sewing machine work which went really quick. Why isn't there a machine for this? Here's how they looked when I was done: I'm going to hold off on gluing these into the shoulder bells so that I can finish connecting the chest to the back first. I'm about ready to spend some more time on the torso and install those connections. Feels good to get these done and I enjoyed learning some new tools/techniques. -Dana1 point
-
Actually, I think it looks pretty good. The Helmet is one of the more difficult pieces to assemble properly. It looks as if they did a good job on that. The paint on the teeth however will have to be touched up. That seams to be the thing that stands out the most as far as something that would keep you from gaining appoval. If that is one of your goals.1 point
-
Hey guys! Just wanted to let you know that I was approved. I am officially TK55933!!! I am very grateful for this!!!! So excited to troop1 point
-
Hengstler inner boxes in from the casting guy1 point
-
Nice work hollowing the scope, I didn’t do as good a job on mine Sent from my iPhone using Tapatalk1 point
-
Thanks so much guys! I really appreciate the help. It isn't easy to notice the flaws in something when you can't psychically look at it/touch it. I'm glad I looked at these forums before rushing into a purchase and regretting it. I will most likely look into some kits sold by independents who don't recast and actually put love and care into their work.1 point
-
Just to add to the SDS/Shepperton/originalstormtrooper topic, aside from the law suit and the claims made by said maker, the armour (in my opinion) is just not good enough for the money being charged. I work near their Twickenham shop and have had a good look, close up, at their armour displays. The way that they themselves build/construct the armour shows a serious lack of attention to detail: for example, rivets on the sniper knee, overlap rather than butt joints, strapping in the wrong places, wrong shape on the thigh ammo pack, a very oddly proportioned thermal detonater etc etc. Now, I’m not saying that we all use the exact methods as the originals as this is not always practical for trooping, however, there just seems to be a total lack of effort into making these even close to resembling the originals. Especially when you’re charging up to 3 times more than other makers, makers that make much more accurate armour. It’s a sad story to me - I bought an early stunt TK helmet from AA back in 2005. He seemed nice enough when I met him - so much so that I later bought the TK bust, Tie helmet and tie bust. I just think he got carried away with the ‘back story’. If the armour were a third of the price and the story was ironed out, I wouldn’t say it’s that bad. Just needs quite a bit of effort to make it more accurate. However, I’d still buy elsewhere from a supplier hat has put some love and creativity into what they make. :-) Speech over, and again, this is just my personal view point. :-)1 point
-
Initial fitting. So the first thing I did after I took stock of the inventory (and geeked out for a bit) was to do some really rough fitting. With the use of some painters tape I quickly tried to assemble some pieces to gauge how much work was ahead of me. The first part I tried to put together was one of the forearms. I took the two pieces - figured which way was the top and bottom and tried to hold them together so that the bottom lined up - I knew the top would not. No dice - the pieces seemed wonky and would not line up. So like any rational, grown man who has had several months to research this process, I panicked and sent Mark a rambling and incoherent email asking how to start this process. He quickly responded and talked me off my self-made ledge. It all seems so simple now. Anyway - a little nudge here and there while you tape the pieces together and at least on end will line up (bottom for the arm parts). He recommended starting with the outside join (lining up the bottom) and then tying to get the inside as close as possible. outside edge joined with tape - the bottom of the forearm is to the top. You can see it does not line up - but a little nudge and the ABS will line up when taping up this inside edge. forearms and biceps - all lower edges are nicely lined up. This is without any additional trimming. Initial fit of the forearm. Mark trims all pieces for 20mm along the joining return edge (ie 20mm cover strip). I have a little room to spare so I'm going to shave a little off to get the arm cover strips closer to 15mm. I'll probably do 16 or 17mm (so my hand can get through the opening at the end) for the arms and just over 20 for the legs (and 25mm for the back of the shins). Note, I have the arms of a 10 year old ballerina with a protein allergy and I still found the pieces to not be very big - I was surprised. The original people who wore these things must of been pretty slight.1 point