Leaderboard


Popular Content
Showing content with the highest reputation on 10/11/2017 in Posts
-
....when everyday things start reminding you of it.
 3 points
 -
Regarding the eye swoop. I brought this up before but the OTTK has wonky written all over it yet none of it is in any CRL. Why are we discussing this let alone considering it at any level?2 points
-
Greetings everybody! Probably it is my first topic on FISD, despite that I approve my stormtrooper in 2013 +)) But after conversation with Daniel during our trooping in Moscow. He asked to give a look on 3D model of stormtrooper armor that I currently work under in my workshop. So there is our current progress with 3d modeling of helmet and armor. After "approved" parts I will do first 3d prints of it and then will think cast of vac forming it. So there is a links on: Helmet ------------------- Armor ------------------ Armor in piece------------------ We use my photos from celebration London, photos from Visual Guide, Hot Toys figure & Anovos manual for @part sepereation@ to create this pieces. Probably we miss something or don't see. And I know that many people don't like look of new armor, but for me it is really like HD version of OT armor. But I will be very grateful for help, view and critique notes Best regards, Andrew TK-250071 point
-
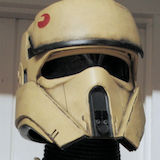
Here are some pictures of my Shoretrooper costume build so far. It is an ongoing project so I will not call it finished yet.1 point
-
General Information Name: Taylor A. Goodson FISD Name: Ruthar Legion ID#: 12110 (Legion profile page) Garrison: Northeast Remnant EIB Application: #760 - Mandatory Information Armor Maker: ATA (Affordable Trooper Armor) Helmet Maker: ATA (Affordable Trooper Armor) Blaster Type: Custom 3D print (E-11), Hyperfirm (DLT-19), Petesprops (SE-14r) Additional Information Height: 5' 07" Weight: 178 lbs. Boots: TK Boots Canvas Belt: Rob Kittell Hand Plates: justjoseph63 Electronics: iComm with Aker amp, Henry's modular helmet fans Neck Seal: Darman's Props Holster: Darman's Props Centurion Level Rivets and Screws: justjoseph63: Side and thigh rivets | TD screws Photos Full Ensemble: Front: (updated from EIB application to show improved biceps and belt) Back: (updated from EIB application to show adjusted back/kidney overlap) Left: Right: Helmet Details: Front: Left: Back: Right: Green lenses: S-trim: 3 ear screws - left: 3 ear screws - right: Hovi-tip mics and vocoder: Helmet interior: Armour Details: Ab/kidney rivets (provided by justjoseph63 Side and thigh rivets) Upper right abdomen male snap: Free-floating shoulders with elastic: Abdomen detail: (updated plate sizes (slightly smaller edges) from EIB application) Center plate edge shortened: Button plate edges shortened: Forearm front return edge removed: (fully removed - updated from EIB application) Posterior/cod connection details: Right Thigh Ammo Pack: Cap rivets from justjoseph63 (Side and thigh rivets) Interior cap rivet: Inside: Outside: Sniper Knee Plate: Front: Inside: Outside: Main belt: Drop box 1/2" thickness: Drop box attachment and inner box: Belt boxes now glued in correct position (update from EIB application): Belt construction detail rear: Belt construction detail front: Interior strapping and electronics: Hand plates and gloves: Flexible hand plates: Rubber gloves: Full view of gloves with installed hand plates: Neck Seal: Boots: Slightly scuffed: Thermal Detonator: Screws from justjoseph63 (TD screws) 4 screws and aluminum clips: Slotted pan-headed screws: Full canister dimension - 7.25": 3/4" end caps: Clips and panel placement: Further Updates from EIB Application: Bicep lower edges: Ugly lower edge removed on right bicep: Belt placement adjusted higher to match screen reference more closely: Weaponry: E-11 DLT-19: SE-14r: Action shots: Bucket off: Thank you so much for your time and consideration! The feedback on the EIB application was amazingly clear and very helpful - it certainly made the updates required for Centurion that much easier to make, so thank you for such clear guidance!1 point
-
Yes with the FOTK it was a clear spaghetti strap connected to the bell1 point
-
I know I already said it on Facebook, but congrats again, Alberto - great work! Hope to troop with you again soon!1 point
-
It appears to be there but it's very very subtle, I've just been through the R1 visual dictionary and it is slightly noticeable on some images but not others, really depends on what angle the helmet is on.1 point
-
They have the data but look at the huge difference between the TFA Premier and Standard buckets. Very different. Most regard the standard as more accurate. Their FOJE looks a little lazy too. Sent from my iPhone using Tapatalk Pro1 point
-
Besides being a huge Star Wars fan this is one of the biggest reasons I'm building a TK....can't wait to to troops like this. Great job, hope you put some smiles on the kids faces1 point
-
congratulations Alberto! Great job man!1 point
-
Congrats Alberto!!!! Here we are! Another Centurion for ECG! You really did an awesome job and you should be proud.1 point
-
Hi Yu. Mike's email is [email protected] if you would like to reach out to him.1 point
-
No way... but Anovos has access to laser scanned data that no one else has and they are clearly the best of the best /s1 point
-
That's NOT my concern! I am working to try and contribute something and it's just not being used. Seems like a huge waste of effort, that's my concern. I don't care about any form of credit on the CRL..... Sent from my iPhone using Tapatalk1 point
-
Am I Invisible? I spent much of my time and put effort towards this CRL but nobody seems to acknowledge that I exist? I wrote up this list for the CRL E-11 Optional Accessory and put it forward a while back, and I even spent much time making the Official FISD Rogue One E-11 Blaster Reference Guide thread here:https://www.whitearmor.net/forum/topic/41271-rogue-one-e-11-blaster-reference/ But nobody seems to care about what I've tried to contribute at all. Could somebody please acknowledge my existence?... I've been trying to help make a contribution to this CRL but it seems like nobody wants my help at all apparently. I was going to try and get royalty free photos of a proper Rogue One E-11 with all the correct greeblies too. Oh well I guess our detachment wants to go with a generic ANH photo and description, which is completely and utterly inaccurate. Especially compared to the rest of the CRL. I've put all this effort towards this particular CRL Optional Accessory and it's sad to see none of it put forward, just a simple copy and paste from the ANH CRL,.. no effort whatsoever, and it shows too. Anyways here's the list I wrote again, perhaps for level 3: Rogue One E-11 Blaster Rifle -Blaster shall be based on a real or replica S&T Sterling L2A1 AEG airsoft gun. -Scope shall be a real or replica M.H.R. (Minneapolis Honeywell Regulator Co.) M38 Telescope. 1943 version with the wide front foot is preferred. -Counter shall be a real or replica Hengstler 400 Series Counter. Small eagle logo is preferred. -Power Cylinders shall be mounted on top of the magazine well. R1 style power cylinders are preferred over ANH style. -6 rows of T-Tracks cover the Sterling receiver holes except for the lower left row with the bayonet lug. -Scope Rail is mounted approximately 3/4" above the top of the blaster. -A flashlight shall be mounted to the right side of the blaster over the T-tracks. Flashlight is a real or replica Element M300A Mini Scout Light. And here's the official FISD Rogue One E-11 Blaster Reference guide thread that I was requested to make and put in charge of writing: https://www.whitearmor.net/forum/topic/41271-rogue-one-e-11-blaster-reference/1 point
-
In the visual guide to R1 there is a few good images that show how the thighs are connected. From the outward most belt boxes there appears to be adjustable straps that run down the legs.1 point
-
Like I said, it's super subtle. I don't have a drawing program, but look at the left eye (your view) on the bottom. See how it curves down, instead of swoops down like the right? That's a recreation of the bump seen on the OTTTK's. You can see how it's fatter than the right eye if you look at the shaded portion.1 point
-
Wow Eric, you look better than the toon. I was really leary about this costume but you make it look good! Are you going to try to be the first one approved? Seems like we've been busy with CRLs anyway.... ::whistles::1 point
-
This is why I love a forum. If we can't get any evidence, out from the CRL it goes.1 point
-
Fixed. CRLs are always using right/left as if you are wearing the costume.1 point
-
Stephen - just wanted to drop you a message that I've loved following your build thread. You clearly care so much about the quality of your build, and I love your sense of humor and the odd travel pic interspersed. From one fellow short trooper to another, great job! You're almost there!1 point
-
Our Vader uses pre recorded voice files and has several push to talk switches in his glove which he can press depending on the required line needed. I have played around with cheap voice modulators before for a Boussh which worked quite well, added an amp jack to it so it would run to an Aker amp. Problem you will have is trying to replicate her voice, think I'd go pre recorded, seems they do at Disney parks1 point
-
your not right.....1 point
-
Awww yes! Exciting! Remember to give the insides of the armor a good sanding and a wash before you try it on This is going to be great1 point
-
I can't answer whether this method is indeed screen accurate, however due to fact the R1 suit's torso piece must hang from something internally i can't image the screen method could be that different. It seems to me that if the heavy flexible fiberglass torso hung from breast and back plates the weight would be distributed to the connection straps which at least in my build would be uncomfortable and make it more difficult to suit up. Sent from my SAMSUNG-SM-G935A using Tapatalk1 point
-
First-rate work on the grub screw installation for your carved-out sight block - It's making the piece pop with detail! As for the lower-front portion of the inner rod you cut away, what you can do to hide the 'stump' is to cut out two pieces of plastic to rectangular shape and put a heat gun to it, and making it flush to say the rod, to form it's shape. I would then use E-6000 to glue the plastic pieces to the aluminum inner rod. I am thinking the versatility of E-6000 will do the trick as Tino's glue provided is excellent for resin to resin contact I believe. If you want to retain the aluminum look, would rub-n-buff do well here? Not entirely sure. Never used the product. Anyways, hope this helps! My two cents Dan!1 point
-
I like the temporary bolt idea. Those RS split rivets are really hard to bend if you need to remove them. Sent from my SM-G935V using Tapatalk1 point
-
Looking good and I think the back-piece will be just fine, it will tilt slightely back when wearing it and make it line up better1 point
-
It's not just the teeth, you could change the shape of the snout and narrow down the sides of the mouth a little using bondo then repainting, if you compare the two helmets closely you can notice a few of the differences, even the new Anovos Executioner doesn't appear to have all the details of the new helmet ;). The more accurate you can make it look the better, that being said it is your GML that will ultimately be approving your costume so at the end it is really up to him/her.1 point
-
Looking great mate - very nice work finding new strap replacements for your holster! Sent from my iPhone using Tapatalk Pro1 point
-
Looks like the pictures are working. 1. You may want to retake the pictures of the sides with your arms raised. Your armor looks like it was not secure (separation of abdomen/kidney) 2. Take a picture of the back of the thermal detonator. 3. need action shot of classic TK (no HWT)... agree, great shot though 4. Rivet on the cod must not be painted (remove the paint) 5. Need a picture of the D-ring on the blaster (back) 6. Make sure all rivets on the left side of your clam connection are all painted white 7. You may want to clean up the button on your abdomen, you over-painted them a bit. Good Job bud!1 point
-
Excellent. Good Luck on your build. We hope to see you strive for accuracy and get you into the EIB Ranks1 point
-
3 rivets for the belt, 2 rivets for the drop boxes and 2 for the thigh ammo pack1 point
-
Thank you for asking. My fiance had a friend who was at the concert. She was shot in the leg, luckily she was able to escape and is expected to make a full recovery. Almost everyone here it seems has had a connection to it. It's been a tough week, however we are Vegas Strong and the community has been rallied together. I'm proud of my city. At any rate it makes me want to finish this build and get out there and bring joy to those around me.1 point
-
I made this schematic drawing of an E11 blaster to show what type of components I used for the blasters I've built. I think a picture tells more than a thousand words, therefore instead of a list I decided to go with this: If you have any enquiry about any of these parts, I can gladly link in where I got them. Mostly on ebay, and directly from Adafruits, they have amazing neopixel stuff.1 point
-
Looking good Alberto! We should be getting another centurion in our ECG ranks shortly. I also think you get extra points for the marvelous carpet Sent from my Nexus 6P using Tapatalk1 point
-
DoopyDoos stuff takes a lot of work. Fortunately, when someone is willing to put a lot of work into it, the finished product is often exceptional. Your persistence is paying off and this project looks great! Keep up the great work.1 point
-
Well, ideally it would all be self contained right? Nothing is worse than taking your bucket off and there are a bunch of leads that you have to dangle with, or hide wires once you put it back on. That's the trick. One of my garrison mates had aerator speakers that where loud enough, and everything - batteries, fan, microphone, and speakers, were 100% self contained in the bucket. If there is no way around something 100% self-contained, then you can actually locate batteries elsewhere in the costume. The thermal detonator comes to mind as having a lot of space to put electronics including batteries in a self-contained unit. If you do that, then any lead coming in to the helmet should be designed in such a way that you can easily clip/unclip it yourself even with gloves on. In the past the wish list for helmet electronics boils down to: - Amplified external sound (external speaker) - No sound (ambient) - Cellphone (take calls) - FRS type of system (trooper to trooper) - Music device Microphone - Off - Always on (e.g. while talking on a cellphone) - Push to talk Actually if you look at motorcycle Bluetooth speaker sets, they do most all of this but PTT. Sena makes probably the top line for this and I have one in my motorcycle helmet. https://www.amazon.com/Sena-20S-02-Motorcycle-Bluetooth-Communication/dp/B00L15WWCW/ The trick is that this is a big thing that is externally mounted. You'd have to get chin mounted switches for a TK helmet to toggle between modes. The PTT seems the hardest option. I think John Danter proposed a TK ear that had a momentary switch on it if you wanted PTT. I think as voice recognition gets better, in a perfect world it will be like your Amazon Echo, you'd just use voice commands. "Alexa, call my wife". "Alexa, turn helmet to FRS". I dig the idea of a screen for sure. I have bifocals or 2 pairs of glasses as my reading/distance are separate. With a screen, I can just wear one, or none at all. I've never used an HUD, but I have used HoloLens a bit and found that I just adjust it so that I can use my distance glasses and it worked out perfectly. For voice modulation, some want none, some a lot. One of the leading TK voice options allows you to adjust this to your needs, so I presume this would be analogous. Can I ask for more? How about an easy way to adjust volume without having to take the helmet on/off, so I can easily keep my voice lower inside, then louder when I go outside.1 point
-
There is GENIUS within the walls of this Detachment!1 point
-
Update #20 - it's been a while... ...and I felt like doing an update again after reading your last comments. Thanks for these kind words, guys! As stated the last time, the missing work is: white letters in the scope, front sight and power cylinders. To be honest: I totally underestimated the last two of them and have to correct the completeness of the last update to something about 80% . However, my son (unknowingly) helped me with a little piece of white crayon for the scope letters. If he knew what it has been used for, he would go crazy (yes, he is a big Star Wars fan ). The letters aren't filled 100% to make it look a bit old and used. When I started work on the front sight (months ago) the "pin holder" and "protection cover" got separated as seen in a reference picture. A pin was made with the Dremel from aluminum and later got slightly reshaped. Isn't it strange to see bright resin again at this stage of the build?! Then I noticed it was a big mistake not to frequently check the reference pictures, because I had removed too much resin and now it was totally wrong! As the main build had to continue, I decided to move on just with the protection cover and to later add the missing pin (after I found a way to correct this error). A thin layer of "green stuff" was used to bring some pattern from a small file onto the protection cover. This was already visible since update #13 (page 5) but got partially covered by the paint layers. Now the "pin holder" needed intense corrections. Some kind of adaption piece is placed on the round receiver barrel. A rectangular block sits on top of it, to receive the pin. I saw no other chance than to add "green stuff" again to bring it in shape step by step... On the right side (left on my picture) there is a small grub screw, which obviously makes the pin replaceable. Found one which fitted good and installed it. Looks real but its very short, so it doesn't reach the pin. IMHO the front sight should look something like this, but that doesn't seem to be the common opinion, as in most builds the front sight is left in one piece. Has this ever been done before? Then I filled the little center gap on the barrel, removed a bit of the paint (for better adhesion) and glued the parts together. The last picture clearly shows there are two separate parts, the side slots, the screw and the pin. During the last weeks I managed to find more accurate hex screws for the muzzle and replaced the existing M6 with real 1/4"-20. The new ones remained in original length. Alright, that's it for today already. Now I have to start this tricky power cylinder issue - and I already did some mistakes on the resin part . Next update (hopefully this year) will show, if and how I solved these... As always, please feel free to leave comments / critics.1 point