Leaderboard


Popular Content
Showing content with the highest reputation on 11/29/2019 in all areas
-
11/28/19: Charlotte Thanksgiving Day Parade Got a good workout from walking through the whole parade, we were #13 and got lots of smiles and waves (and just a few hugs!)3 points
-
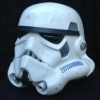
**Please be aware that is is my personal opinion, explained in detail below.** If you are looking for accuracy with your ANH Stormtrooper build, hopefully you will find this very useful. Before you start building, I’d highly recommend that you use the following; - Magnets; to experiment with, and fine tune, positioning of the two parts of your helmet (faceplate / back & cap) - screen reference photos (found on whitearmor.net and/or starwarshelmets.com) - free collage apps (example, LiveCollage) to compare your progress with screen used examples Aligning the faceplate with the back & cap is a key factor in defining the look of your Stunt Stormtrooper helmet. Based on the reference photos below, especially the various group shots throughout ANH, it is my opinion that the majority of screen used stunts had a ‘similar’ appearance to the photos below. There were, of course, a few variations, however, there is certainly a trend (backed up by the group shots). My suggestions are along the same lines as the CRL, following the most common appearance throughout the movies for an instantly recognisable look. Mounting the faceplate high into the back/cap leads to a long (front to back) but short (height) looking helmet, more reminiscent of ROTJ/ESB MKII. This can also lead to the eyes looking a little cross-eyed from the front. The following photos will give examples of this. I have seen this a lot recently and thought it was worth highlighting. As always, each helmet was handmade so slightly different, however, the vast majority follow this method of construction. Do bear in mind that, due to the differences in helmets from different makers, results may vary. Let’s start with the basic premise - the majority of reference photos show that if you draw an imaginary line (shown here in green) from the rear molded line of the back and cap, this will sit just above the eyes; or to put it another way, it is very unlikely that the eyes will sit HIGHER than this imaginary line; Let’s look at this with a helmet kit. The below example is using an RWA Stunt, 1.5mm helmet kit. The below images show how vastly different the same helmet can look, all based on the alignment of the faceplate and back/cap. There are many examples of the ANH style throughout the movie and reference materials, but very few with the faceplate mounted so high into the cap (in ANH). The below photo is a Hero helmet that also supports this theory. As with most Hero helmets, they also had a clear gap between the eyes and the brow trim. Here is Han’s helmet supporting the same theory; The below two photos are the RS Propmasters screen used helmet, again, supporting this theory and alignment. Another, just for reference. Here are some more examples of helmets following this type of alignment/appearance. As mentioned early on, each helmet was handmade so slightly different, however, the vast majority follow this method of construction, as shown in the many reference photos and screen shots. Do bear in mind that due to the differences in helmets from different makers, results may vary.2 points
-
I put my name on the list of interested parties to see if they would come through but never received an email asking for payment or an update on why it was delayed. On the plus side they haven’t asked for money on something they couldn’t deliver.2 points
-
Looks bad A$$2 points
-
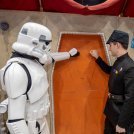
Troop #1 ( #2 and #3?? Not sure if this counts as 3 troops). News of possible Rebel forces gathering at Tokyo Comic Con from the Imperial Computer Network prompted a large deployment of the Japanese Garrison for three days. This was my first troop as a new member in the JG and over the 3 days spend a total of 15 hours on patrol. Many locals were excited to see the Empire step up to keep the peace with many exhibiting strange local fashions in celebration. The JG CO took to the local squares main stage and spoke to the large gathered crowd of the benefits of life under the Empire and recruitment possibilities. At the end of the weekend peace was maintained and the Rebel scum retreated. Roll Call of deployed members taken from JG forums, visiting members were also on hand to bring peace by choice or by force to the locals. KENT 21211 Bulldog44 42114 Simsim 22000 Takabon 12114 Ji8oyi 10778 Kawato 52100 FO: Tie: FarEast 19758 Hino 10983 Kookaburra 66212 Happyjack 16008 Tkenshin 51227 Darth Vader Preamour (epi 3 dark Anakin) Iceman 70302 Yoshi 88888 Or Reserve Gan 19580 ArmitageHux 56969 Hux 5652 Yorke Or Krennic Ochakumi 919 Wingman 11336 Togo 87277 Ogu 77513 Benthic Husky68 77712 Sae 38106 AB70000 70000 Leonard 3081 Santa: Atat-D: Paipu 89898 Kathlene TI-179241 point
-
As the Boy Scout motto says, "Be prepared". In most cases, if taken care of a well built set of armor should last a long, long time. Inspecting the various components before an event is suggested, but when the inevitable "Oh crap" moments occur having things at-the-ready can really help. Not just for you, but for a fellow trooper as well! The following is a list of suggested items to have with you for "wardrobe malfunctions" which happen to many of us during a troop. I'm not saying you have to have each and every item shown below, so the choices are yours for what to include. 1. Gaffer's ("gaffa") tape (white/2" (5 cm) wide: This is a heavy cotton cloth tape with great adhesive properties, and is widely used in theatre, film and television productions. Although strong, it can be torn by hand as needed, leaves little or no residue and will generally not damage most surfaces. If you look closely, it was used a LOT in the first SW films, and is a good temporary fix for cracks/splits. -- alternatively -- 2. Duct tape (white/2" (5 cm) wide: Everyone knows it has a powerful adhesive property and super strength, but it leaves behind a strong, sticky residue which can be difficult to remove, especially if left on for extended periods. Rubbing alcohol, Goo Gone or even cooking oil can remove it, but it is not easy so therefore is not suggested. In case you have a strapping issue (snaps pop out, strap disconnects from an armor piece, etc.) it's not a huge deal if you are prepared. Installing/setting snaps in the field is not always possible (unless you have a hammer/snap setting device) and can take time. Though temporary, a quicker alternative is to use nylon strapping (you probably have a few feet left over from your build) cut to length with Velcro (cut to size) in lieu of the snaps. 3. Black 2" (5 cm) wide nylon strapping 2' (60 cm) long: Black 1" (2.5 cm) wide nylon strapping 2' (60 cm) long. Industrial Strength Velcro *** (2" x 4" sections) *** Although very strong, it will a leave residue from the adhesive backing. This can be removed from your armor with Goo-Gone or a similar product. NOTE: If you want to be extra prepared, having lengths of other materials (nylon.elastic, white Velcro etc.) used in your build are encouraged. 4. CA (Super) Glue (Single use sizes) 5. Zip-Kicker I am not a fan of using CA glue on any armor part, but in an emergency it can certainly come in handy. If needed, I highly suggest using the GEL type, as it will not run like the regular type does. Available at most craft and "Dollar" stores. Zip Kicker is an accelerant that will set CA glue instantly. There are other name brands, but I used this one as an example. Available in a spray or aerosol. 6. Razor knife 7. Lexan scissors 8. Sanding sponge Having a sharp razor knife on hand will come in handy for many things, including cutting strapping, Velcro, etc. For safety, I recommend the folding type as seen below, and always have a new blade in it. Dull blades are useless. Be CAREFUL when cutting. As TKs, we are not known for our shooting accuracy, especially when missing our trigger finger. Lexan scissors are great for cutting/trimming ABS, especially if you need to cut shims for cracks/splits (see below). Do NOT use these to cut Industrial Strength Velcro. The adhesive will gum up the blades. A sanding sponge is perfect to have in case you need to smooth out any rough edges that may be cutting into you or snagging your under suit. Scrap ABS A piece of scrap ABS about 2" x 6" can be used to make emergency shims for cracks. Just cut it to the width/length needed and CA glue it to the inside of the affected area. 9. USB battery charger/power supply 10. Batteries Whether you use the rechargeable USB type or regular type for your fan system, etc. having a backup is always a good idea. 11. Screwdriver (multi-bit) 12. Small pliers Although these may only be needed for those with the "classic" strapping system, they can be used to tighten helmet screws and such. I have loaned mine to those with costumes from Lord Vader to Boba Fett on troops. It's better to "have em' and not need em' than need em' and not have em'". I have the "stubby" type screwdriver as seen below, as it takes up less room and all the bits are stored in the handle. 13. Lens de-fogger Even if using a good fan system in your bucket, you can still get fogged lenses. Not only is it annoying, it's dangerous, as our field of vision is not the best to begin with. You can purchase a product designed to prevent this, or (as I do) rub a bit of shaving cream (foam type) inside and polish it out before each troop. Your choice. 14. Magic Eraser 15. Paint pens For minor scuffs on shiny white armor the Magic erasers really do the trick. A single one will last a LONG time. Paint pens are a quick and easy fix for deeper scratches in your armor (white) or touch-ups on the ear bumps, etc. (black). I suggest the Acrylic type (not the oil based) paint as it can be more easily removed if/when needed. 16. Adhesive bandages It happens. Cuts, armor bite, blisters, etc. I suggest having a few of each in various sizes, especially as they don't take up much room. 17. Disinfecting wipes Let's face it. We wear compression suits and plastic so we sweat, and sweat can smell bad. To keep my bin from having the aroma of a gym locker I use these to wipe down my armor before putting it away after each use. Your fellow trooping mates (and the public) will thank you. 18: Cleaner/Polish No Matter how careful you are with your armor, you are going to get scratches or scuffs. It happens. One way of dealing with it is to use a product that cleans and shines all at one time. Although I have not used it (yet), this product has high reviews: Link and reviews here. Thank you to Greg @Oldracer for this tip! Now, there are a lot of other items that I have seen people carry.... electrical tape, a hammer, snap setting tool, safety pins, files, etc. It all depends on your particular needs and how much room you have, but most of the above items will fit together in a medium sized plastic container. Please feel free to add anything that you feel may help, and happy trooping!1 point
-
Just posting a few handy vocoder images from ANH. As per the photos, there is quite a common theme/style amongst the stunt helmets. As with all things ANH, there are variations and exceptions. I’m posting this based on the 501st’s usual pattern of selecting the “most common” appearance for uniformity. *note that the current CRL does not specify anything more than the vocoder must be painted black. The main thing to note is how “most” ANH stunt helmets have the “fuller” vocoder style. This is when bars 2 and 6 are quite long/tall. See pictures below. there are variations and exceptions: however, the below image shows two clearly different vocoder styles. Hero helmets have more variation, some with a fuller vocoder, others with a thinner central section.1 point
-
Hi Guys, arrived 2 days ago from RS Prop Masters, those guys are Legends, perfect fit, as for the Brian Muir signature helmet !!! its mind blowing. First rushed fit, thigh armour definitely too high. I will upload more when I have chance. Thanks, Eric.

 1 point
 -
I'll see if that can be moved, in full computer version the gallery tab is separate but when you condense the screen it moves under the "more" tab1 point
-
THANK YOU! Well I feel dumb. User error. I did look for a Gallery section in the forums but didn't see one. I did have that link to screencaps from another builder that I have been using. I didn’t understand that was in the gallery. After searching, I now see it is located under the “More” drop down menu.1 point
-
I definitely will!1 point
-
Learning some thing new every day.1 point
-
Yes it is more screen accurate. The rs full commissioned can be modified for better accuracy but I’ve never seen the brow stop anyone from basic approval1 point
-
Hope is goes well for you! Remember to post pictures1 point
-
By the way, I bought the helmet yesterday!1 point
-
I've been thinking on this also before this post got started. Now I know we should be able to carry a BFG and sport an orange or white pauldron =')1 point
-
It may just be me, but I never quite understood why long-range heavy blaster rifles (DLT-19s) were stored/available in a fairly small area like a Detention Block instead of being in a weapons locker. This sort of thing keeps me up at night.1 point
-
Thank you mate !, Great build reference. Cheers1 point
-
i ordered my Rubies blaster yesterday. $12.50 with shipping and tax. Off eBay.1 point
-
I ordered my TK kit yesterday!! WOO HOO!!!! I'm very stoked and can't wait to start my build. Now I need to get all the fasteners and strapping and soft parts.1 point
-
This is for the Rebels TK and has nothing to do with ANH, with that said a DLT19 is allowed to carry both in the Hero and Stunt set-up. No pauldron though, that’s for Sandtroopers1 point
-
Troop #11 Event: Special Childrens Christmas Party Date: 23 November 2019 Location: Christchurch New Zealand I had the privilege once again to attend this event. This event is held for children with special needs to provide them with a Christmas they will never forget. Our goal was to put smiles on Chrildrens faces for at least one day of the year. We arrived got kitted up and after the briefing we met the children and their parents/guardians at the door where we handed out hats for them to keep. We also had our trusty marker pens on hand to sign the hats. I lost count of how many hats I signed but there were up to 1200 children at the event. Lots of photos and high fives were had. One woman I spoke to said that they have been coming to the event for a few years and that we were the highlight of the event for them. I have done a few of these troops in the past and these are always my favourite event, however this year was the time I have trooped at this event in my ESB TK.1 point
-
Here is a close up from a screen used asset right arm pill indents.1 point
-
Depth and breadth in your research - valuable for accuracy enthusiasts [emoji106] Sent from my SM-G960W using Tapatalk1 point
-
Great video show casing your work - a niche approach that will definitely meet a desire out there [emoji106] Sent from my SM-G960W using Tapatalk1 point
-
I wouldn’t get too hung up on the bicep pills. Many cut them in the early days, myself included, so they are certainly approvable that way. I don’t think anyone produces a decal set for the 850 kit yet as they do for Jim, Anovos etc. Here’s a couple of pics of screen used TFA assets for further reference. Sent from my iPhone using Tapatalk Pro1 point
-
There’s a mention in the upper levels on the helmet... “Traps/ tears and tube stripes have the correct ANH TK details.”1 point
-
With a little delay, I want to show you the build of my own full metal power cylinders with real vintage METALMITE capacitors for the E-11 ANH blaster. After 7 years of hunting, I was lucky to find some real vintage TCC METALMITE capacitors which were accurate enough for my Sterling conversation build. I completed the capacitors with: - real vintage resistors - real vintage cloth coated isolation - metal baseplate "D" shape - aluminium pipe - metal endcaps - copper tubes - screws - nuts - square nuts1 point
-
My goodness - as some one whose scratch built one, the vintage parts so beautiful - eye popping beauty! Sent from my SM-G960W using Tapatalk1 point
-
I like your walker pet. Now I need one.1 point
-
You are correct. I just ordered my TK armor kit today. This thread is helping me to decide which way to go for my bucket build. I appreciate it my friends.1 point
-
Because as far as it seems Anovos is sending all their inventory to Disney for their parks. As long as they get their licensing cut and product I doubt they care.1 point
-
1 point
-
What I was actually asking was if a modified Rubbies e-11 blaster was approved for trooping. Sent from my iPhone using Tapatalk1 point
-
Final result Thanks for sharing1 point
-
assembling resistors...1 point
-
assembling endcaps and capacitors...1 point
-
painting black...1 point
-
installing the square nut...1 point
-
working on the basplate...1 point
-
installing vent holes, fit test with endcaps and screws...1 point
-
cutting the aluminium tube and endcaps...1 point
-
Peeling of the capacitor sleeves...1 point
-
Hi all, As we’re all sharing helmet pics (WIPs, clearance etc.), I thought I’d share a little photography tip for anyone that wants to give it a go; As many of us use smart phones to quickly snap out progress, holding the camera too close to the subject will cause some distortion, leading the the helmet looking “droopy”. Try taking a couple of steps back and zooming in - this will look much closer to how the human eye sees it. :-)1 point
-
Welcome to the Club of the "Armor Fever" Looking great Trooper!!1 point
-
1 point
-
1 point
-
There are still some issues to be resolved especially with paint details, but I'm pretty happy to present you my blaster. Still don't know if I'll do weathering. It was a fabulous journey and I want to thank you all for your support and advices.1 point
-
I've done the t-tracks. It wasn't easy and I stressed a lot. I used hot water and pliers to curve them. It works pretty good. I followed mainly two tutorials : http://www.stormtrooperblaster.com/e11-blaster-t-track-installation.html I've glued the t-tracks with cynolate glue. I shoud have used hot glue because cyanolate vapors made white stains on the paint between the t-tracks. I had to retouch paint. The result looks good. For a first time, I'm not disappointed. Not perfect but accurate. Will do better with the next blaster !1 point
-
Avoid, avoid, avoid. You can do MUCH better. https://www.whitearmor.net/forum/topic/11538-the-various-types-of-armor-and-where-to-find-them/ This list includes kits used and endorsed widely across the trooping community. There are various price points in there. Also, I’d suggest avoiding TKUK and SDS/originalstormtrooper.com due to their inaccuracies. :-)1 point